In the dynamic world of computing, few upgrades deliver as dramatic and immediate a performance boost as transitioning to a Solid State Drive (SSD). Among these, the M.2 form factor stands out as the pinnacle of modern storage technology, offering unparalleled speed, compactness, and efficiency. Whether you’re a hardcore gamer, a creative professional dealing with large files, or simply an everyday user tired of sluggish boot times and application loading, installing an M.2 SSD can redefine your computing experience.
This comprehensive guide will walk you through everything you need to know, from understanding the “why” behind this powerful upgrade to the meticulous “how-to” of installation and optimization. We’ll delve into the technical nuances, provide practical, step-by-step instructions, and share essential tips to ensure a smooth and successful transition. Get ready to unlock the full potential of your system and embrace a new era of speed and responsiveness.
I. Unlocking Next-Generation Performance: Why M.2 SSDs Are a Game-Changer
The journey of digital storage has been a fascinating one, evolving from bulky, mechanical Hard Disk Drives (HDDs) to the sleek, lightning-fast M.2 SSDs we have today. This evolution isn’t just about shrinking components; it’s about fundamentally transforming how our computers interact with data, directly impacting everything from system responsiveness to application loading times.
The Evolution of Storage: From Platter to PCIe
For decades, Hard Disk Drives (HDDs) were the workhorse of digital storage. Relying on spinning platters and read/write heads, they offered vast capacities at an affordable price. However, their mechanical nature introduced inherent limitations in speed and susceptibility to physical shock. The advent of SATA Solid State Drives (SSDs) marked a significant leap forward. By replacing moving parts with flash memory, SATA SSDs shattered the performance barrier of HDDs, offering vastly improved boot times and application loading. Yet, even SATA SSDs were ultimately bottlenecked by the SATA III interface, which topped out at around 600 MB/s.
Enter the M.2 SSD. This compact form factor, resembling a stick of RAM, utilizes the high-bandwidth PCI Express (PCIe) interface, the same pathway used by graphics cards. This direct connection to the motherboard’s central processing unit (CPU) allows M.2 SSDs, particularly those employing NVMe (Non-Volatile Memory Express) technology, to achieve speeds that utterly dwarf their predecessors.
The M.2 Advantage: Blazing Speed and Compact Form Factor
The M.2 standard brings a host of compelling advantages, making it a must-have upgrade for any performance-conscious user.
- Blazing Speeds (NVMe vs. SATA): This is arguably the most significant benefit. While some M.2 drives still use the SATA protocol, the true power of M.2 comes alive with NVMe. NVMe M.2 SSDs can achieve sequential read/write speeds upwards of 3,500 MB/s, with newer PCIe Gen 4 and Gen 5 drives pushing past 7,000 MB/s and even 10,000 MB/s respectively. This is a monumental leap compared to SATA SSDs, which are capped at around 550 MB/s. What does this mean in practical terms? Faster operating system boot-ups, near-instant application launches, dramatically reduced game loading screens, and swift transfer of large files – a true revolution in computing responsiveness. This enhancement directly addresses the “Tech” aspect of maximizing your hardware’s potential.
- Compact Form Factor: The M.2 standard enables incredibly small storage devices. Typically resembling a gum stick, these drives eliminate the need for bulky 2.5-inch drive bays and unsightly power and data cables, contributing to cleaner case aesthetics and improved airflow within your system. This is particularly beneficial for compact builds, laptops, and ultra-thin devices where space is at a premium.
- Enhanced System Responsiveness: Beyond raw sequential speeds, M.2 NVMe SSDs excel in random read/write operations, which are crucial for multitasking and everyday system responsiveness. This means your computer feels snappier, more agile, and less prone to frustrating slowdowns, significantly boosting your overall “Productivity.”
Is an M.2 SSD Right for You?: Investing in Performance
An M.2 SSD is an exceptional upgrade for a wide range of users:
- Gamers: Experience faster level loads, reduced texture pop-in, and a more immersive gaming environment. Many modern games are specifically optimized for SSD performance.
- Content Creators & Professionals: If you work with large video files, high-resolution images, 3D models, or complex datasets, the speed of an M.2 NVMe SSD will drastically cut down render times, file transfers, and project loading, freeing up valuable time and boosting your “Productivity.”
- Everyday Users: Even for general web browsing, office tasks, and multimedia consumption, the instant responsiveness of an M.2 SSD makes a noticeable difference, transforming a sluggish PC into a joy to use.
While the initial investment in an M.2 NVMe SSD might be higher than a traditional HDD or even a SATA SSD, the long-term gains in speed, efficiency, and overall user experience represent excellent “Money” value for serious users. It’s an investment in your digital future.
II. Preparing for Liftoff: Essential Pre-Installation Steps
A successful M.2 SSD installation begins long before you open your PC case. Proper preparation is paramount to ensure compatibility, prevent data loss, and safeguard your hardware. This section covers everything from checking your system’s readiness to gathering the necessary tools and taking crucial safety precautions.
A. Compatibility is Key: Ensuring Your System is Ready
The most critical step is verifying that your computer’s motherboard supports an M.2 SSD and, more specifically, the type of M.2 SSD you intend to install.
- Motherboard M.2 Slots: Most modern motherboards (from around 2016 onwards) feature at least one M.2 slot. Visually inspect your motherboard for a small, rectangular slot, often labeled “M.2” or “SSD,” usually positioned near the CPU or under a heatsink. Refer to your motherboard’s manual for precise locations and specifications.
- NVMe vs. SATA M.2 Compatibility: Not all M.2 slots are created equal. An M.2 SSD can communicate via either the older SATA protocol or the faster NVMe protocol.
- SATA M.2 drives typically have two notches in their connector (B+M key). They offer similar performance to 2.5-inch SATA SSDs but in a smaller form factor.
- NVMe M.2 drives usually have a single notch (M key) and leverage the PCIe interface for superior speeds.
Crucially, a motherboard slot that supports NVMe will also support SATA M.2 drives, but a slot designed only for SATA M.2 will not support NVMe M.2 drives. Always check your motherboard manual to confirm which protocols its M.2 slots support.
- PCIe Lanes and Generations: NVMe M.2 SSDs utilize PCIe lanes. Newer motherboards support PCIe Gen 4 or even Gen 5, offering double the bandwidth of the previous generation (Gen 3). While a Gen 4 SSD will work in a Gen 3 slot, it will be limited to Gen 3 speeds. Understanding this helps manage performance expectations and make informed purchasing decisions based on your existing “Tech” infrastructure.
- SSD Form Factors: M.2 SSDs come in various lengths, denoted by a four-digit number (e.g., 2280, 2242, 22110). The most common size is 2280 (22mm wide, 80mm long). Ensure your M.2 slot has the mounting points for the length of your chosen SSD. Most slots support 2280, but always double-check.
- Checking Your System: If you don’t have your manual, software tools like CPU-Z or HWInfo can provide details about your motherboard model. A quick online search for your motherboard’s specifications will reveal its M.2 slot capabilities.
B. Gathering Your Arsenal: Tools and Precautions
Once compatibility is confirmed, it’s time to prepare your workspace and tools.
- Essential Tools:
- Phillips Head Screwdriver: A good quality magnetic screwdriver (PH1 or PH2 size) is indispensable for opening your PC case and securing the M.2 drive.
- Anti-static Wrist Strap: This is highly recommended to protect sensitive components from electrostatic discharge (ESD), which can cause irreversible damage. If you don’t have one, frequently touch a grounded metal object (like your PC’s metal frame after unplugging it) to discharge static electricity.
- Flashlight: Essential for illuminating cramped or poorly lit areas inside your PC, especially for smaller components like the M.2 slot and mounting screw.
- Non-conductive Pry Tool (for laptops): If you’re installing in a laptop, a plastic spudger can be useful for gently opening clips or prying covers without scratching.
- Data Backup: The Cardinal Rule: Before beginning any hardware upgrade, always back up your critical data. While an M.2 SSD installation is generally safe, unforeseen issues (like accidental component damage or a corrupted OS during migration) can occur. Use an external hard drive, cloud storage, or dedicated backup software to ensure your precious files, documents, and memories are safe. This adheres to best practices for “Digital Security” and provides invaluable peace of mind.
- Power Down & Unplug: Completely shut down your computer, then unplug it from the wall socket. Press the power button a few times after unplugging to discharge any residual power in the system’s capacitors.
- Grounding Yourself: Wear your anti-static wrist strap, connecting it to an unpainted metal part of your PC case. If not using a strap, periodically touch the metal frame of your disconnected PC. This simple step is crucial to prevent static electricity from damaging components.
C. Choosing the Right M.2 SSD: A Smart Investment
With compatibility and safety addressed, the final pre-installation step involves selecting the best M.2 SSD for your needs and budget.
- NVMe vs. SATA M.2: Performance and Price Differences:
- NVMe M.2: Offers the best performance, ideal for operating systems, frequently used applications, and demanding workloads. It comes at a higher price point per gigabyte.
- SATA M.2: A more budget-friendly option, providing speeds comparable to 2.5-inch SATA SSDs. Good for secondary storage or systems that don’t support NVMe.
Weigh the performance benefits against your budget and intended use. Investing in NVMe for your primary drive is almost always worth the “Money” for the speed gains.
- Capacity Considerations: M.2 SSDs come in various capacities, typically from 250GB to 8TB.
- 250GB-500GB: Suitable for an OS drive and a few essential applications.
- 1TB-2TB: A sweet spot for most users, offering ample space for the OS, games, and significant software libraries.
- 4TB+: Ideal for professionals with massive data sets or extensive game collections.
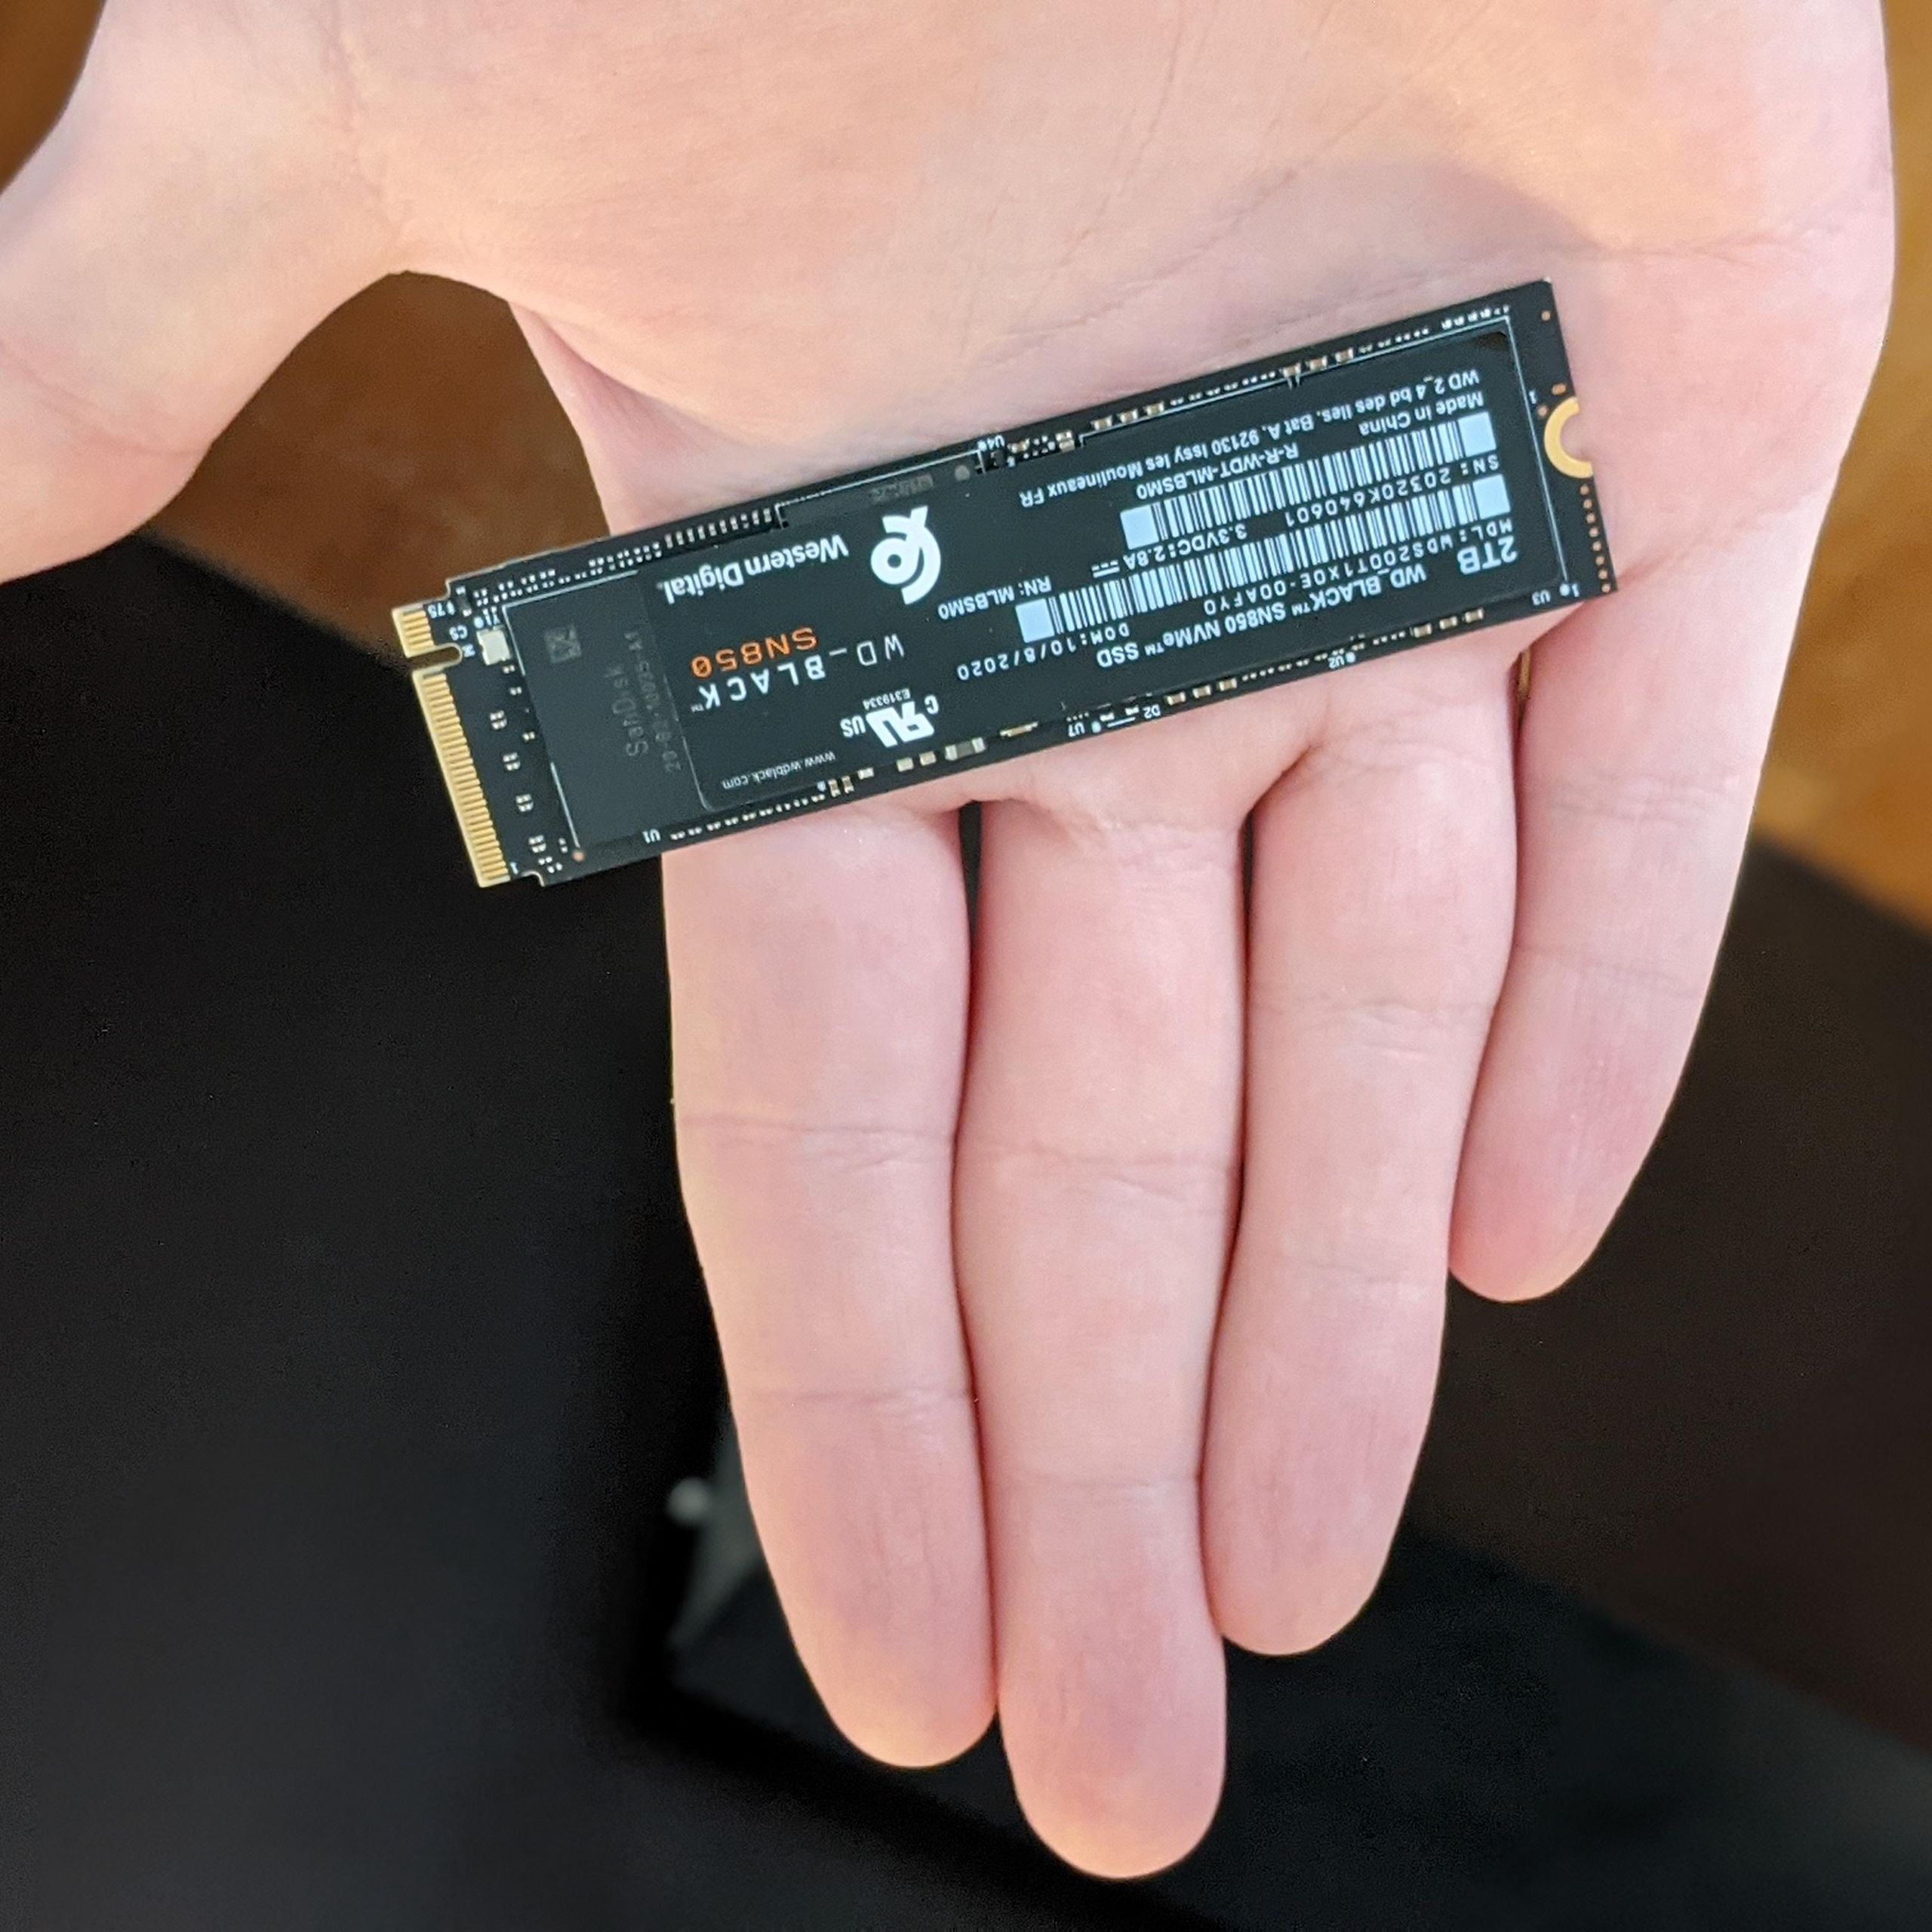
- Reputable Brands: When making your “Money” investment, choose an SSD from a reputable brand known for reliability and performance. Major players include Samsung (renowned for top-tier performance), Crucial, Western Digital (WD), Seagate, Kingston, and SK Hynix. Check independent reviews and benchmarks to make an informed decision. Reputable “Brand” names often come with better warranties and support.
- Thermal Solutions: High-performance NVMe SSDs, especially those on PCIe Gen 4/5, can generate significant heat under sustained load. This heat can lead to “thermal throttling,” where the drive slows down to prevent overheating. Many motherboards come with integrated M.2 heatsinks. If yours doesn’t, consider purchasing an aftermarket heatsink for your NVMe drive to ensure consistent peak performance. This small “Tech” addition can significantly impact long-term drive health and performance.
III. The Installation Odyssey: Step-by-Step Guide
With your system prepared, tools at hand, and your new M.2 SSD ready, it’s time for the physical installation. This section will guide you through the process for both desktop PCs and, with a general approach, for laptops.
A. Opening Your System: Accessing the Core
- Desktop PCs:
- Remove Side Panel: Unplug all cables from the rear of your PC. Lay the tower on its side (usually the left side, so the motherboard is facing up). Locate the thumbscrews or regular screws on the rear of the case that secure the main side panel. Loosen or remove them and gently slide the panel off. Set it aside in a safe place.
- Identify Components: Take a moment to familiarize yourself with the internal layout. Locate the motherboard, CPU cooler, RAM sticks, and any existing storage drives.
- Laptops:
- Extreme Caution: Laptop disassembly varies greatly by model. Refer to your specific laptop’s service manual or a reliable online tutorial for your exact model.
- Remove Battery: If possible (some laptops have internal batteries), disconnect the battery first. This is a critical safety step to prevent accidental shorts.
- Access Panel: Most laptops require removing the entire bottom panel. This usually involves numerous small screws, often hidden under rubber feet or stickers. Use a non-conductive pry tool to carefully separate the clips holding the panel once all screws are removed. Work slowly and gently to avoid damaging plastic clips or internal cables.
B. Locating and Preparing the M.2 Slot
Whether desktop or laptop, the next step is finding the M.2 slot.
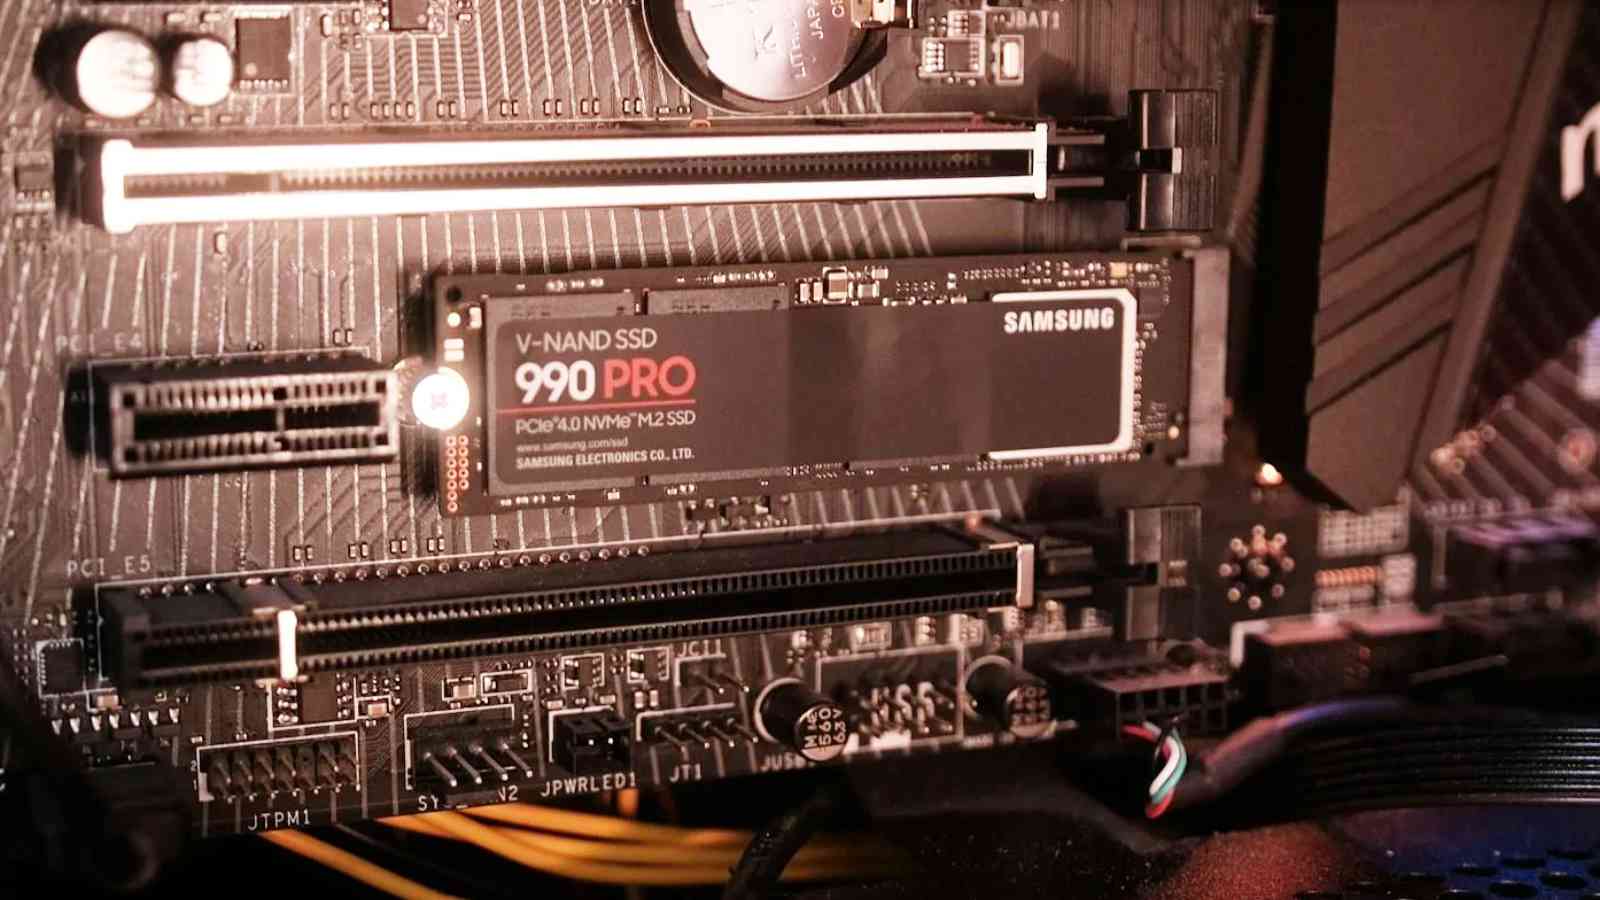
- Identifying the M.2 Slot(s): On desktops, M.2 slots are typically horizontal and located near the CPU, often between PCIe slots or below the graphics card. They might be covered by a motherboard heatsink. On laptops, they are usually in a more open area once the bottom panel is removed, often near the RAM or existing storage drives.
- Removing the Mounting Screw/Standoff (and potential heatsink):
- Heatsink Removal (Desktops): If your M.2 slot is covered by a motherboard-integrated heatsink, you’ll need to remove it first. It’s usually secured by one or two small screws. Gently lift it off. If there’s a thermal pad on the underside, be careful not to damage it.
- Standoff Screw: The M.2 slot will have a small screw or plastic latch system at the far end, which secures the SSD in place. Unscrew it and set it aside. Beneath where the screw was, there might be a small metal or plastic ‘standoff.’ This standoff supports the M.2 drive and needs to be in the correct position for your SSD’s length (usually 2280). If it’s movable, adjust it accordingly.
C. Seating the M.2 SSD: The Critical Connection
This is the most delicate part of the installation.
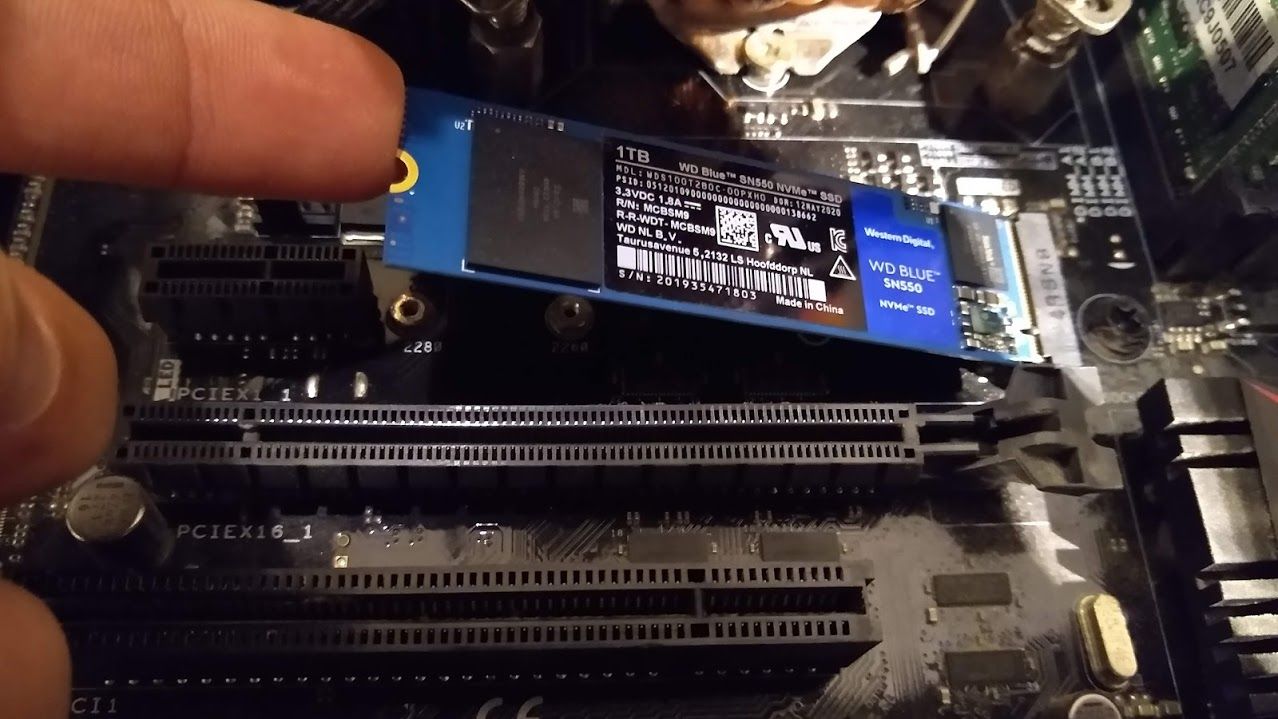
- Aligning the Notch: Look at your M.2 SSD’s connector edge. It has a specific notch (or key). Align this notch with the corresponding key in the M.2 slot on your motherboard. This ensures the drive is inserted correctly and prevents damage.
- Gently Inserting the SSD at an Angle: Hold the M.2 SSD by its edges (avoid touching the golden contacts or chips) and gently slide it into the slot at approximately a 30-degree angle. You should feel it slide in smoothly. Do not force it. If it doesn’t go in, recheck the alignment of the notch.
- Pressing Down and Securing with the Screw: Once fully seated in the slot, the drive will be angled upwards. Gently but firmly push the M.2 SSD down until it is parallel with the motherboard. While holding it down, reinsert the small mounting screw (or use the latching mechanism) into the standoff to secure the drive. Do not overtighten the screw – just enough to hold the drive firmly in place.
- Attaching Heatsink (if applicable): If you removed a motherboard heatsink, or if you’re installing an aftermarket heatsink, now is the time to apply it. Ensure any thermal pads are correctly placed (remove plastic film if present) and then secure the heatsink over the SSD.
D. Reassembling Your System
- Closing the Case/Panels: Once the SSD is securely in place, carefully reattach any motherboard heatsinks, then close up your PC case or laptop bottom panel. Make sure all screws are reinserted and tightened appropriately.
- Reconnecting Peripherals: Reconnect all cables to the rear of your desktop PC, or reconnect your laptop’s power adapter.
IV. Post-Installation & Optimization: Bringing Your SSD to Life
With the physical installation complete, your M.2 SSD isn’t quite ready for action. The final steps involve configuring it within your system’s software.
A. Initial Boot-Up and BIOS/UEFI Configuration
- Power On: Turn on your computer.
- Enter BIOS/UEFI: As your system boots, repeatedly press the designated key to enter your BIOS/UEFI settings (common keys include DEL, F2, F10, F12).
- Verifying SSD Detection: Navigate to the ‘Storage,’ ‘Boot,’ or ‘Peripherals’ section of your BIOS/UEFI. Look for your newly installed M.2 SSD. It should be listed among your other storage devices. If it’s not detected, double-check the physical installation, ensuring it’s fully seated and the screw isn’t overtightened.
- Setting Boot Order (if installing OS on new SSD): If you plan to install your operating system on the new M.2 SSD, you’ll need to adjust the boot order to prioritize your Windows/Linux installation media (USB drive or DVD) over any existing drives.
- Enabling AHCI/NVMe Mode: For optimal performance, ensure that your M.2 slot is operating in AHCI (for SATA M.2) or NVMe mode (for NVMe M.2). Most modern motherboards default to the correct mode, but it’s worth checking, usually under SATA configuration or M.2 settings.
B. Initializing and Formatting Your New Drive (Windows)
Even if detected by the BIOS, your new M.2 SSD won’t appear in “My Computer” or “This PC” until it’s initialized and formatted.
- Access Disk Management: In Windows, right-click the Start button and select “Disk Management” (or type “diskmgmt.msc” in the Run dialog).
- Initialize the Disk: Disk Management should prompt you to initialize the new disk. If not, look for a disk marked “Unknown” or “Not Initialized.” Right-click it and choose “Initialize Disk.”
- GPT (GUID Partition Table): Recommended for modern systems (UEFI boot) and drives larger than 2TB.
- MBR (Master Boot Record): Older standard, limited to 2TB drives and traditional BIOS boot.
Choose GPT.
- Create a New Simple Volume and Formatting: Once initialized, the disk will show as “Unallocated Space.” Right-click the unallocated space and select “New Simple Volume.” Follow the wizard to:
- Assign a drive letter.
- Choose a file system (NTFS is standard for Windows).
- Perform a quick format.
Click “Finish,” and your M.2 SSD will now appear as a usable drive in Windows.
C. Operating System Migration: Fresh Install vs. Cloning
Now that your SSD is recognized, you have two primary options for getting your OS onto it.
- Clean Installation: The Recommended Path:
- Pros: This is the ideal method for optimal “Tech” performance and stability. It ensures a fresh, clutter-free operating system free from old drivers or software conflicts.
- Cons: Requires reinstalling all your applications and manually transferring your user data.
- Process: Create a bootable USB drive with your chosen OS (e.g., Windows Media Creation Tool). Boot from the USB, delete all partitions on your new M.2 SSD, and install the OS onto the unallocated space.
- Cloning Your Existing OS: When and How:
- Pros: Saves time by migrating your entire existing OS, applications, and settings directly to the new SSD without reinstallation.
- Cons: Carries over any existing bloatware, registry errors, or OS issues from your old drive. Might require resizing partitions.
- Software Tools: Popular cloning software includes Macrium Reflect Free, EaseUS Todo Backup, or proprietary tools provided by SSD manufacturers (e.g., Samsung Data Migration).
- Process: Connect both your old drive and the new M.2 SSD to your PC. Use the cloning software to copy the contents of your old drive to the new M.2 SSD. Once complete, you’ll need to adjust the boot order in BIOS/UEFI to boot from the new M.2 SSD.
D. Driver Installation and Optimization Tips
- SSD Drivers: While generic Windows drivers often suffice, some NVMe SSD manufacturers provide specific drivers that can further optimize performance. Check the manufacturer’s website for your specific drive model.
- TRIM Support: Ensure TRIM is enabled. TRIM is a command that helps your SSD manage deleted data blocks efficiently, preserving performance and extending the drive’s lifespan. Windows typically enables TRIM automatically for SSDs. You can verify it via Command Prompt (
fsutil behavior query DisableDeleteNotify). A result of ‘0’ means TRIM is enabled. - Over-Provisioning: Some SSDs or optimization tools allow for “over-provisioning,” dedicating a small percentage of the drive’s capacity (e.g., 7-10%) as spare area. This can improve performance and longevity, especially for drives under heavy write loads.
- Firmware Updates: Regularly check for firmware updates from your SSD manufacturer. Firmware updates can resolve bugs, improve performance, and enhance “Digital Security” by patching vulnerabilities. Use the manufacturer’s utility software to check and apply updates.
- Don’t Defragment SSDs! Unlike HDDs, SSDs do not benefit from defragmentation. In fact, it can reduce their lifespan by increasing unnecessary write cycles. Windows automatically recognizes SSDs and optimizes them differently (e.g., running TRIM instead of defragging).
V. Troubleshooting Common Issues
Even with careful preparation, issues can arise. Here are some common problems and their solutions:
- SSD Not Detected:
- Physical Connection: Double-check that the M.2 SSD is fully seated in its slot and the mounting screw isn’t overtightened, potentially causing a slight lift.
- BIOS/UEFI Settings: Ensure the M.2 slot is enabled in BIOS/UEFI and that it’s configured for the correct mode (NVMe/SATA).
- Motherboard Manual: Some motherboards share PCIe lanes with other components (e.g., specific SATA ports might be disabled when an M.2 slot is in use). Consult your manual.
- Compatibility: Re-verify that your motherboard supports the specific type of M.2 SSD (NVMe vs. SATA) you installed.
- Slow Performance:
- Drivers: Ensure you have the latest drivers for your SSD and motherboard’s chipset.
- Thermal Throttling: Check temperatures using monitoring software. If the SSD is overheating, ensure any heatsink is properly installed or consider adding one. Ensure good case airflow.
- Full Drive: SSDs tend to slow down when they are almost full. Try to keep at least 15-20% of the drive’s capacity free.
- TRIM: Verify TRIM is enabled.
- Boot Problems (after OS migration/fresh install):
- Boot Order: Check your BIOS/UEFI boot order to ensure your new M.2 SSD is prioritized.
- OS Installation Issues: If it’s a fresh install, ensure the installation media was created correctly and the installation process completed without errors.
- Cloning Errors: If you cloned, ensure the cloning process was successful and the boot partitions were correctly transferred. Sometimes a “repair Windows installation” from the bootable USB can fix bootloaders.
VI. Conclusion: Embrace the Speed and Efficiency
Congratulations! By following this comprehensive guide, you have successfully navigated the process of installing and optimizing your M.2 SSD. You’ve not only performed a significant “Tech” upgrade but also invested in a smoother, faster, and more efficient computing experience.
The immediate benefits are undeniable: lightning-fast boot times, near-instant application launches, and dramatically reduced loading screens. This translates directly into enhanced “Productivity” for work, more fluid and immersive gaming, and an overall more enjoyable interaction with your computer. The compact form factor also contributes to a cleaner build and better airflow, showcasing the elegance of modern hardware design.
As technology continues to evolve, staying current with hardware advancements like M.2 SSDs ensures your system remains performant and ready for future challenges. Embrace the speed, revel in the efficiency, and enjoy the transformative power of your upgraded system. You’ve not just installed a piece of hardware; you’ve unlocked a new level of computing potential.
aViewFromTheCave is a participant in the Amazon Services LLC Associates Program, an affiliate advertising program designed to provide a means for sites to earn advertising fees by advertising and linking to Amazon.com. Amazon, the Amazon logo, AmazonSupply, and the AmazonSupply logo are trademarks of Amazon.com, Inc. or its affiliates. As an Amazon Associate we earn affiliate commissions from qualifying purchases.