
In the contemporary digital landscape, where high-resolution media, complex applications, and massive datasets dominate our local storage, the Secure Digital (SD) card remains an indispensable tool. Whether you are a professional photographer capturing 4K RAW footage, a gamer looking to expand a handheld console’s library, or a smartphone user reaching the limits of internal memory, knowing how to properly install and configure an SD card is a fundamental technical skill. This guide explores the intricate nuances of SD card installation, from hardware compatibility to software optimization, ensuring your data remains secure and your device performs at its peak.

1. Understanding SD Card Standards and Hardware Compatibility
Before attempting to install an SD card, it is critical to understand the various technical specifications that define these storage modules. Not all SD cards are created equal, and inserting an incompatible card can lead to data corruption or hardware errors.
Form Factors: SD vs. MicroSD
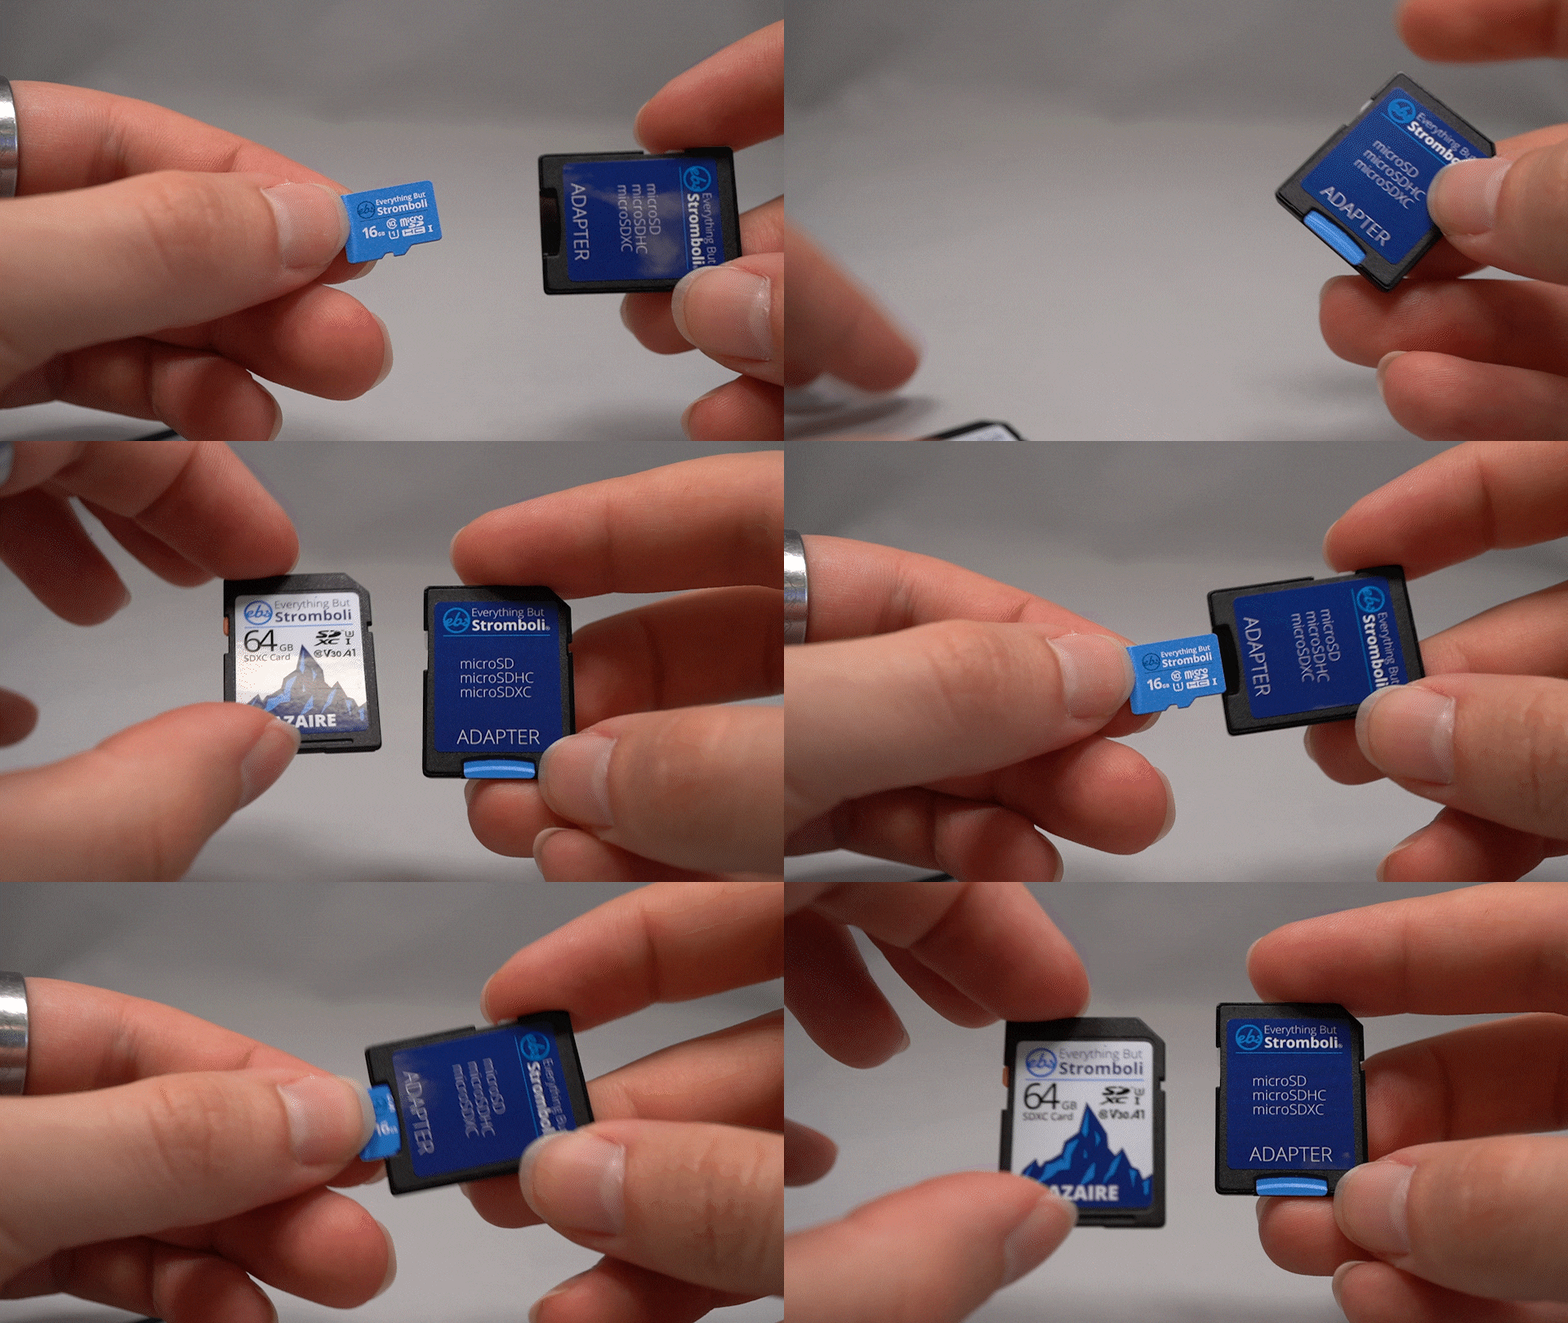
The most visible difference between cards is their physical size. Standard SD cards are typically used in larger devices like DSLR cameras, laptops, and audio recorders. MicroSD cards, roughly the size of a fingernail, are the standard for smartphones, action cameras (like GoPros), and the Nintendo Switch. While MicroSD cards can be used in standard SD slots via a passive adapter, the reverse is not possible.
Capacity Tiers: SDHC and SDXC
Compatibility is often dictated by the card’s capacity standard.
- SDHC (High Capacity): Ranges from 4GB to 32GB. Most modern devices support this.
- SDXC (Extended Capacity): Ranges from 64GB up to 2TB. Older devices manufactured before the SDXC standard became mainstream may not recognize these cards even if they fit physically.
- SDUC (Ultra Capacity): The newest standard, supporting up to 128TB, though these are currently rare in consumer markets.
Speed Classes and Bus Interfaces
For tech-heavy tasks like recording 4K video or running apps, the installation is only successful if the card’s speed matches the device’s requirements. Look for the “V” rating (Video Speed Class, e.g., V30, V60) or the “UHS” (Ultra High Speed) rating. A V30 card is the minimum recommendation for modern 4K video recording, while a V90 card is necessary for 8K or high-bitrate professional workflows.
2. Step-by-Step Installation for Mobile and Computing Devices
The physical installation process varies depending on the device’s architecture. Proper handling is essential to prevent Electrostatic Discharge (ESD) from damaging the card’s sensitive flash memory.
Mobile Devices: Smartphones and Tablets
Most modern Android smartphones utilize a SIM/SD hybrid tray.
- Power Down: Always turn off the device to prevent file system errors during the mounting process.
- Ejection: Use a SIM ejector tool to apply firm, even pressure to the pinhole on the side of the device.
- Orientation: Place the MicroSD card into the designated slot on the tray. The gold contact points must face downward. The card should sit flush; if it is tilted, the tray will jam.
- Insertion: Gently slide the tray back into the device. If you feel resistance, stop and re-align the card.
Laptops and Desktop Workstations
Many professional-grade laptops include a dedicated SD slot. On desktops, you may need a USB-C or USB 3.0 card reader.
- Locate the Slot: Ensure the slot is free of dust.
- Orientation: Standard SD cards usually have a notched corner. Align this notch according to the diagram on the device (usually with the label facing up or toward the keyboard).
- The “Click”: Many laptop slots are spring-loaded. Push the card in until you hear or feel a mechanical click. To remove it, push it in slightly again to trigger the release mechanism.
Specialized Hardware: Gaming Consoles
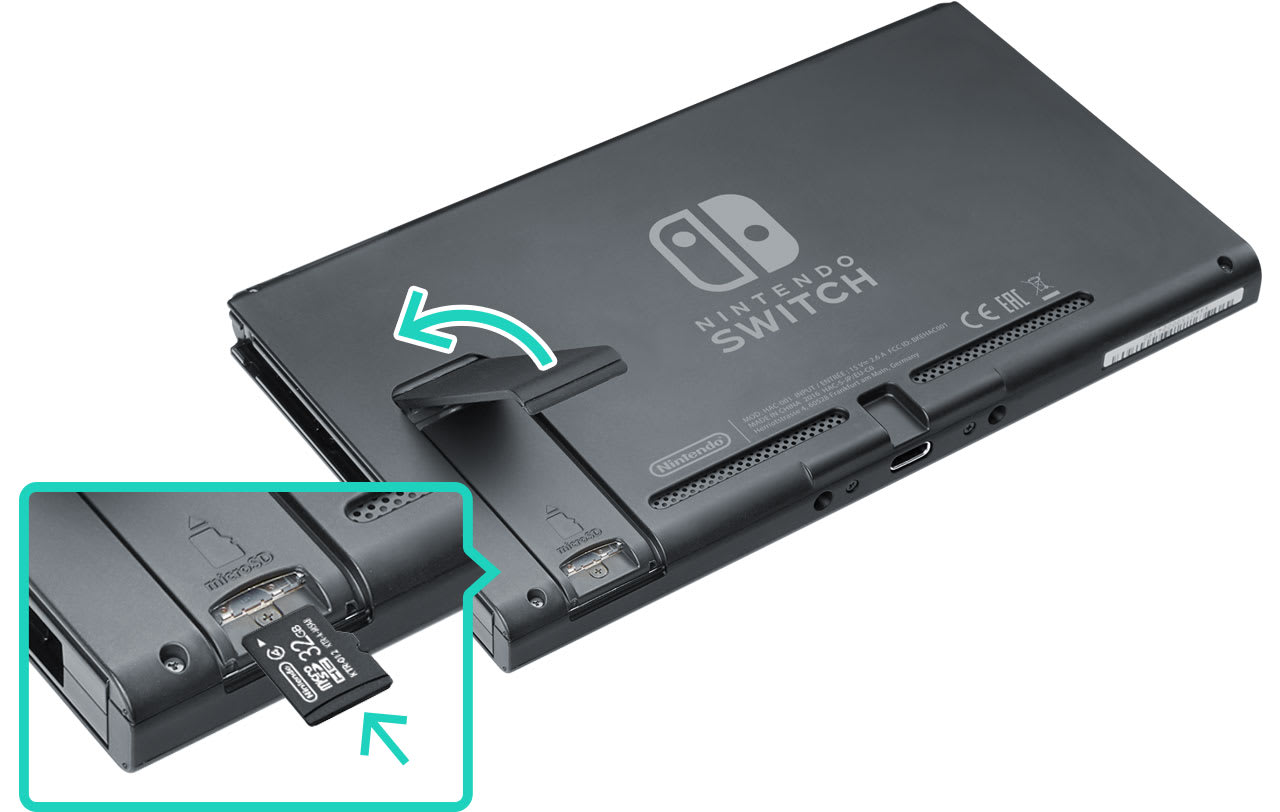
For devices like the Steam Deck or Nintendo Switch, the SD card is often the primary storage for high-bandwidth gaming data.
- Locate the Hidden Slot: On the Nintendo Switch, the slot is located behind the kickstand. On the Steam Deck, it is at the bottom edge.
- Secure Seating: Ensure the card is fully seated before powering the device back on, as these consoles perform a file system check upon boot.
3. Software Configuration and File System Optimization
Physical installation is only half the process. For the operating system to utilize the storage effectively, the software must mount and format the card correctly.
Choosing the Correct File System
When you first install an SD card, the device will likely prompt you to format it. The choice of file system impacts compatibility and file size limits:
- FAT32: Compatible with almost everything (cameras, old consoles, Windows, Mac). However, it has a 4GB maximum file size limit, which is unsuitable for modern video.
- exFAT: The modern standard for SDXC cards. It supports massive file sizes and is compatible with both Windows and macOS, as well as modern smartphones and cameras.
- NTFS: Primarily for Windows environments. Not recommended for SD cards unless used exclusively for Windows system backups.
Android-Specific Configuration: Portable vs. Internal Storage
Android offers two ways to handle a newly installed SD card:
- Portable Storage: The card acts like a USB drive. You can move photos and videos to it, and you can remove the card to plug it into a computer. This is the safest option for most users.
- Adoptable Storage (Internal): The card is “adopted” by the system and encrypted. It becomes part of the phone’s internal memory, allowing you to install apps directly to it. Warning: Once adopted, the card cannot be used in any other device without formatting, and if the card fails, the phone’s operating system may become unstable.
Formatting Within the Device
Technical experts recommend formatting the SD card within the device you intend to use it with, rather than on a computer. For example, a DSLR camera creates a specific folder structure (like the DCIM folder) that ensures optimal write speeds and data organization during a shoot.
4. Troubleshooting and Data Integrity Management
Even with a perfect installation, technical hurdles can arise. Understanding how to diagnose and fix these issues is vital for maintaining a reliable digital workflow.
The “Write-Protect” Lock
A common technical support issue with standard SD cards is the physical write-protect switch located on the side of the card. If this switch is toggled to the “Lock” position, the device can read the data but cannot save new files or format the card. Always check this switch if you receive a “Disk is Write Protected” error.
Handling “SD Card Not Detected” Errors
If your device fails to recognize the card after installation, follow these diagnostic steps:
- Reseat the Card: Remove and re-insert the card to ensure the contact pins are making a firm connection.
- Clean the Contacts: Use 90% Isopropyl alcohol on a lint-free cloth to gently wipe the gold contacts. Oils from skin can interfere with electrical signals.
- Check Driver Integrity: On Windows, check “Disk Management” to see if the card appears as unallocated space. On macOS, use “Disk Utility.”
- Test in a Second Device: Determine if the failure point is the card itself or the host device’s card reader.
The Importance of Safe Ejection
One of the most frequent causes of SD card corruption is “hot-swapping” or pulling the card out while the system is still writing data.
- On Windows: Click “Safely Remove Hardware” in the system tray.
- On Android: Go to Settings > Storage > Unmount SD Card.
- On Cameras: Ensure the write-indicator LED (usually red or green) has stopped flashing before opening the battery/card door.
5. Maximizing the Lifespan of Your SD Card
SD cards use NAND flash memory, which has a finite number of write cycles. To get the most out of your installation, follow these technical best practices:
Avoiding Full Capacity
Performance often degrades as a card approaches 90-95% capacity. The controller on the SD card needs “breathing room” to perform wear leveling—a process that distributes data across different memory cells to prevent any single cell from wearing out prematurely.
Use High-Endurance Cards for Constant Writing
If you are installing an SD card in a dashcam or a home security system, standard cards will fail quickly. In these scenarios, use “High Endurance” cards specifically designed for continuous overwrite cycles. These utilize specialized MLC (Multi-Level Cell) or pSLC (Pseudo Single-Level Cell) technology to survive years of constant use.
Regular Refresh Cycles
Flash memory stores data as electrical charges. If an SD card is left unpowered for several years, those charges can leak, leading to “bit rot” or data loss. A technical best practice is to mount the card and read the data at least once a year to allow the controller to refresh the cells.
By meticulously following these installation and maintenance protocols, you ensure that your SD card serves as a robust expansion of your digital environment. From the initial hardware selection to the intricacies of file system formatting, a tech-first approach guarantees both the speed you need for modern applications and the security required for your most valuable data.
aViewFromTheCave is a participant in the Amazon Services LLC Associates Program, an affiliate advertising program designed to provide a means for sites to earn advertising fees by advertising and linking to Amazon.com. Amazon, the Amazon logo, AmazonSupply, and the AmazonSupply logo are trademarks of Amazon.com, Inc. or its affiliates. As an Amazon Associate we earn affiliate commissions from qualifying purchases.