A fresh installation of Windows 10 can feel like a complete system overhaul, breathing new life into a sluggish computer, resolving persistent software glitches, or providing a clean slate free from digital clutter. Whether you’re upgrading to a new SSD, battling a stubborn virus, or simply crave the crisp performance of a brand-new operating system, a clean install is often the most effective solution. This comprehensive guide will walk you through every step of the process, ensuring a smooth transition to an optimized and secure computing experience.
Why Opt for a Fresh Windows 10 Install?
Many users shy away from a fresh Windows installation, perceiving it as a complex and time-consuming task. However, the benefits often far outweigh the initial effort, making it a powerful tool for maintaining system health and maximizing productivity. Understanding why a clean install is beneficial can motivate you to undertake this rewarding project.
Revitalizing Performance and System Health
Over time, any Windows installation accumulates digital debris. This includes leftover files from uninstalled programs, remnants of system updates, temporary internet files, fragmented registry entries, and potentially unwanted software (PUPs) or malware. This accumulation, often referred to as “bloatware” or “bit rot,” can significantly degrade system performance. Your computer might take longer to boot, applications could launch slowly, and multitasking might become a frustrating endeavor with constant freezing or crashing.
A fresh Windows 10 install wipes the slate clean, removing all these performance inhibitors. You start with only the essential operating system files, allowing your hardware to operate at its peak efficiency. This means faster boot times, snappier application launches, and a more responsive overall user experience. For older machines, a clean install can often provide a noticeable speed boost, extending their usable life and saving you the cost of premature hardware upgrades. It’s akin to giving your car a full tune-up – everything runs smoother and more reliably.
Furthermore, a clean install can resolve deep-seated software conflicts that are difficult to diagnose and fix. If you’ve been grappling with recurring errors, bluescreens, or unexplained system instability, these issues might stem from corrupted system files, conflicting drivers, or malware that has burrowed deep into your system. Reinstalling Windows effectively eradicates these problems, providing a stable foundation upon which to rebuild your digital environment. This not only saves countless hours of troubleshooting but also reduces frustration, allowing you to focus on your work or leisure activities without constant interruptions.
Enhancing Digital Security and Productivity
Beyond performance, a fresh Windows 10 install is a potent tool for digital security. Malicious software – viruses, ransomware, spyware – can be incredibly resilient, often hiding in obscure system directories or modifying core Windows files to survive uninstallation attempts. Even the most robust antivirus software can sometimes miss sophisticated threats. A clean install is the ultimate malware removal tool; by formatting the drive and reinstalling the OS, you guarantee the complete eradication of any persistent infections. This peace of mind is invaluable, knowing your system is free from surveillance or data compromise.
Starting with a clean system also provides an excellent opportunity to establish robust security practices from the ground up. You can ensure Windows Defender is active and up-to-date, implement strong password policies, and meticulously choose which applications to install, avoiding potentially risky software. This proactive approach significantly reduces your attack surface, making your system less vulnerable to future threats.
From a productivity standpoint, a fresh install offers a streamlined and distraction-free workspace. Without unnecessary programs hogging system resources or cluttering your desktop and taskbar, you can create an environment tailored precisely to your needs. This minimalism can lead to greater focus and efficiency. You also have the chance to reorganize your files, implement a logical folder structure, and install only the essential software that contributes directly to your workflow. An optimized, secure, and personalized system is fundamental to sustained productivity in today’s digital landscape.
Comprehensive Pre-Installation Checklist
Before you embark on the journey of reinstalling Windows 10, thorough preparation is paramount. Skipping these crucial steps can lead to data loss, activation issues, or a frustrating installation process. Take your time with this checklist; it will save you considerable headaches later on.
Crucial Data Backup Strategies
This is arguably the most critical step. A fresh Windows installation involves formatting your primary drive, which means all data on that drive will be permanently erased. You must back up everything you consider important.
- Identify Critical Data: This includes documents, photos, videos, music, email archives, browser bookmarks, game saves, and any custom application settings. Don’t forget files stored in less obvious locations like your desktop, downloads folder, or custom folders outside your “My Documents” directory.
- Choose a Backup Method:
- External Hard Drive/SSD: The most common and reliable method. Simply copy and paste your files to the external drive.
- Cloud Storage: Services like OneDrive, Google Drive, Dropbox, or iCloud offer convenient syncing and off-site backup. Ensure all critical files are synced before proceeding.
- Network Attached Storage (NAS): If you have a home network server, this is an excellent option for large backups.
- USB Flash Drives: Suitable for smaller sets of critical documents.
- Verify Your Backup: After backing up, connect your external drive or check your cloud storage from another device to ensure all files are accessible and intact. There’s nothing worse than discovering your backup is corrupted or incomplete after you’ve formatted your main drive.
Locating Your Windows 10 Product Key
While modern Windows 10 installations often self-activate on machines that previously had a digital license, it’s always wise to have your product key handy as a safeguard.
- Digital License: If your Windows 10 was an upgrade from Windows 7/8/8.1, or came pre-installed on your PC, you likely have a digital license tied to your Microsoft account or hardware. In this case, Windows 10 should activate automatically once connected to the internet after installation.
- Retail Product Key: If you purchased a standalone retail version of Windows 10, your product key will be on a sticker inside the packaging or in a confirmation email. It’s a 25-character alphanumeric code.
- Pre-installed on Older PCs: For older PCs that came with Windows 7 or 8, the product key might be on a sticker on the PC chassis itself (often on the bottom of laptops or side of desktops). While this is for an older OS, it can sometimes be used to activate Windows 10 if it was part of the free upgrade path.
- Using a Key Finder Tool: Before reinstalling, you can use third-party tools like NirSoft’s ProduKey or ShowKeyPlus to retrieve your current Windows 10 product key from your running system. Make sure to record it safely.
Preparing Your Installation Media: USB vs. DVD
To install Windows 10, you’ll need bootable installation media. A USB flash drive is generally preferred due to its speed and widespread compatibility.
Using the Windows Media Creation Tool
Microsoft provides an official and free tool for creating bootable Windows 10 installation media: the Media Creation Tool.
- Download the Tool: Go to Microsoft’s official Windows 10 download page and click “Download tool now.”
- Run the Tool: Execute the downloaded file. Accept the license terms.
- Choose “Create installation media”: Select “Create installation media (USB flash drive, DVD, or ISO file) for another PC” and click Next.
- Select Language, Edition, and Architecture: The tool usually recommends options based on your current PC. If you’re installing on a different PC, uncheck “Use recommended options for this PC” and select the correct choices (e.g., English, Windows 10, 64-bit).
- Choose Media Type:
- USB flash drive: This is recommended. Ensure you have a USB drive with at least 8 GB of storage. All data on this USB drive will be erased.
- ISO file: If you prefer to burn a DVD later or use a virtual machine, select this option. You’ll need DVD burning software (like Rufus) if you opt for a DVD from an ISO.
- Start Creation: The tool will download the Windows 10 files and create your bootable media. This process can take some time depending on your internet speed.
Gathering Essential Drivers and Software
While Windows 10 has excellent built-in driver support, it’s a good practice to download crucial drivers beforehand, especially for network adapters (Wi-Fi/Ethernet) and graphics cards.
- Identify Your Hardware: Note down your PC’s make and model, and specifically your motherboard, graphics card, and network adapter models. Tools like Speccy can help identify these.
- Download from Manufacturer Websites: Visit the official websites of your PC manufacturer (e.g., Dell, HP, Lenovo) or component manufacturers (e.g., ASUS, MSI for motherboards; NVIDIA, AMD for graphics cards). Download the latest Windows 10 compatible drivers for your hardware. Store them on your backup drive or a separate USB stick.
- Essential Software List: Make a list of all the applications you regularly use (web browsers, office suites, photo editors, games, etc.). Knowing what you need will streamline the post-installation process. You might even download installers for your most critical programs to your backup drive.
The Step-by-Step Windows 10 Installation Process
With your preparations complete, you’re ready to begin the actual installation. This part requires careful attention, especially when it comes to disk partitioning.
Booting from Your Installation Media

Your computer needs to start from the USB drive or DVD rather than its internal hard drive.
- Connect Media: Insert the bootable USB drive or DVD into your computer.
- Restart PC: Restart your computer.
- Access Boot Menu/BIOS/UEFI: As the PC starts, you’ll need to press a specific key repeatedly to enter the BIOS/UEFI settings or a dedicated boot menu. Common keys include F2, F10, F12, DEL, or ESC. The exact key is usually displayed briefly on the screen during startup.
- Select Boot Device: In the boot menu, select your USB drive or DVD as the primary boot device. If you’re in BIOS/UEFI, navigate to the “Boot Order” or “Boot Priority” section and move your media to the top of the list. Save changes and exit.
- Start Setup: Your computer should now boot from the installation media, and you’ll see the “Windows Setup” screen. If you’re prompted to “Press any key to boot from CD or DVD,” do so.
Navigating the Setup Wizard
The initial setup screens are straightforward.
- Language, Time, and Keyboard: Select your preferred language, time and currency format, and keyboard layout. Click “Next.”
- Install Now: Click the “Install now” button.
- Product Key (Optional): If prompted for a product key, you can enter it here. If you have a digital license, you can click “I don’t have a product key” and Windows will activate automatically after installation when connected to the internet.
- Accept License Terms: Read and accept the Microsoft Software License Terms. Click “Next.”
Custom Installation and Disk Partitioning
This is the most critical stage of the installation process, especially if you want a truly clean install.
- Choose Installation Type: Select “Custom: Install Windows only (advanced).” This allows you to manage your disk partitions.
- Select Drive to Install Windows: You’ll see a list of drives and partitions.
- Existing Windows Installation: If you’re reinstalling on a drive that already has Windows, you’ll see several partitions (e.g., “Drive 0 Partition 1: Recovery,” “Drive 0 Partition 2: System,” “Drive 0 Partition 3: MSR,” “Drive 0 Partition 4: Primary”).
- Clean Install Recommendation: To ensure a truly fresh start, delete all partitions associated with your previous Windows installation. Select each partition one by one and click “Delete.” Be absolutely certain you are deleting partitions on the correct drive, especially if you have multiple internal drives. This is where your data is erased.
- Unallocated Space: Once all relevant partitions are deleted, you’ll be left with “Drive 0 Unallocated Space.” Select this unallocated space.
- Create New Partition (Optional but recommended): Click “New” to create a new partition. Windows will suggest the maximum available size. You can adjust this if you want to create multiple partitions (e.g., one for the OS, one for data), but for most users, using the full space is fine. Click “Apply.” Windows will then create additional small system partitions automatically (e.g., Recovery, EFI System, MSR).
- Select Primary Partition: Select the largest “Primary” partition (this is where Windows will be installed) and click “Next.”
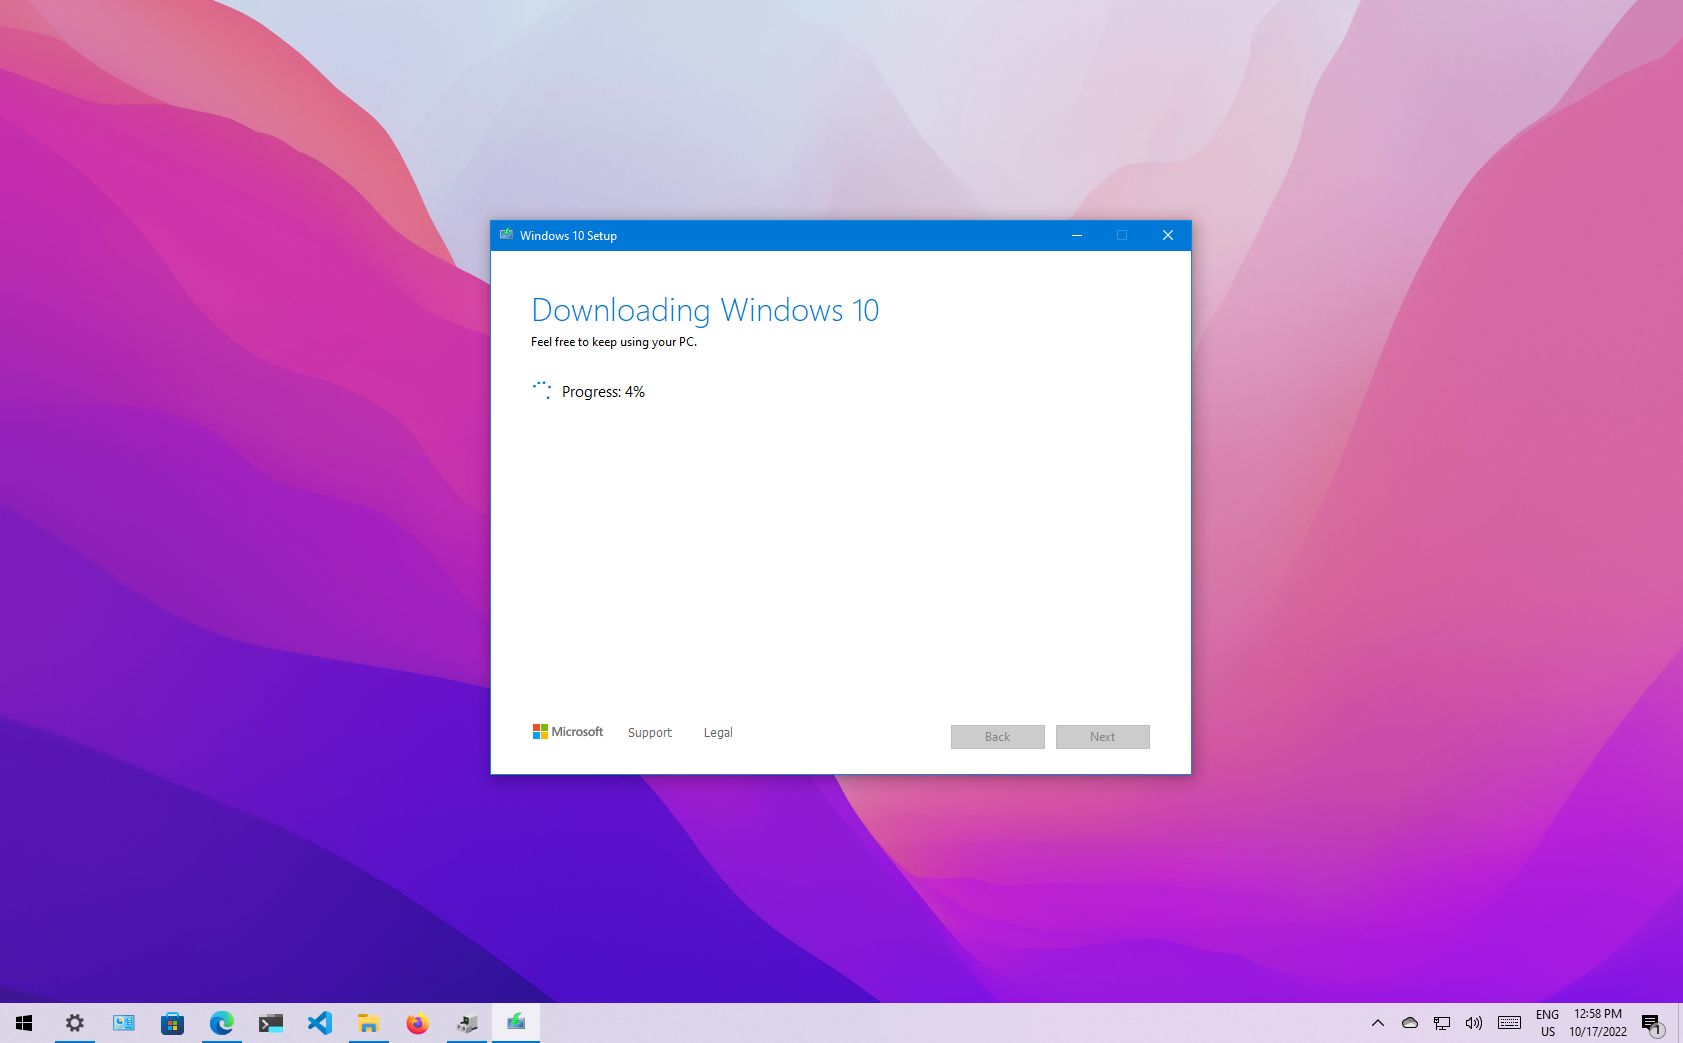
- File Copying: Windows will now begin copying files and installing features. Your computer will restart multiple times during this process. Do not remove the installation media until prompted to do so.
Initial System Configuration
After the reboots and initial file copying, Windows will guide you through some final setup steps.
- Region and Keyboard Layout: Confirm your region and keyboard layout.
- Connect to a Network: Connect to your Wi-Fi or plug in an Ethernet cable. This is crucial for activation (if using a digital license) and downloading updates later.
- Sign in with Microsoft Account: You’ll be prompted to sign in with your Microsoft account. This ties your digital license to your account and syncs settings. You can also choose “Offline account” if you prefer a local account, but functionality like OneDrive integration and Microsoft Store will be limited.
- PIN Creation: Set up a PIN for faster login.
- Privacy Settings: Review and adjust your privacy settings (location, speech recognition, diagnostic data, etc.). It’s advisable to take a moment to understand each setting.
- Cortana/OneDrive Setup (Optional): You’ll have options to set up Cortana and OneDrive. You can skip these if you don’t plan to use them immediately.
- Finalizing: Windows will spend a few more minutes finalizing the setup, and then you’ll be presented with your brand-new desktop!
Post-Installation Essentials and Optimization
Your journey isn’t over just because you see the desktop. Several crucial steps remain to ensure your new Windows 10 installation is fully functional, secure, and optimized for your use.
Installing Drivers and System Updates
This is the most critical first step after reaching the desktop.
- Check for Windows Updates:
- Go to Start Menu > Settings > Update & Security > Windows Update.
- Click “Check for updates.” Windows will download and install critical updates, security patches, and many drivers automatically. Allow this process to run its course, restarting your PC as requested. Repeat until no more updates are found.
- Install Missing/Proprietary Drivers:
- After Windows Update, check Device Manager (Right-click Start Button > Device Manager) for any devices with yellow exclamation marks. These indicate missing or improperly installed drivers.
- Install the drivers you downloaded earlier from your manufacturer’s website (graphics card, network adapter, chipset, audio, etc.). Always install chipset drivers first, then graphics, then audio and network.
- For graphics drivers, it’s often best to download the latest version directly from NVIDIA or AMD rather than relying solely on Windows Update or the PC manufacturer’s older versions.
- Verify Functionality: Test your internet connection, audio, display resolution, and any peripheral devices to ensure all drivers are working correctly.
Restoring Your Data and Applications
Now you can bring your digital life back onto your clean system.
- Restore Data: Copy your backed-up files from your external drive or cloud storage back to their appropriate locations (Documents, Pictures, Videos, etc.) on your new Windows installation.
- Install Applications: Begin installing the software you need from your list.
- Browsers: Start with your preferred web browser.
- Productivity Suites: Install your office software (Microsoft Office, LibreOffice).
- Essential Utilities: Antivirus (if you’re not relying on Windows Defender), media players, compression tools (7-Zip).
- Specialized Software: Install any specific software for your work, hobbies, or gaming.
- Ninite (Optional): For quick installation of many common free programs, consider using Ninite.com, which allows you to select multiple apps and install them all at once, silently and without bloatware.
Personalization and Security Enhancements
Tailor your new system to your preferences and strengthen its defenses.
- Personalize:
- Background & Theme: Set your desktop background, theme, and accent colors (Settings > Personalization).
- Taskbar & Start Menu: Organize your taskbar icons and Start Menu tiles for quick access to your most used apps.
- Sound Settings: Adjust audio output and input devices.
- Security Software:
- Windows Defender: Ensure Windows Defender is active and up-to-date. For most users, it provides robust protection.
- Third-Party Antivirus (Optional): If you prefer a different antivirus, install it now. Ensure it’s up-to-date.
- Firewall: Windows Firewall is usually sufficient, but ensure it’s enabled.
- Password Manager: Install and set up a password manager to help you create and store strong, unique passwords for all your online accounts.
- Browser Security: Install browser extensions for ad-blocking, privacy protection (e.g., uBlock Origin, Privacy Badger), and password management.
- Create a Restore Point: Once your system is fully set up and running smoothly, create a manual system restore point. This provides a snapshot you can revert to if future installations or updates cause issues.
Troubleshooting Common Installation Issues
Even with careful preparation, issues can sometimes arise. Here are solutions to some common problems.
Addressing Boot Problems
- “No bootable device found” or similar: This usually means your PC isn’t trying to boot from the correct media. Re-enter BIOS/UEFI and verify the boot order. Ensure the USB drive or DVD is properly inserted and recognized. If using a USB, try a different port.
- Stuck on a black screen or spinning dots: This could indicate corrupted installation media. Try recreating the USB drive with the Media Creation Tool or using a different USB drive. It could also point to a hardware issue (RAM, drive).
- Legacy vs. UEFI: Modern PCs use UEFI boot mode. Ensure your BIOS/UEFI settings are configured for UEFI boot for your installation media. If you have an older system or specific needs, you might use Legacy/CSM mode, but generally, UEFI is preferred for Windows 10.
Resolving Driver Conflicts
- No internet after install: This is common if Windows didn’t automatically install your network adapter driver. Use another device to download the correct Ethernet or Wi-Fi driver to a USB drive, then transfer and install it on your new Windows system.
- Low resolution/Generic display driver: Install your dedicated graphics card drivers (NVIDIA, AMD, Intel) downloaded from their official websites.
- Audio not working: Check Device Manager for audio device status. Install motherboard audio drivers from your PC or motherboard manufacturer’s website.
If you encounter persistent issues, search online forums with specific error messages. Microsoft’s support website and various tech communities are excellent resources for troubleshooting.

Conclusion: A Fresh Start for Peak Performance
Performing a fresh Windows 10 install is more than just a technical chore; it’s an investment in your digital productivity, security, and overall computing experience. By meticulously following the preparation steps, executing the installation carefully, and diligently completing the post-installation tasks, you transform a potentially slow, cluttered, or insecure system into a lean, fast, and robust workstation.
This process revitalizes your hardware, strips away unnecessary software bloat, and fortifies your digital defenses, ensuring your computer is operating at its absolute best. The immediate benefits of enhanced performance and stability are clear, but the long-term advantages—reduced troubleshooting time, greater system reliability, and a more secure environment for your data—are even more compelling. Embrace the power of a clean slate; your refreshed Windows 10 system is now ready to handle whatever you throw at it with unparalleled efficiency and peace of mind.
aViewFromTheCave is a participant in the Amazon Services LLC Associates Program, an affiliate advertising program designed to provide a means for sites to earn advertising fees by advertising and linking to Amazon.com. Amazon, the Amazon logo, AmazonSupply, and the AmazonSupply logo are trademarks of Amazon.com, Inc. or its affiliates. As an Amazon Associate we earn affiliate commissions from qualifying purchases.