The allure of macOS is undeniable. With its sleek interface, robust ecosystem, and a reputation for stability and intuitive design, it’s no wonder many are considering the switch or looking to refresh their existing Mac experience. Whether you’re a seasoned tech aficionado eager to explore the latest macOS version, a new Mac owner embarking on your digital journey, or even a business looking to standardize its fleet, understanding the installation process is paramount. This comprehensive guide will walk you through everything you need to know, from preparing your Mac to successfully installing and setting up the latest operating system.

The world of technology is constantly evolving, and staying updated with the latest software is crucial for optimal performance, security, and access to new features. macOS, Apple’s flagship operating system, is no exception. Each major release brings a host of improvements, from enhanced productivity tools and cutting-edge AI integrations to robust digital security measures and refined user experiences. This article aims to demystify the process of installing macOS, making it accessible and straightforward for everyone.
Preparing for Your macOS Installation: Laying the Groundwork for Success
Before diving headfirst into the installation process, meticulous preparation is key. Just as a well-planned marketing campaign sets the stage for brand success, a thorough preparation phase ensures a smooth and efficient macOS installation, minimizing potential hiccups and data loss. Think of this as the foundational step in your “brand” strategy for your Mac’s operating system – a strong start leads to a better overall experience.
1. Understanding macOS Versioning and Compatibility
Apple offers a consistent naming convention for its macOS releases, typically incorporating elements of California geography (e.g., Monterey, Ventura, Sonoma). Each new version builds upon the previous one, introducing new features and sometimes deprecating older ones. It’s vital to confirm that your Mac hardware is compatible with the version of macOS you intend to install. Apple provides a comprehensive list of supported models on its website for each release. Attempting to install an incompatible version can lead to boot failures or a non-functional system.
For those looking to upgrade, Apple usually offers free upgrades to the latest macOS version for compatible hardware. This is a significant benefit, allowing users to leverage the newest technologies without additional cost. However, if you are considering a clean install – completely wiping your drive and starting fresh – you’ll need to ensure you have the correct installer.
2. Backing Up Your Data: The Cornerstone of Digital Security
In the realm of technology and digital security, data backup is not just a recommendation; it’s a non-negotiable imperative. A system installation, whether it’s an upgrade or a clean install, inherently carries a risk of data loss. Therefore, creating a comprehensive backup of your Mac’s current data is the most critical preparatory step.
Utilizing Time Machine for Seamless Backups
Apple’s built-in Time Machine utility is the simplest and most effective way to back up your Mac. Connect an external hard drive to your Mac and enable Time Machine in System Settings. It will automatically back up your entire system, including your operating system, applications, user files, and settings. This backup can be used to restore your Mac to its previous state if anything goes wrong during the installation, or if you decide to revert to an older version. Ensure your Time Machine backup is up-to-date before proceeding with any installation.
Alternative Backup Strategies
While Time Machine is excellent for most users, some might prefer or require additional backup methods. Cloud storage services like iCloud Drive, Google Drive, or Dropbox can be used to sync important documents and files. For a more robust solution, consider cloning your entire hard drive using third-party disk imaging software. This creates an exact replica of your drive, which can be invaluable for disaster recovery. Regardless of the method, always verify that your backup is complete and accessible.
3. Ensuring Sufficient Disk Space and Power
macOS installations, especially major upgrades, require a significant amount of free disk space. Apple typically specifies the minimum required space for each OS version. It’s advisable to have at least 20-30 GB of free space to ensure the installation process runs smoothly and that there’s room for temporary files and system updates post-installation.
Furthermore, it’s crucial to connect your Mac to a reliable power source throughout the installation process. Power interruptions can corrupt the installation and potentially render your Mac unbootable. If you’re using a MacBook, ensure it’s plugged into AC power and that the battery is fully charged.
The Installation Process: Navigating Through the Steps
With your Mac prepped and data secured, you’re ready to begin the installation itself. The process can vary slightly depending on whether you’re performing an upgrade or a clean install, but the core steps remain consistent. Think of this as the execution phase of your technology strategy – precise steps lead to the desired outcome.
1. Performing an In-Place Upgrade: Seamless Transition
The most common method for installing a newer version of macOS is through an in-place upgrade. This means installing the new OS over your existing one, preserving your files, applications, and settings.
Downloading macOS from the App Store
For most users, the easiest way to initiate an upgrade is by downloading the latest macOS installer directly from the Mac App Store. Simply search for the desired macOS version (e.g., “macOS Sonoma”) and click “Get” or “Download.” Once the download is complete, the installer application will launch automatically, or you can find it in your Applications folder.
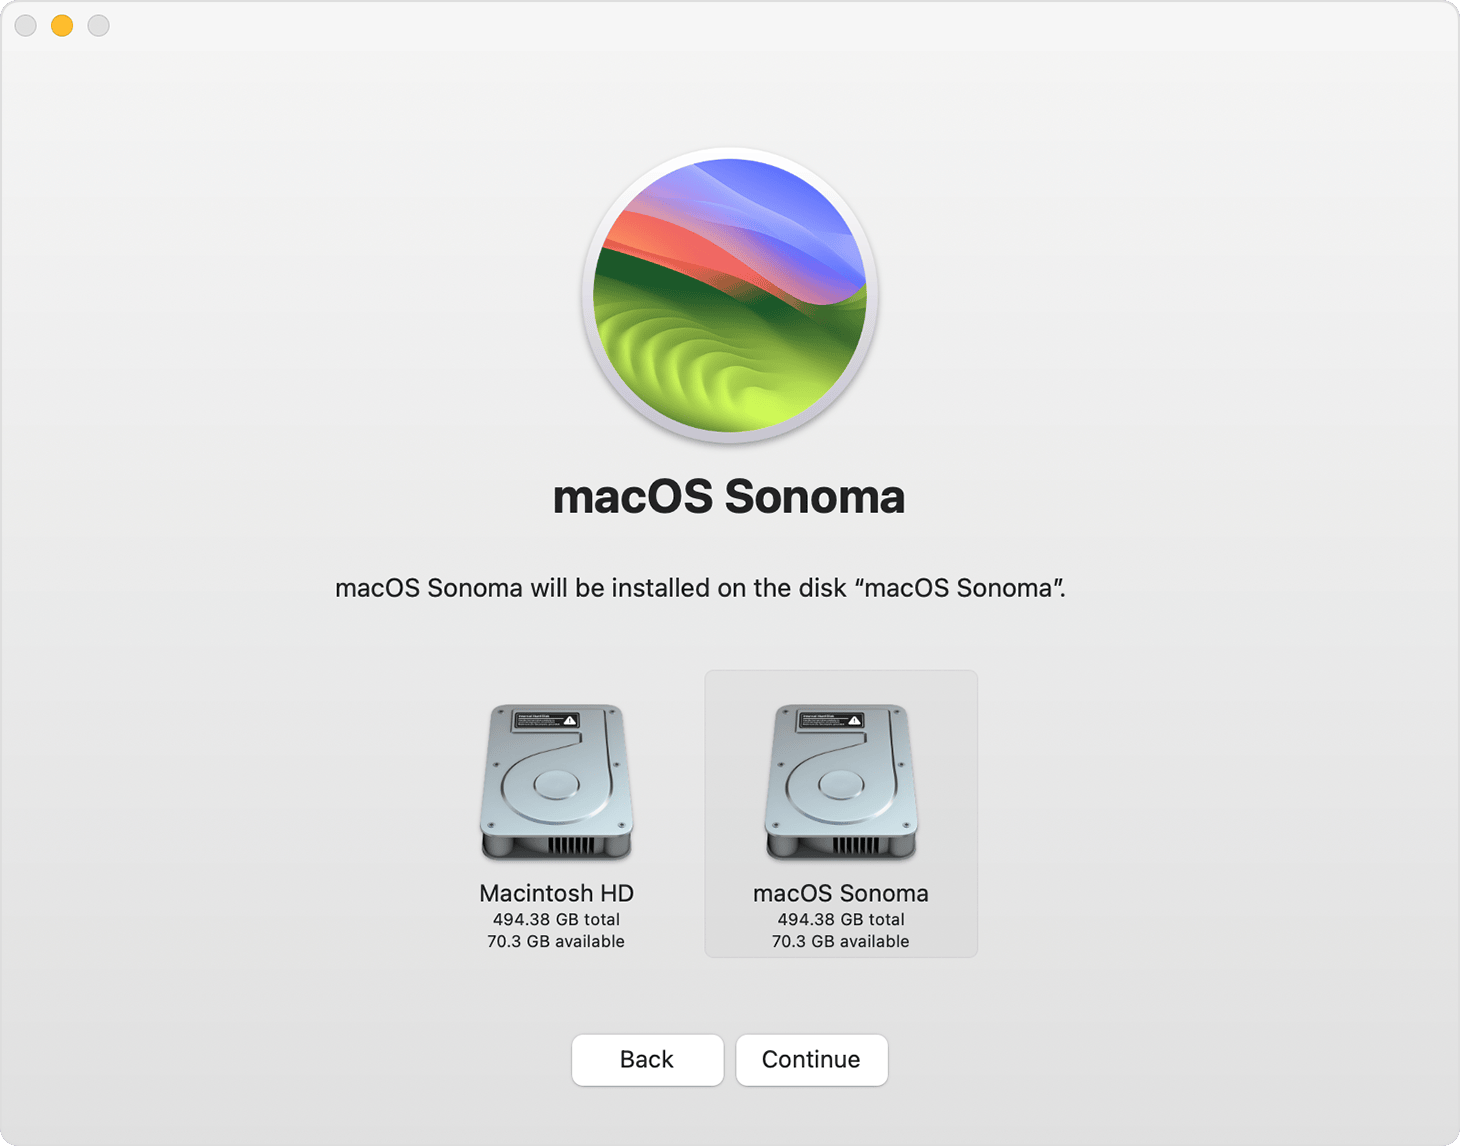
Running the Installer
Follow the on-screen prompts provided by the installer. You’ll be asked to agree to the software license agreement and select the destination disk for installation. In most cases, you’ll want to install it on your Mac’s primary startup disk. The installer will then copy the necessary files and restart your Mac to begin the installation. This process can take a considerable amount of time, depending on your Mac’s speed and the size of the OS update. Do not interrupt the process or shut down your Mac during this phase.
2. Performing a Clean Install: A Fresh Start
A clean install involves completely erasing your Mac’s startup disk and then installing macOS from scratch. This is often recommended to resolve persistent software issues, improve performance, or when selling or giving away your Mac.
Creating a Bootable macOS Installer
For a clean install, you’ll typically need to create a bootable macOS installer on a USB flash drive. This involves downloading the macOS installer from the App Store, then using the createinstallmedia command in the Terminal application. The command syntax is specific and requires careful attention to detail. You’ll need a USB drive of at least 16GB capacity, which will be erased during the process.
Booting from the Installer and Erasing the Disk
Once the bootable USB drive is created, insert it into your Mac. Restart your Mac while holding down the Option (⌥) key (or Alt on some keyboards). This will bring up the Startup Manager, allowing you to select the bootable USB drive as your startup disk. After booting from the USB, you’ll be presented with macOS Utilities. Here, you will need to select “Disk Utility.”
Within Disk Utility, select your Mac’s startup disk (usually named “Macintosh HD”) and click the “Erase” button. Choose a suitable format (APFS is recommended for modern macOS versions) and a scheme (GUID Partition Map). After erasing the disk, close Disk Utility and select “Install macOS” from the Utilities window. Follow the prompts to install macOS onto the newly erased disk.
Post-Installation Setup and Configuration: Personalizing Your Mac Experience
Once the macOS installation is complete, your Mac will restart into the Setup Assistant. This is your opportunity to configure your new operating system and personalize your Mac experience. This stage is akin to refining your brand identity – making sure every detail reflects your preferences and needs.
1. Initial Setup Assistant: Guiding You Through the Essentials
The Setup Assistant will guide you through a series of essential steps, including:
- Country/Region Selection: Choose your location to set the correct time zone and language.
- Keyboard Layout: Select your preferred keyboard layout.
- Wi-Fi Connection: Connect to your wireless network.
- Data & Privacy: Review Apple’s privacy policies.
- Migration Assistant: This is a crucial step if you’re migrating from another Mac or a Windows PC. You can transfer your user accounts, applications, settings, and files. If you performed a Time Machine backup, this is where you would restore from it.
- Apple ID Sign-In: Sign in with your Apple ID to access iCloud services, the App Store, and other Apple features. You can also create a new Apple ID if you don’t have one.
- Terms and Conditions: Agree to the macOS software license agreement.
- Create a Computer Account: Set up your user account with a full name, account name, password, and password hint.
- Express Set Up vs. Customize Settings: You can choose to use recommended settings or customize various aspects of your Mac, such as Siri, Screen Time, and iCloud usage.
2. Installing Updates and Essential Software
After completing the Setup Assistant, your Mac will be ready for use. However, it’s highly recommended to immediately check for any available software updates.
Ensuring Your System is Up-to-Date
Navigate to System Settings (or System Preferences on older macOS versions) and select General > Software Update. Your Mac will scan for any new updates, including security patches and minor feature enhancements. Installing these updates is critical for maintaining the security and stability of your system.
Reinstalling Your Favorite Apps and Configuring Preferences
Now it’s time to reinstall your essential applications that may not have been transferred during a migration. Visit the Mac App Store or the websites of your favorite software providers to download and install them. Once your core applications are in place, take some time to configure their settings and your Mac’s system preferences to your liking. This might involve setting up your default browser, configuring email accounts, adjusting display settings, and customizing the Dock and Menu Bar.
For businesses, this stage is also crucial for deploying enterprise applications, configuring network settings, and ensuring compliance with corporate IT policies. This meticulous configuration mirrors a strong corporate identity strategy, ensuring a unified and productive user experience across the organization.

Conclusion: Embracing Your Newly Installed macOS
Installing macOS might seem daunting at first, but by following these steps and preparing diligently, you can ensure a smooth and successful transition to the latest operating system. Whether you’re upgrading your existing Mac or starting fresh with a clean install, the process is designed to be user-friendly.
A well-installed and configured macOS environment can significantly enhance your productivity, creativity, and overall digital experience. By staying informed about compatibility, backing up your data, and carefully following the installation and setup procedures, you’re setting the stage for a powerful and efficient Mac that will serve you well. Embrace the new features, explore the refined interface, and enjoy the seamless integration that macOS offers. This technical undertaking is not just about software; it’s about optimizing your digital workspace, much like a well-executed marketing strategy enhances a brand’s perception and reach.
aViewFromTheCave is a participant in the Amazon Services LLC Associates Program, an affiliate advertising program designed to provide a means for sites to earn advertising fees by advertising and linking to Amazon.com. Amazon, the Amazon logo, AmazonSupply, and the AmazonSupply logo are trademarks of Amazon.com, Inc. or its affiliates. As an Amazon Associate we earn affiliate commissions from qualifying purchases.