
In the digital age, while paperless offices are a growing aspiration, the humble printer remains an indispensable tool for homes, small businesses, and large corporations alike. From printing crucial documents and vibrant photographs to educational materials and marketing flyers, a reliable printer ensures smooth operations and tangible outputs. Among the myriad of printer brands, Canon stands out for its reputation for quality, innovation, and user-friendly designs. However, even the most advanced Canon printer is only as good as its ink supply. Knowing how to properly install ink cartridges is not just a basic maintenance task; it’s a critical skill that impacts print quality, printer longevity, and your overall productivity.

Improper cartridge installation can lead to a host of problems: streaky prints, unrecognized cartridges, wasted ink, and even damage to the printer’s delicate internal mechanisms. This comprehensive guide is designed to demystify the process, providing a clear, step-by-step walkthrough to ensure you can confidently replace ink cartridges in your Canon printer, maintaining optimal performance and vibrant print results every time. We’ll delve into the necessary preparations, the installation sequence, post-installation checks, and crucial troubleshooting tips, ensuring your Canon device remains a reliable workhorse for all your printing needs.
Understanding Your Canon Printer and Ink Cartridges
Before diving into the mechanics of installation, it’s beneficial to understand the role of ink cartridges and why meticulous handling is paramount. Your Canon printer is a sophisticated piece of technology, and its ink system is at the heart of its imaging capabilities.
Why Proper Cartridge Installation Matters
The ink cartridge is more than just a reservoir for ink; it’s a precision component containing tiny nozzles, electrical contacts, and sometimes even its own print head. When you install a new cartridge, you’re engaging with a complex system. A correctly installed cartridge ensures an airtight seal, preventing ink from drying out or leaking, which can severely impact print quality and potentially damage the print head. It also guarantees proper electrical contact with the printer, allowing the device to recognize the cartridge, monitor ink levels, and deliver ink precisely onto the page.
Moreover, proper installation is a cornerstone of productivity. An incorrectly seated cartridge can lead to frustrating error messages, repeated installation attempts, and ultimately, downtime. For businesses, this translates to lost time and potential delays. From a financial perspective, preventing leaks and ensuring efficient ink usage means you get the most out of every expensive cartridge, avoiding unnecessary replacements and repair costs. Adhering to the correct procedure helps extend the life of your printer, safeguarding your technology investment and contributing to its long-term reliability.
Identifying the Right Ink Cartridge for Your Canon Model
One of the most common pitfalls users encounter is purchasing the wrong ink cartridge. Canon offers a vast array of printer models, each designed to work with specific series of ink cartridges. Using an incompatible cartridge can cause damage, prevent printing altogether, and often void your printer’s warranty.
To identify the correct cartridge, follow these steps:
- Check Your Printer Model Number: This is usually found on the front or top of your printer, or on a label on the back. It might look something like “PIXMA TS3320” or “MAXIFY MB2720.”
- Refer to Your Printer Manual: The user manual provided with your printer will list the exact cartridge numbers compatible with your model. This is the most reliable source of information.
- Look at the Old Cartridge: If you’re replacing an existing cartridge, the model number is typically printed on the cartridge itself. Be aware that some cartridges come in standard (e.g., CL-246) and XL (e.g., CL-246XL) versions, with XL indicating a higher ink volume.
- Use Canon’s Website: Canon’s official website offers a cartridge finder tool where you can input your printer model and it will display compatible ink options.
While generic or refilled cartridges might seem like a cost-effective alternative, Canon strongly recommends using genuine Canon ink cartridges. These are engineered to work seamlessly with Canon printers, ensuring optimal print quality, color accuracy, and device reliability. Generic inks may not offer the same performance, potentially leading to clogs, faded prints, or even hardware issues, which can be a false economy in the long run. Choosing genuine Canon ink ensures that the brand’s reputation for quality extends to your printing experience.
Essential Preparations Before Installation
Before you even touch the new cartridge, a few preparatory steps will ensure a smooth and safe installation process. Thinking ahead can save you time and prevent potential headaches.
Gathering Your Tools and Supplies
While installing an ink cartridge typically doesn’t require specialized tools, having a few items on hand can make the process cleaner and more efficient:
- New Ink Cartridges: Ensure you have the correct, genuine Canon cartridges (black, color, or individual colors as required by your model).
- Lint-Free Cloth or Paper Towels: Useful for wiping up any potential ink drips. Even if you’re careful, minor smudges can happen.
- Gloves (Optional but Recommended): Latex or nitrile gloves can prevent ink from staining your hands, especially if you’re prone to messes or have sensitive skin.
- Printer User Manual: Keep it handy, especially if you have an unfamiliar model or encounter an unexpected issue. It often contains diagrams and specific instructions.
- Trash Can: For immediate disposal of old cartridges and packaging.
Having these items within reach before you start means you won’t have to pause mid-installation to search for them, streamlining the process and maintaining focus.
Powering Up and Accessing the Cartridge Compartment
The first step in interacting with your Canon printer’s internal mechanisms is to properly prepare the device itself.
- Ensure the Printer is Powered On: Turn on your Canon printer. The print head carriage needs to move to an accessible position for you to safely remove and insert cartridges. Do not attempt to force the carriage manually while the printer is off, as this can cause damage.
- Open the Printer Cover/Access Door: The exact location varies by model, but most Canon inkjet printers have a front cover or top lid that, when opened, exposes the ink cartridge carriage. Consult your manual if you’re unsure. On some models, the carriage only moves into position after you open the cover.
- Wait for the Cartridge Carriage to Stop: Once the cover is open, the print head carriage (the assembly holding the ink cartridges) will typically move to the center or a designated access point. Wait until it completely stops moving and is stationary before proceeding. This is a crucial safety step to prevent injury or damage to the printer. Do not try to hold it or stop it manually.
- Observe the Indicator Lights: Many Canon printers have lights on the cartridge carriage that indicate which cartridge is low or empty, often blinking or turning off. This helps confirm which cartridge needs replacement.
This preparatory phase is critical for both your safety and the longevity of your printer. Rushing this step or neglecting to power down/up correctly can lead to operational errors or even damage the print head, requiring costly repairs.
A Step-by-Step Guide to Ink Cartridge Installation
With your preparations complete, you are now ready for the core task: replacing the ink cartridges. This sequence should be followed carefully to ensure a successful installation.
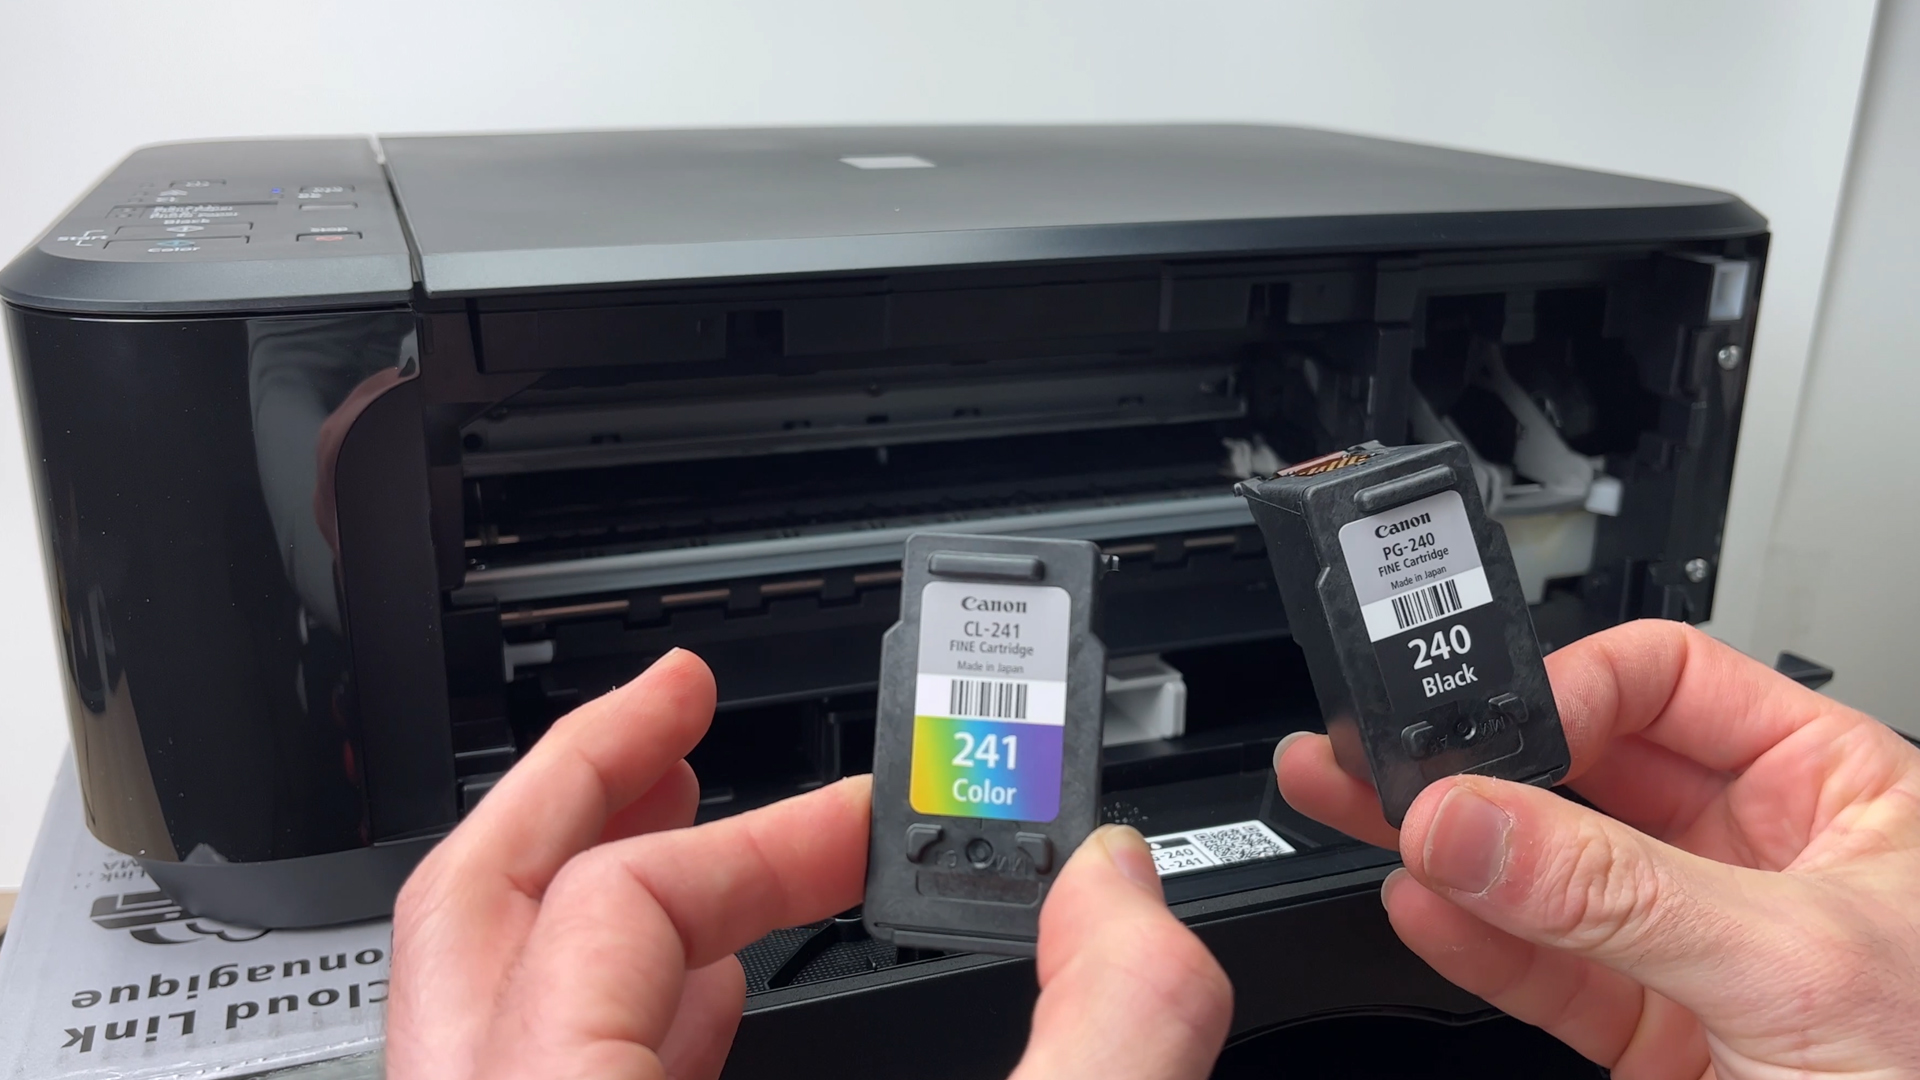
Removing the Old Cartridge (if applicable)
If you’re replacing an empty cartridge, this is your starting point:
- Identify the Cartridge to Replace: As mentioned, your printer’s display or indicator lights will often show which cartridge is low or empty. Confirm you are replacing the correct one.
- Press the Release Lever/Tab: Most Canon cartridges are held in place by a small lever, tab, or push-down mechanism. Gently press down on this tab or lever. You might hear a small click as the cartridge releases and slightly lifts.
- Lift and Pull the Old Cartridge Out: Once released, carefully lift the cartridge straight up or pull it towards you, depending on your printer model, to remove it from its slot. Try to avoid touching the exposed print head nozzles or electrical contacts on the printer carriage.
- Dispose of the Old Cartridge Responsibly: Place the old cartridge immediately into a designated recycling bin (many office supply stores offer cartridge recycling programs) or your trash can. Handling the old cartridge with a paper towel or gloves can prevent ink stains.
Unpacking and Preparing the New Cartridge
The new cartridge requires specific handling to ensure its integrity and proper function:
- Remove from Packaging: Take the new cartridge out of its sealed plastic packaging.
- Remove Protective Tape/Film: All new ink cartridges come with protective orange tape, film, or a plastic clip. This seals the ink nozzle and sometimes protects the electrical contacts. Carefully peel off this tape or remove the clip. Crucially, do not touch the gold-colored electrical contacts or the ink nozzles (the small metal plate or dark ink port) on the cartridge with your fingers. Skin oils can clog the nozzles or interfere with electrical connections, leading to poor print quality or cartridge recognition issues.
- Do Not Shake Excessively: While a gentle shake can help distribute ink in some larger-reservoir cartridges, avoid vigorous shaking, as this can introduce air bubbles or cause ink to leak.
Inserting the Cartridge into Your Printer
This is the final, and most critical, step:
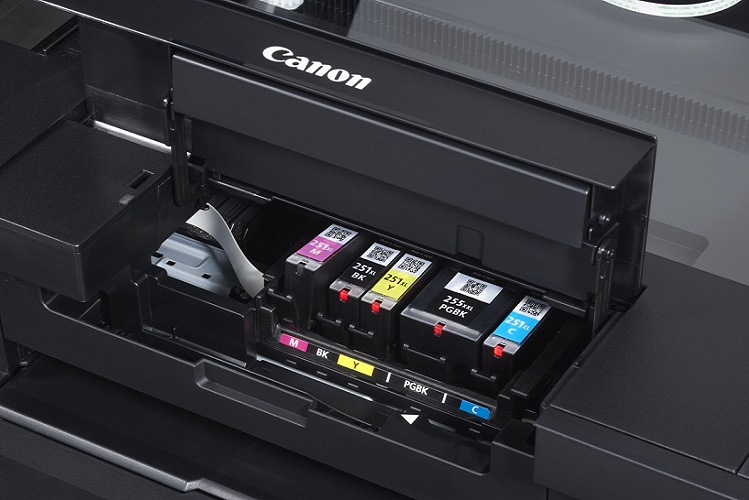
- Match Color and Slot: Observe the color coding and shape of the new cartridge and compare it to the empty slot in the printer carriage. Each cartridge is designed to fit into only one specific slot (e.g., black into the black slot, cyan into the cyan slot, etc.).
- Slide or Place the Cartridge: Gently slide the cartridge into its designated slot. Ensure it’s aligned correctly. For some models, you might need to insert it at a slight angle and then press it down.
- Push Down Until It Clicks: Firmly (but not forcefully) push the cartridge down or forward until you hear an audible click. This click confirms that the cartridge is securely seated and the release lever has locked it into place. A properly installed cartridge will sit flush with the other cartridges or snap securely into position.
- Close the Printer Cover: Once all new cartridges are installed, carefully close the printer’s cover or access door. The printer will typically begin a short initialization process, which may involve some internal sounds as it recognizes the new cartridges.
Post-Installation Procedures and Troubleshooting
The job isn’t quite done after the cartridges are installed. A few final steps ensure everything is working correctly, and knowing how to address common issues can save you time and frustration.
Performing a Test Print and Alignment
After installation, your printer may automatically initiate an alignment process or prompt you to do so via its display or your computer.
- Wait for Initialization: Allow the printer to complete its internal initialization process, which may take a minute or two.
- Perform a Test Print: Print a test page. Many Canon printers have an option to print a nozzle check pattern or an alignment page directly from the printer’s menu. Alternatively, you can print a simple document from your computer. This helps verify that ink is flowing correctly and the print heads are clean.
- Run Print Head Alignment (if necessary): If the test page shows misaligned lines, blurriness, or banding, you may need to perform a print head alignment. This is usually done through the printer’s utility software on your computer or directly from the printer’s control panel. Alignment optimizes the print head position for the clearest, sharpest output. This is a key step in maintaining print quality and ensures your investment in quality ink translates into professional-grade documents.
Common Issues and Quick Fixes
Even with careful installation, you might occasionally encounter issues. Here are some common problems and their solutions:
-
“Ink Cartridge Not Recognized” Error:
- Re-seat the Cartridge: Open the cover, remove the cartridge, and re-insert it firmly until it clicks. Sometimes, the initial seating isn’t perfect.
- Clean Electrical Contacts: With the printer off and unplugged, gently wipe the gold-colored electrical contacts on both the cartridge and inside the printer carriage with a lint-free cloth lightly dampened with distilled water or isopropyl alcohol. Allow them to dry completely before re-inserting.
- Restart the Printer: Turn the printer off, unplug it from the wall for about 60 seconds, then plug it back in and turn it on. This can reset the printer’s internal sensors.
- Check for Protective Tape: Ensure all protective tape/clips have been completely removed from the cartridge.
-
Streaky or Faded Prints, Missing Colors:
- Run a Nozzle Check: This diagnostic pattern will show if specific nozzles are clogged.
- Perform Print Head Cleaning: Use the printer’s utility software or control panel to run a print head cleaning cycle. You might need to do this 2-3 times. This forces ink through the nozzles to clear blockages.
- Check Ink Levels: Although a new cartridge, confirm the printer registers it as full.
-
Ink Leaks:
- Ensure Proper Seating: A poorly seated cartridge can sometimes leak. Remove and re-seat it.
- Check for Damaged Cartridge: If the cartridge appears physically damaged or compromised, it might be defective. Contact the retailer or Canon support for a replacement.
Troubleshooting effectively means approaching the problem systematically. Most issues are minor and can be resolved with these simple steps, preventing unnecessary calls to support or service appointments.
Maximizing Printer Performance and Cartridge Longevity
Beyond installation, how you use and maintain your printer and ink cartridges can significantly impact their performance and lifespan, ultimately affecting your printing budget.
Best Practices for Ink Cartridge Care
To get the most out of your Canon ink cartridges and ensure consistent print quality:
- Print Regularly: Inkjet printers benefit from regular use. Printing at least once a week helps prevent ink from drying out and clogging the nozzles. If you don’t print often, consider running a nozzle check every week or two.
- Store Spare Cartridges Correctly: Keep unused cartridges in their sealed packaging in a cool, dark place until needed. This prevents them from drying out prematurely. Avoid extreme temperatures.
- Turn Off Printer Properly: Always use the printer’s power button to turn it off. This allows the print head to return to its “parking” position, where it’s capped to prevent ink from drying. Unplugging it directly can leave the print head exposed.
- Use Quality Paper: The type of paper you use can affect how ink is absorbed and how vibrant your prints appear. For best results, especially with photos, use Canon brand photo paper designed for your specific printer.
The Environmental and Economic Impact of Cartridge Choices
The lifecycle of your ink cartridges has both environmental and economic considerations:
- Recycling Programs: Empty ink cartridges are significant contributors to landfill waste. Many Canon retailers, office supply stores, and even local governments offer free recycling programs for ink cartridges. Participating in these programs helps reduce electronic waste and promotes a more sustainable approach to technology use. This aligns with broader “Tech” trends towards environmental responsibility.
- Original vs. Compatible/Refilled: As discussed earlier, while compatible or refilled cartridges might offer a lower upfront cost, they can sometimes lead to reduced print quality, higher failure rates, and potential printer damage. This could result in more frequent replacements or even expensive repairs, ultimately costing more in the long run. Sticking with genuine Canon ink generally offers better long-term reliability and print consistency, safeguarding your printer and ensuring better value for your “Money.” Considering the total cost of ownership, including reliability and print quality, is crucial.
Mastering the process of installing ink cartridges in your Canon printer empowers you to maintain your device’s peak performance, ensuring crisp documents and vibrant photos whenever you need them. By following these detailed steps and adopting best practices for care, you’ll not only prolong the life of your printer but also maximize the efficiency and quality of your printing tasks, turning a routine chore into a confident and smooth operation.
aViewFromTheCave is a participant in the Amazon Services LLC Associates Program, an affiliate advertising program designed to provide a means for sites to earn advertising fees by advertising and linking to Amazon.com. Amazon, the Amazon logo, AmazonSupply, and the AmazonSupply logo are trademarks of Amazon.com, Inc. or its affiliates. As an Amazon Associate we earn affiliate commissions from qualifying purchases.