
In an era of ubiquitous digital transactions, managing your financial accounts with vigilance is more critical than ever. From online subscriptions to point-of-sale purchases, tracking every debit and credit can feel like a full-time job. However, the convenience of digital banking also brings powerful tools designed to empower consumers to protect their money. One such essential tool is the ability to dispute a questionable charge directly from your banking app. For millions of Chase customers, understanding how to dispute a charge on the Chase app isn’t just about recovering a few dollars; it’s a vital aspect of proactive financial management and safeguarding personal finances against fraud, errors, and unauthorized transactions.
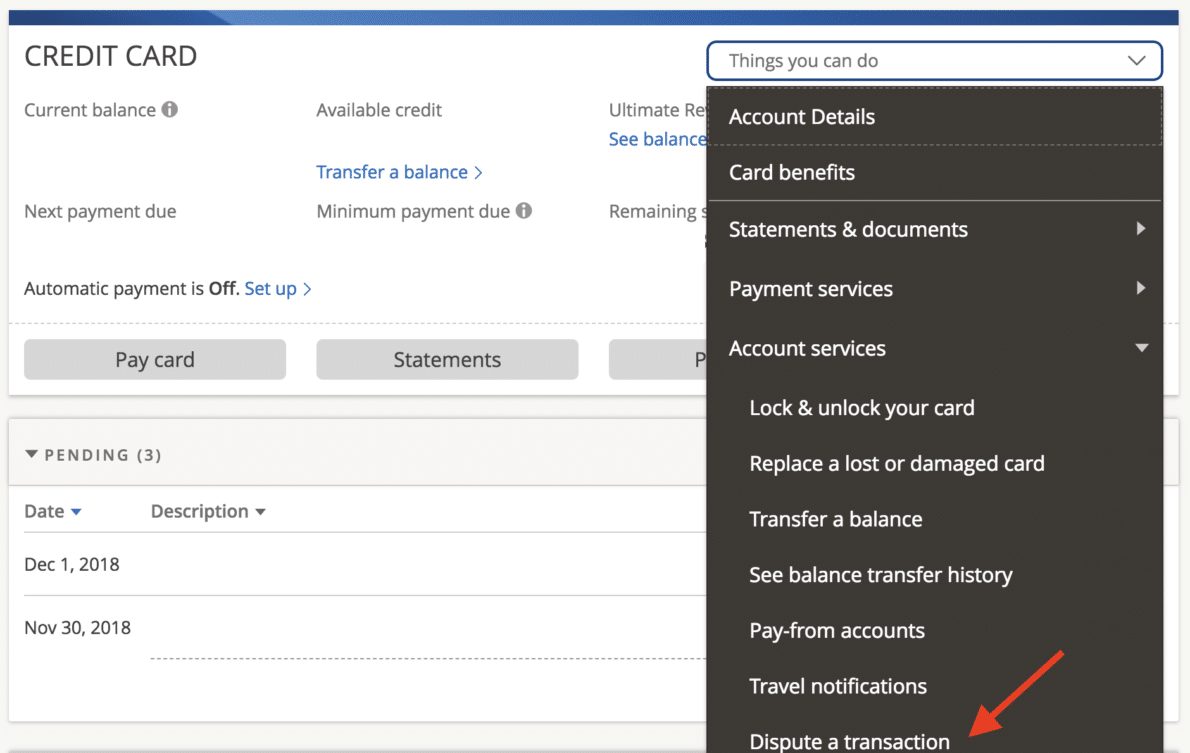
This comprehensive guide will walk you through the process of challenging a transaction using the Chase mobile application. We’ll explore the reasons why you might need to dispute a charge, the crucial steps for preparation, a detailed walkthrough of the app’s interface, and best practices to ensure a smooth resolution, all framed within the context of sound financial stewardship.
Understanding Why and When to Dispute a Charge
Disputing a charge isn’t a frivolous action; it’s a fundamental consumer right and a necessary step in protecting your financial well-being. Knowing when and why to initiate a dispute is the first step in effective money management.
Common Scenarios for Disputes
Financial discrepancies can arise from various sources, some of which are easily rectifiable, while others demand a more formal dispute process. Recognizing these common scenarios helps you determine the appropriate course of action:
- Fraudulent Activity: This is perhaps the most serious reason for a dispute. If you notice a transaction you absolutely did not authorize or make, it’s a strong indicator of potential fraud. This could range from stolen card numbers used online to physical card theft. Timely reporting is crucial in these cases to limit your liability.
- Incorrect Amount Charged: Sometimes, a merchant might accidentally charge you more than the agreed-upon price. This could be a simple data entry error or a misunderstanding during the transaction. Always compare your receipts or confirmations with your bank statement.
- Duplicate Charges: A common glitch in payment systems can lead to a single transaction being processed twice. While often unintentional, these duplicate charges tie up your funds and need to be reversed.
- Unrecognized Merchant: You might see a charge from a merchant you don’t recall interacting with. This could be due to a merchant operating under a different business name, or it could be a sign of an unauthorized transaction. Researching the merchant online before disputing can sometimes clarify the situation.
- Canceled Services Not Refunded: If you’ve canceled a subscription, returned an item, or opted out of a service but have not received the promised refund within a reasonable timeframe, disputing the charge might be necessary to recover your funds.
- Goods or Services Not Received: You paid for a product or service that was never delivered or rendered. This often applies to online purchases, event tickets, or services like home repairs that were paid for but not completed.
- Defective or Misrepresented Goods/Services: While typically addressed directly with the merchant, if an item is significantly not as described or a service was completely inadequate, and the merchant is unwilling to resolve it, a dispute may be warranted.
The Importance of Timeliness and Documentation
Financial institutions, including Chase, have specific timeframes within which you can dispute a charge, often dictated by consumer protection laws like the Fair Credit Billing Act (FCBA) for credit cards and the Electronic Fund Transfer Act (EFTA) for debit cards. Generally, you have 60 days from the date the statement containing the error was sent to you. While disputing outside this window is sometimes possible, your protections may be significantly reduced.
Therefore, regular monitoring of your account statements and transaction history is paramount. The sooner you identify and report a discrepancy, the stronger your position for a successful resolution. Furthermore, meticulous documentation is your best ally. Keep all receipts, order confirmations, communication with merchants, and any other relevant evidence. This proactive approach not only supports your claim but also demonstrates your commitment to responsible financial oversight.
Preparing for Your Dispute: Gathering Essential Information
Before you even open the Chase app to initiate a dispute, taking a few preparatory steps can significantly streamline the process and increase the likelihood of a favorable outcome. This preparation involves reviewing transaction details and gathering all pertinent evidence.
Reviewing Your Transaction History
Your Chase app provides a wealth of information about your spending. When you spot a suspicious charge, your first action should be to thoroughly review its details within your transaction history.
- Date of Transaction: Pinpoint the exact date the charge occurred.
- Amount: Confirm the precise amount of the disputed charge.
- Merchant Name: Note the exact name appearing on your statement. Sometimes, the merchant name on your statement might differ slightly from the popular store name (e.g., “AMZN MKTPLACE” instead of “Amazon”).
- Transaction ID/Reference Number: If available, this unique identifier can be very helpful.
- Pending vs. Posted: Understand if the charge is still pending or if it has fully posted to your account. While pending charges can sometimes be reversed by the merchant, formal disputes usually apply to posted transactions.
- Other Transactions: Look for any other related transactions that might shed light on the charge (e.g., a refund you were expecting that never appeared).
This initial review often clarifies misunderstandings. For instance, you might realize a charge from an “unrecognized merchant” is actually a recurring subscription you forgot about or a purchase made by another authorized user on your account.
Collecting Supporting Evidence
The more evidence you can provide to support your claim, the stronger your case. Financial institutions act as impartial arbiters in disputes, and they rely on concrete proof.
- Receipts or Order Confirmations: For incorrect amounts, duplicate charges, or unreceived goods, a copy of your original receipt or order confirmation email is invaluable. It clearly shows the agreed-upon amount and items.
- Communication with the Merchant: If you’ve already attempted to resolve the issue directly with the merchant, document all interactions. This includes dates of calls, names of customer service representatives, summaries of conversations, emails, and chat transcripts. This demonstrates your good faith effort to resolve the issue first.
- Screenshots: For online purchases or app-based services, screenshots of product descriptions, terms of service, cancellation policies, or error messages can serve as powerful evidence.
- Police Reports: In cases of outright fraud or theft, a police report adds significant weight to your claim and is often a mandatory requirement for larger fraudulent claims.
- Delivery Tracking Information: If you paid for goods that were never delivered, tracking numbers showing non-delivery or delivery to an incorrect address are crucial.
Organize all this information digitally or physically so it’s readily accessible when you initiate the dispute.
Contacting the Merchant First (When Appropriate)
While it might seem counterintuitive to contact the merchant when you want to dispute with your bank, it’s often a recommended first step for many types of discrepancies (excluding outright fraud).
- Faster Resolution: Many errors (like duplicate charges or incorrect amounts) are easily resolved directly by the merchant. This can be much quicker than going through a formal bank dispute process.
- Demonstrates Good Faith: Financial institutions often look favorably upon customers who have attempted to resolve the issue with the merchant first, especially for non-fraudulent claims.
- Required for Some Claims: For certain types of disputes, like issues with quality of goods or services not as described, banks typically require you to show proof that you attempted to resolve it with the merchant.
However, if you suspect outright fraud, the merchant is unresponsive, or you’re dealing with a scam, it’s generally best to proceed directly with your bank. Use your judgment based on the severity and nature of the charge.
Navigating the Chase App Dispute Process
Once you’ve prepared all your information, the Chase app makes initiating a dispute relatively straightforward. The user-friendly interface is designed to guide you through each step, making it a powerful financial tool for managing your accounts on the go.
Step-by-Step Guide to Initiating a Dispute on the App
The exact steps might vary slightly with app updates, but the general flow remains consistent:
- Log In to Your Chase Mobile App: Open the app on your smartphone or tablet and securely log in using your username, password, fingerprint, or facial recognition.
- Select the Relevant Account: From your account dashboard, tap on the specific checking, savings, or credit card account where the disputed charge occurred.
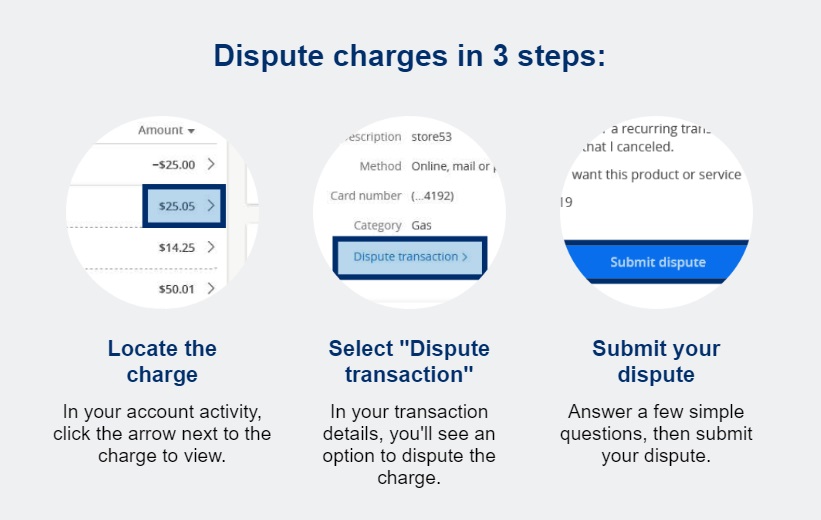
- Locate the Transaction: Scroll through your transaction history to find the specific charge you wish to dispute. You can often use the search bar or filters to quickly narrow down transactions by date, amount, or merchant.
- Tap on the Transaction: Once you find the charge, tap on it to view its detailed information.
- Initiate the Dispute: Look for an option like “Dispute Transaction,” “Report Fraud,” “Problem with this transaction,” or an icon that signifies reporting an issue (often a question mark or a three-dot menu). The wording can vary but will clearly indicate a way to report an issue.
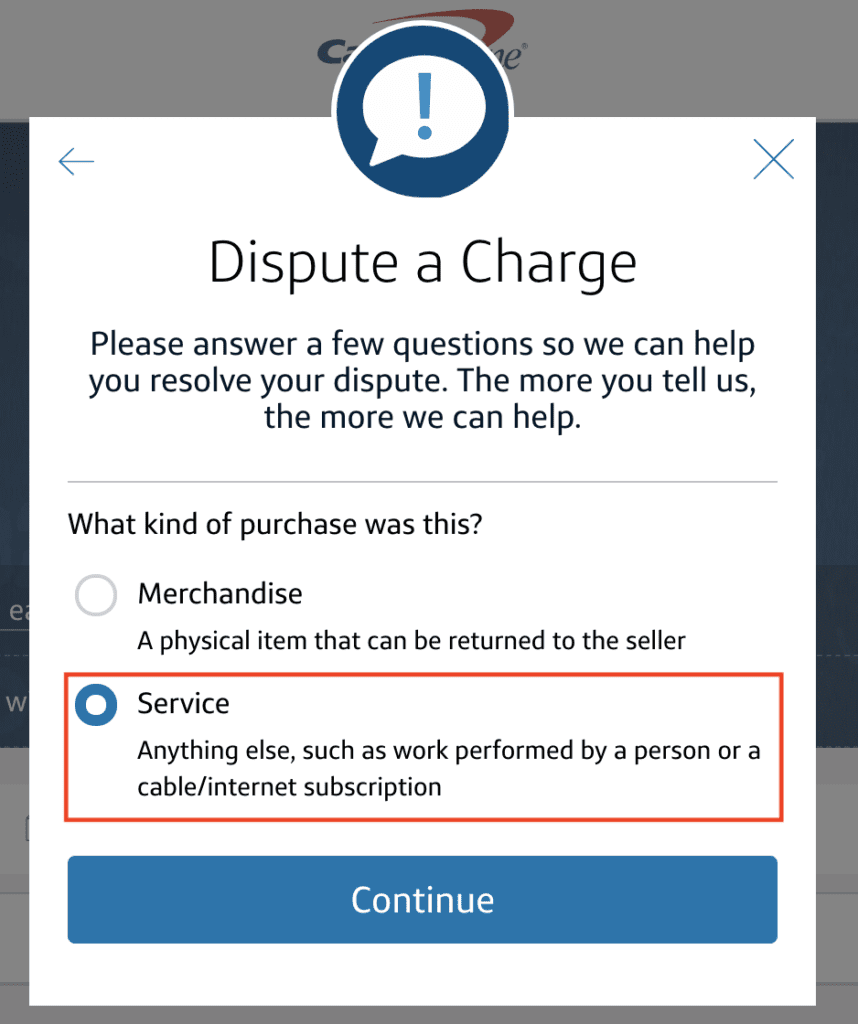
- Select the Reason for Dispute: The app will prompt you to choose from a list of common reasons for disputing a charge (e.g., “I don’t recognize this transaction,” “I was charged the wrong amount,” “I didn’t receive the item/service,” “Duplicate charge,” “Canceled subscription not honored,” “Fraudulent”). Select the option that best describes your situation. Be as accurate as possible, as this guides the subsequent investigation.
- Provide Details and Context: This is a crucial step. You’ll be given text fields to explain in your own words why you are disputing the charge. Provide a clear, concise summary, including:
- What exactly is wrong with the charge.
- Dates and times of relevant events (e.g., when you ordered, when you tried to contact the merchant).
- Any specific names or reference numbers.
- What efforts you made to resolve it with the merchant (if any).
- Crucially, if it’s fraud, state clearly that you did not authorize the transaction.
- Upload Supporting Documents (if prompted): Some disputes may allow you to upload photos or files of your evidence directly through the app. If this option is available, use it to submit your receipts, communication logs, or screenshots. If not, note that you have documentation available if the bank requests it later.
- Review and Submit: Carefully review all the information you’ve entered to ensure accuracy and completeness. Once satisfied, submit your dispute. You will typically receive a confirmation message or email with a reference number for your dispute. Keep this number handy for future inquiries.
What to Expect After Submitting Your Dispute
Submitting a dispute through the Chase app is just the beginning of the process. Understanding what happens next helps manage expectations and maintain your financial oversight.
- Temporary Credit (Provisional Credit): For debit card disputes and many credit card disputes, Chase may issue a provisional credit to your account while the investigation is ongoing. This temporarily restores the disputed funds to your balance, giving you access to your money sooner. This credit is “provisional” because it can be reversed if the investigation concludes in favor of the merchant.
- Investigation Period: Chase will launch an investigation, which typically involves contacting the merchant to gather their side of the story and reviewing all submitted evidence. This process can take anywhere from a few days to several weeks, or even up to 90 days, depending on the complexity of the case and the type of transaction (debit vs. credit).
- Communication from Chase: You may receive updates on the status of your dispute via email, secure message within the app, or postal mail. Chase might also contact you for additional information or clarification. Respond promptly to any requests to avoid delays.
- Resolution: Once the investigation is complete, Chase will notify you of their decision.
- If your dispute is successful: The provisional credit becomes permanent, and the charge is officially removed from your account.
- If your dispute is denied: Chase will provide an explanation for their decision. You may have options to appeal, especially if you have new evidence.
Throughout this period, continue to monitor your account for any further activity related to the disputed charge or new unauthorized transactions.
Beyond the App: Other Avenues and Best Practices
While the Chase app is a powerful tool for dispute resolution, it’s part of a broader ecosystem of financial protection. Understanding other avenues and adopting best practices can further fortify your financial security.
Alternative Contact Methods
For situations where the app might not be sufficient, or for those who prefer speaking directly with a representative, Chase offers several other channels:
- Phone Support: Calling Chase customer service is often the fastest way to report fraud or complex issues that require detailed explanation. The numbers are typically found on the back of your card or on the Chase website. Be prepared to provide your account details and the dispute information.
- In-Branch Visit: For highly complex cases or if you prefer face-to-face assistance, visiting a Chase branch can be beneficial. A banking associate can guide you through the process and help you fill out necessary forms.
- Secure Message: Within the Chase Online Banking portal (accessible via web browser), you can send secure messages to customer service. This is a good option for non-urgent inquiries where you want a written record of your communication.
- Written Correspondence: For formal documentation, you can send a dispute letter via mail, especially for credit card disputes under FCBA, which grants specific rights when sending a written notice.
Monitoring Your Account During the Dispute Process
Vigilance doesn’t end after you submit a dispute. Continuous monitoring of your accounts is a cornerstone of responsible financial management:
- Check Provisional Credits: Ensure that any promised provisional credit appears on your account statement within the expected timeframe.
- Look for Reversals: If a provisional credit is issued, watch for any reversals if the dispute is decided in the merchant’s favor.
- Review Communication: Regularly check your email, postal mail, and the Chase app for updates or requests for more information regarding your dispute.
- Identify Further Suspicious Activity: If the initial dispute stemmed from fraud, be extra diligent in monitoring for any subsequent unauthorized charges, as fraudsters often attempt multiple transactions. Consider placing a fraud alert or freezing your credit if the fraud is severe.
Tips for Preventing Future Disputes
The best way to handle a dispute is to avoid needing one in the first place. Proactive measures can significantly reduce your risk of encountering problematic charges:
- Set Up Transaction Alerts: Configure the Chase app to send you real-time alerts for every transaction, large purchases, or international activity. This allows you to spot suspicious charges immediately.
- Review Statements Regularly: Make it a habit to review your full bank and credit card statements at least once a month. This is where hidden or overlooked charges often surface.
- Use Secure Online Practices: Only shop on secure websites (look for “https://” and a padlock icon). Be wary of phishing attempts and never share your banking credentials.
- Use Virtual Card Numbers: For online shopping, consider using services that offer virtual card numbers, which provide an additional layer of security by masking your actual card details.
- Keep Detailed Records: Maintain a digital or physical folder for all significant purchase receipts, order confirmations, and subscription agreements.
- Understand Subscription Terms: Before signing up for trials or subscriptions, fully read the terms and conditions, especially regarding automatic renewals and cancellation policies.
In conclusion, knowing how to dispute a charge on the Chase app is an indispensable skill for modern financial management. It empowers you to act swiftly and decisively when your money is at stake. By understanding the reasons for disputes, preparing thoroughly, navigating the app’s features effectively, and embracing best practices for financial security, you can ensure that your personal finances remain protected and that your banking experience remains secure and reliable. The Chase app, in this context, transforms from a mere transaction portal into a robust financial guardian, putting control directly into your hands.
aViewFromTheCave is a participant in the Amazon Services LLC Associates Program, an affiliate advertising program designed to provide a means for sites to earn advertising fees by advertising and linking to Amazon.com. Amazon, the Amazon logo, AmazonSupply, and the AmazonSupply logo are trademarks of Amazon.com, Inc. or its affiliates. As an Amazon Associate we earn affiliate commissions from qualifying purchases.