A clean install of Windows 10 is a process that involves completely wiping your hard drive and installing a fresh copy of the operating system. This can be an effective way to resolve persistent software issues, improve system performance, and start with a completely uncorrupted OS. This guide will walk you through the entire process, from preparing your system to the final setup, ensuring a smooth and successful installation.
Why a Clean Install? The Benefits and When to Consider It
Before diving into the technical steps, it’s crucial to understand why you might want to perform a clean install and when it’s the most beneficial approach. While Windows 10 offers upgrade paths, a clean install offers a definitive fresh start, often resolving issues that traditional troubleshooting or even in-place upgrades can’t.

Resolving Performance Degradation and Persistent Issues
Over time, your Windows installation can become bogged down with accumulated temporary files, registry bloat, fragmented data, and remnants of uninstalled software. This can manifest as sluggish performance, frequent crashes, application errors, and even unexpected behavior. A clean install effectively eliminates all of this digital clutter, returning your system to its optimal state.
Think of it like this: if your computer were a physical workspace, a clean install would be like emptying out the entire room, cleaning every surface, and then meticulously putting back only what you truly need. This process can breathe new life into older hardware or systems that have seen years of constant use.
When should you seriously consider a clean install?
- Significant performance slowdowns: If your computer takes a long time to boot, applications are slow to open, or multitasking feels like a struggle, a clean install can often provide a dramatic improvement.
- Frequent system crashes and blue screens of death (BSODs): While these can sometimes be hardware-related, persistent software conflicts or corrupted system files are common culprits that a clean install can rectify.
- Unexplained software errors or conflicts: If you’re experiencing bizarre behavior with applications, or if new software consistently causes problems, a clean slate might be the solution.
- After a major hardware upgrade: While not always strictly necessary, a clean install can ensure that Windows is optimized for your new hardware and avoids any potential conflicts with old drivers or settings.
- Preparing to sell or give away your computer: A clean install is essential for privacy and security, ensuring that all your personal data is completely removed from the device.
- After encountering malware or viruses: Even with robust antivirus software, some infections can leave behind persistent traces. A clean install is the most foolproof way to ensure your system is free of them.
The Trade-offs: What You’ll Lose and How to Prepare
It’s important to acknowledge that a clean install is a more drastic measure than an upgrade. The primary trade-off is that all data on the drive where Windows is installed will be erased. This includes your operating system, installed programs, personal files (documents, photos, videos), and all settings. Therefore, preparation is absolutely paramount.
- Data Backup is Non-Negotiable: This is the single most critical step. Before you begin the clean install process, you must back up all your important files. This can be done using external hard drives, cloud storage services (like OneDrive, Google Drive, Dropbox), or network-attached storage (NAS). Categorize your files and ensure you have a comprehensive backup of everything you care about.
- Application Reinstallation: All your software will need to be reinstalled from scratch. Make a list of all the programs you use regularly, including any paid software, and ensure you have the installation media (download links, discs) and license keys readily available.
- Driver Downloads: While Windows 10 is excellent at automatically detecting and installing drivers, it’s a good practice to visit the manufacturer’s website for your motherboard, graphics card, network adapter, and other key components to download the latest drivers before you begin. Store these on a separate USB drive or have them easily accessible.
- Product Key: Ensure you have your Windows 10 product key handy. While Windows 10 often reactivates automatically based on your hardware if it was previously activated, having the key is a good failsafe.
Creating the Installation Media: Your Gateway to a Fresh Start
To perform a clean install, you’ll need a bootable USB drive or DVD containing the Windows 10 installation files. Microsoft provides a free tool for this purpose, the Media Creation Tool, which simplifies the process.
Using the Media Creation Tool
- Download the Media Creation Tool: Go to the official Microsoft website and search for “Download Windows 10”. Locate the Media Creation Tool and download it to your current Windows system.
- Run the Tool: Once downloaded, run the tool. Accept the license terms.
- Choose “Create installation media (USB flash drive, DVD, or ISO file) for another PC” and click Next.
- Select Language, Edition, and Architecture: The tool will often suggest recommended options based on your current PC. You can uncheck “Use the recommended options for this PC” if you want to choose a different language, edition (e.g., Home, Pro), or architecture (32-bit or 64-bit). It’s generally recommended to stick with the same edition and architecture as your current installation unless you have a specific reason to change.
- Choose Media Type: Select “USB flash drive”. Ensure you have a USB drive with at least 8GB of space, and importantly, all data on this USB drive will be erased. Click Next.
- Select Your USB Drive: Choose the correct USB drive from the list. Click Next.
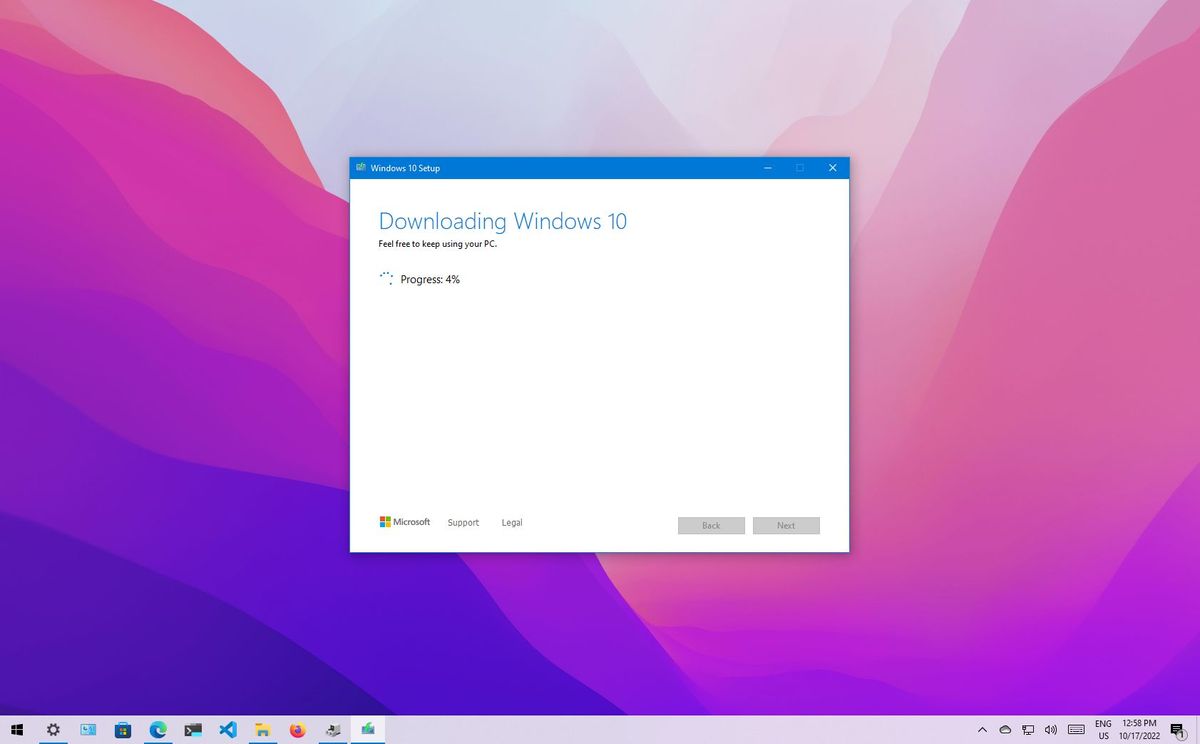
- Download and Create: The tool will now download the Windows 10 files and create the bootable USB drive. This process can take some time depending on your internet speed. Once complete, click Finish.

Your bootable Windows 10 installation media is now ready. Keep this USB drive safe, as you’ll need it to start the installation process on the target computer.
The Clean Installation Process: Step-by-Step
With your installation media ready and your data backed up, you’re prepared to begin the actual clean install. This involves booting your computer from the USB drive and following the on-screen prompts.
Booting from the Installation Media
- Insert the USB Drive: Plug the bootable Windows 10 USB drive into the computer you want to install Windows on.
- Access BIOS/UEFI Settings: You need to tell your computer to boot from the USB drive instead of its internal hard drive. To do this, you’ll need to access your computer’s BIOS or UEFI settings. This is typically done by pressing a specific key during the initial startup screen, immediately after powering on your computer. Common keys include
F2,Del,F10,F12, orEsc. The exact key will vary depending on your motherboard manufacturer. Look for a message on the screen like “Press [Key] to enter Setup” or “Press [Key] for Boot Menu”. - Change Boot Order: Once in the BIOS/UEFI settings, navigate to the “Boot” or “Boot Order” section. You’ll need to move your USB drive (it might be listed by its brand name or as “USB HDD”) to the top of the boot priority list.
- Save and Exit: Save your changes (usually by pressing
F10) and exit the BIOS/UEFI. Your computer will restart.
The Windows 10 Setup Wizard
If you’ve successfully configured the boot order, your computer will now boot from the USB drive, and you’ll see the Windows Setup screen.
- Language and Keyboard Settings: Choose your preferred language, time and currency format, and keyboard layout. Click Next.
- Install Now: Click the “Install now” button.
- Product Key (Optional): You may be prompted to enter your product key. If you don’t have it handy or if Windows will activate automatically later (due to digital entitlement linked to your hardware), you can click “I don’t have a product key”. You can activate Windows later.
- Select Operating System: If prompted, select the edition of Windows 10 you want to install (e.g., Windows 10 Home, Windows 10 Pro). This should match the edition you previously had activated.
- Accept License Terms: Read and accept the Microsoft license terms. Click Next.
- Choose Installation Type: This is the crucial step for a clean install. Select “Custom: Install Windows only (advanced)”.
- Partitioning the Drive: You will now see a list of drives and partitions on your computer.
- Identify the target drive: Locate the drive where you want to install Windows. This is usually your primary drive (often labeled “Drive 0”).
- Delete Existing Partitions: To perform a true clean install, you need to delete all existing partitions on the target drive. Select each partition on that drive one by one and click “Delete”. Be absolutely certain you are deleting partitions on the correct drive, as this action is irreversible and will erase all data. You will end up with “Unallocated Space” on that drive.
- Create a New Partition (Optional but Recommended): Select the “Unallocated Space” and click “New”. Windows will typically suggest the maximum size. You can create a single large partition for Windows and all your files, or create multiple partitions (e.g., one for the OS, another for data). For simplicity, creating one large partition is common.
- Select the Partition: After creating the partition(s), select the primary partition where you want to install Windows.
- Click Next: Windows will now begin copying files and installing the operating system onto the selected partition.
The installation process will proceed through several stages: copying files, getting files ready for installation, installing features, installing updates, and finally, finishing up. Your computer will restart several times during this process. Do not remove the USB drive until you are prompted to do so, or until you’ve reached the initial setup screen after the first restart where Windows boots from the hard drive.
Post-Installation Setup and Optimization
Once the core Windows 10 installation is complete, you’ll be greeted by the Out-Of-Box Experience (OOBE) setup. This is where you configure your basic Windows settings and personalize your experience.
Initial Setup and Configuration
- Region and Keyboard Layout: Confirm your region and keyboard layout.
- Connect to Network: Connect to your Wi-Fi or Ethernet network. This is important for Windows Updates and activation.
- Account Setup: You’ll be prompted to sign in with your Microsoft account or create a local account. Using a Microsoft account allows for cloud syncing of settings and access to the Microsoft Store.
- Privacy Settings: Review and adjust the privacy settings for your device. It’s recommended to be mindful of the data you share.
- Cortana: You’ll have the option to set up Cortana, Microsoft’s virtual assistant.
Essential Post-Installation Steps
After the initial setup, your fresh Windows 10 installation is ready for optimization and personalization.
- Run Windows Update: Immediately after getting to the desktop, go to
Settings > Update & Security > Windows Updateand click “Check for updates”. Install all available updates. This is crucial for security and to ensure you have the latest drivers and system improvements. You might need to restart your computer multiple times as updates are installed. - Install Drivers: While Windows Update often installs most drivers, it’s a good idea to manually install drivers for critical components, especially your graphics card, motherboard chipset, and network adapter. Visit the manufacturers’ websites for the latest versions.
- Install Your Essential Software: Now is the time to reinstall your applications. Start with your web browser, antivirus software, and any productivity suites you use.
- Restore Your Data: Copy your backed-up personal files back to your computer.
- Personalize Settings: Adjust your desktop background, theme, and other personalization options to your liking.
- Review Startup Programs: Go to
Task Manager (Ctrl+Shift+Esc) > Startupand disable any programs that you don’t need to launch automatically when your computer starts. This can significantly speed up boot times. - Disk Cleanup (Optional): While a clean install is already lean, you can run Disk Cleanup (
type "disk cleanup" in the search bar) to remove any temporary files that might have accumulated.
A clean install of Windows 10 is a powerful way to revitalize your PC, solve persistent problems, and enjoy a smoother, faster computing experience. By following these steps carefully, you can ensure a successful installation and a fresh start for your digital life.
aViewFromTheCave is a participant in the Amazon Services LLC Associates Program, an affiliate advertising program designed to provide a means for sites to earn advertising fees by advertising and linking to Amazon.com. Amazon, the Amazon logo, AmazonSupply, and the AmazonSupply logo are trademarks of Amazon.com, Inc. or its affiliates. As an Amazon Associate we earn affiliate commissions from qualifying purchases.