
An Epson printer, like any other sophisticated piece of technology, requires regular maintenance to ensure optimal performance and print quality. One of the most common and crucial maintenance tasks is replacing or installing a new ink cartridge. While it might seem like a straightforward process, a few incorrect steps can lead to ink smudges, printer errors, or even damage to the print head. This guide will walk you through the entire process of installing an ink cartridge in your Epson printer, ensuring a smooth and successful operation every time. We’ll cover everything from preparing your printer and identifying the correct cartridge to the final installation and troubleshooting any potential issues.
This article falls under the broad umbrella of Tech, specifically within the Tutorials and Gadgets subcategories, as it provides practical guidance on using and maintaining a common electronic device.
Preparing for the Ink Cartridge Installation
Before you dive into the physical act of swapping out an ink cartridge, a little preparation goes a long way. This ensures a clean process, prevents potential errors, and saves you from frustration later on.
Gathering Your Supplies
The most critical item you’ll need is, of course, the new Epson ink cartridge. It’s essential to ensure you have the correct cartridge model for your specific Epson printer. Using an incompatible cartridge can lead to poor print quality, system errors, or even damage to your printer. You can usually find the correct cartridge number on your old cartridge, in your printer’s manual, or by checking the Epson support website for your printer model.
Beyond the ink cartridge, it’s a good idea to have a few other items on hand:
- Paper towels or a lint-free cloth: For wiping away any stray ink drips or dust.
- Your printer’s manual (optional but recommended): While this guide offers comprehensive instructions, your printer’s specific manual might have unique details relevant to your model.
- A stable, well-lit workspace: Ensure you have enough room to work comfortably and can clearly see what you’re doing.
Ensuring Your Printer is Ready
Before you begin, power on your Epson printer and allow it to initialize. This process often moves the print head carriage to a position where it’s easily accessible for cartridge replacement. Avoid physically forcing the print head carriage; it should move freely when the printer is on and ready.
Important Safety Precaution: Never attempt to install or remove ink cartridges while the printer is powered off or if the print head carriage is in an unstable position. This can cause mechanical damage.
Understanding Your Epson Printer’s Ink System
Epson printers utilize different ink systems, most commonly:
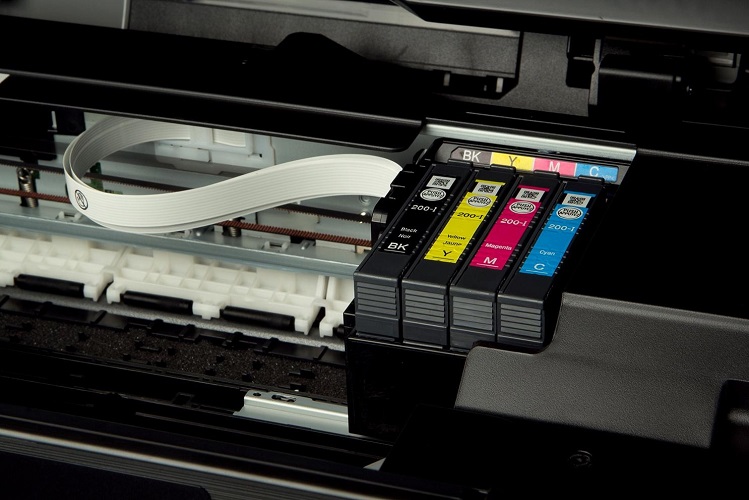
- Individual Ink Cartridges: Each color (black, cyan, magenta, yellow, and sometimes lighter shades or specialized inks) has its own separate cartridge. This is the most common type and the focus of this guide.
- Integrated Ink Tanks (EcoTank Models): These printers have refillable ink tanks that you fill from bottles. The process of refilling these tanks is different from installing cartridges and will not be covered in this general guide.
This guide specifically addresses the installation of individual ink cartridges.
The Step-by-Step Process for Installing Epson Ink Cartridges
Now that you’ve prepared your workspace and confirmed you have the correct supplies, it’s time to get hands-on with the installation process.
Step 1: Accessing the Ink Cartridge Area

- Power On Your Printer: As mentioned, ensure your printer is turned on. You should hear it whirring and preparing for operation.
- Open the Printer Cover: Locate the cover that provides access to the ink cartridges. This is typically a lid on the top or front of the printer. It might lift up or slide open. Refer to your printer’s manual if you’re unsure.
- Wait for the Print Head Carriage to Move: Once the cover is open, the print head carriage (the mechanism that holds the ink cartridges) should automatically move to the center or an accessible position. Do not manually try to move the print head carriage. If it doesn’t move, check that the printer is powered on and the cover is fully open. There might be a small lever or button to release it in some models, but this is less common.
Step 2: Removing the Old Ink Cartridge
- Identify the Cartridge to Replace: The printer screen or your computer’s printer utility software should indicate which ink cartridge is low or empty. Locate this specific cartridge within the carriage.
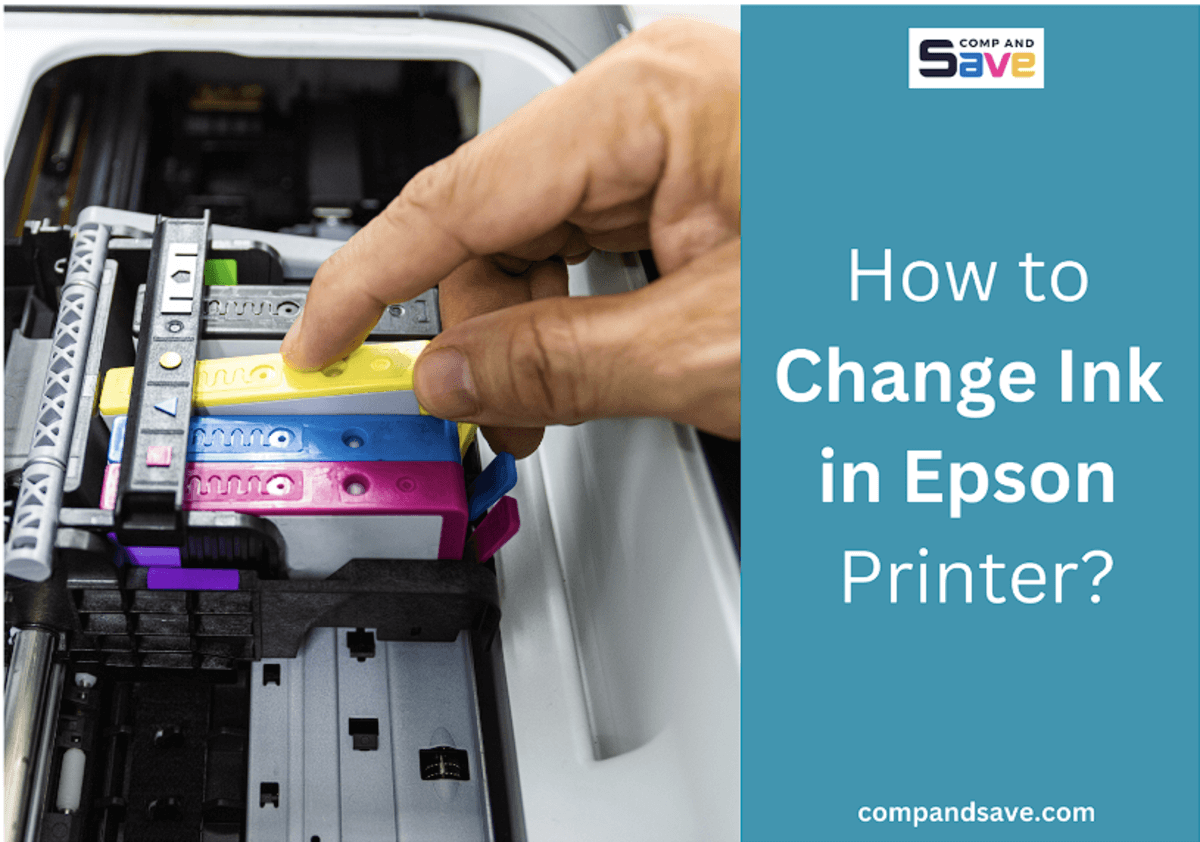
- Release the Old Cartridge: Epson ink cartridges are usually secured by a small latch or clip.
- Gently press down on the latch or clip located on the top or front of the cartridge.
- As you press the latch, the cartridge should pop up slightly, allowing you to pull it out.
- Do not pull with excessive force. If it feels stuck, double-check that the latch is fully disengaged.
- Dispose of the Old Cartridge Responsibly: Once removed, place the old ink cartridge in a safe place, perhaps on a paper towel to prevent ink stains, and prepare it for disposal or recycling. Many retailers and Epson offer ink cartridge recycling programs.
Step 3: Preparing the New Ink Cartridge
- Unpack the New Cartridge: Carefully remove the new Epson ink cartridge from its packaging. Avoid touching the ink nozzles or electrical contacts, as oils from your fingers can interfere with proper operation.
- Remove Protective Tape: New cartridges typically have protective tape over the ink nozzles and sometimes a tab to be removed.
- Locate the “Pull Here” Tab: You’ll usually find a colored tab (often yellow or orange) labeled “Pull Here” or with an arrow. Gently and steadily pull this tab straight out to remove the protective tape and seal.
- Verify Nozzle Cover is Removed: Ensure any plastic cover over the ink nozzles has also been removed.
- Important: Do not touch the ink nozzles or the chip on the cartridge. These are sensitive components.
- Avoid Shaking the Cartridge: Unlike some older ink cartridge designs, modern Epson cartridges generally do not require shaking. Shaking can sometimes introduce air bubbles or cause ink to leak.
Step 4: Installing the New Ink Cartridge
- Align the New Cartridge: Carefully align the new ink cartridge with the empty slot in the print head carriage. The shape of the cartridge and the slot are designed for a specific orientation, so it should only fit one way.
- Insert the Cartridge: Gently push the new cartridge straight into the slot. You should feel it click or seat firmly into place. The latch or clip should automatically engage to secure the cartridge.
- Confirm Installation: Ensure the cartridge is flush with the carriage and feels securely seated.
Step 5: Completing the Installation and Printer Initialization
- Close the Printer Cover: Once all necessary cartridges have been replaced, securely close the printer cover.
- Printer Initialization: The printer will likely go through an initialization or priming process. This is crucial as it allows the printer to recognize the new cartridges and prepare them for use. You might hear a series of whirring and clicking sounds.
- Print Head Cleaning/Alignment (Optional but Recommended): Many Epson printers will prompt you to perform a print head cleaning or alignment cycle after installing new cartridges. This is highly recommended to ensure optimal print quality and prevent streaking or color inaccuracies. You can usually initiate these functions from the printer’s control panel or through the printer utility software on your computer. Follow the on-screen prompts for these procedures.
Troubleshooting Common Issues After Installation
Even with careful installation, you might encounter minor hiccups. Here are some common issues and how to resolve them.
Error Messages on Printer Display or Computer
- “Ink Cartridge Not Recognized”:
- Check Installation: The most common cause is that the cartridge isn’t fully seated. Power off the printer, open the cover, remove and re-insert the cartridge, ensuring it clicks into place.
- Verify Cartridge Compatibility: Double-check that you’ve used the correct Epson cartridge model for your printer.
- Clean Contacts: Gently clean the electrical contacts on both the cartridge and the carriage with a dry, lint-free cloth. Be very careful not to smudge them.
- “Ink Leak Detected”:
- Check for Loose Seals: Ensure all protective tapes and seals were fully removed from the new cartridge.
- Inspect Cartridge: Examine the cartridge for any visible damage or leaks. If damaged, replace it with a new one.
- Clean Up: If ink has leaked, use paper towels to carefully clean the affected areas on the carriage and inside the printer.
- “Ink Level Incorrect”:
- Initialization Complete: Ensure the printer has fully completed its initialization process. Sometimes the levels take a moment to update.
- Reset (if applicable): Some older models might have a reset procedure, but this is less common and can void warranties. Consult your manual cautiously.
Poor Print Quality After Installation
- Print Head Cleaning: If prints are streaky, faint, or have missing colors, a print head cleaning cycle is usually the solution. Run this utility from your printer’s software. You might need to run it a couple of times.
- Print Head Alignment: If colors are misaligned or text appears fuzzy, a print head alignment procedure is necessary. This calibrates the print heads to ensure precise dot placement.
- Ink Flow: In rare cases, especially with new cartridges, it might take a few prints for the ink to flow perfectly. Try printing a few test pages.
Beyond Installation: Maintaining Your Epson Printer’s Health
Successfully installing an ink cartridge is just one part of keeping your Epson printer in top shape. Consider these additional tips:
- Regular Printing: Printers are best maintained by being used. If you print infrequently, try to print a test page or a document with all colors at least once a week to prevent ink from drying in the print heads.
- Use Genuine Epson Ink: While third-party inks can be cheaper, genuine Epson ink is formulated to work optimally with your printer’s specific print head technology. This minimizes the risk of clogs and ensures the best possible print quality and longevity. This is a key aspect of Tech and Productivity, ensuring your gadget performs as intended.
- Store Ink Cartridges Properly: Store spare ink cartridges in a cool, dry place, away from direct sunlight and extreme temperatures. Keep them in their original packaging until ready for use.
- Update Printer Drivers and Firmware: Regularly check the Epson support website for updated printer drivers and firmware. These updates often include performance enhancements, bug fixes, and improved compatibility, contributing to overall Tech efficiency.
By following these steps and recommendations, you can confidently install ink cartridges in your Epson printer, ensuring consistent, high-quality prints and prolonging the life of your device. This attention to detail in maintaining your technology can also translate into better Productivity and a more reliable workflow.
aViewFromTheCave is a participant in the Amazon Services LLC Associates Program, an affiliate advertising program designed to provide a means for sites to earn advertising fees by advertising and linking to Amazon.com. Amazon, the Amazon logo, AmazonSupply, and the AmazonSupply logo are trademarks of Amazon.com, Inc. or its affiliates. As an Amazon Associate we earn affiliate commissions from qualifying purchases.