
Chromebooks have revolutionized personal computing by offering an affordable, secure, and user-friendly experience primarily focused on web-based productivity. Their lightweight design, long battery life, and seamless integration with Google’s ecosystem make them ideal for students, professionals, and anyone seeking a no-fuss computing solution. However, for many years, the notion of gaming on a Chromebook seemed almost paradoxical. Traditional PC gaming, particularly titles found on platforms like Steam, was firmly outside their capabilities.
Yet, thanks to Google’s continuous advancements and the integration of Linux (Beta), Chromebooks are slowly but surely shedding their “browser-only” label. This guide delves deep into the process of installing Steam on your Chromebook, transforming it from a mere productivity machine into a surprisingly capable, albeit limited, gaming device. We’ll explore the technical prerequisites, walk through the installation step-by-step, discuss optimization tips, and set realistic expectations for what you can achieve.
Unlocking Gaming Potential on Your Chromebook: The Chromebook Paradox
The primary appeal of a Chromebook lies in its simplicity and efficiency. Running on Chrome OS, a Linux-based operating system, they are designed for speed and security, relying heavily on cloud services. This design philosophy traditionally meant minimal local storage and processing power dedicated to demanding applications like video games.
However, the introduction of the Linux development environment, commonly known as Crostini, fundamentally altered this landscape. Crostini allows users to run a full-fledged Debian Linux container directly on their Chromebook, providing access to a vast array of Linux applications, including the Steam client. This innovation bridges the gap between the Chrome OS ecosystem and the world of desktop software, opening up new possibilities for developers, power users, and, crucially, gamers.
Why Consider Steam on a Chromebook?
For many, the idea of gaming on a Chromebook might seem counterintuitive. After all, dedicated gaming PCs and laptops exist for a reason. However, there are compelling reasons why tech enthusiasts and casual gamers might explore this avenue:
- Cost-Effectiveness: If you already own a relatively modern Chromebook, installing Steam leverages existing hardware, saving you the expense of purchasing a separate gaming rig. This aligns well with a “Money” conscious approach to tech.
- Portability: Chromebooks are inherently portable. Being able to access a library of games on a device you carry for work or school adds significant value and convenience.
- Accessibility to a Vast Library: Steam boasts an immense catalog of games, from indie darlings to AAA blockbusters. While not all will run, gaining access to even a fraction of this library is a significant win.
- Learning Opportunity: For those new to Linux, this process offers a hands-on introduction to command-line interfaces and the power of open-source software, enhancing your “Tech” literacy.
- Multi-Purpose Device: Transform your productivity machine into an entertainment hub without needing separate devices.
It’s important to set realistic expectations from the outset. A Chromebook is not a gaming powerhouse, and installing Steam will not magically turn it into one. Performance will vary significantly based on your Chromebook’s specifications, and you’ll likely be limited to older, less graphically intensive games or indie titles. Nevertheless, for many, the ability to play some PC games on their Chromebook is a significant leap forward.
Preparing Your Chromebook for Steam: Essential Prerequisites
Before diving into the installation process, it’s crucial to ensure your Chromebook meets the necessary requirements and to prepare its environment. This foundational step is critical for a smooth installation and a functional gaming experience.
Checking Compatibility and System Requirements
Not all Chromebooks are created equal, especially when it comes to supporting a demanding application like Steam. The success of your endeavor hinges heavily on your device’s hardware specifications.
-
Hardware Check: CPU, RAM, and Storage:
- Processor (CPU): You’ll ideally want a Chromebook with an Intel Core i-series processor (i3, i5, i7) or a recent AMD Ryzen equivalent. Older Celeron or MediaTek processors, while capable for web browsing, will struggle immensely with even lightweight games. More powerful CPUs will handle game logic and rendering much better.
- RAM: This is perhaps the most critical component. While Chrome OS itself is lightweight, running a Linux container and Steam and a game simultaneously demands significant memory. A minimum of 8GB RAM is highly recommended. Chromebooks with 4GB RAM might technically run Steam, but the gaming experience will likely be plagued by stuttering, slow loading times, and frequent crashes.
- Storage: Steam games require local storage. Even lightweight titles can consume several gigabytes. Factor in the Chrome OS system, the Linux container, and any other files you have. A minimum of 64GB of internal storage is advised, but 128GB or more is highly preferable. Consider using an external SSD or a high-speed USB drive for game installations if internal storage is limited, though this can sometimes impact loading times.
- GPU (Graphics Processing Unit): Many Chromebooks rely on integrated graphics (e.g., Intel Iris Xe, UHD Graphics). While not as powerful as dedicated GPUs, newer integrated graphics can handle older 3D games and many 2D indie titles. Ensure your Chromebook supports hardware acceleration within the Linux environment for the best possible performance. You can often check for this in
chrome://flags.
-
Understanding Chrome OS and Linux (Beta):
The ability to run Steam on a Chromebook stems from “Linux (Beta),” Google’s codename for Crostini. Crostini provides a secure, isolated virtual machine where a Debian-based Linux distribution runs. This container doesn’t replace Chrome OS but runs alongside it, allowing you to install traditional Linux applications. It’s a key feature that transforms a Chromebook’s utility, moving it beyond just a browser.
Activating the Linux Development Environment (Crostini)
This is the foundational step that enables all subsequent Linux-based installations, including Steam.
-
Step-by-Step Guide to Enabling Linux (Beta):
- Open Settings: Click on the clock in the bottom right corner of your screen, then select the gear icon to open your Chromebook’s Settings.
- Navigate to Linux (Beta): In the left-hand menu, scroll down until you see “Linux (Beta)” or “Developers.” Click on it.
- Turn On: You’ll see an option to “Turn on” the Linux development environment. Click this button.
- Follow On-Screen Prompts: A setup wizard will appear. It will guide you through choosing a username (this can be anything you like) and allocating a disk size for your Linux environment. It’s recommended to allocate at least 10-15 GB initially, especially if you plan to install a few games. You can usually expand this later if needed.
- Installation Process: The Chromebook will then download and install the necessary Linux files. This process can take several minutes, depending on your internet connection and Chromebook’s speed. Do not close your Chromebook lid or turn it off during this time.
- Terminal App Appears: Once complete, a “Terminal” app will appear in your app launcher. This is your gateway to the Linux command line.
-
Initial Setup and Terminal Access:
After the installation, open the Terminal app. You’ll be greeted with a command-line interface, typically displaying your chosen username and a prompt. This is your interaction point with the Linux environment. It’s a powerful tool, but don’t be intimidated; we’ll guide you through the necessary commands. Familiarity with basic terminal commands (likecdfor change directory,lsfor list files) can be helpful, but for this guide, we’ll provide the exact commands you need.
The Installation Process: Bringing Steam to Your Chromebook
With your Linux environment set up, you’re ready to proceed with installing the Steam client. This involves using the Linux terminal to update your system’s package list and then download and install Steam.
Updating and Preparing Your Linux Environment
Before installing any new software, it’s good practice to ensure your Linux environment is up-to-date. This prevents potential dependency conflicts and ensures you’re working with the latest stable versions of system packages.
-
The Importance of
apt updateandapt upgrade:
Open your Terminal app. The first commands you should always run in a new or recently updated Linux environment are:sudo apt update sudo apt upgrade -ysudo apt update: This command downloads the latest package information from the configured repositories. It doesn’t install new software but rather updates your system’s understanding of what software is available and where to find it.sudo apt upgrade -y: This command then applies any available updates to the packages already installed in your Linux environment. The-yflag automatically confirms any prompts, allowing the upgrade to proceed without requiring manual input. This step is crucial for security and stability.
Allow these commands to complete. Depending on how long it’s been since your Linux environment was set up or last updated, this could take a few minutes.
-
Addressing Potential Dependencies:
While thesteam-installerpackage typically handles most dependencies automatically, some users might encounter issues related to 32-bit libraries, as Steam is primarily a 32-bit application. To ensure full compatibility, especially on 64-bit Linux environments (which Crostini usually provides), you might need to enable multiarch support:
bash

sudo dpkg --add-architecture i386

sudo apt update
The first command adds support for 32-bit architectures, and the second command updates the package list again to include 32-bit packages. This step is often recommended as a preventative measure for smooth Steam operation.
Installing the Steam Client via Terminal
Now that your Linux environment is prepared, you can proceed with the Steam installation.
-
Executing the Installation Command:
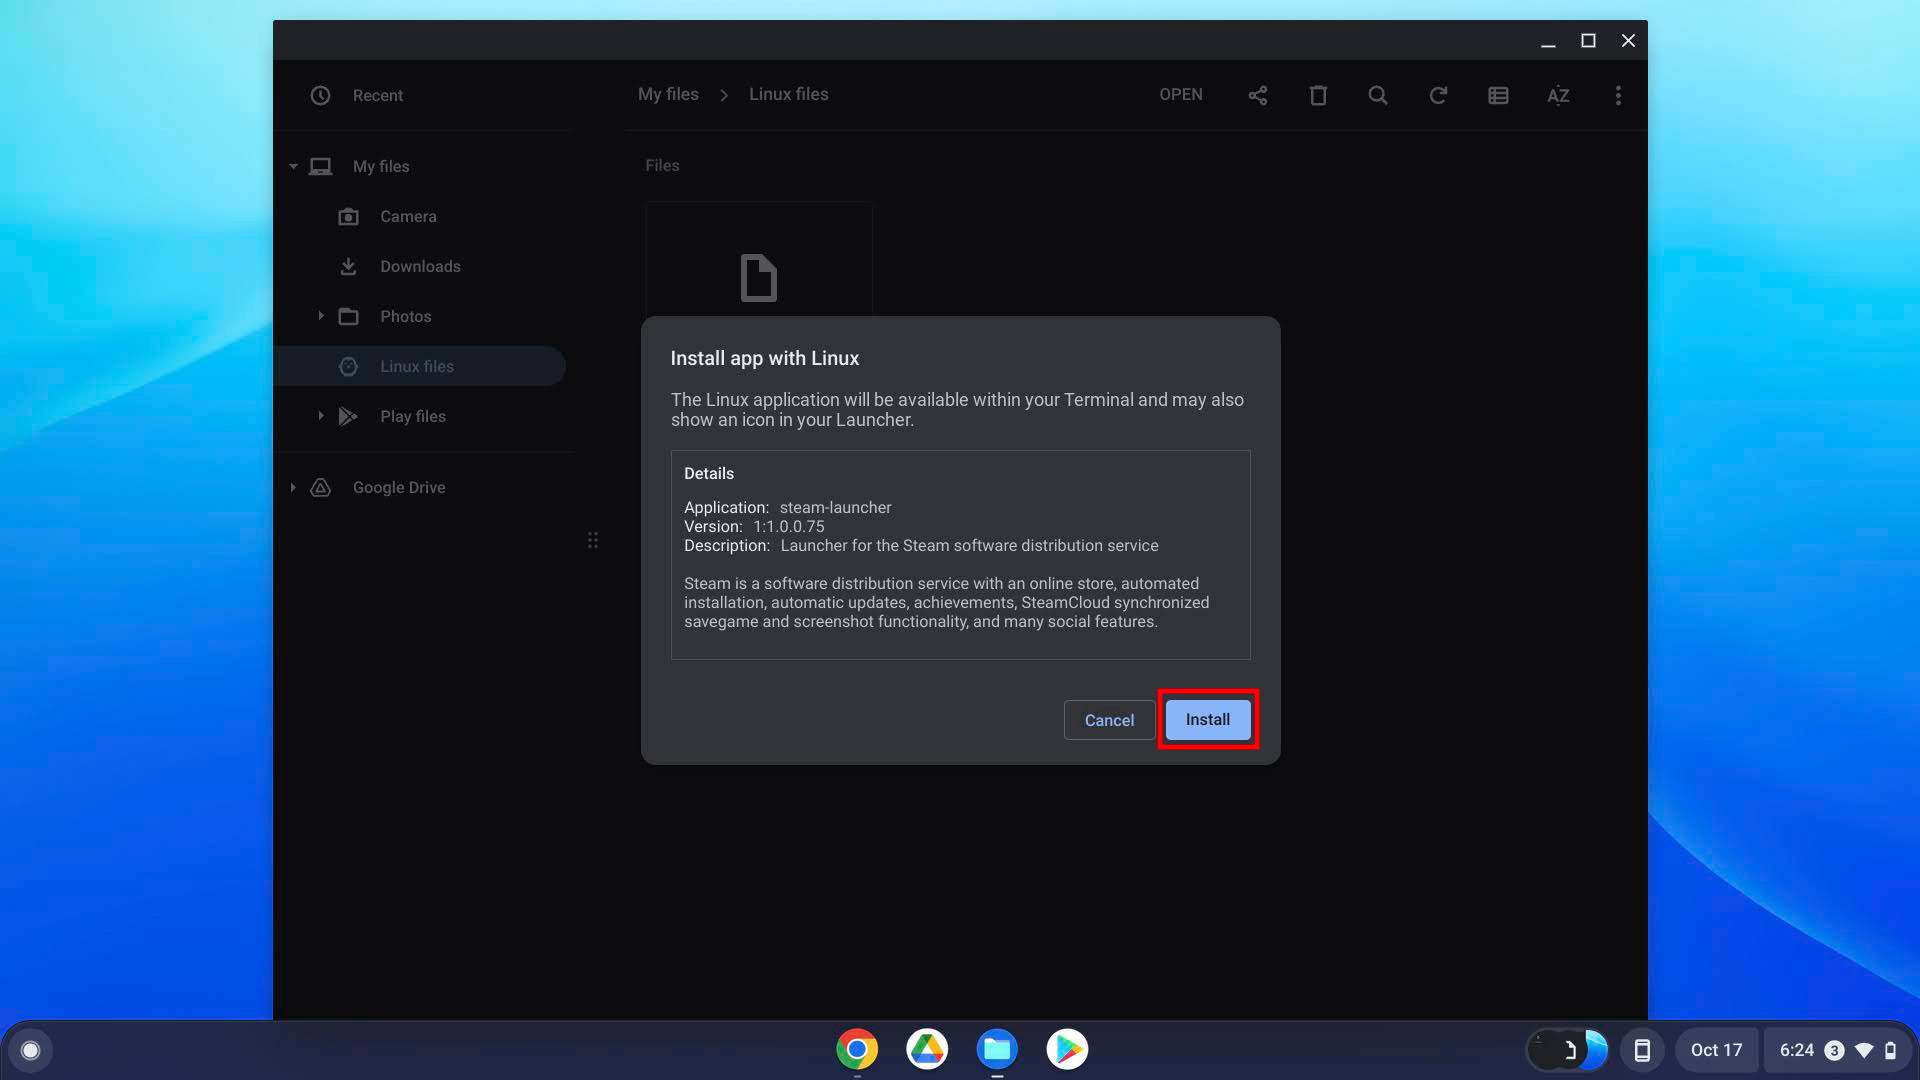
In your Terminal, enter the following command:sudo apt install steam-installer -ysudo apt install: This is the command to install new packages using the Advanced Package Tool (apt).steam-installer: This is the specific package name for the Steam client.-y: Again, this flag automatically confirms the installation, allowing it to proceed without manual prompts.
The system will download the Steam installer package and all its necessary dependencies. This can be a substantial download, so ensure you have a stable internet connection. Once the download is complete, the installer will run automatically, setting up the Steam client on your Linux environment.
-
First Launch and Initial Steam Setup:
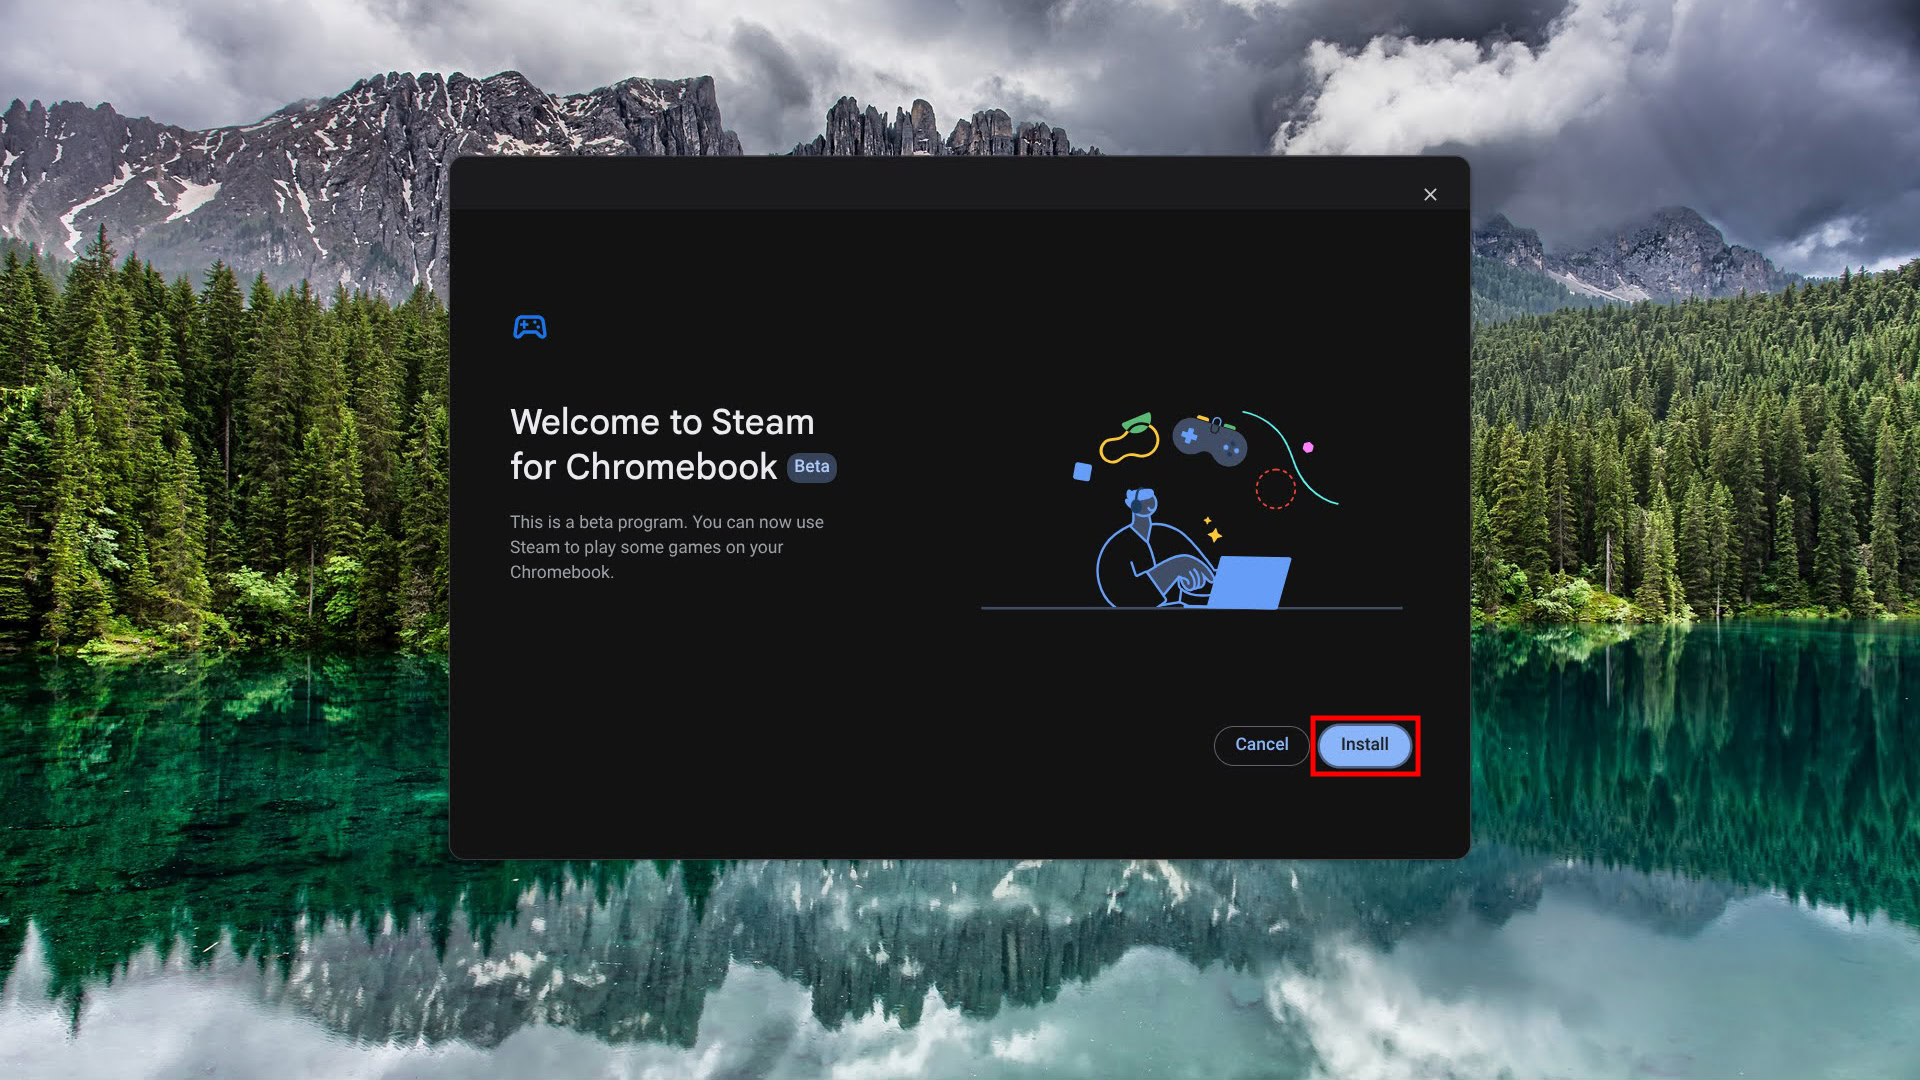
After the installation is complete, you can close the Terminal. Steam should now appear as an application in your Chrome OS app launcher, usually under the “Linux apps” folder.- Launch Steam: Click on the Steam icon in your app launcher.
- Initial Client Download: The first time you launch Steam, it will download additional client files and updates. This can also take a significant amount of time and data, as the Steam client itself is a complex application.
- Login or Create Account: Once the updates are finished, you’ll be presented with the familiar Steam login screen. Enter your existing Steam credentials or create a new account if you don’t have one.
- Browse and Install Games: After logging in, you’ll have access to the full Steam store and your game library. You can now browse, purchase, and install games just like you would on a traditional PC. Remember the storage limitations of your Chromebook.
Optimizing Your Gaming Experience and Troubleshooting Common Issues
Successfully installing Steam is a major step, but getting games to run smoothly on a Chromebook requires further optimization and an understanding of common challenges. This section will help you get the most out of your Steam-on-Chromebook setup.
Enhancing Performance and Game Compatibility
-
Leveraging Steam Play and Proton for Windows Games:
Many games on Steam are designed for Windows. To run these on Linux, Valve developed Steam Play, which includes Proton. Proton is a compatibility layer that allows Windows games to run on Linux.- Enable Steam Play: In the Steam client, go to
Steam > Settings > Steam Play. - Check “Enable Steam Play for supported titles”: This enables Proton for games that Valve has officially verified to work well on Linux.
- Check “Enable Steam Play for all other titles”: This is crucial if you want to try running any Windows game. Be aware that not all games will work, and some may have glitches.
- Select a Proton Version: You can often choose different Proton versions for specific games. Newer versions often have better compatibility or performance. Experimentation is key here.
- Enable Steam Play: In the Steam client, go to
-
Tips for Selecting Games and Adjusting Settings:
- Prioritize Linux Native Games: Games with native Linux versions will generally run best. You can filter your Steam library or the store to show Linux-compatible titles.
- Focus on Older or Less Demanding Titles: Games released before 2015, indie games, 2D platformers, puzzle games, and strategy games with less intensive graphics often perform well. Examples might include Stardew Valley, Terraria, Factorio, Hollow Knight, Undertale, or older Half-Life titles.
- Adjust In-Game Settings: For any game you try, immediately go to its graphics settings. Lower resolutions (e.g., 720p instead of 1080p), turn down texture quality, disable shadows, anti-aliasing, and other demanding effects. Every setting you reduce frees up valuable resources.
- Monitor Resources: Use the Chrome OS Task Manager (
Shift + Esc) or Linux commands likehtop(installable viasudo apt install htop) to monitor CPU, RAM, and GPU usage while gaming. This can help identify bottlenecks.
-
Managing Storage and External Drives:
As mentioned, internal storage on Chromebooks can be limited.- Install Games on External Storage: If you have an external SSD or a high-speed USB flash drive, you can tell Steam to install games there. In Steam, go to
Steam > Settings > Downloads > Steam Library Folders. Click “Add Library Folder” and navigate to your mounted external drive (it will appear under/mnt/chromeos/removable). - Delete Unplayed Games: Be ruthless with your game library. If you’re not actively playing a game, uninstall it to free up space.
- Install Games on External Storage: If you have an external SSD or a high-speed USB flash drive, you can tell Steam to install games there. In Steam, go to
Addressing Graphics, Sound, and Input Challenges
-
Understanding GPU Acceleration (if available):
Modern Chromebooks (typically those released in the last few years with Intel 10th-gen or newer, or AMD Ryzen processors) often support GPU acceleration for Linux apps. This means the Linux container can directly access your Chromebook’s integrated graphics hardware, significantly boosting performance for graphical tasks, including games.- Check
chrome://flags: Search for “Crostini GPU support” or similar flags. Enable them if they exist and reboot your Chromebook. - Verify in Terminal: You can sometimes check for GPU acceleration using commands like
glxinfo | grep "OpenGL renderer"in your Linux Terminal (you might need to installmesa-utilsfirst:sudo apt install mesa-utils).
- Check
-
Troubleshooting Audio Output:
Sometimes, sound might not work out of the box in Linux apps or games.- Volume Mixer: Ensure the volume in Chrome OS, Steam, and the game itself is turned up.
- Pulseaudio: Crostini uses Pulseaudio for sound. If you have issues, try restarting Pulseaudio in the Linux terminal:
pulseaudio -k && pulseaudio --start. - Default Output: In some rare cases, you might need to specify the default audio output device within the Linux environment, but usually, it defaults correctly to Chrome OS’s audio output.
-
Input Devices and Gamepad Support:
- Keyboard and Mouse: These will generally work without issues.
- Gamepads: Most standard USB gamepads (Xbox, PlayStation, generic controllers) should work with Steam, especially if they are XInput or DirectInput compatible. Just plug them in. Bluetooth controllers might require pairing through Chrome OS and then ensuring they are recognized by the Linux container. Sometimes, you might need to enable specific Steam controller drivers in Steam’s settings (
Steam > Settings > Controller).
Expectations, Limitations, and the Future of Gaming on Chrome OS
After going through the setup and optimization, it’s essential to maintain a realistic perspective on what your Chromebook can truly deliver as a gaming machine.
What to Expect: Performance vs. Dedicated Gaming Rigs
-
Realistic Performance Benchmarks:
Even with GPU acceleration, a Chromebook’s integrated graphics and power-efficient CPU are not designed for high-fidelity gaming.- Expect low to medium settings: Most games, even older ones, will require running at low to medium graphical settings and often at 720p resolution to achieve playable frame rates (30+ FPS).
- Indie and retro games shine: This setup excels with less graphically demanding games. Think 2D pixel art games, visual novels, emulation of older consoles (which can be set up in Linux), and older 3D titles from the early 2010s.
- AAA titles are mostly out of reach: Modern AAA games with complex 3D environments and advanced graphical effects will likely be unplayable, suffering from extremely low frame rates, stuttering, and potential crashes, even on the most powerful Chromebooks.
-
Battery Life and Thermal Considerations:
Running Steam and games is a demanding task that will significantly impact your Chromebook’s battery life. What might typically last 8-10 hours for productivity could drop to 2-3 hours or less when gaming. Furthermore, expect your Chromebook to run warmer than usual. While Chrome OS devices are generally well-designed for passive cooling, extended gaming sessions can push the thermal limits, potentially leading to performance throttling to prevent overheating. It’s advisable to game with your Chromebook plugged in.
The Evolving Landscape of Chrome OS Gaming
While local Steam installation offers a traditional gaming experience, it’s not the only, or often even the best, way to game on a Chromebook.
-
Cloud Gaming Alternatives (GeForce NOW, Xbox Cloud Gaming):
For a truly high-fidelity gaming experience, cloud gaming services are often superior on a Chromebook. Services like NVIDIA GeForce NOW or Xbox Cloud Gaming (part of Xbox Game Pass Ultimate) stream games directly to your Chromebook over the internet.- Pros: Access to modern AAA titles at high settings, no local installation required, minimal impact on Chromebook’s resources, performance only limited by your internet connection.
- Cons: Requires a stable and fast internet connection, subscription costs, potential input lag, less ideal for competitive gaming.
- Relevance: This is a strong “Tech” trend that perfectly complements the Chromebook’s cloud-centric design. If gaming performance is paramount, cloud gaming is often the smarter “Money” decision as it bypasses hardware limitations.
-
The Road Ahead for Linux Gaming on Chromebooks:
Google continues to invest in Chrome OS and its Linux capabilities. Improvements in Crostini’s integration, better GPU acceleration support, and ongoing development of Proton mean that the local gaming experience on Chromebooks is likely to improve over time. We might see more powerful Chromebook hardware emerge that specifically targets these capabilities, further blurring the lines between traditional laptops and Chrome OS devices. The “Tech” landscape is always evolving, and Chromebooks are increasingly part of that evolution.

Conclusion: Is Gaming on a Chromebook Right for You?
Installing Steam on a Chromebook is a fantastic technical endeavor that showcases the versatility of Chrome OS and the power of Linux. It offers a unique opportunity to breathe new life into an existing device, transforming a productivity tool into a modest gaming machine. For tech enthusiasts, it’s a rewarding project that expands their understanding of Linux and virtual environments.
However, it’s crucial to manage expectations. If your primary goal is to play the latest AAA titles at maximum settings, a Chromebook, even with Steam installed, will disappoint. Its strengths lie in providing access to older games, indie gems, and a vast library of casual experiences that don’t demand cutting-edge hardware.
For those who already own a compatible Chromebook and are looking for a cost-effective way to enjoy a selection of PC games, or for users who value the portability and simplicity of Chrome OS but crave occasional gaming, this guide provides the roadmap. It’s a testament to how adaptable and powerful modern “Tech” can be, allowing you to leverage a single “Money”-friendly device for both work and play. Ultimately, the decision to install Steam on your Chromebook comes down to balancing your gaming aspirations with the realistic capabilities of your device and embracing the unique niche it fills in the world of computing.
aViewFromTheCave is a participant in the Amazon Services LLC Associates Program, an affiliate advertising program designed to provide a means for sites to earn advertising fees by advertising and linking to Amazon.com. Amazon, the Amazon logo, AmazonSupply, and the AmazonSupply logo are trademarks of Amazon.com, Inc. or its affiliates. As an Amazon Associate we earn affiliate commissions from qualifying purchases.