In the digital age, where visual communication reigns supreme, the typography we choose for our documents, designs, and digital creations plays a pivotal role. Fonts are not merely decorative elements; they are powerful tools that convey personality, establish tone, enhance readability, and reinforce brand identity. Whether you’re a graphic designer crafting a logo, a content creator producing engaging visuals, a business professional preparing a compelling presentation, or simply someone looking to personalize their computing experience, knowing how to manage and install custom fonts on Windows 10 is an essential skill.
Windows 10, like its predecessors, offers a robust system for handling fonts, but the methods have evolved, offering users more streamlined and intuitive options. This comprehensive guide will walk you through the various ways to install, manage, and even troubleshoot fonts on your Windows 10 PC, ensuring your system is equipped with the perfect typography for every project. We’ll delve into the practical steps, explore the nuances of different font types, and discuss best practices that can elevate your digital workflow and creative output.
The Power of Typography: Why Custom Fonts Matter
Before diving into the “how-to,” let’s briefly underscore the “why.” In the vast digital landscape, where attention spans are fleeting and competition is fierce, every detail matters. Fonts are silent communicators, influencing perception and engagement in profound ways.
Enhancing Brand Identity and Professionalism
For businesses and personal brands, consistency is key. A distinctive font can become as recognizable as a logo, instantly associating a piece of content with a specific entity. Using a carefully selected font across all your communications—from your website and marketing materials to emails and presentations—helps build a cohesive and professional brand image. It projects an air of credibility and attention to detail, which can significantly impact how your audience perceives your message and organization. In the competitive “Money” landscape, a strong brand, partly defined by its typography, can translate into better engagement and ultimately, revenue.
Boosting Readability and User Experience
Beyond aesthetics, fonts profoundly impact readability. The right typeface, weight, and size can make complex information digestible, reducing eye strain and improving comprehension. Conversely, a poorly chosen font can make text difficult to read, frustrating your audience and detracting from your message. This is particularly crucial for apps, websites, and digital documents where user experience (UX) is paramount. Selecting fonts that are clear, legible, and appropriate for the context ensures your message is delivered effectively, enhancing productivity and user satisfaction.
Unleashing Creative Expression and Personalization
For creatives—designers, artists, writers, and hobbyists—custom fonts are tools for expression. They allow you to break free from the standard system fonts and infuse your projects with unique flair and personality. Whether you’re designing invitations, crafting digital art, or simply want your desktop to reflect your personal style, an extensive font library opens up a world of creative possibilities. Personalizing your Windows 10 environment with fonts you love can also make your daily computing experience more enjoyable and inspiring, aligning with the broader “Tech” trend of customization.
Essential Methods for Installing Fonts on Windows 10
Windows 10 offers several straightforward methods to add new fonts to your system, catering to different preferences and scenarios. We’ll explore the three primary approaches, from the most modern and integrated to the classic manual technique.
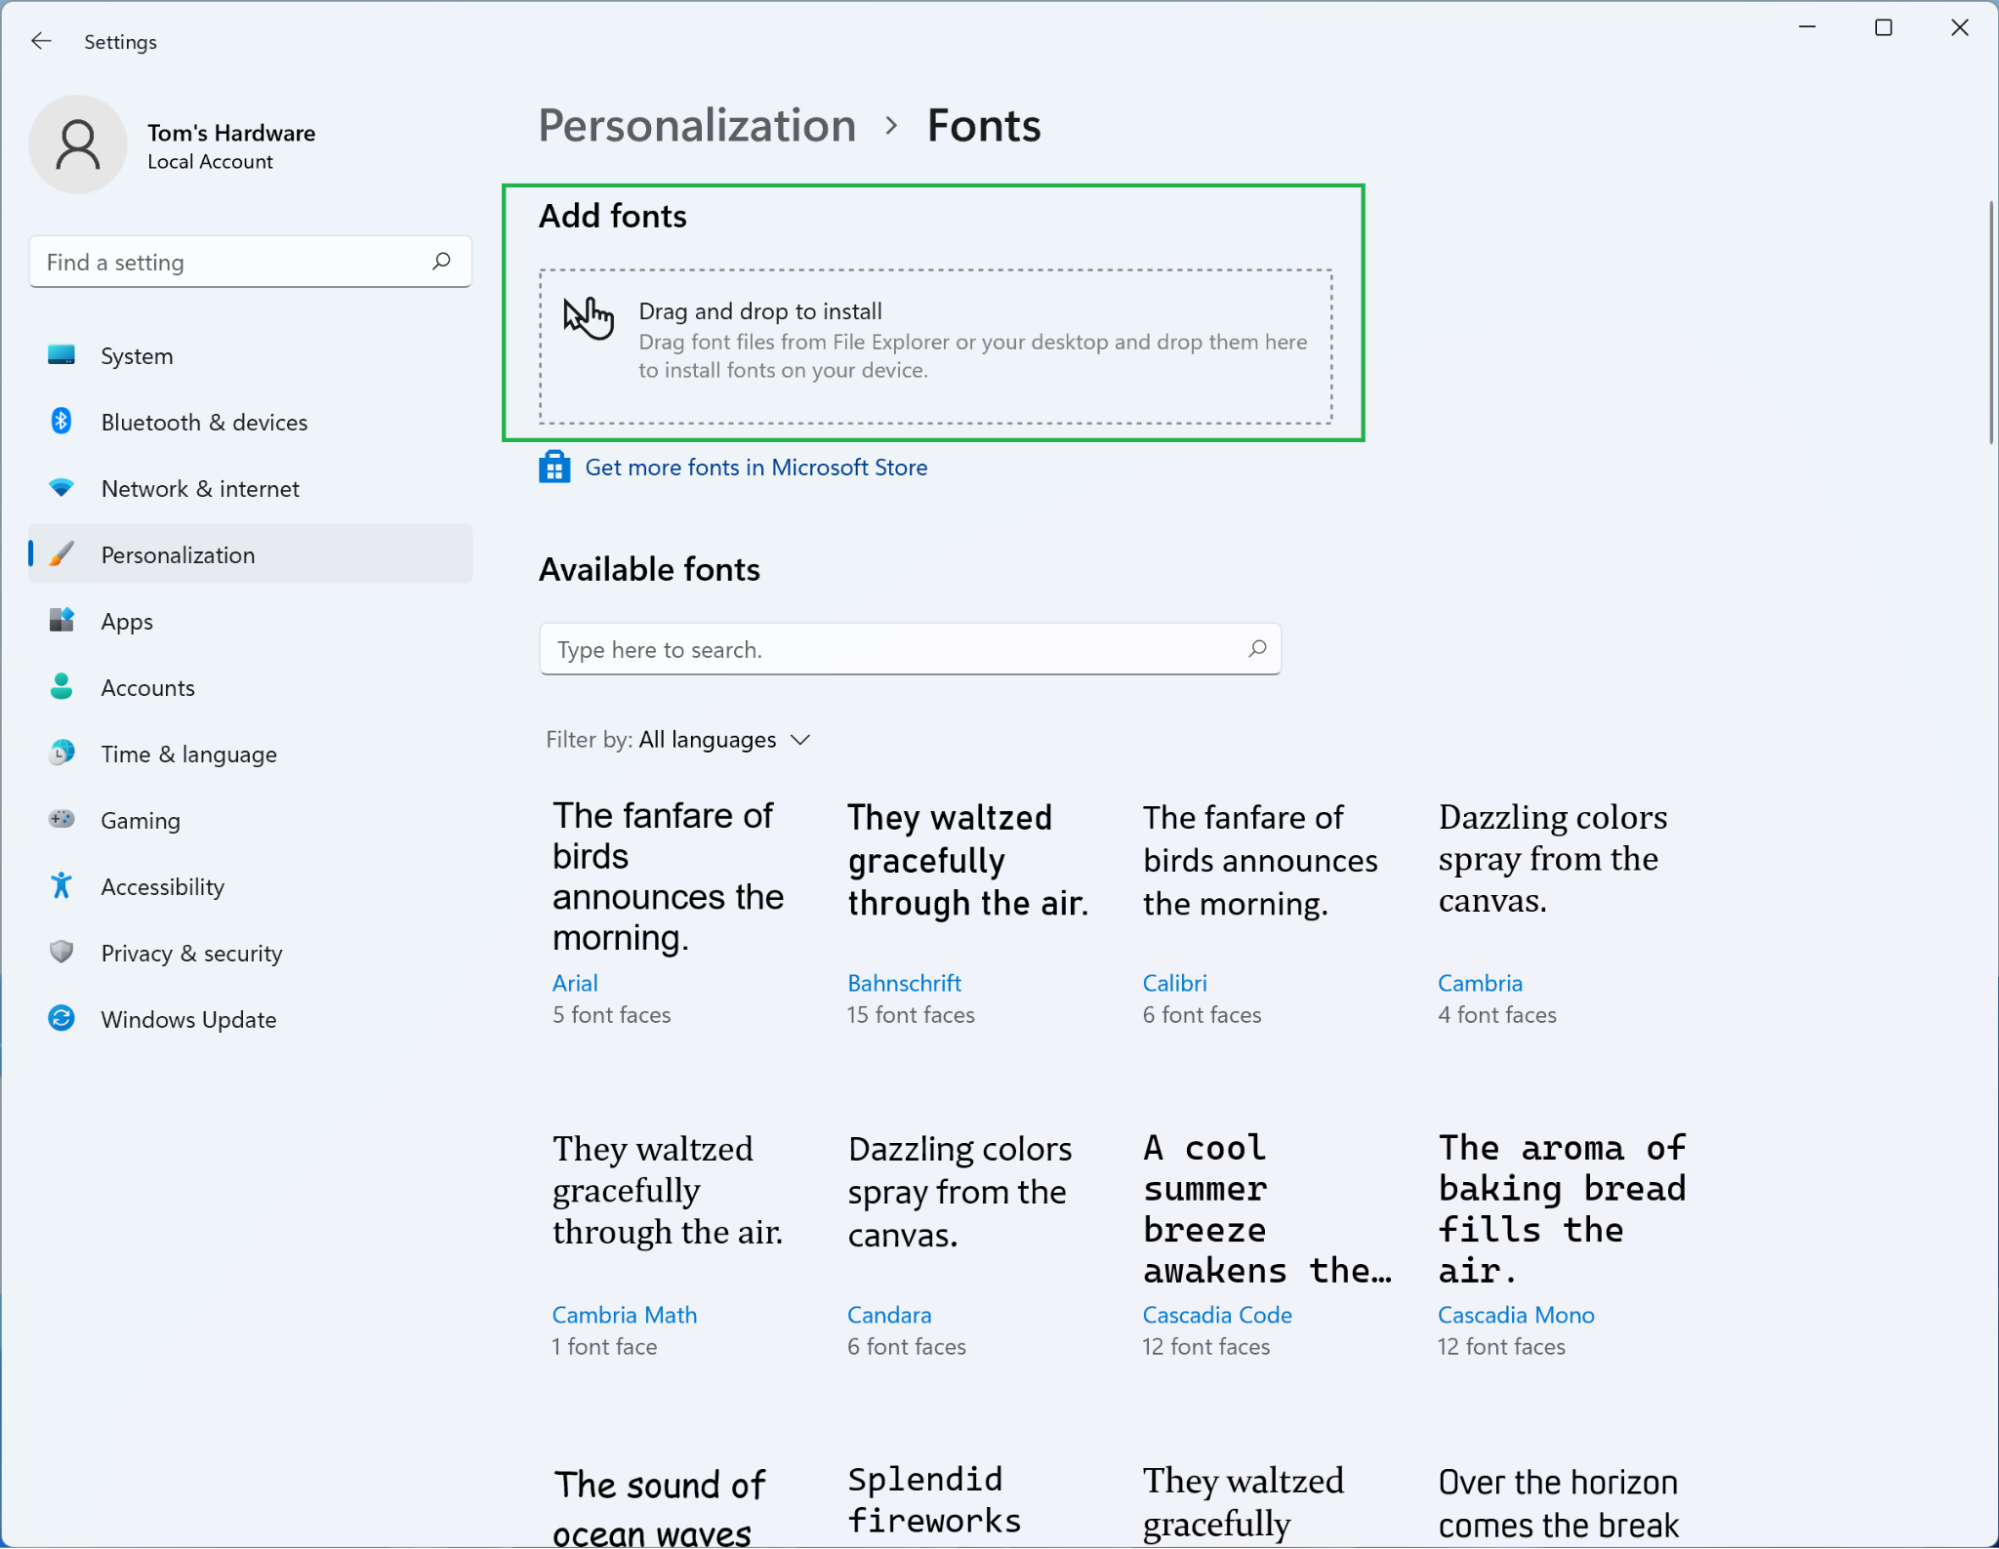
Method 1: Installing Fonts via Windows Settings (Recommended)
Since the Windows 10 Creators Update, the Settings app has become the central hub for managing many system features, including fonts. This method is often the most intuitive and offers a clean interface for adding and reviewing your font collection.
Navigating to the Font Settings
- Open Settings: Click on the Start button (Windows icon) in the bottom-left corner of your screen and then click on the “Settings” gear icon, or simply press
Windows key + I. - Go to Personalization: In the Settings window, select “Personalization.”
- Select Fonts: In the left-hand pane, click on “Fonts.”
Drag-and-Drop Installation
The Fonts section in Settings features a prominent “Drag and drop to install” area. This is arguably the easiest way to add new fonts:
- Locate Your Font Files: First, ensure you have downloaded your desired font files. Fonts typically come in
.ttf(TrueType Font),.otf(OpenType Font), or sometimes.ttc(TrueType Collection) formats. They are often bundled in.ziparchives, so you’ll need to extract them first. You can usually find these files in your “Downloads” folder or wherever you saved them. - Select and Drag: Open the folder containing your extracted font files. Select the font files you wish to install (you can select multiple files at once by holding
Ctrland clicking, orShiftfor a range). - Drop into Settings: Drag the selected font files directly into the “Drag and drop to install” box within the Fonts section of your Windows Settings.
- Confirmation: Windows will quickly process the files, and you’ll see a brief notification confirming the installation. The newly installed fonts will then appear in the list below, ready for use in all your applications.
This method is quick, efficient, and provides immediate visual confirmation of the installation.
Method 2: Manual Installation via Right-Click (Classic Method)
This is a long-standing method in Windows and remains a reliable way to install fonts, especially if you prefer not to use the Settings app or are installing just one or two fonts.
Step-by-Step Manual Installation
- Download and Extract Fonts: As with the previous method, download your desired font files and extract them from any
.ziparchives. - Locate Font File: Navigate to the folder where your font files (
.ttfor.otf) are located. - Right-Click and Install: Right-click directly on the font file you wish to install.
- Choose “Install” or “Install for all users”:
- Install: This option makes the font available only to your current user account.
- Install for all users: This option makes the font available to all user accounts on the computer. This is often the preferred choice for shared computers or professional setups to ensure consistency across user profiles, especially in a “Brand” context where multiple team members might need access to specific brand fonts.
- Installation Progress: A small dialog box will appear, showing the installation progress. Once it disappears, the font is installed.
You can select multiple font files and right-click to install them simultaneously, which can save time if you have several new fonts to add.
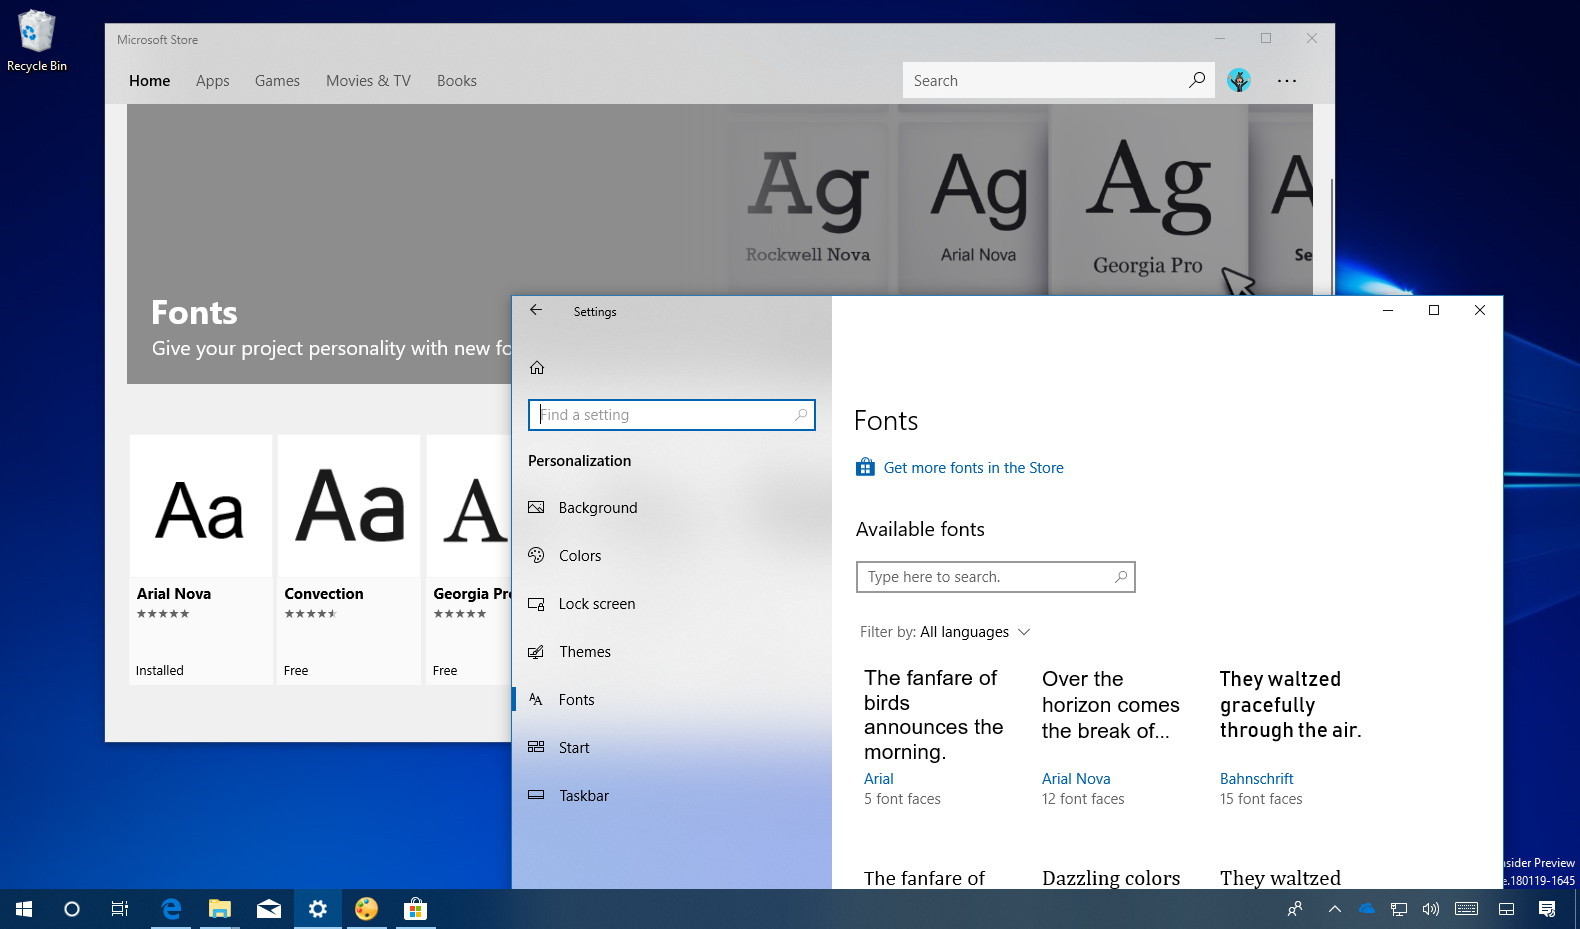
Method 3: Installing Fonts from the Microsoft Store
The Microsoft Store offers a curated collection of fonts, some free and some paid, providing another convenient way to expand your typography options. This method integrates seamlessly with your Microsoft account and offers a secure source for fonts.
Accessing and Installing Fonts from the Store
- Open Microsoft Store: In the Fonts section of Windows Settings (Personalization > Fonts), look for the link “Get more fonts in Microsoft Store” at the top. Click on it. Alternatively, open the Microsoft Store directly from your Start Menu and search for “fonts.”
- Browse and Select: The Microsoft Store will open to a dedicated Fonts section. You can browse various font packs, individual typefaces, or search for specific styles. Some fonts are free, while others are available for purchase.
- Download/Purchase and Install: Once you find a font or font pack you like, click on it. Then, click the “Get” or “Buy” button. The Microsoft Store will handle the download and installation automatically.
- Automatic Integration: After installation, the fonts will be added to your system and will appear in the Fonts section of Settings, just like manually installed fonts.
This method is particularly useful for discovering professionally curated font collections and ensures compatibility and easy updates for “Tech” enthusiasts.

Managing Your Font Collection and Best Practices
Installing fonts is only half the battle; effective management ensures your system remains organized, performs optimally, and adheres to legal guidelines.
Viewing and Uninstalling Fonts
Over time, your font collection can grow quite large. Windows 10 provides tools to view your installed fonts and remove those you no longer need.
Using Windows Settings to Manage Fonts
- Open Fonts Settings: Go to Start > Settings > Personalization > Fonts.
- Browse Installed Fonts: Scroll down to see a list of all installed fonts. Each entry shows the font name and a preview of its appearance. Clicking on a font name will display a detailed preview, including all its available styles (regular, bold, italic, etc.), and metadata.
- Uninstall a Font: To remove a font, click on its name in the list. On the font detail page, you’ll see an “Uninstall” button. Click this button, and confirm your choice when prompted.
- Caution: Be careful when uninstalling fonts, especially system fonts. Removing essential system fonts can cause display issues in Windows and various applications. Generally, only uninstall custom fonts you’ve added yourself.
Using the Legacy Control Panel
For those who prefer the older interface or for certain advanced scenarios:
- Open Control Panel: Search for “Control Panel” in the Start Menu and open it.
- Navigate to Fonts: Set the “View by” option to “Large icons” or “Small icons,” then click on “Fonts.”
- Manage Fonts: This window displays all installed fonts. You can hide, delete, or even preview fonts from here. Right-click on a font and select “Delete” to uninstall it.
Understanding Font File Types
When downloading fonts, you’ll primarily encounter two main file types:
- TrueType Fonts (TTF): Developed by Apple and Microsoft, TTF is one of the most common font formats. They are widely supported across operating systems and software. Most free fonts you find online will be in TTF format.
- OpenType Fonts (OTF): Developed by Adobe and Microsoft, OTF is a more advanced format that builds upon TrueType. OTF fonts can contain more glyphs (characters), ligatures, stylistic alternates, and other advanced typographic features, making them a favorite among professional designers. They often offer greater flexibility and higher quality for print and digital design, aligning well with “Brand” specific design needs.
While both are widely supported by Windows 10 and most applications, OTF often provides richer typographic capabilities.
Where to Find High-Quality Fonts
The internet is a treasure trove of fonts, both free and paid. Here are some popular and reputable sources:
- Google Fonts: An excellent resource for high-quality, free, open-source fonts. They are optimized for web use but work perfectly on desktop. Ideal for both personal and commercial projects, a great “Money”-saving option.
- DaFont and Font Squirrel: Popular websites offering a vast collection of free fonts. DaFont allows users to upload fonts, so quality and licensing can vary. Font Squirrel curates only high-quality, commercially licensed free fonts, making it a safer bet for professional work.
- Adobe Fonts (Creative Cloud Subscription): If you’re an Adobe Creative Cloud subscriber, Adobe Fonts provides access to a massive library of high-quality fonts directly within your Adobe applications. These are ideal for professional “Brand” work.
- Commercial Font Marketplaces (e.g., MyFonts, Fontspring, Creative Market): For unique, premium typefaces with robust licensing, these marketplaces offer fonts from independent designers and established foundries. While an investment, high-quality licensed fonts are crucial for serious “Brand” development and avoiding legal issues.
Font Licensing and Usage Considerations
This is where the “Money” and “Brand” aspects intersect significantly. Not all fonts are free for all uses. Understanding font licenses is crucial:
- Personal Use Only: Many free fonts are licensed only for personal, non-commercial use. Using them in a business logo, marketing material, or for generating income could violate the license agreement.
- Commercial Use: Fonts licensed for commercial use can be used in projects that generate revenue. Even free fonts sometimes come with commercial licenses. Always check the license file (often a
.txtfile included with the font download) or the website’s terms of service. - Web Fonts vs. Desktop Fonts: Some fonts are specifically licensed for web use (e.g., using
@font-facein CSS), while others are for desktop applications. Ensure you have the correct license for your intended application.
Ignoring licensing can lead to legal issues and financial penalties, so always verify the terms, especially if you’re using fonts for professional or business-related projects.
Performance Considerations
While Windows 10 is designed to handle many fonts, having an excessive number can sometimes impact system performance. This is usually more noticeable on older or less powerful machines, or in design software that loads all fonts at startup.
- Keep it Lean: Regularly review and uninstall fonts you no longer use.
- Font Manager Software: For extensive font collections (e.g., thousands of fonts), consider using dedicated font management software (like FontBase, RightFont, or Adobe Fonts built-in manager). These tools allow you to activate and deactivate fonts as needed, preventing all fonts from loading into your system memory at once, thereby improving “Tech” performance.
Troubleshooting Common Font Issues
Even with straightforward installation methods, you might occasionally encounter issues. Here’s a quick guide to common problems and their solutions:
- Font Not Appearing in Applications:
- Restart Application: After installing a new font, most applications (especially design software like Photoshop, Word, or InDesign) need to be restarted to recognize the new addition.
- Restart Windows: If restarting the application doesn’t work, a full Windows restart might be necessary, especially for older or more stubborn software.
- Check Installation: Verify that the font was indeed installed correctly by checking the “Fonts” section in Windows Settings.
- Corrupt Font File: If a font causes application crashes or displays incorrectly, the font file itself might be corrupt. Try re-downloading the font from a reliable source and reinstalling it.
- Font Appears Jagged or Blurry:
- ClearType: Ensure ClearType (Windows’ text rendering technology) is enabled and calibrated. Search for “Adjust ClearType text” in the Start Menu and follow the wizard.
- Font Quality: Some free fonts may have lower quality or improper hinting, leading to poor rendering at certain sizes. Consider using high-quality OTF fonts for critical “Brand” materials.
- Font Licensing Errors: If an application reports a licensing issue, double-check your font’s license agreement. You might need to purchase a specific license for commercial or particular types of usage.
By understanding these common pitfalls, you can quickly diagnose and resolve most font-related problems, maintaining a smooth and productive workflow.
Conclusion: Empowering Your Digital Creations
Installing and managing fonts on Windows 10 is a straightforward process, made even easier with the integrated tools within the Settings app and the Microsoft Store. By leveraging these methods, you gain the power to personalize your system, enhance your creative projects, and maintain a consistent and professional “Brand” identity across all your digital endeavors.
Remember, typography is a foundational element of effective communication and design. By carefully selecting and strategically deploying custom fonts, you can significantly impact the readability, aesthetic appeal, and overall impression of your work. Always be mindful of font licensing, manage your collection efficiently, and explore the vast world of available typefaces to find the perfect voice for every message. With the knowledge gained from this guide, your Windows 10 machine is now ready to become a canvas for limitless typographic expression, empowering you in all your “Tech,” “Brand,” and even “Money”-generating ventures.
aViewFromTheCave is a participant in the Amazon Services LLC Associates Program, an affiliate advertising program designed to provide a means for sites to earn advertising fees by advertising and linking to Amazon.com. Amazon, the Amazon logo, AmazonSupply, and the AmazonSupply logo are trademarks of Amazon.com, Inc. or its affiliates. As an Amazon Associate we earn affiliate commissions from qualifying purchases.