
In the rapidly evolving world of technology, Python stands out as a versatile and powerful programming language, driving everything from web development and data science to artificial intelligence and automation. For any Python developer, managing external packages and libraries is a fundamental skill, and that’s where Pip comes in. Pip is the standard package manager for Python, enabling users to install and manage software packages written in Python. Without it, the vast ecosystem of Python libraries – critical for almost any significant project – would be largely inaccessible.
This comprehensive guide is designed to walk you through the process of installing Pip on your Windows operating system. Whether you’re a budding developer, a seasoned professional migrating to a new machine, or simply looking to expand your toolkit, mastering Pip installation is a crucial step towards unleashing the full potential of Python. We’ll cover everything from the prerequisites to multiple installation methods, verification, and even troubleshooting common issues, ensuring you have a smooth and successful setup.
Understanding Pip: The Backbone of Python Development
Before we dive into the technicalities of installation, let’s take a moment to understand what Pip is and why it’s so indispensable for anyone working with Python, especially within a Windows environment. Grasping its significance will reinforce why this installation process is a cornerstone of your development journey.
What is Pip and Why Do You Need It?
At its core, Pip stands for “Pip Installs Packages” (a recursive acronym, common in computing). It’s a command-line utility that allows you to install and manage additional libraries and dependencies that are not part of the Python standard library. Think of it as an app store specifically for Python modules. Python’s power lies not just in its core language, but in its enormous collection of third-party libraries – ranging from requests for making HTTP requests, NumPy for numerical computing, Django and Flask for web development, pandas for data analysis, to scikit-learn for machine learning.
Without Pip, integrating these libraries into your projects would be a cumbersome, manual process involving downloading source code, compiling it (if necessary), and manually placing it in your Python path. Pip automates this entire workflow, fetching packages from the Python Package Index (PyPI) and installing them with all their dependencies, saving countless hours and preventing compatibility headaches. This automation is a huge boost to productivity, allowing developers to focus on writing code rather than managing dependencies.
The Indispensable Role of Pip for Windows Users
While the concept of Pip is universal across operating systems, its importance for Windows users carries particular weight. Windows environments, unlike some Linux distributions or macOS, often require a slightly more hands-on approach for command-line tools and environment variable management. Successfully installing and configuring Pip on Windows ensures that your development environment is robust and ready for any Python project.
For individuals and businesses leveraging Python for data analysis, automation, web applications, or AI tools on Windows machines, a properly configured Pip installation is non-negotiable. It enables the seamless integration of cutting-edge technologies and frameworks, directly contributing to more efficient workflows and the ability to capitalize on the latest technological trends. From a personal branding perspective, having a well-set-up development environment showcases professionalism and proficiency, enhancing your technical reputation. For businesses, it translates into faster project deployment and reduced operational friction.
Preparing Your Windows Environment for Pip Installation
A smooth Pip installation begins with a properly configured Python environment. On Windows, this primarily means ensuring Python itself is installed correctly and, crucially, that its executable paths are accessible from your command prompt.
Ensuring Python is Installed (and Added to PATH)
Pip is intrinsically linked to a Python installation. You cannot install Pip without Python already present on your system. Most modern Python distributions for Windows (Python 3.4 and above) include Pip by default. However, verifying its presence and ensuring Python is added to your system’s PATH variable is a critical first step.
When you install Python on Windows, during the initial setup wizard, there’s usually a checkbox labeled “Add Python to PATH.” It is highly recommended to check this box. If you didn’t, don’t worry, we’ll cover how to add it manually later. Adding Python to PATH means that you can run Python commands (like python or pip) from any directory in your Command Prompt or PowerShell, rather than having to navigate to the specific Python installation directory. This is a massive time-saver for any development work.
Verifying Your Python Installation
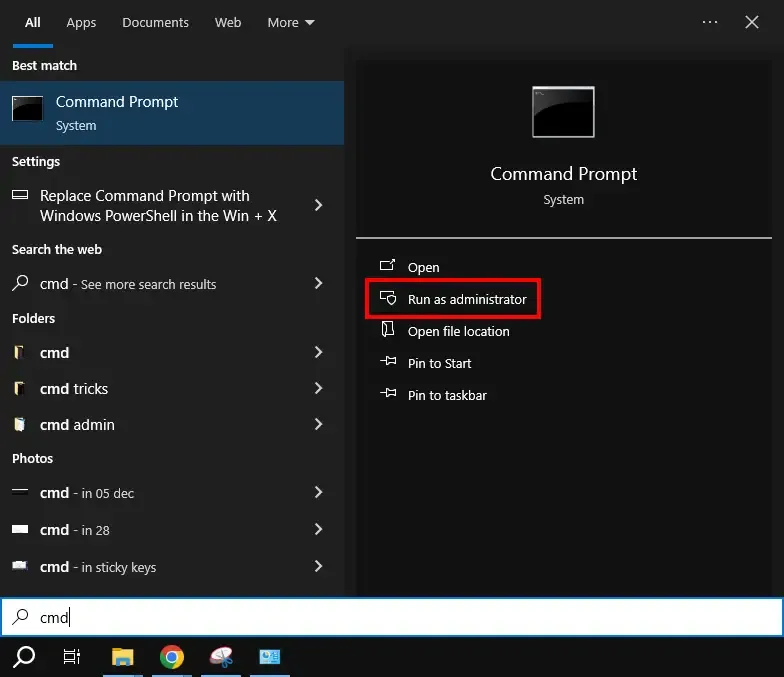
To check if Python is installed and accessible via PATH, open your Command Prompt (search for cmd in the Start menu) or PowerShell and type:
python --version
Or, for some setups:
py --version
You should see an output similar to Python 3.10.x (where x is the specific minor version). If you get an error like 'python' is not recognized as an internal or external command, it means Python is either not installed or not added to your system’s PATH.
If Python is not installed, download the latest stable version from the official Python website (python.org/downloads/windows/). During installation, make sure to check the “Add Python to PATH” option. If you missed it, you’ll need to add it manually.
To manually add Python to PATH:
- Search for “Environment Variables” in your Windows Start menu and select “Edit the system environment variables.”
- Click the “Environment Variables…” button.
- Under “System variables,” find the
Pathvariable and select it, then click “Edit.” - Click “New” and add the path to your Python executable (e.g.,
C:Python310) and itsScriptsdirectory (e.g.,C:Python310Scripts). The exact path depends on where you installed Python and its version. - Click “OK” on all windows to save the changes.
- Restart your Command Prompt or PowerShell for the changes to take effect, then try
python --versionagain.
Step-by-Step Pip Installation Methods on Windows
Once your Python environment is correctly set up, you’re ready to install Pip. As mentioned, for most recent Python versions, Pip comes bundled. We’ll explore the primary methods, starting with the most straightforward.
Method 1: The Modern Approach with ensurepip (Recommended)
For Python 3.4 and later, Pip is included by default. The ensurepip module is a built-in Python module specifically designed to install Pip into a Python environment. This is the simplest and most recommended way to ensure Pip is present and up-to-date.
-
Open Command Prompt or PowerShell: Search for
cmdorpowershellin your Start menu and open it. -
Run the
ensurepipcommand: Type the following command and press Enter:python -m ensurepip --default-pipIf
pythondoesn’t work, trypyinstead:py -m ensurepip --default-pipThis command tells Python to run the
ensurepipmodule, which will install Pip and Setuptools (another essential package management tool) into your current Python environment. You might see some output indicating the installation process and confirmation of success. -
Upgrade Pip (Optional but Recommended): After installation, it’s good practice to upgrade Pip to its latest version to ensure you have the newest features and bug fixes.
python -m pip install --upgrade pipAgain, if
pythondoesn’t work, trypy. This command uses Pip itself to upgrade Pip, which is a common and safe practice.
Method 2: Installing Pip with get-pip.py (Fallback/Manual Method)
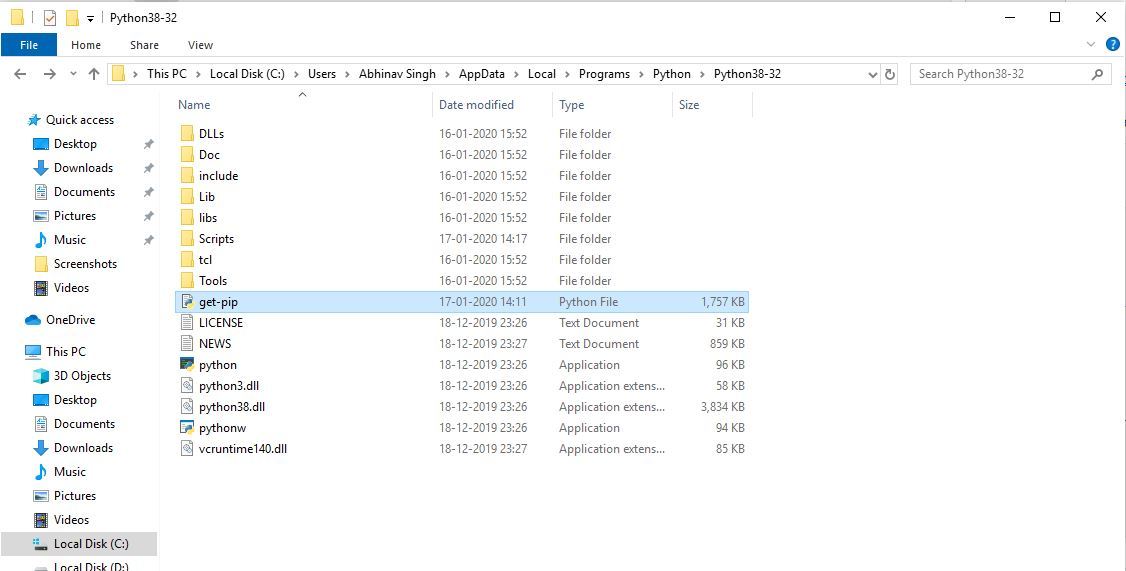
This method is useful if, for some reason, ensurepip doesn’t work or you are working with an older Python version where Pip wasn’t automatically included. It involves downloading a script provided by the PyPA (Python Packaging Authority) and running it manually.
-
Download
get-pip.py:- Open your web browser and go to the official URL:
https://bootstrap.pypa.io/get-pip.py - Right-click on the page and select “Save as…”
- Save the file to a convenient location on your computer, such as your Downloads folder or a dedicated
C:Tempfolder. Make sure it’s saved asget-pip.py.
- Open your web browser and go to the official URL:
-
Open Command Prompt: Navigate to the directory where you saved
get-pip.pyusing thecdcommand. For example, if you saved it inC:UsersYourUserDownloads:cd C:UsersYourUserDownloads(Replace
YourUserwith your actual Windows username.)
-
Run the script: Once in the correct directory, execute the script using Python:
python get-pip.pyOr, if
pythondoesn’t work:py get-pip.pyThis script will download and install Pip along with its dependencies. You’ll see output indicating the installation progress.
-
Upgrade Pip (Recommended): Just like with
ensurepip, it’s a good idea to upgrade Pip after installation:python -m pip install --upgrade pip
Method 3: Upgrading an Existing Pip Installation
If you already have Pip installed but suspect it’s outdated or want to ensure you’re on the latest version, upgrading is straightforward. This is also the command you’d use periodically to keep your Pip healthy.
-
Open Command Prompt or PowerShell.
-
Run the upgrade command:
python -m pip install --upgrade pipThis command leverages the
pipmodule itself to download and install the newest version of Pip, replacing the old one. This process is generally very reliable and recommended for maintaining a healthy development environment.
Verifying Your Pip Installation and Basic Usage
After successfully running any of the installation methods, the next crucial step is to verify that Pip is installed correctly and learn some fundamental commands to start managing your Python packages.
Confirming Pip’s Presence and Version
To check if Pip is successfully installed and to see its version number, open your Command Prompt or PowerShell and type:
pip --version
You should see an output similar to pip 23.2.1 from C:Python310Libsite-packagespip (python 3.10). This confirms that Pip is installed, indicates its version, and shows its location within your Python installation. If you get an error like 'pip' is not recognized, it likely means that Python’s Scripts directory (where pip.exe resides) is not in your system’s PATH. Refer back to the “Adding Python to PATH” section to resolve this.
You can also use:
python -m pip --version
This explicitly tells Python to run the pip module, which can sometimes work even if pip --version directly fails, indicating a PATH issue that needs fixing.
Essential Pip Commands to Get Started
Now that Pip is installed, here are some fundamental commands that every Python developer should know:
-
Install a Package:
To install a new package, useinstallfollowed by the package name. For example, to install the popularrequestslibrary for making HTTP requests:pip install requestsPip will download the package and all its dependencies from PyPI and install them into your Python environment.
-
Uninstall a Package:
To remove a package you no longer need:pip uninstall requestsPip will ask for confirmation before removing the package and its related files.
-
List Installed Packages:
To see all packages currently installed in your environment, along with their versions:pip listThis command is invaluable for tracking dependencies and diagnosing version conflicts.
-
Upgrade a Package:
To upgrade an already installed package to its latest version:pip install --upgrade package_nameFor example, to upgrade
requests:pip install --upgrade requests -
Show Package Details:
To get detailed information about an installed package, including its version, location, dependencies, and author:
cmd

pip show requests
These commands form the core of package management with Pip and will be your constant companions as you develop Python applications. Mastering them enhances your productivity and allows you to efficiently manage the software components of your projects.
Troubleshooting Common Pip Installation Issues
Even with clear instructions, you might encounter issues during installation or while using Pip. Here are some common problems Windows users face and their solutions.
“Pip is Not Recognized” Error
This is by far the most frequent issue and almost always points to an incorrectly configured system PATH.
- Cause: The directory where
pip.exeis located (usuallyC:PythonXXScripts, whereXXis your Python version) is not included in your Windows system’s PATH environment variable. - Solution:
- Manually add Python’s
Scriptsdirectory to PATH: Follow the steps outlined in the “To manually add Python to PATH” section above, ensuring you add both your Python installation directory (e.g.,C:Python310) and itsScriptssubdirectory (e.g.,C:Python310Scripts). - Restart Command Prompt/PowerShell: Environment variable changes only take effect in new terminal sessions. Close and reopen your Command Prompt or PowerShell after modifying PATH.
- Verify with
python -m pip: As a workaround or for further diagnosis, try usingpython -m pip(orpy -m pip) instead of justpip. If this works, it confirms Pip is installed but the PATH variable is still the issue.
- Manually add Python’s
Dealing with Proxy Settings and Network Restrictions
If you’re in a corporate or heavily firewalled environment, Pip might fail to download packages due to network restrictions.
- Cause: Your network requires a proxy server to access external websites, and Pip isn’t configured to use it.
- Solution:
- Configure Pip to use a proxy: You can specify proxy settings directly in Pip commands using the
--proxyflag:
cmd

pip install requests --proxy http://username:password@proxy_host:proxy_port
Replaceusername,password,proxy_host, andproxy_portwith your actual proxy details. - Set environment variables: For a more permanent solution, you can set
HTTP_PROXYandHTTPS_PROXYenvironment variables in Windows:- Go to “Edit the system environment variables” (similar to PATH).
- Click “Environment Variables…”.
- Under “User variables” or “System variables,” click “New…” and add:
- Variable name:
HTTP_PROXY - Variable value:
http://username:password@proxy_host:proxy_port - And similarly for
HTTPS_PROXY.
- Variable name:
- Restart your Command Prompt/PowerShell.
- Configure Pip to use a proxy: You can specify proxy settings directly in Pip commands using the
Permission Denied Errors
Sometimes, Pip commands might fail with permission errors, especially when trying to install or upgrade packages globally.
- Cause: You don’t have sufficient administrative privileges to modify the Python installation directory or certain system directories.
- Solution:
- Run Command Prompt/PowerShell as Administrator: Right-click on the Command Prompt or PowerShell icon in the Start menu and select “Run as administrator.” Then try your Pip command again.
- Use virtual environments: For development, it’s highly recommended to use Python virtual environments. Virtual environments create isolated Python installations for each project, meaning you can install packages without requiring system-wide administrative privileges. You install
virtualenvor use Python’s built-invenvmodule:
cmd

python -m venv myproject_env

myproject_envScriptsactivate

pip install requests # This will install requests only in 'myproject_env'
This is a best practice that not only solves permission issues but also helps manage project dependencies cleanly, avoiding “dependency hell” where different projects require conflicting versions of the same library.

Conclusion
Installing Pip on Windows is a fundamental step for anyone looking to leverage the full power of Python. By following the steps outlined in this guide, you should now have a robust and functional Python package management system in place. We’ve covered the crucial prerequisites, detailed the modern ensurepip method, provided get-pip.py as a fallback, and armed you with essential commands for package management. Furthermore, understanding how to troubleshoot common issues ensures that you can overcome hurdles and maintain a smooth development workflow.
With Pip installed, you’ve unlocked access to the vast Python Package Index (PyPI), a treasure trove of libraries and frameworks that can supercharge your productivity and expand your capabilities in areas like web development, data science, machine learning, and automation. This foundational skill not only enhances your technical proficiency but also aligns with key aspects of personal and professional growth – streamlining operations (Tech), building a strong skill set for career advancement (Brand), and potentially opening doors to new income streams through advanced projects (Money). Now, go forth and explore the incredible world of Python packages!
aViewFromTheCave is a participant in the Amazon Services LLC Associates Program, an affiliate advertising program designed to provide a means for sites to earn advertising fees by advertising and linking to Amazon.com. Amazon, the Amazon logo, AmazonSupply, and the AmazonSupply logo are trademarks of Amazon.com, Inc. or its affiliates. As an Amazon Associate we earn affiliate commissions from qualifying purchases.