In the intricate world of computing, the graphics card, often referred to as the GPU (Graphics Processing Unit), stands as a cornerstone for visual performance. Whether you’re a hardcore gamer aiming for the highest frame rates, a creative professional rendering complex 3D models or editing high-resolution videos, an AI enthusiast working with machine learning, or simply someone looking to enhance their daily computing experience, a powerful graphics card is indispensable. It dictates the fidelity, speed, and responsiveness of everything you see on your screen.
Upgrading or installing a new graphics card is one of the most impactful hardware changes you can make to your PC. It can breathe new life into an aging system, provide the necessary muscle for demanding applications, or complete the build of a brand-new custom machine. While the prospect of diving into your computer’s internals might seem daunting to some, the process is surprisingly straightforward when approached methodically. This comprehensive guide will walk you through every step, from crucial pre-installation checks to post-installation optimization, ensuring a smooth and successful upgrade. By the end, you’ll not only have a powerful new component integrated into your system but also a deeper understanding of your PC’s inner workings.
Pre-Installation Checklist: Essential Preparations
Before you even think about opening your PC case, a series of critical preparatory steps must be undertaken. Skipping these can lead to compatibility issues, power problems, or even damage to your components. Taking the time for thorough preparation will save you significant headaches down the line.
Compatibility and Power Supply Assessment
The success of your graphics card installation hinges on compatibility and sufficient power. This is not a “one size fits all” scenario, and careful planning is required.
- Motherboard Compatibility: The vast majority of modern graphics cards connect via a PCI Express (PCIe) x16 slot. While older motherboards might have PCIe 2.0 or 3.0 slots, and newer ones feature PCIe 4.0 or even 5.0, these slots are generally backward compatible. This means a PCIe 4.0 card will work in a PCIe 3.0 slot (though at reduced bandwidth, which might slightly impact performance in some scenarios). Ensure your motherboard actually has an available x16 slot. Many motherboards have multiple PCIe slots, but only one or two are full x16 length and wired for x16 bandwidth. Consult your motherboard manual for specifics.
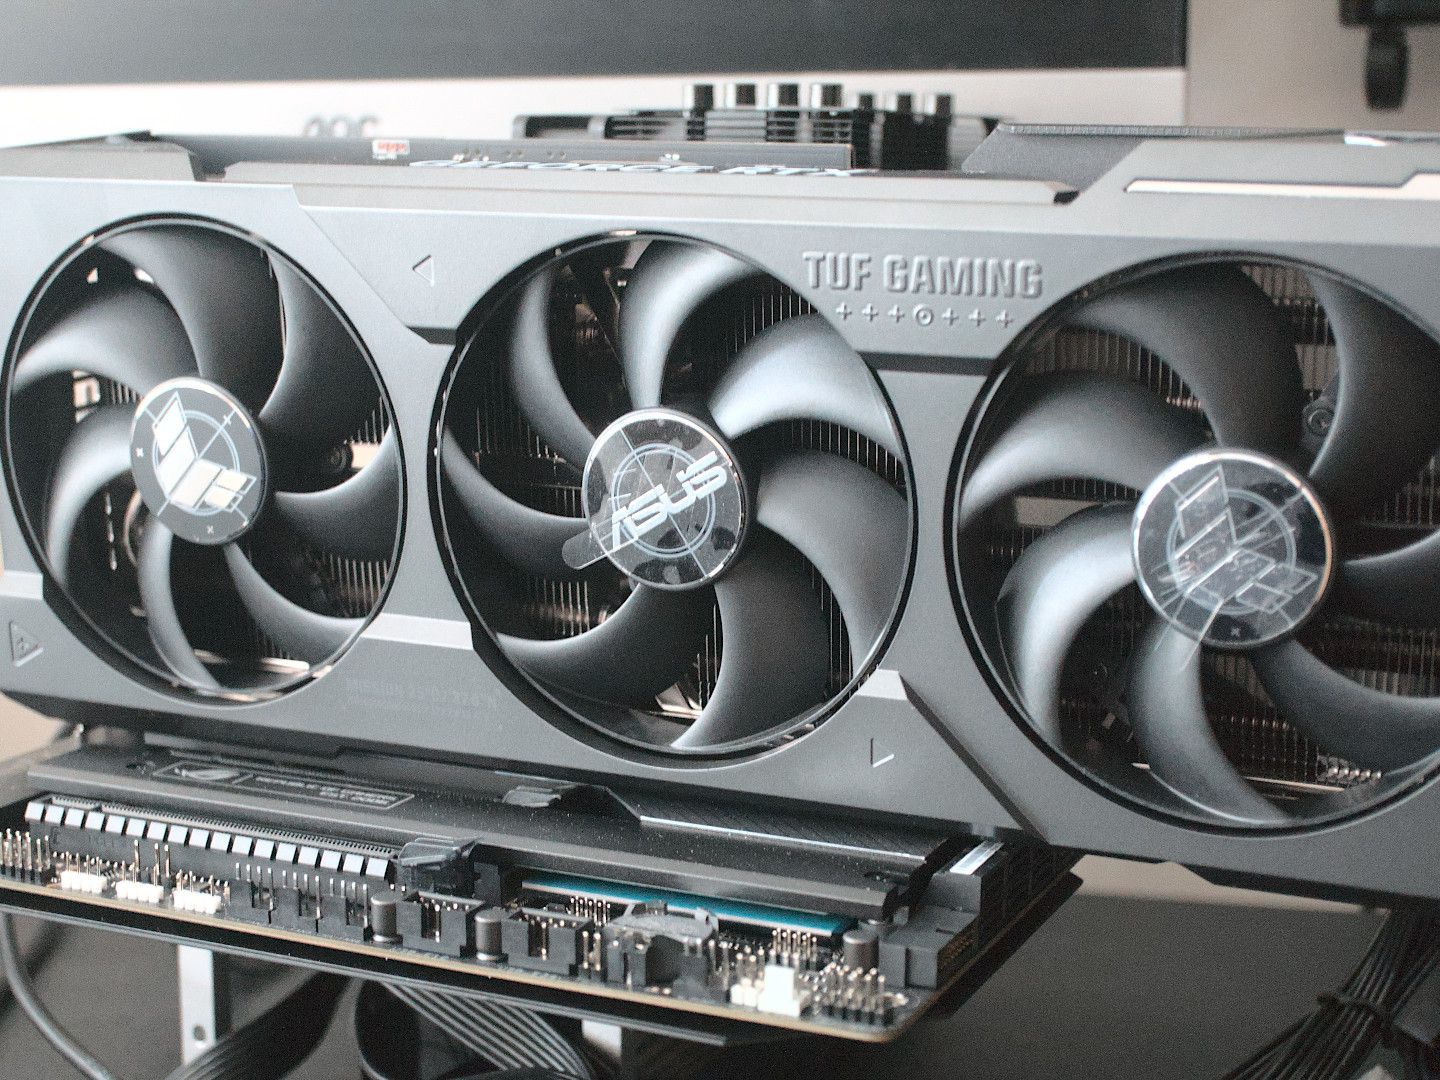
- Case Size and Clearance: Graphics cards come in various sizes – from compact single-fan models to massive triple-fan beasts. Measure the available length and width inside your PC case, particularly the space between the rear of the case and the front drive bays/radiator. Also, consider the height (number of slots it occupies, e.g., dual-slot, triple-slot) to ensure it doesn’t obstruct other components or prevent your side panel from closing. A common mistake is buying a card that’s too long or too wide for the case, leading to a frustrating return process.
- Power Supply Unit (PSU) Requirements: This is perhaps the most critical compatibility check. Every graphics card has a recommended PSU wattage. This information is typically found on the manufacturer’s website or the product packaging. Your existing PSU must meet or exceed this wattage, considering the power draw of all other components (CPU, motherboard, RAM, drives, etc.). More importantly, your PSU must have the correct PCIe power connectors. Most mid-range to high-end graphics cards require one or two 6-pin, 8-pin, or 6+2-pin PCIe power connectors. Check your PSU for these cables. If your PSU lacks the necessary connectors or sufficient wattage, you’ll need to upgrade your PSU as well. Investing in a quality power supply (perhaps from a reputable “Brand” known for reliability) is crucial for system stability and longevity, providing a good “Money” investment in your PC’s health.
- CPU Bottlenecking Considerations: While not strictly a compatibility issue that prevents installation, it’s worth considering the overall balance of your system. Installing a very powerful graphics card with an older, weaker CPU can lead to a “bottleneck,” where the CPU cannot feed data to the GPU fast enough, preventing the graphics card from performing at its full potential. Conversely, a very powerful CPU paired with an entry-level GPU might limit gaming performance. While you can still install the card, understanding potential bottlenecks helps manage performance expectations and future upgrade paths.
Gathering Your Tools and Workspace Setup
Preparation extends beyond just hardware checks. Having the right tools and a proper workspace makes the installation process smoother and safer.
- Essential Tools:
- Phillips Head Screwdriver: The most common tool you’ll need for opening the case, removing existing cards, and securing the new one.
- Anti-Static Wrist Strap (Recommended): This is crucial for preventing electrostatic discharge (ESD), which can permanently damage sensitive electronic components. Attach it to a grounded metal surface (like an unpainted part of your PC case) before touching any internal components. If you don’t have one, regularly touching a grounded metal surface can help, but a strap offers continuous protection.
- Zip Ties or Velcro Straps: For effective cable management after installation. Good cable management improves airflow and makes future maintenance easier.
- Flashlight or Headlamp: To illuminate the often cramped and dark interior of your PC case.
- Small Container/Bowl: To hold screws so they don’t get lost.
- Workspace Setup:
- Clean and Well-Lit Area: Ensure your workspace is free of clutter. A well-lit area is essential for seeing small screws and connectors.
- Solid, Non-Carpeted Surface: Work on a hard, flat surface. Carpets can generate static electricity, so avoid working directly on them. A wooden table is ideal.
- Static-Free Environment: Minimize sources of static. Avoid wearing wool sweaters or socks, and keep pets away from your workspace.
- Backup Important Data (General Practice): While installing a graphics card is generally safe, it’s always good practice to have a recent backup of your critical data before performing any significant hardware changes. This is a general “Tech” best practice for digital security and peace of mind.
- Download Latest Drivers: Before you even install the new card, visit the manufacturer’s website (NVIDIA or AMD) and download the latest drivers for your specific graphics card model and operating system. Having them ready ensures a quick and seamless transition once the hardware is physically installed.
The Installation Process: A Step-by-Step Guide
With all preparations complete, it’s time to get hands-on. This section guides you through the physical installation of your new graphics card. Patience and precision are key here.
Opening Your PC Case and Disconnecting Components
Safety first! Before touching any internal component, ensure your system is completely powered down and disconnected.
- Power Down and Unplug: Completely shut down your computer from the operating system. Once it’s off, disconnect the power cable from the back of the PSU. Also, unplug all other peripherals: monitor, keyboard, mouse, USB devices, Ethernet cable, etc.
- Move to Workspace: Carefully move your PC to your prepared, static-free workspace.
- Open the PC Case: Most PC cases have a removable side panel, usually secured by two or three thumbscrews or standard Phillips head screws at the back. Unscrew them and gently slide or pivot the side panel off. Set it aside in a safe place.
- Ground Yourself: If using an anti-static wrist strap, put it on and attach the clip to an unpainted metal part of your PC case. If not, regularly touch an unpainted metal part of the case to discharge any static electricity from your body.
- Remove the Old Graphics Card (If Upgrading):
- Disconnect Power Cables: If your old graphics card required auxiliary PCIe power, carefully unclip and pull out these cables from the card.
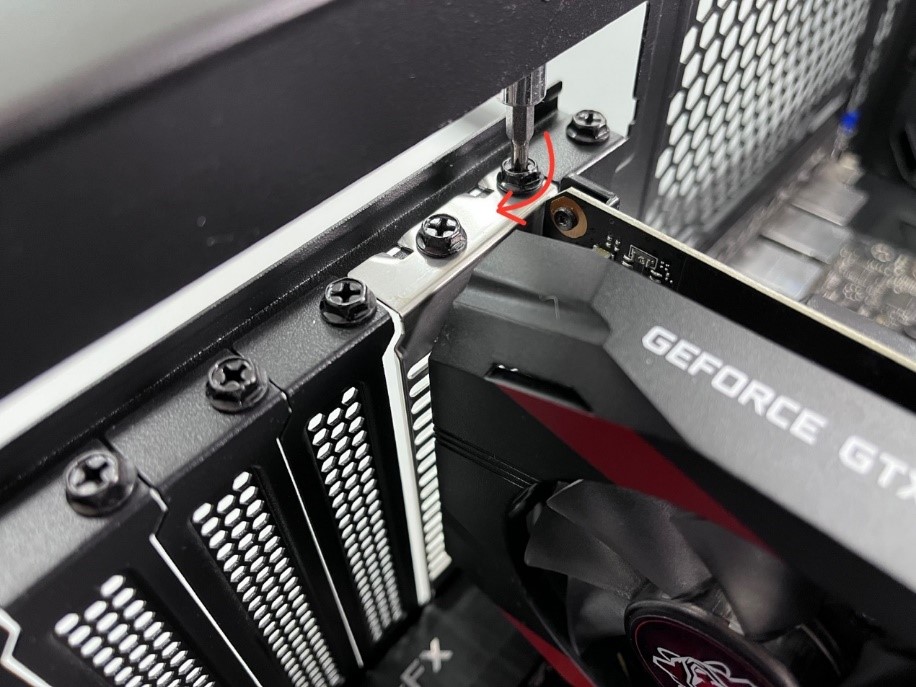
- Unscrew Mounting Bracket: The graphics card is typically secured to the case with one or two screws at its rear mounting bracket. Unscrew these.
- Release PCIe Retention Clip: Look at the end of the PCIe x16 slot where the card is inserted. There will be a small plastic lever or clip. Gently push or pull this clip away from the card to unlock it. Be careful not to force it, as these clips can be fragile.
- Gently Remove Card: With the power cables disconnected, screws removed, and the retention clip released, gently but firmly pull the old graphics card straight up and out of the PCIe slot. Place it in its anti-static bag (if you have one) or a safe, protected place.
Securing the New Graphics Card
Now for the main event – installing the new graphics card.
- Prepare the PCIe Slot and Case:
- If you’re installing into a new build or a slot that hasn’t been used, you’ll need to remove the metal slot covers from the back of your PC case that align with your graphics card’s mounting brackets. Most cards are dual-slot or triple-slot, so remove the corresponding number of covers. Twist them off or unscrew them, depending on your case design.
- Locate the primary PCIe x16 slot on your motherboard. This is usually the topmost, longest PCIe slot.
- Insert the New Graphics Card:
- Carefully align the new graphics card with the PCIe x16 slot. Ensure the gold contacts on the card line up perfectly with the slot.
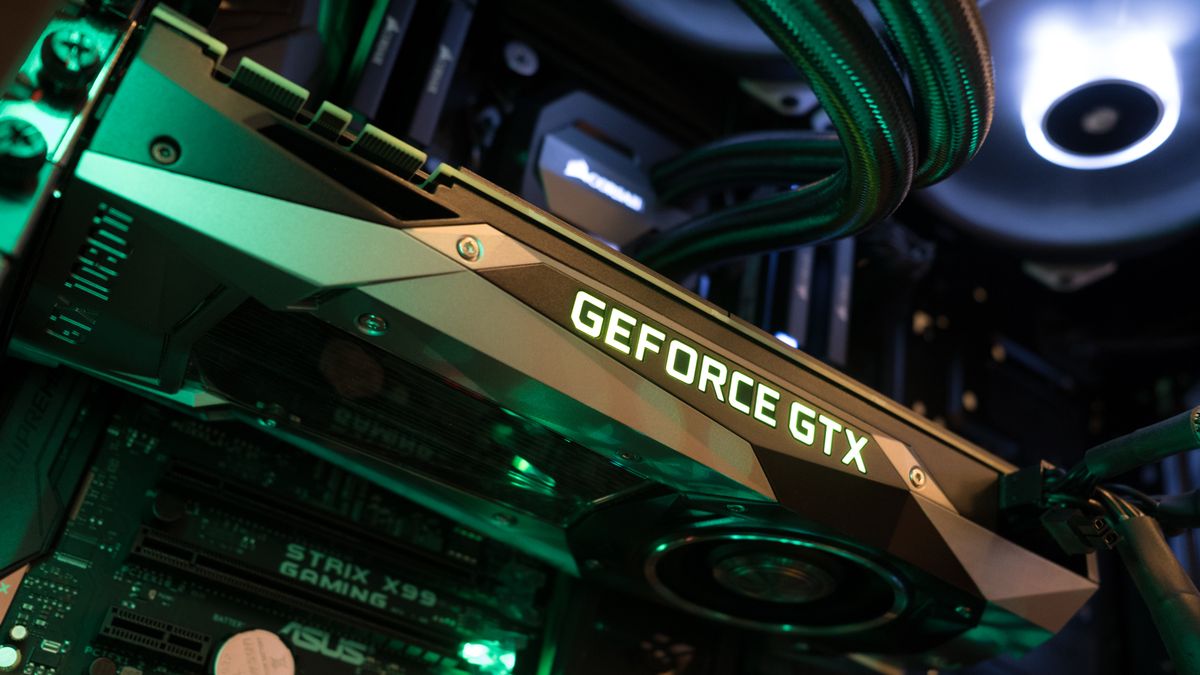
- Gently push the card straight down into the slot until it is fully seated. You should hear a satisfying “click” as the PCIe retention clip locks into place. Visually inspect both ends of the card to ensure it’s fully seated and level. If it’s not fully seated, your system won’t detect it.
- Secure with Screws: Use the screws you removed earlier (or new ones provided with your case/card) to secure the graphics card’s mounting bracket(s) to the back of your PC case. This prevents the card from sagging or becoming dislodged.
- Connect PCIe Power Cables: This is crucial. Connect the necessary PCIe power cables from your PSU to the graphics card. These connectors are usually on the side or top edge of the card. Ensure you use the correct 6-pin, 8-pin, or 6+2-pin connectors as specified by your card’s requirements. Make sure they click firmly into place. Never mix up PCIe power cables with CPU power cables (EPS), as they are different and can cause damage.
Reassembling Your PC and Initial Boot
With the new card physically in place, it’s time to button things up and test your work.
- Cable Management: Now is a good time to tidy up any loose cables. Use zip ties or Velcro straps to bundle cables and route them neatly, ensuring they don’t obstruct airflow or cooling fans. Good cable management not only looks better but also contributes to better thermal performance, a key “Tech” consideration for hardware longevity.
- Close the PC Case: Carefully reattach the side panel of your PC case. Secure it with the screws you removed earlier.
- Reconnect Peripherals: Move your PC back to its usual spot. Reconnect your monitor (ensuring you connect it to one of the display outputs on your new graphics card, not the motherboard’s integrated graphics ports), keyboard, mouse, power cable, and any other peripherals.
- Initial Power On: Take a deep breath and press the power button on your PC.
- Listen for fans spinning up, particularly the graphics card fans.
- Watch your monitor for a display. If you see your operating system loading, congratulations! The physical installation was successful. If not, don’t panic; refer to the troubleshooting section.
Post-Installation: Driver Setup and Optimization
Physical installation is only half the battle. For your new graphics card to perform optimally, you need the correct software drivers and potentially some system adjustments.
Installing and Updating Graphics Drivers
Drivers are the software bridge between your operating system and your hardware. Without them, your graphics card won’t function correctly or at its full potential.
- Initial Boot-Up: Your operating system may boot using generic drivers (Microsoft Basic Display Adapter). This will likely result in a low resolution and may not detect your monitor’s full capabilities. This is normal.
- Install Downloaded Drivers: Locate the driver package you downloaded earlier from NVIDIA’s website (GeForce Experience) or AMD’s website (Adrenalin Software).
- NVIDIA: Run the GeForce Experience installer. It will guide you through the process, offering options for “Express Installation” or “Custom Installation.” For most users, “Express” is fine. If you were upgrading from an old NVIDIA card, a “Custom” installation with the “Perform clean installation” box checked is highly recommended to remove all remnants of previous drivers.
- AMD: Run the Adrenalin Software installer. Similar to NVIDIA, it will guide you through. Look for options to perform a “Factory Reset” or “Clean Install” to ensure no old driver files conflict.
- Perform a Clean Installation (Recommended for Upgrades): If you were replacing an existing graphics card (especially if it was from a different manufacturer, e.g., AMD to NVIDIA), it’s highly advisable to use a tool called Display Driver Uninstaller (DDU) before installing the new drivers.
- Boot into Windows Safe Mode.
- Run DDU to thoroughly remove all traces of old graphics drivers (both GPU and sound drivers, if applicable).
- Restart your PC into normal mode.
- Then, proceed with installing the new drivers from scratch. This prevents potential driver conflicts that can lead to instability, crashes, or performance issues.
- Restart PC: After the driver installation is complete, your system will likely prompt you to restart. Do so. Upon reboot, you should see your monitor at its native resolution and refresh rate, and your new graphics card will be fully recognized.
Verifying Installation and System Optimization
Once drivers are installed, a few final checks and optimizations will ensure your system is running perfectly.
- Device Manager Check:
- Right-click on the Start button and select “Device Manager.”
- Expand the “Display adapters” section.
- You should see your new graphics card listed by its correct name (e.g., “NVIDIA GeForce RTX 4070 Ti” or “AMD Radeon RX 7900 XT”). If you see “Microsoft Basic Display Adapter” or an error symbol, the driver installation may not have been successful, or the card isn’t detected.
- Graphics Card Utility Software: Both NVIDIA GeForce Experience and AMD Adrenalin Software provide comprehensive control panels.
- Monitor Temperatures and Fan Speeds: Use these utilities (or third-party tools like HWMonitor, MSI Afterburner) to monitor your GPU’s temperatures and fan speeds, especially under load. Ensure temperatures are within acceptable limits (typically below 80-85°C for most cards under heavy load). Adjust fan curves if needed for optimal cooling and noise balance.
- Game Optimization (NVIDIA GeForce Experience): GeForce Experience can optimize game settings for you, providing the best balance of performance and visual quality.
- Overclocking (Advanced Users): For advanced users, these utilities also allow for safe overclocking to squeeze out extra performance, though this should be approached cautiously.
- Benchmarking (Optional but Recommended): Run a benchmark tool (e.g., 3DMark, Unigine Heaven/Superposition) or play a demanding game to test the card’s performance and stability. Compare your scores/frame rates to online reviews of similar systems to ensure your card is performing as expected.
- BIOS/UEFI Settings: In some rare cases, you might need to adjust settings in your motherboard’s BIOS/UEFI.
- Ensure the PCIe x16 slot where your new card is installed is set as the primary display output (if there’s an option).
- If your CPU has integrated graphics and you’re not using them, you might consider disabling them in the BIOS/UEFI to prevent potential conflicts, though this is often not necessary as the system prioritizes the discrete GPU.
- Monitor Settings: Finally, ensure your monitor’s settings are configured correctly in Windows. Check your display resolution and refresh rate (especially if you have a high-refresh-rate monitor, ensure it’s set to 120Hz, 144Hz, or higher in Windows display settings).
Troubleshooting Common Issues
Even with careful preparation, issues can arise. Knowing how to diagnose and resolve them is part of the “Tech” journey.
Black Screen or No Display
This is the most common and alarming issue after a new installation.
- Check All Power Connections: Double-check that the PSU’s main 24-pin cable, the 8-pin CPU power cable, and especially the PCIe power cables to the graphics card are all firmly seated and clicked into place. Ensure the power cable to the PSU itself is also secure.
- Monitor Cable and Input: Ensure your monitor cable (HDMI, DisplayPort) is connected to one of the new graphics card’s output ports, not the motherboard’s integrated graphics ports. Also, check that your monitor is set to the correct input source. Try a different monitor cable or port on the card if possible.
- Reseat the Graphics Card: Power down, unplug, open the case, and carefully remove the graphics card. Reinsert it, ensuring it’s fully seated and the retention clip clicks into place. Re-secure with screws.
- Try Integrated Graphics (if applicable): If your CPU has integrated graphics, remove the new graphics card, connect your monitor to the motherboard’s video output, and see if your system boots. If it does, your problem might be with the new card or its power connection.
- Clear CMOS: If the system still doesn’t boot, try clearing your motherboard’s CMOS (Complementary Metal-Oxide-Semiconductor) settings. This resets your BIOS/UEFI to factory defaults, which can resolve boot issues. Refer to your motherboard manual for how to do this (usually by removing a small battery or shorting specific pins).
Driver-Related Problems
Issues like crashes, freezing, graphical artifacts, or poor performance after installation often point to driver problems.
- Reinstall Drivers: The first step is to perform a clean reinstallation of the graphics drivers. Follow the steps in the “Installing and Updating Graphics Drivers” section, especially using DDU if you haven’t already.
- Try Older Drivers: Occasionally, the very latest drivers might have a bug. Visit the manufacturer’s website and try installing a slightly older, stable driver version.
- Boot into Safe Mode: If your system crashes before you can perform driver maintenance, boot into Windows Safe Mode (press F8 or Shift + Restart during boot-up) and run DDU from there, then reboot normally to install fresh drivers.
Performance Issues and Overheating
If your games or applications aren’t running as well as expected, or your system is crashing under load.
- Check Temperatures: Use monitoring software (GeForce Experience, Adrenalin Software, HWMonitor) to check your GPU’s temperature while under load. High temperatures (consistently above 85-90°C) can lead to thermal throttling, where the card reduces its clock speed to cool down, resulting in lower performance.
- Improve Airflow: Ensure your PC case has good airflow. Add case fans if necessary, and ensure they are oriented correctly (intake and exhaust).
- Clean Dust: Dust accumulation can severely hinder cooling. Clean your PC’s internal components, especially fans and heatsinks, with compressed air.
- Power Limits: Ensure your PSU is providing adequate power and that all PCIe power connectors are securely attached. Some cards have “power limits” in their software that can be adjusted, but this is usually for advanced users.
- CPU Bottleneck: Revisit the CPU bottleneck discussion. If your CPU is significantly older or less powerful than your new GPU, it might be limiting performance.
- Verify Settings: Double-check in-game settings. Sometimes games default to ultra settings that even a powerful card might struggle with at very high resolutions or refresh rates. Adjust settings to find a balance.
Conclusion
Installing a new graphics card is a rewarding process that can significantly elevate your computing experience. By following this detailed guide, from the meticulous pre-installation checks to the crucial driver setup and post-installation optimizations, you’ve equipped yourself with the knowledge and confidence to perform this upgrade successfully.
Remember, patience and attention to detail are your best allies throughout this endeavor. While it might seem like a complex “Tech” task, each step is manageable, and the reward of a more powerful, visually stunning, and responsive system is well worth the effort. Whether you’re now diving into the latest AAA games, accelerating your creative workflows, or simply enjoying a smoother daily computing experience, your investment in a quality graphics card and a proper installation will undoubtedly pay dividends. Maintain your system, keep your drivers updated, and enjoy the enhanced performance your new graphics powerhouse brings to the table.
aViewFromTheCave is a participant in the Amazon Services LLC Associates Program, an affiliate advertising program designed to provide a means for sites to earn advertising fees by advertising and linking to Amazon.com. Amazon, the Amazon logo, AmazonSupply, and the AmazonSupply logo are trademarks of Amazon.com, Inc. or its affiliates. As an Amazon Associate we earn affiliate commissions from qualifying purchases.