In the ever-evolving landscape of technology, the term “ISO” is frequently encountered, particularly by those delving into operating system installations, software deployment, or even gaming emulation. If you’ve ever found yourself staring at an .iso file and wondering “how do I install an ISO?”, you’re not alone. This article aims to demystify the process, breaking down what an ISO file is, why it’s used, and providing clear, step-by-step instructions for its installation across various scenarios. Whether you’re looking to install a new operating system on your computer, create bootable media, or access the contents of a disc image, this guide will equip you with the knowledge and practical steps to achieve your goals.

The “.iso” file format, officially known as an ISO disk image, is essentially a digital replica of an optical disc, such as a CD, DVD, or Blu-ray disc. It captures the entire file system and data structure of the original disc in a single, archive file. Think of it as a perfect snapshot of the disc’s contents, ready to be accessed or deployed as if the physical disc were present. This portability and integrity make ISO files incredibly useful in the tech world.
Understanding the Power of ISO Files
Before we dive into the installation process, it’s crucial to understand why ISO files are so prevalent and beneficial. Their utility spans across several key areas within technology, making them an indispensable tool for both casual users and seasoned professionals.
Why Use ISO Files?
- Operating System Installation: This is arguably the most common use case. When you download an operating system like Windows or Linux, it’s typically provided as an ISO file. This allows you to create a bootable USB drive or DVD to install the OS on a new computer or perform a clean installation on an existing one.
- Software Distribution: Many software applications, especially larger ones or those that require a complex installation process, are distributed as ISO files. This ensures that all necessary files and configurations are bundled together in a reliable manner.
- Backup and Archiving: ISO files are excellent for backing up the contents of optical discs. If you have important data on a CD or DVD, creating an ISO image is a great way to preserve it digitally and prevent data loss due to disc degradation or physical damage.
- Virtualization: In the realm of virtual machines (VMs), ISO files are the primary method for installing operating systems within virtual environments like VirtualBox or VMware. The VM “mounts” the ISO as if it were a physical DVD drive, allowing for seamless OS installation.
- Emulation: For users interested in gaming or running older software, ISO files are essential for emulating the behavior of original game discs or software installation discs on modern hardware that may not have optical drives.
Different Scenarios for ISO Installation
The “installation” of an ISO file can mean different things depending on your objective. We can broadly categorize these into a few primary scenarios:
- Mounting an ISO: This is the simplest form of “installing” an ISO. It involves making the contents of the ISO file accessible as if it were a physical drive (like a CD or DVD) without actually burning it to a disc or installing an OS. This is useful for accessing files, running installers from the ISO directly, or using it with virtual machines.
- Creating a Bootable USB Drive or DVD: This involves using the ISO file to create a portable installation medium that can boot a computer and initiate an operating system or software installation.
- Installing an Operating System from an ISO: This is the ultimate goal for many who download ISO files – to put a new OS onto their computer.
Mounting an ISO: Accessing the Contents
Mounting an ISO file is a fundamental skill that unlocks immediate access to its contents. This process makes the ISO file appear as a virtual drive within your operating system, allowing you to browse its files and folders just like you would with a physical disc.
How to Mount an ISO on Windows
Windows 10 and Windows 11 have built-in support for mounting ISO files, making it incredibly straightforward.
- Locate the ISO File: Navigate to the folder where you have saved your
.isofile. - Double-Click or Right-Click:
- Double-click: Simply double-clicking the ISO file will often automatically mount it as a new drive letter in “This PC” (or “My Computer”).
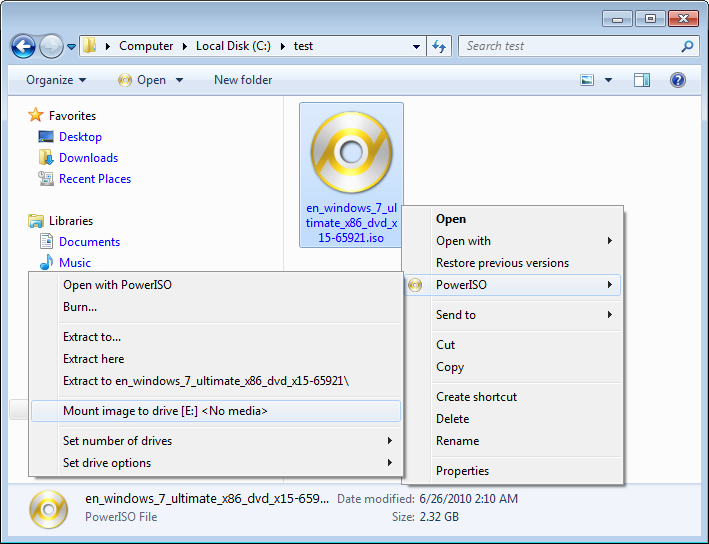
- Right-click: Alternatively, right-click on the ISO file and select “Mount” from the context menu.
- Access the Drive: A new drive will appear in File Explorer, usually with an icon resembling a CD or DVD. You can now open this drive and access all the files within the ISO.
To unmount the ISO, simply go to “This PC”, right-click on the virtual drive that was created, and select “Eject”.
How to Mount an ISO on macOS
macOS also offers native support for mounting ISO files.
- Locate the ISO File: Find the
.isofile in Finder. - Double-Click: Double-clicking the ISO file will automatically mount it.
- Access the Mounted Volume: A new volume will appear on your Desktop and in the Finder sidebar. You can now browse its contents.
To unmount the ISO, you can drag the mounted volume icon to the Trash (which will transform into an Eject icon) or right-click on the volume in Finder and select “Eject”.
Mounting ISOs on Linux
Linux users can mount ISOs using the mount command in the terminal.
- Create a Mount Point: First, create a directory where you want to mount the ISO. For example:
bash

sudo mkdir /mnt/iso
- Mount the ISO: Use the following command:
bash

sudo mount -o loop /path/to/your/image.iso /mnt/iso
Replace/path/to/your/image.isowith the actual path to your ISO file and/mnt/isowith the mount point you created. The-o loopoption is crucial as it tells the system to treat the file as a block device. - Access the Files: Navigate to the mount point directory (
/mnt/isoin our example) to access the ISO’s contents.
To unmount the ISO, use:
sudo umount /mnt/iso
For users who prefer a graphical interface, many Linux distributions come with tools that allow mounting ISOs by simply double-clicking them or through right-click context menus.
Creating Bootable Media from an ISO
Often, mounting an ISO is just the first step. To install an operating system or run diagnostic tools from an ISO on a computer that doesn’t have an optical drive, you’ll need to create a bootable USB drive or DVD.
Using Rufus (Windows)
Rufus is a popular, free, and open-source utility for Windows that is excellent for creating bootable USB drives from ISO files.
- Download and Run Rufus: Download the latest version of Rufus from its official website. It’s a portable application, so no installation is required.
- Insert USB Drive: Plug in your USB flash drive. Ensure it has enough capacity for the ISO file and that you’ve backed up any important data on it, as the process will erase everything.
- Configure Rufus:
- Device: Select your USB drive from the dropdown menu.
- Boot selection: Click “SELECT” and browse to your ISO file.
- Partition scheme and Target system: Rufus usually auto-detects these based on the ISO, but you might need to adjust them (e.g., GPT for UEFI systems, MBR for older BIOS systems). For modern computers, GPT and UEFI are typically recommended.
- File system: Leave this at the default or choose FAT32 for broader compatibility.
- Start the Process: Click “START”. Rufus will warn you that all data on the USB drive will be destroyed. Confirm to proceed.
- Wait for Completion: Rufus will format the USB drive and copy the ISO contents, making it bootable. Once finished, click “CLOSE”.
Using Balena Etcher (Windows, macOS, Linux)
Balena Etcher is a beautifully designed, cross-platform tool that simplifies the process of flashing OS images, including ISOs, to SD cards and USB drives.
- Download and Install Etcher: Download and install Balena Etcher from its official website for your operating system.
- Launch Etcher: Open the application.
- Select Image: Click “Flash from file” and select your ISO file.
- Select Target: Click “Select target” and choose your USB drive. Be extremely careful to select the correct drive!
- Flash! Click the “Flash!” button. Etcher will write the ISO to the USB drive and then verify it.
Creating Bootable DVDs
While USB drives are more common now, you can also create bootable DVDs.
- Windows: Right-click on the ISO file and select “Burn disc image.” Insert a blank DVD into your optical drive and follow the on-screen prompts.
- macOS: Open Disk Utility (Applications > Utilities > Disk Utility). Go to File > Burn. Select your ISO file and then choose your DVD burner.
- Linux: Most Linux distributions have a built-in disc burning utility. You can typically right-click the ISO file and select “Burn to Disc” or find a dedicated application like Brasero.
Installing an Operating System from an ISO
This is where the practical application of ISOs truly shines – installing a new operating system. The general principle is to boot your computer from the bootable media you created in the previous step.
The Installation Process
-
Boot from USB/DVD:
- Insert your bootable USB drive or DVD into the computer where you want to install the OS.
- Restart or turn on the computer.
- As the computer starts up, you’ll need to press a specific key to enter the BIOS/UEFI settings or the Boot Menu. Common keys include F2, F10, F12, DEL, or ESC. This key is usually displayed briefly on the screen during the initial startup.
- In the BIOS/UEFI settings, navigate to the “Boot Order” or “Boot Priority” section and set your USB drive or DVD drive as the first boot device. If you accessed the Boot Menu, simply select your USB or DVD drive from the list.
- Save the changes and exit the BIOS/UEFI. The computer will restart.
-
Follow On-Screen Prompts: Your computer should now boot from the ISO media. You will be greeted by the installer for the operating system you are installing (e.g., Windows Setup, Ubuntu installer).
- Language and Keyboard Layout: Select your preferred language, time format, and keyboard layout.
- Installation Type: You’ll typically have options like “Install Now,” “Upgrade,” or “Repair.” For a fresh installation, choose “Install Now.”
- Partitioning: This is a critical step. You’ll need to decide where to install the operating system. You can often choose to use the entire drive (erasing all existing data) or manually partition the drive to create specific sections for the OS, programs, and data. Back up any important data before proceeding with partitioning if you’re not performing a clean install on a new drive.
- Installation: The installer will then copy files and configure the operating system. This process can take some time.
- Restart and Configuration: After the main installation is complete, the computer will restart. Remove the USB drive or DVD when prompted or ensure the boot order is set back to your hard drive. You’ll then proceed through the final configuration steps, such as creating a user account, setting a password, and configuring network settings.
Considerations for Virtual Machines
If you’re installing an OS in a virtual machine (like VirtualBox or VMware), the process is similar but you’ll be interacting with the virtual machine’s settings.
- Create a New Virtual Machine: Set up a new VM and configure its hardware specifications (RAM, storage, CPU).
- Mount the ISO: In the VM’s settings, you’ll find an option to attach a virtual CD/DVD drive. Select your ISO file as the source for this drive.
- Start the VM: Power on the virtual machine. It will boot from the mounted ISO, and you can proceed with the OS installation within the virtual environment.

Conclusion: Mastering the ISO
The ability to effectively install and utilize ISO files is a fundamental skill in modern computing. From the simple act of mounting an ISO to access its contents to the more involved process of creating bootable media for operating system installations, understanding these steps empowers you to take control of your digital environment. Whether you’re a student learning about operating systems, a professional deploying software, or a tech enthusiast customizing your setup, the methods outlined in this guide will serve you well. So, the next time you encounter an ISO file, you’ll know exactly “how do I install an ISO?” – and more importantly, how to leverage its full potential.
aViewFromTheCave is a participant in the Amazon Services LLC Associates Program, an affiliate advertising program designed to provide a means for sites to earn advertising fees by advertising and linking to Amazon.com. Amazon, the Amazon logo, AmazonSupply, and the AmazonSupply logo are trademarks of Amazon.com, Inc. or its affiliates. As an Amazon Associate we earn affiliate commissions from qualifying purchases.