In the ever-evolving landscape of technology, efficient device management is paramount, especially when it comes to the digital real estate on our computers. macOS, Apple’s powerful operating system, is known for its robust performance and user-friendly interface. However, even the most streamlined systems can accumulate unnecessary files, leading to storage constraints and potentially impacting performance. One common query that surfaces among Mac users, particularly after a major OS update or when struggling with dwindling disk space, is “Can I delete the ‘Install macOS Monterey’ file?”
This question, seemingly simple, uncovers a deeper need for understanding how macOS installers work, their role in system maintenance, and best practices for managing your Mac’s storage. In this comprehensive guide, we’ll delve into the nuances of the macOS Monterey installer, explore the reasons for deleting it, provide step-by-step instructions, and offer broader strategies for optimizing your Mac’s valuable disk space. This isn’t just about deleting a file; it’s about empowering you with the knowledge to maintain a healthy, high-performing Mac, enhancing your digital security, and boosting your productivity.
Understanding the macOS Monterey “Install” File
Before we talk about deleting anything, it’s crucial to understand exactly what “Install macOS Monterey” refers to. Often, users might be confused between the installer application itself, the installed operating system, and the recovery partition. Clarifying these distinctions is the first step towards informed system management.
What is the macOS Monterey Installer?
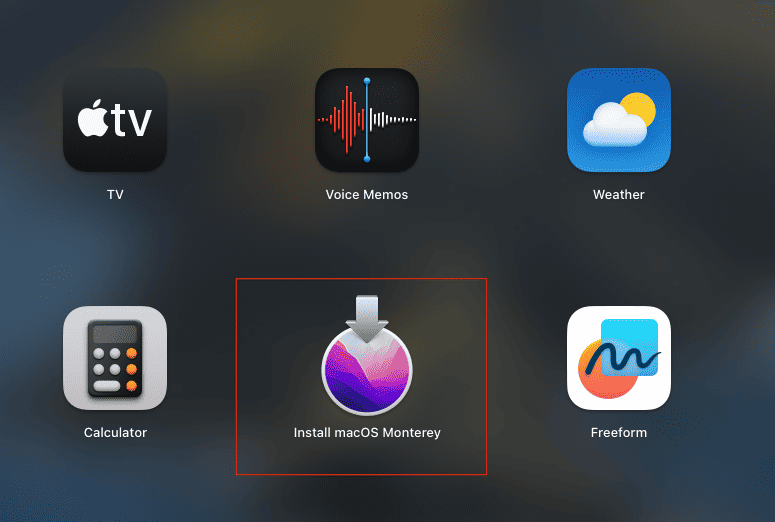
The “Install macOS Monterey” file is essentially a standalone application (usually named Install macOS Monterey.app) that contains all the necessary components to install or reinstall the macOS Monterey operating system on a compatible Mac. When you download macOS Monterey from the App Store or Apple’s support pages, this is the file you receive. It’s typically found in your Applications folder or your Downloads folder, depending on how you initiated the download.
This installer file is quite large, often ranging from 12GB to 14GB, as it packs the entire operating system, drivers, and bundled applications. Its primary purpose is to facilitate a fresh installation of macOS Monterey, an upgrade from an older macOS version, or a reinstallation in case of system issues.
Where Does it Typically Reside?
After downloading from the Mac App Store, the “Install macOS Monterey.app” usually lands in your /Applications folder. Sometimes, if you’ve paused or manually saved a download, it might be in your Downloads folder. Many users download the installer with the intention of upgrading immediately. Once the upgrade is complete, the system typically deletes the installer automatically. However, there are scenarios where it might persist:
- Cancelled installation: If you download the installer but don’t proceed with the installation, it remains in your Applications or Downloads folder.
- Manual download: If you specifically downloaded it for creating a bootable installer or for future use on multiple Macs, it will stay put.
- System glitch: Occasionally, the automatic deletion post-installation might fail.
Identifying its location is key to managing it effectively. A quick check in your Applications folder via Finder or a Spotlight search (Cmd + Space, then type “Install macOS Monterey”) will usually reveal its presence.
Distinguishing Between Installer and Operating System
This is perhaps the most critical distinction. The “Install macOS Monterey.app” is not the operating system itself once it’s installed. Think of it like a software disc or a USB drive containing Windows; once Windows is installed on your computer’s hard drive, you don’t need to keep the disc in your CD drive or the USB plugged in for the computer to run.
- The Installer: A temporary file (or application) designed to put the OS onto your storage drive. It’s an ephemeral tool.
- The Operating System: The actual software that your Mac boots from and runs on a daily basis. It resides permanently on your Mac’s internal storage (SSD or HDD). Deleting the installer will not uninstall macOS Monterey from your Mac if it’s already installed. Your Mac will continue to function normally.
Understanding this distinction removes the fear that deleting the installer will somehow cripple your Mac, allowing you to manage your storage with confidence.
Why You Might Want to Delete the macOS Monterey Installer
With a clearer understanding of what the “Install macOS Monterey” file is, the next logical question is: why would someone want to delete it? The reasons are primarily practical, focusing on optimizing performance, maintaining digital security through good hygiene, and managing resources effectively.
Reclaiming Valuable Disk Space
This is by far the most common and compelling reason. As mentioned, the macOS Monterey installer is a large file, typically around 12-14 GB. For users with limited storage capacity, especially those with 128GB or 256GB SSDs, freeing up this amount of space can make a significant difference. Modern applications, high-resolution media, and extensive digital projects rapidly consume storage. Reclaiming 10+ GB can mean:
- Improved performance: While directly freeing space doesn’t always speed up your Mac, having adequate free space prevents the system from slowing down due to lack of swap space or fragmentation (less common with SSDs, but still relevant).
- Room for new applications and files: You can install more apps, download more movies, or store more documents without worrying about hitting a storage wall.
- Enhanced productivity: A Mac that isn’t constantly battling storage issues runs smoother, allows for quicker file access, and reduces frustrating delays, contributing directly to a more productive workflow. From a money perspective, extending the useful life of your current Mac by optimizing storage can delay the costly purchase of a new device.
Preparing for a Clean Installation (and potential re-download)
Sometimes, users download the installer with the intent to perform a clean installation – a process of erasing the entire drive and installing macOS from scratch. This is often done to resolve deep-seated system issues, remove bloatware, or simply start fresh. However, if plans change or the installation is postponed, the installer might sit unused. In such cases, if you decide against a clean install or if you’ve already performed it, the installer becomes redundant.
It’s important to remember that if you do plan a clean installation in the future, you’ll simply re-download the latest version of the installer from the App Store when you’re ready. Apple maintains access to previous macOS versions for compatible hardware, ensuring you can always get what you need. This approach also ensures you’re installing the most up-to-date version of Monterey, complete with the latest security patches – a critical aspect of digital security.
Troubleshooting and System Maintenance
Occasionally, a corrupted installer file can cause issues, such as failed installation attempts or even system instability if it’s somehow interfering with other processes. Deleting a problematic installer and downloading a fresh copy can be a simple troubleshooting step.
Furthermore, removing old installers is a good habit for general system maintenance. It’s part of keeping your digital environment tidy and efficient. Just as you declutter your physical workspace, regularly reviewing and removing unnecessary files from your Mac helps maintain its optimal condition, akin to a brand maintaining its reputation by keeping its offerings current and well-supported.
Step-by-Step Guide to Deleting the Installer File
Deleting the “Install macOS Monterey” file is a straightforward process, but it’s important to do it correctly to ensure the file is permanently removed and doesn’t just sit in your Trash, still consuming space.
Locating the Installer
The first step is to find the installer file. As previously mentioned, it’s typically named Install macOS Monterey.app.
- Using Finder:
- Open a new Finder window (you can click the Finder icon in your Dock).
- In the sidebar, click on
Applications. - Scroll through the list of applications to find “Install macOS Monterey.”
- Alternatively, you can navigate to your
Downloadsfolder if you suspect it’s there.
- Using Spotlight Search:
- Press
Command (⌘) + Space barto open Spotlight Search. - Type “Install macOS Monterey” into the search bar.
- Spotlight should quickly locate the application. Once found, you can usually click and drag it from the Spotlight results directly to the Trash, or hold
Commandand click on it in the results to open the folder where it’s located, then drag it to the Trash from there.
- Press
Ensure you’re selecting the actual application file and not a shortcut or alias. The icon will typically be a gray square with an ‘M’ or the macOS logo.
The Deletion Process
Once you’ve located the “Install macOS Monterey.app” file, deleting it is as simple as deleting any other file on your Mac:
- Drag to Trash: Click and drag the “Install macOS Monterey.app” file directly to the Trash icon in your Dock.
- Right-Click (Control-Click) and Move to Trash: Alternatively, right-click (or Control-click) on the file and select “Move to Trash” from the contextual menu.
- Keyboard Shortcut: Select the file and press
Command (⌘) + Delete.
After moving the file to the Trash, it still occupies space on your drive. To permanently delete it and free up the space:
- Empty the Trash:
- Right-click (or Control-click) on the Trash icon in your Dock.
- Select “Empty Trash” from the contextual menu.
- A confirmation dialog will appear, asking if you’re sure you want to permanently delete the items in the Trash. Click “Empty Trash” again to confirm.
Once the Trash is emptied, the space consumed by the installer file will be reclaimed and available for use. This simple act can significantly improve your Mac’s storage health and contribute to better digital security by reducing unnecessary data points on your system.
Using Storage Management Tools
macOS includes built-in tools that can help you identify and manage large files, including installers.
-
About This Mac > Storage:
- Click on the Apple menu in the top-left corner of your screen.
- Select “About This Mac.”
- Go to the “Storage” tab.
- Click on “Manage…” This opens the Storage Management window.
-
Storage Management Window:
- This window provides a breakdown of how your storage is being used (Apps, Documents, macOS, System Data, etc.).
- Look for categories like “Applications” or “macOS Installers” (though dedicated installer categories might vary by OS version).
- In the sidebar, you can click on “Applications.” This will list all your installed applications by size. You should be able to find “Install macOS Monterey.app” here and delete it directly from this interface.
- The “Recommendations” section might also suggest optimizing storage by emptying Trash automatically, deleting old files, or moving data to iCloud.
Using these tools not only helps in deleting the installer but also in gaining a holistic view of your storage consumption, enabling more effective long-term management – a key component of productivity for any tech user.
Important Considerations Before Deleting
While deleting the macOS Monterey installer is generally safe and often beneficial, there are a few scenarios and best practices to consider before you hit that “Empty Trash” button. These considerations ensure you’re making an informed decision that aligns with your specific needs and prepares you for potential future requirements.
The Importance of Backups
This cannot be stressed enough: Always have a reliable backup of your Mac before making any significant system changes or deletions, even seemingly minor ones. While deleting the installer won’t affect your installed OS, accidental deletions or unforeseen circumstances can always occur.
- Time Machine: macOS’s built-in backup solution, Time Machine, is an excellent way to keep your entire system backed up. It continuously saves versions of your files, allowing you to restore your Mac to a previous state if needed.
- Cloud Backups: Services like iCloud, Dropbox, Google Drive, or specialized backup services offer off-site storage for your crucial documents and files, adding an extra layer of security.
Having a current backup provides peace of mind. If, by some remote chance, you delete something critical or encounter an issue that requires a complete system reinstallation, you’ll be able to recover your data effortlessly. This practice is fundamental for digital security and data integrity.
When to Keep the Installer
There are specific situations where you might want to retain the macOS Monterey installer, despite its size:
- Multiple Macs: If you manage several Macs in a household or small business, having one copy of the installer can save time and internet bandwidth, especially if your internet connection is slow or capped. You can create a bootable USB installer and use it on multiple machines.
- Limited or Unreliable Internet Access: If you live in an area with inconsistent or very slow internet, re-downloading a 12GB+ file can be a significant hassle. Keeping a copy means you can reinstall or upgrade without relying on a fast connection.
- Creating a Bootable USB Installer: Many advanced users create bootable USB drives with the macOS installer. This is invaluable for troubleshooting, performing clean installations, or installing macOS on Macs that lack internet recovery capabilities. If you intend to create such a drive, you need the original
Install macOS Monterey.appfile. - Older Mac Models: For older Macs that might not easily access the latest macOS versions through the App Store, having a specific installer on hand can be crucial for future reinstallation.
If any of these scenarios apply to you, consider moving the installer to an external hard drive or a large USB flash drive after creating your bootable media. This frees up your internal storage while keeping the installer accessible.
Understanding macOS Recovery and Reinstallation
It’s important to remember that even if you delete the installer file, you still have multiple ways to reinstall macOS Monterey should the need arise:
- macOS Recovery: All modern Macs have a built-in recovery partition. You can access it by restarting your Mac and holding
Command (⌘) + R(for the current OS) orOption (⌥) + Command (⌘) + R(for the latest compatible OS) until you see the Apple logo. From macOS Recovery, you can erase your drive and reinstall macOS directly from Apple’s servers, requiring an internet connection. - Internet Recovery: If your internal recovery partition is damaged or unavailable, your Mac can automatically switch to Internet Recovery, downloading the necessary recovery tools and the macOS installer over the internet.
These built-in features provide a safety net, ensuring that deleting the local installer file does not leave you stranded without a way to restore your system. This resilience is a hallmark of Apple’s brand and ecosystem, providing users with robust solutions even when local files are removed for efficiency.
Beyond the Installer: Optimizing Mac Storage for Peak Performance
Deleting the macOS Monterey installer is a great start, but true storage optimization is an ongoing process that significantly impacts your Mac’s performance, longevity, and overall user experience. This goes hand-in-hand with boosting productivity and ensuring your digital security through responsible data management.
Identifying and Removing Other Space Hogs
Your Mac’s hard drive isn’t just filled with operating system files. Many other categories can quickly consume vast amounts of space.
- Large Files: Videos, high-resolution photos, uncompressed audio files, and large project files are major culprits. Regularly review your
Documents,Movies, andPicturesfolders. Use Finder’s “Size” filter to quickly identify the largest files. - Old Applications: Do you have applications you installed years ago and rarely use? Uninstall them properly (don’t just drag them to Trash, as they leave behind residual files). Third-party uninstallers or app cleaners (used cautiously) can help remove associated files.
- Downloads Folder: This folder is often a forgotten graveyard of downloaded installers, ZIP files, PDFs, and disk images. Make it a habit to clean it out regularly.
- Cache and Temporary Files: While macOS manages most of these, sometimes large caches can build up, especially from browsers or design applications. Cleaning these can occasionally free up space, though caution is advised as some caches are necessary for performance.
- Duplicate Files: Over time, you might accumulate multiple copies of the same file. Dedicated duplicate file finders can help identify and remove these.
By addressing these common space hogs, you not only free up gigabytes but also create a leaner, more responsive system, which is a direct benefit to your productivity.
Leveraging Cloud Storage Solutions
For many users, cloud storage has become an indispensable tool for managing files without consuming precious local disk space.
- iCloud Drive: Apple’s integrated cloud service allows you to store documents, photos, and other data in the cloud, syncing across all your Apple devices. The “Optimize Mac Storage” option for iCloud Drive and iCloud Photos can automatically store full-resolution versions of files and photos in iCloud, keeping smaller, optimized versions on your Mac when space is low. This is a seamless way to offload data while maintaining access.
- Third-Party Services: Dropbox, Google Drive, Microsoft OneDrive, and others offer similar functionality, often with generous free tiers and affordable paid plans. These services are excellent for collaboration, sharing, and ensuring your most important files are backed up off-site, adding a crucial layer of digital security.
- Cost-Benefit Analysis: While cloud storage comes with a subscription cost, consider it an investment. It can often be more cost-effective than repeatedly upgrading internal storage on new Macs, and it provides an unparalleled level of data redundancy and accessibility, critical for business finance and personal productivity.

The Role of Digital Security and Productivity in Storage Management
Efficient storage management isn’t just about speed; it’s intricately linked to digital security and productivity.
- Digital Security: A cluttered drive can sometimes hide malware or make it harder for antivirus software to scan effectively. Regularly cleaning out unnecessary files reduces the attack surface and helps maintain a healthier system. Obsolete applications or files can also contain vulnerabilities. Furthermore, ensuring you have enough space for crucial system updates is vital, as these often contain security patches.
- Productivity: A fast, responsive Mac with ample storage allows you to work uninterrupted. No more “disk full” warnings interrupting your creative flow or critical tasks. Quick access to files, smooth multitasking, and the ability to install powerful AI tools and productivity apps without hesitation all contribute to a highly productive environment. The time saved from not constantly managing storage can be repurposed for more valuable work or personal endeavors, illustrating a direct link to financial efficiency through improved time management.
By integrating these practices into your routine, you move beyond simply deleting a single installer file and embrace a holistic approach to Mac maintenance. This ensures your technology investment continues to serve you effectively, efficiently, and securely for years to come, reflecting a well-managed digital life and a smart approach to your personal finance and tech investments.
aViewFromTheCave is a participant in the Amazon Services LLC Associates Program, an affiliate advertising program designed to provide a means for sites to earn advertising fees by advertising and linking to Amazon.com. Amazon, the Amazon logo, AmazonSupply, and the AmazonSupply logo are trademarks of Amazon.com, Inc. or its affiliates. As an Amazon Associate we earn affiliate commissions from qualifying purchases.