
The Microsoft Surface Pro line has redefined the concept of a portable computing device. Blending the power of a laptop with the portability of a tablet, Surface Pros are versatile machines designed for both productivity and entertainment. However, like any operating system, Windows 10 might occasionally require a fresh installation. Whether you’re troubleshooting persistent issues, upgrading from an older version, or simply want a clean slate, installing Windows 10 from a USB drive is a common and effective method. This guide will walk you through the entire process, ensuring a smooth and successful installation on your Surface Pro.
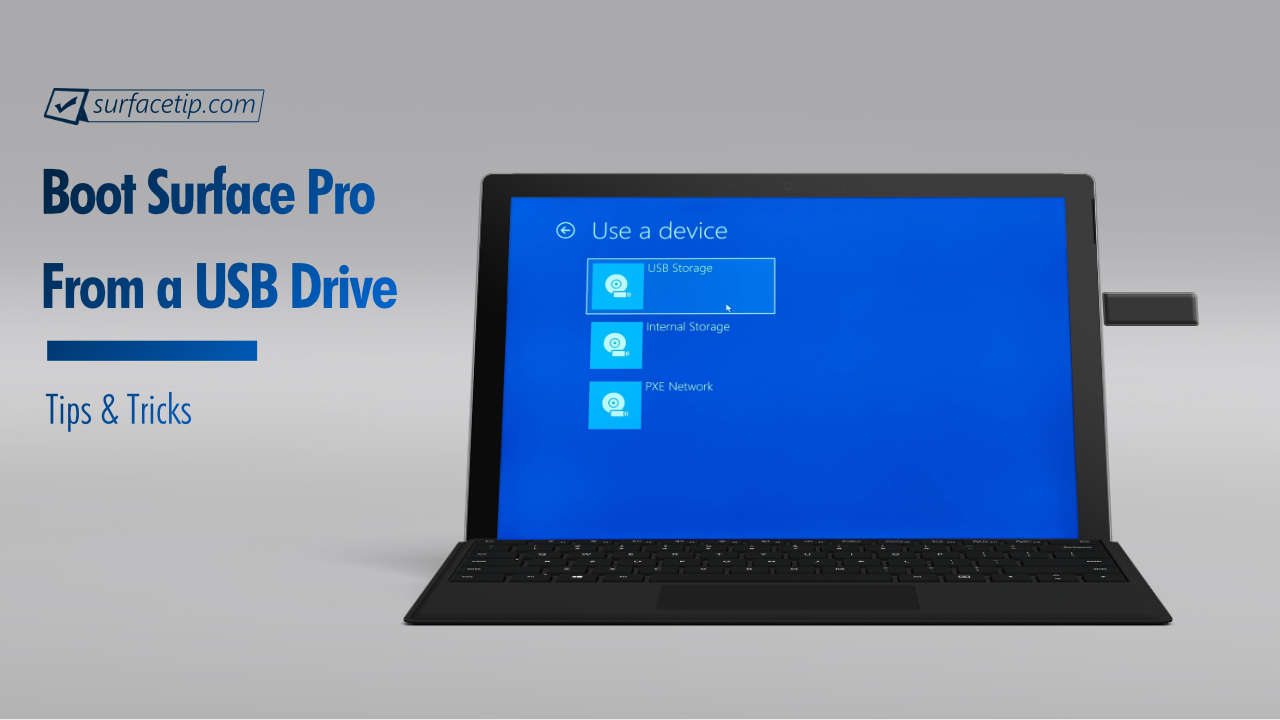
While the process is fundamentally the same for most Windows installations, the unique hardware and firmware of the Surface Pro necessitate a few specific considerations. This tutorial, drawing from the expertise found within our tech-focused website, will cover everything from preparing your USB drive to navigating the Surface Pro’s boot menu and completing the installation. We’ll also touch upon aspects relevant to the “Brand” and “Money” categories, considering how a clean install can impact your device’s performance and longevity, and by extension, your productivity and potential for earning.
Preparing Your Installation Media and Surface Pro
Before you can embark on the installation journey, meticulous preparation is key. This involves creating a bootable USB drive with the Windows 10 installation files and ensuring your Surface Pro is ready to receive the new operating system.
Creating a Bootable Windows 10 USB Drive
The cornerstone of this process is the bootable USB drive. You’ll need a USB flash drive with a minimum capacity of 8GB. While most modern USB drives will suffice, a faster USB 3.0 drive will significantly speed up the file transfer and installation process.
The most straightforward and recommended method for creating a bootable USB drive is by using Microsoft’s official Media Creation Tool. This free utility downloads the latest version of Windows 10 directly from Microsoft’s servers and prepares the USB drive for you.
Steps to Create a Bootable USB Drive:
- Download the Media Creation Tool: Navigate to the official Microsoft Windows 10 download page. Look for the “Download tool now” button and click it. Save the executable file to your computer.
- Run the Media Creation Tool: Once downloaded, double-click the
MediaCreationToolxxxx.exefile to launch it. Accept the license terms. - Select “Create installation media (USB flash drive, DVD, or ISO file) for another PC”: On the “What do you want to do?” screen, choose this option and click “Next.”
- Choose Language, Edition, and Architecture: The tool will typically suggest the recommended options for your current PC. However, since you’re installing on a Surface Pro, it’s crucial to ensure you select the correct options. Generally, you’ll want to select the language you prefer, “Windows 10” for the edition (this includes both Home and Pro versions, and you’ll select your specific license during installation), and “64-bit (x64)” for the architecture, as all Surface Pro models use 64-bit processors. If you’re unsure, you can uncheck “Use the recommended options for this PC” to manually select. Click “Next.”
- Choose “USB flash drive”: On the “Choose which media to use” screen, select “USB flash drive” and click “Next.”
- Select Your USB Drive: Connect your 8GB or larger USB drive to your computer. The Media Creation Tool will list available removable drives. Select the correct USB drive from the list. Crucially, ensure you have backed up any important data on this USB drive, as it will be completely erased during this process. Click “Next.”
- Wait for the Process to Complete: The tool will now download the Windows 10 files and format your USB drive, making it bootable. This process can take a considerable amount of time, depending on your internet speed and the speed of your USB drive. Once it’s finished, you’ll see a confirmation message. Click “Finish.”
Preparing Your Surface Pro for Installation
Before proceeding with the installation, it’s a good practice to prepare your Surface Pro:
- Backup Your Data: This is the most critical step. A clean installation of Windows 10 will erase everything on your Surface Pro’s internal drive. Ensure you have backed up all your important documents, photos, videos, and any other personal files to an external hard drive, cloud storage, or another reliable location.
- Charge Your Surface Pro: Ensure your Surface Pro has at least 50% battery charge or is connected to its power adapter throughout the installation process. A power interruption during installation can lead to serious system errors.
- Disconnect Unnecessary Peripherals: For the installation, it’s best to disconnect any external hard drives, printers, or other non-essential peripherals to avoid potential conflicts or confusion.
- Access Your Microsoft Account: Have your Microsoft account credentials ready. You’ll likely need them to sign in after Windows is installed to sync your settings and access services like the Microsoft Store.
- Windows Product Key (If Applicable): If you are installing a version of Windows 10 that requires a product key, make sure you have it readily available. In many cases, if your Surface Pro came with Windows 10 pre-installed, the license is digitally embedded, and Windows will activate automatically.
Booting Your Surface Pro from the USB Drive
The next hurdle is to instruct your Surface Pro to boot from the USB drive instead of its internal storage. This involves accessing the UEFI/BIOS settings, which is done differently on Surface devices compared to traditional PCs.
Accessing the Surface Pro Boot Menu
Surface Pro devices utilize a UEFI (Unified Extensible Firmware Interface) environment, which is a modern replacement for the traditional BIOS. Accessing the boot menu on a Surface Pro requires a specific key combination during startup.
Steps to Access the Surface Pro Boot Menu:
- Shut Down Your Surface Pro Completely: Ensure your Surface Pro is powered off, not just in sleep mode.
- Insert the Bootable USB Drive: Plug the bootable Windows 10 USB drive you created into one of the USB ports on your Surface Pro. If you’re using a Surface Pro with only USB-C ports, you might need a USB-C to USB-A adapter or a USB hub.
- Access the Boot Options:
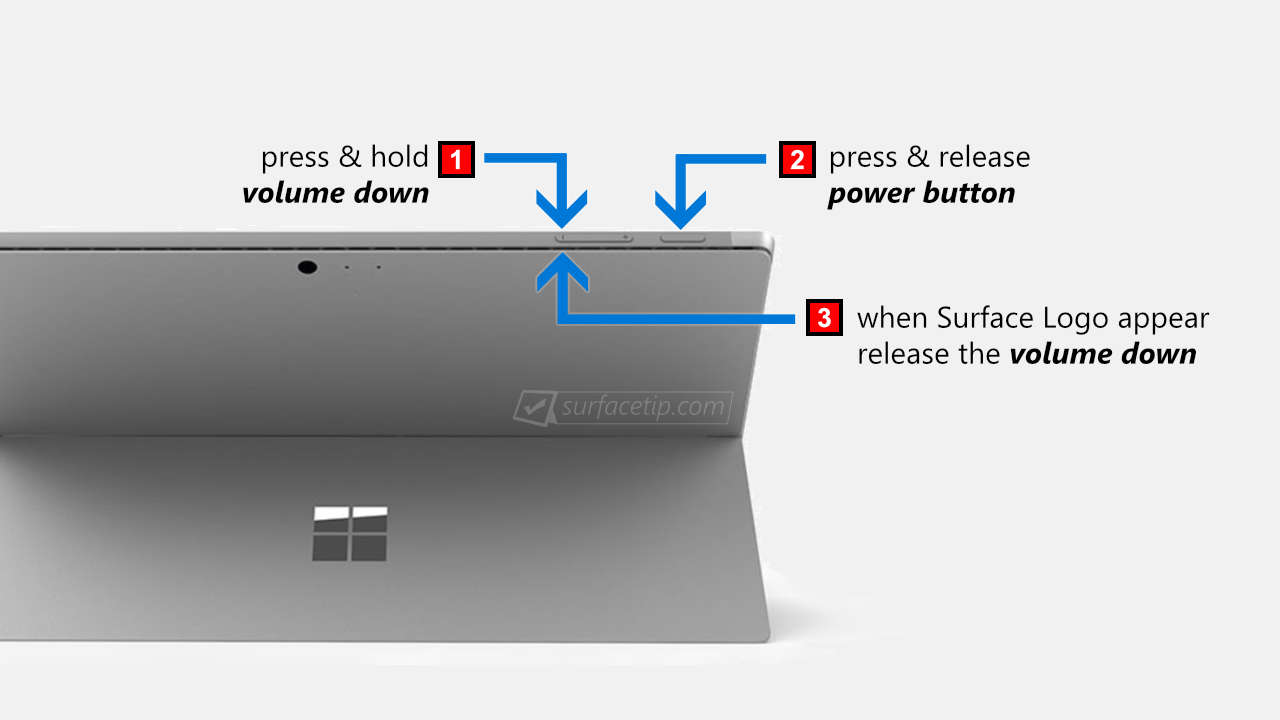
- If your Surface Pro has a physical Windows button: Press and hold the Volume Down button on your Surface Pro. While still holding Volume Down, press and briefly hold the Power button. Release the Power button as soon as the Surface logo appears. Continue holding the Volume Down button until you see the UEFI/BIOS screen or the boot device selection menu.
- If your Surface Pro does not have a physical Windows button (e.g., later models): Press and hold the Volume Up button on your Surface Pro. While still holding Volume Up, press and briefly hold the Power button. Release the Power button as soon as the Surface logo appears. Continue holding the Volume Up button until you see the UEFI/BIOS screen or the boot device selection menu.
- Select the USB Drive: Once you are in the boot menu or UEFI settings, you will see a list of bootable devices. Use the arrow keys (or touchscreen if available) to navigate and select your USB drive. It might be listed as “USB HDD,” “Removable Devices,” or the specific brand name of your USB drive.
- Confirm and Boot: Press Enter to select the USB drive. Your Surface Pro will then attempt to boot from it. You should see a message like “Press any key to boot from USB…” If you see this, press any key on your keyboard (or tap the screen) to proceed.
Potential Issues and Troubleshooting Booting
- USB Drive Not Recognized: If your USB drive isn’t showing up in the boot menu, try a different USB port, a different USB drive, or ensure the drive was created correctly using the Media Creation Tool. Sometimes, older USB drives can be problematic.
- “No Bootable Device Found”: This error indicates that the Surface Pro couldn’t find a valid operating system on any of the connected drives. Double-check that you’ve selected the correct USB drive in the boot menu and that the drive itself is properly created.
- Fast Startup Interference: In some rare cases, if you’re upgrading and not performing a clean install, Fast Startup in Windows can sometimes interfere with booting from external media. A full shutdown, as described in step 1, is usually sufficient to bypass this.
Installing Windows 10 on Your Surface Pro
With your Surface Pro configured to boot from the USB drive, you’re now ready to begin the actual Windows 10 installation process. This phase involves following on-screen prompts and making several key decisions.
The Windows 10 Setup Process
Once your Surface Pro successfully boots from the USB drive, you’ll be greeted by the Windows Setup wizard.
- Language, Time, and Keyboard: The first screen will prompt you to select your language, time and currency format, and keyboard or input method. Choose your preferred settings and click “Next.”
- Install Now: Click the prominent “Install now” button.
- Activate Windows: You’ll be asked to enter your Windows product key.
- If you have a product key: Enter it here.
- If your Surface Pro has a digital license: Click “I don’t have a product key.” Windows will activate automatically after installation if your hardware is recognized as previously having a genuine Windows 10 license.
- Select Operating System: If prompted, choose the edition of Windows 10 you want to install (e.g., Windows 10 Home, Windows 10 Pro). Ensure this matches your license. Click “Next.”
- Accept License Terms: Read the Microsoft Software License Terms and check the box to accept them. Click “Next.”
- Choose Installation Type: This is a crucial step. You will see two options:
- Upgrade: This option installs Windows 10 and keeps your files, settings, and applications. However, for troubleshooting or a truly clean experience, “Upgrade” is generally NOT recommended. It’s best suited for upgrading from an older version of Windows.
- Custom: Install Windows only (advanced): This is the option you want for a clean installation. It allows you to choose where to install Windows and delete or format partitions. Select “Custom.”
Disk Management and Partitioning
The “Custom” installation option brings you to the “Where do you want to install Windows?” screen. This is where you manage your Surface Pro’s internal storage.
- Identify Your Drive: You’ll see a list of drives and partitions. Your Surface Pro’s internal SSD will likely be listed as “Drive 0” or similar, with several partitions. Be extremely careful at this stage, as selecting the wrong partition and formatting it will result in data loss.
- Clean Installation Strategy: For a clean installation, the most thorough approach is to delete all existing partitions associated with the previous Windows installation. This ensures no residual files or settings can cause conflicts.
- Select each partition that is part of your current Windows installation (usually labeled as “Primary” or related to the system).
- Click the “Delete” option for each one. Confirm the deletion when prompted.
- Warning: Do NOT delete any partitions that are labeled as “Recovery” or “System” if you intend to use them for advanced recovery scenarios later, though for a complete fresh start, even these can sometimes be deleted and recreated. However, the simplest and most common method for a clean install is to delete all partitions on the target drive.
- Create a New Partition (Optional but Recommended): After deleting the old partitions, you’ll see “Unallocated Space.”
- Select the “Unallocated Space.”
- Click “New.”
- Windows will automatically suggest the maximum size for a new partition, which is typically what you want for your main Windows drive. Click “Apply.”
- Windows will automatically create additional system partitions required for Windows to function (e.g., System Reserved, Recovery).
- Select the Primary Partition: Once you have your new, unallocated space converted into a primary partition (it will likely be labeled “Primary” and be the largest one), select it.
- Click “Next”: Windows will now begin copying files and installing itself onto the selected partition.
The installation process will proceed, involving several restarts. Your Surface Pro may boot back into the USB drive a couple of times during this phase; if it does, simply let it continue. If you are prompted to “Press any key to boot from USB…”, just ignore it and let the installation continue from the hard drive.
Post-Installation Setup and Optimization
Congratulations, you’ve successfully installed Windows 10 on your Surface Pro! The journey isn’t quite over; there are a few crucial steps to take to get your device fully functional and optimized.
Initial Windows Setup and Updates
After the installation completes, your Surface Pro will boot into the initial setup experience for Windows 10.
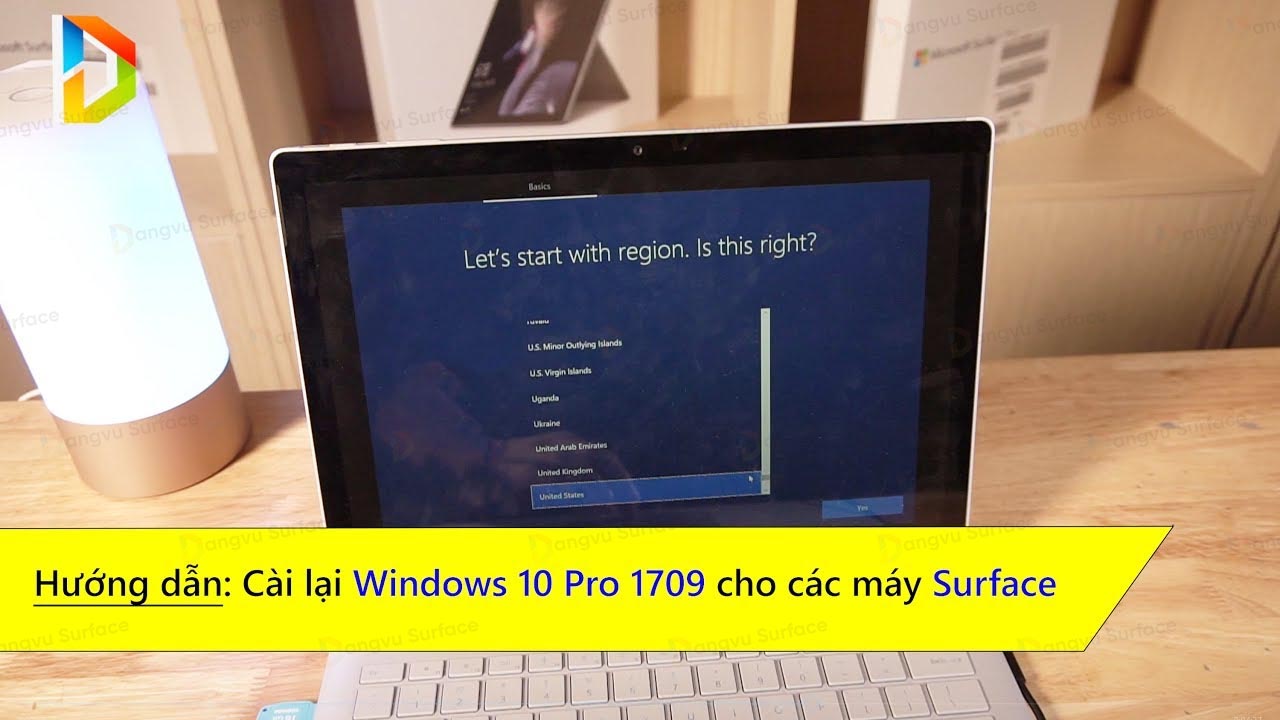
- Region and Keyboard Layout: Confirm your region and keyboard layout.
- Network Connection: Connect to your Wi-Fi network. This is essential for downloading updates and signing into your Microsoft account.
- Microsoft Account Sign-in: Sign in with your Microsoft account. This syncs your settings, preferences, and grants access to the Microsoft Store. You can also choose to create a local account if you prefer, but a Microsoft account is generally recommended for a seamless experience.
- Cortana: You’ll be asked if you want to set up Cortana, Microsoft’s virtual assistant.
- Privacy Settings: Review and configure your privacy settings for things like location, speech recognition, and diagnostics.
- Windows Update: Once you reach the desktop, the very first thing you should do is run Windows Update.
- Go to Settings > Update & Security > Windows Update.
- Click “Check for updates.”
- Install all available updates. This is crucial for security, stability, and ensuring all your Surface Pro’s hardware is recognized and functioning correctly. You may need to restart your device multiple times as updates are applied.
Installing Drivers and Essential Software
While Windows Update installs many necessary drivers, it’s always a good idea to ensure all Surface Pro-specific drivers are up-to-date.
- Surface Drivers and Firmware: Microsoft provides specific driver packs and firmware updates for Surface devices. You can often find these through Windows Update itself. However, you can also manually download them from the Microsoft Support website by searching for your specific Surface Pro model. These drivers are essential for optimal performance of your touchscreen, pen input, Wi-Fi, Bluetooth, and other hardware.
- Essential Applications: Begin installing your commonly used software:
- Web Browser: If you don’t use Microsoft Edge, download and install your preferred browser (Chrome, Firefox, etc.).
- Productivity Software: Install Microsoft Office, Adobe Creative Suite, or any other productivity applications you rely on.
- Security Software: Ensure your antivirus and antimalware software is installed and up-to-date.
- Other Apps: Install any other apps you use for work, communication, or entertainment.
Optimizing Your Surface Pro for Performance and Longevity
A clean installation is a fantastic starting point for optimizing your Surface Pro.
- Disk Cleanup: Once you have your essential software installed, run Disk Cleanup to remove temporary files and free up space. Search for “Disk Cleanup” in the Start menu.
- Defragmentation (for older HDDs, less relevant for SSDs): Surface Pros use SSDs, which don’t require traditional defragmentation. Windows automatically optimizes SSDs.
- Power Settings: Adjust your power plan settings in Settings > System > Power & sleep to balance performance and battery life according to your usage.
- Startup Programs: Review the programs that launch automatically at startup in Task Manager (Ctrl+Shift+Esc > Startup tab). Disable unnecessary programs to speed up boot times.
- Regular Backups: Establish a regular backup routine. This is a key component of responsible tech ownership and crucial for protecting your “Money” and “Brand” (your digital assets and reputation). Using cloud services or an external drive ensures that if disaster strikes, your data is safe.
By following these steps, you’ll have a freshly installed, fully updated, and optimized Windows 10 experience on your Surface Pro, ready for whatever tasks you throw at it. This technical process, while seemingly complex, directly contributes to the longevity and efficiency of your device, enhancing your personal brand and potential for financial gain by ensuring your primary tool is performing at its best.
aViewFromTheCave is a participant in the Amazon Services LLC Associates Program, an affiliate advertising program designed to provide a means for sites to earn advertising fees by advertising and linking to Amazon.com. Amazon, the Amazon logo, AmazonSupply, and the AmazonSupply logo are trademarks of Amazon.com, Inc. or its affiliates. As an Amazon Associate we earn affiliate commissions from qualifying purchases.