
Grand Theft Auto V (GTA 5) remains one of the most popular and enduring open-world games, captivating millions with its vast Los Santos landscape and endless possibilities. While the base game offers an incredible experience, the true magic for many lies in the vibrant and innovative modding community. Mods, short for modifications, allow players to alter and enhance almost every aspect of the game, from introducing new vehicles and weapons to entirely new gameplay mechanics and even graphical overhauls. Whether you’re looking to spice up your single-player adventures or create the ultimate personalized sandbox, understanding how to install mods is your gateway to a virtually limitless GTA 5 experience.
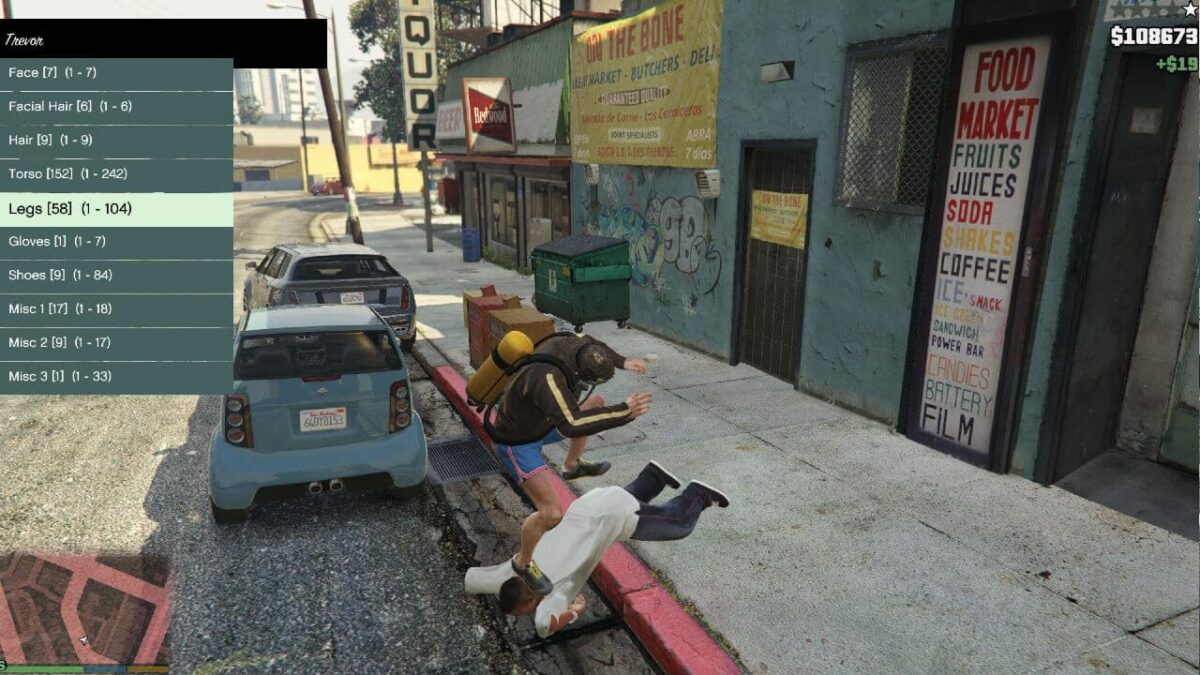
This comprehensive guide will walk you through the essential steps and considerations for successfully installing mods in GTA 5. We’ll cover everything from preparing your game and essential tools to the actual installation process and vital safety precautions. Given the inherent nature of modding, which involves altering game files, a methodical and careful approach is paramount to avoid issues and ensure a smooth, enjoyable experience.
Understanding the Modding Landscape and Essential Preparations
Before diving headfirst into the exciting world of GTA 5 modding, it’s crucial to understand the landscape and take some fundamental preparatory steps. Modding can be incredibly rewarding, but it also comes with inherent risks if not approached correctly.
Why Mod GTA 5? The Allure of Customization
The appeal of modding GTA 5 is multifaceted. For many, it’s about pushing the boundaries of what’s possible within the game. Imagine cruising through Los Santos in a hyper-realistic replica of a supercar not officially in the game, wielding custom-designed weapons with unique firing patterns, or even experiencing entirely new storylines and missions. The modding community constantly churns out a plethora of content, ensuring there’s always something fresh and exciting to discover.
- Visual Enhancements: Mods can dramatically improve the game’s graphics, offering higher-resolution textures, enhanced lighting, more realistic weather effects, and even complete visual overhauls that make Los Santos look more lifelike than ever before.
- Gameplay Tweaks: From tweaking vehicle physics to introducing advanced AI for pedestrians and police, mods can fundamentally change how the game plays, offering a more challenging, realistic, or simply more entertaining experience.
- New Content: This is perhaps the most significant draw. Mods can add new vehicles (cars, planes, helicopters, even trains), custom character models, new weapons, and entirely new scripts that introduce novel gameplay mechanics and features.
- Roleplaying and Creative Expression: For those involved in roleplaying servers or simply wanting to express their creativity, mods provide the tools to build unique environments, create custom scenarios, and develop highly personalized avatars.
Essential Precautions: Safeguarding Your Game and System
While the benefits are clear, it’s imperative to acknowledge the potential pitfalls. Modding involves modifying game files, and improper installation or the use of malicious mods can lead to several problems:
- Game Instability and Crashes: Incorrectly installed mods or conflicts between different mods can cause the game to crash, freeze, or exhibit unpredictable behavior.
- Corrupted Game Files: In rare cases, faulty mods or installation processes can corrupt your GTA 5 installation, requiring a full reinstallation.
- Online Ban: Crucially, never use mods in GTA Online. Rockstar Games actively monitors for any game file modifications in their online service, and using mods online will almost certainly result in a permanent ban from the game. This guide focuses solely on single-player modding.
- Malware and Viruses: Downloading mods from untrusted sources can expose your system to malware, viruses, or other malicious software.
To mitigate these risks, always adhere to the following best practices:
- Always Back Up Your Game Files: Before making any changes, create a backup of your GTA 5 installation directory. This will allow you to revert to a clean state if anything goes wrong.
- Download Mods from Reputable Sources: Stick to well-known and trusted modding websites like GTA5-Mods.com, Nexus Mods, and established modding forums. Always read user reviews and comments before downloading.
- Understand Installation Instructions: Every mod comes with its own set of installation instructions. Read them carefully and follow them to the letter.
- Install Mods One by One: If you’re installing multiple mods, do so one at a time. This makes it easier to identify which mod is causing an issue if problems arise.
- Keep Your Game Updated: Ensure your GTA 5 installation is up to date with the latest official patches. Mod developers usually release updates for their mods to maintain compatibility with newer game versions.
Setting Up Your Modding Environment: Essential Tools
To begin installing mods, you’ll need a few essential tools that facilitate the process. These tools act as intermediaries, allowing you to safely inject custom content into your game files without directly corrupting them.
1. Script Hook V: The Foundation of Scripted Mods
Script Hook V is arguably the most important tool for GTA 5 modding. It’s a library that allows custom scripts to be run in GTA 5. Many of the most popular and complex mods rely on Script Hook V to function.
How to Install Script Hook V:
- Download Script Hook V: Visit the official Script Hook V website (usually found by searching for “Script Hook V GTA 5”). Download the latest version.
- Extract the Files: You’ll find a ZIP archive. Extract its contents to a temporary folder.
- Locate Your GTA 5 Directory: Navigate to your GTA 5 installation folder. This is typically located in
C:Program Files (x86)SteamsteamappscommonGrand Theft Auto Vif you’re using Steam, or a similar path for other platforms. - Copy Essential Files: From the extracted Script Hook V folder, copy the
ScriptHookV.dllfile and theasi-loader.dllfile. - Paste into GTA 5 Directory: Paste both of these
.dllfiles directly into your main GTA 5 installation folder (the same folder that containsGTA5.exe). - Optional: NativeUI: The download also usually includes a
NativeUIfolder. If your mods require it (check the mod’s description), copy this folder into your GTA 5 directory as well.
Verification: Once installed, you can verify Script Hook V is working by launching GTA 5. If you press F4 (or a similar hotkey specified by the mod), a console window should appear, indicating Script Hook V is active.
2. OpenIV: The Powerful File Editor
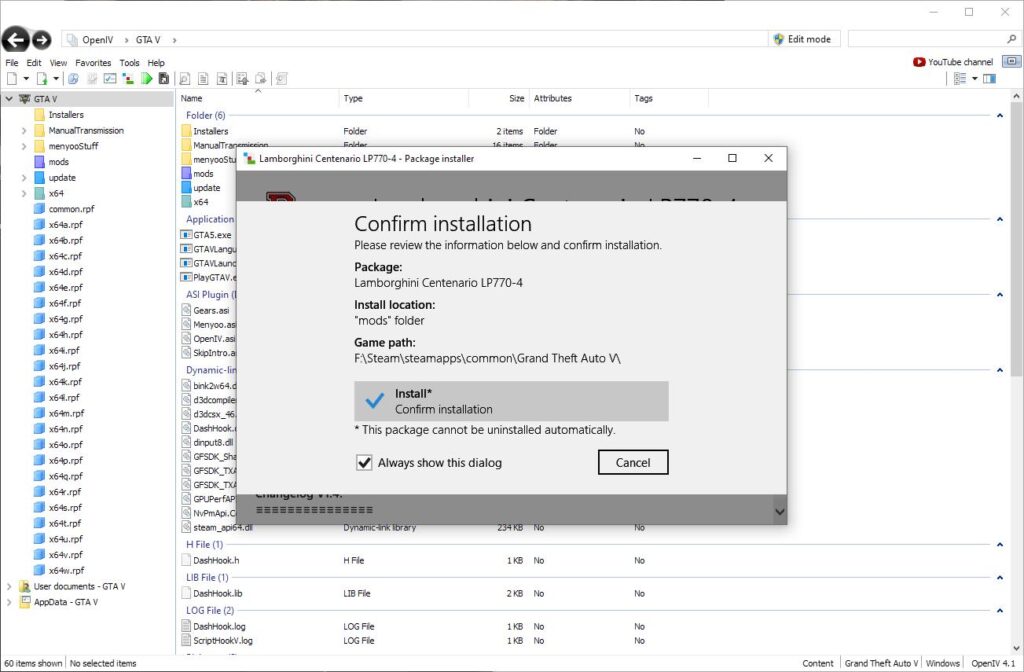
OpenIV is a modding tool for Grand Theft Auto that allows you to open, edit, and save game archive files. It’s essential for installing mods that replace or add game assets like vehicles, textures, and models.
How to Install OpenIV:
- Download OpenIV: Visit the official OpenIV website (search for “OpenIV”). Download the latest version.
- Run the Installer: Execute the downloaded installer and follow the on-screen instructions. Choose a suitable installation location for OpenIV itself.
- Launch OpenIV: Once installed, run OpenIV.
- Select GTA V: When prompted, select “Grand Theft Auto V” from the list of supported games.
- Specify Your GTA 5 Directory: OpenIV will ask for the path to your GTA 5 installation. Browse to and select your main GTA 5 folder.
- Enable Edit Mode: After OpenIV loads your game files, you’ll need to enable “Edit Mode.” Look for the “Edit” button in the toolbar and click it. This will allow you to make changes to the game’s archive files.
- Backup Important Files (OpenIV Specific): OpenIV allows you to create backups of the files you’re about to modify. When prompted to open an archive (like
common.rpf), it’s good practice to let OpenIV create a backup.
Important Note: When working with OpenIV, always ensure you’re modifying files within the update folder (e.g., updatex64dlcpacks) and avoid touching any files in the main game directory unless explicitly instructed by a mod.
Installing Specific Mod Types: Vehicles, Scripts, and Textures
The actual installation process varies depending on the type of mod you’re installing. Here, we’ll cover the most common types.
1. Installing Vehicle Mods (Replacing or Adding New Cars)
Vehicle mods are incredibly popular, allowing you to add real-world supercars, classic cars, or even fictional vehicles to your game. These often come in two main forms: replacements for existing vehicles or entirely new additions.
Using OpenIV for Vehicle Mods:
- Download the Vehicle Mod: Ensure you download the mod from a reputable source and read its instructions carefully. Vehicle mods often come as
.oivfiles (OpenIV Installers) or as individual.yft,.ytd, and.metafiles. - If it’s an
.oivfile:- Open OpenIV and ensure you’re in Edit Mode.
- Click “Tools” > “Package Installer.”
- Browse to the
.oivfile you downloaded and select it. - Follow the on-screen prompts. The installer will guide you through replacing or adding the vehicle files.
- If it’s individual files (
.yft,.ytd,.meta):- Open OpenIV and ensure you’re in Edit Mode.
- Navigate to the
updatex64dlcpacksfolder in OpenIV. - Creating a New DLC Folder (Recommended for Stability): It’s best practice to create a new folder for your custom vehicles rather than overwriting existing ones. Right-click in the
dlcpacksfolder and select “New folder.” Name it something descriptive (e.g.,mycustomcars). - Inside your new
mycustomcarsfolder, create another folder nameddlc.rpf. - Now, open the
dlc.rpffolder. You’ll typically need to add two files here:content.xmland adatafolder. The mod’s download will usually provide these. - Replacing Vehicles: If the mod replaces an existing vehicle (e.g., you want to replace the Infernus with a new supercar), you’ll need to find the corresponding files in OpenIV. Navigate to
updatex64dlcpacks[original_dlc_name]dlc.rpf[vehicle_name]. Replace the existing.yftand.ytdfiles with the ones from your mod. Backup the original files first! - Adding New Vehicles: For adding entirely new vehicles, you’ll typically replace placeholder vehicle files within the
dlc.rpfof your new DLC folder or an existing one. The mod’s instructions will specify which files to replace and how. You’ll also need to editvehicles.metaand other.metafiles to register the new vehicle in the game. This is where.oivinstallers are particularly helpful. - Adding the DLC to
dlclist.xml: After adding your custom DLC folder and its contents, you need to tell the game to load it. Navigate toupdateupdate.rpfcommondata. Right-click ondlclist.xmland select “Edit.” Add a new line for your custom DLC folder, like this:
xml

<Item>dlcpacks:/mycustomcars/</Item>
Save thedlclist.xmlfile.
- Launch GTA 5: Start the game. You might need to use a trainer mod (which requires Script Hook V) to spawn your new vehicle using its in-game name.
2. Installing Script Mods (New Features and Gameplay Mechanics)
Script mods, which require Script Hook V, introduce new gameplay features, tools, and functionalities. Examples include trainers, custom missions, and AI enhancements.
Installation Process for Script Mods:
- Download the Script Mod: Ensure you have Script Hook V installed and downloaded the script mod (usually a
.asifile, or sometimes a folder with multiple files). - Locate the Mod Files: Extract the mod’s contents. You’ll typically find a
.asifile. - Place Files in GTA 5 Directory: Copy the
.asifile(s) directly into your main GTA 5 installation folder, alongsideScriptHookV.dllandasi-loader.dll. - Check for Additional Files: Some script mods may also require a configuration file (e.g.,
.inior.json) or additional folders (likescriptsornatives) to be placed in the GTA 5 directory or a subfolder. Always refer to the mod’s readme file. - Launch GTA 5: Start the game. The script mod should now be active. Often, there’s a hotkey (like
F4,F5,F6, etc.) to bring up its menu or activate its features. The mod’s instructions will specify this.
3. Installing Texture and Model Replacements
Mods that change the appearance of existing assets, like character models, weapon textures, or environmental props, often involve replacing files within the game’s RPF archives.
Using OpenIV for Texture/Model Replacements:
- Download the Mod: Obtain the texture or model replacement mod. These usually come with instructions on which files to replace and where.
- Open OpenIV: Launch OpenIV and enable Edit Mode.
- Navigate to the Target Folder: Follow the mod’s instructions to locate the specific
.rpffile containing the assets you want to replace (e.g.,x64e.rpffor some environmental textures, or specific DLC RPFs for newer assets). - Replace Files: Open the relevant
.rpffile (double-click to open it). You will see a list of files within that archive. Drag and drop the new texture (.ytd) or model (.yft) files from your mod into OpenIV, replacing the existing ones. Always back up the original files first! - Save Changes: Close OpenIV. Changes are usually saved automatically as you replace files, but ensure you see prompts to save.
- Launch GTA 5: Start the game to see your modified textures or models in action.
Troubleshooting Common Modding Issues
Even with careful installation, you might encounter problems. Here are solutions to some common issues:
- Game Crashes on Startup:
- Cause: Conflicting mods, corrupted files, or incorrect installation of Script Hook V.
- Solution: Remove all recently installed mods and try launching the game. If it works, reintroduce mods one by one to identify the culprit. Ensure Script Hook V is correctly installed. Check if any mods require a specific version of Script Hook V.
- Mod Not Working:
- Cause: Incorrect file placement, missing dependencies, outdated game version, or conflicts with other mods.
- Solution: Double-check the installation instructions for the specific mod. Ensure Script Hook V (and any other required mods like NativeUI) is installed correctly. Verify your GTA 5 is updated. Try moving the mod files to the correct directory.
- Visual Glitches (T-posing, stretched textures):
- Cause: Incorrectly installed vehicle or model mods, file corruption, or conflicts between similar mods.
- Solution: Reinstall the problematic mod, ensuring all files are correctly placed and overwriting the correct originals. Use OpenIV to verify the integrity of modified RPF files.
- “Script Hook V is not working” Error:
- Cause: Script Hook V DLLs are not in the main GTA 5 directory, or the game has been updated, requiring a new version of Script Hook V.
- Solution: Redownload the latest version of Script Hook V and place its
.dllfiles into your GTA 5 installation folder. Ensure you’ve updated the game itself.
By following these steps and being patient, you can unlock a whole new dimension of gameplay in Grand Theft Auto V. Remember, the modding community is your greatest resource; always consult mod pages for detailed instructions and support. Happy modding!
aViewFromTheCave is a participant in the Amazon Services LLC Associates Program, an affiliate advertising program designed to provide a means for sites to earn advertising fees by advertising and linking to Amazon.com. Amazon, the Amazon logo, AmazonSupply, and the AmazonSupply logo are trademarks of Amazon.com, Inc. or its affiliates. As an Amazon Associate we earn affiliate commissions from qualifying purchases.