
In the digital age, where visual communication reigns supreme, fonts are more than just mere text; they are powerful tools that shape perception, convey emotion, and define identity. For Mac users, understanding how to effectively install and manage fonts is not just a technicality but a crucial skill that unlocks a world of creative possibilities. Whether you’re a designer crafting a new brand identity, a marketer building compelling content, a student enhancing a presentation, or simply someone who appreciates aesthetic typography, knowing your way around font installation on macOS is indispensable. This guide will walk you through the process, from understanding font types to advanced management and troubleshooting, empowering you to infuse your Mac experience with unparalleled typographic flair.
Why Fonts Matter: Beyond Mere Text
Before diving into the mechanics of installation, it’s essential to appreciate the profound impact fonts have across various domains, particularly in areas touching on brand and communication. They are silent ambassadors, speaking volumes even before a single word is read.
The Impact on Design and Branding
For businesses and individuals alike, a carefully chosen font is a cornerstone of a strong brand strategy. It contributes significantly to corporate identity and personal branding. Think about iconic brands – their logos and marketing materials are instantly recognizable, often thanks to their unique typography. A sophisticated serif font might evoke tradition and reliability, while a clean sans-serif could project modernity and accessibility. The right font can elevate a brand’s message, establishing trust and resonance with its audience. Conversely, a poorly chosen or inconsistent font can undermine credibility, appearing unprofessional or disjointed. Designers spend countless hours selecting typefaces that align with a brand’s ethos, making font installation a critical step in bringing these visions to life.
Enhancing Readability and User Experience
Beyond aesthetics, fonts play a practical role in how easily information is consumed. Readability is paramount for any digital content, from websites and apps to documents and presentations. The size, weight, spacing, and style of a font directly influence how comfortable and efficient the reading experience is. A well-chosen font reduces eye strain, improves comprehension, and guides the reader through the content effortlessly. This directly impacts user experience, whether it’s navigating a complex financial report (connecting to the ‘Money’ aspect of clarity in financial communication) or enjoying a blog post. By installing a diverse range of fonts, Mac users can tailor their documents and designs for optimal readability across various contexts and audiences.
The Creative Professional’s Toolkit
For professionals in design, marketing, content creation, and even software development, fonts are fundamental tools in their arsenal. The ability to access and utilize a wide array of typefaces directly influences productivity and the quality of output. A graphic designer might need specific fonts for client projects, while a video editor might seek expressive typefaces for titles. Understanding how to seamlessly integrate new fonts into macOS applications like Adobe Creative Suite, Microsoft Office, or Apple’s own Pages and Keynote is crucial for maintaining a competitive edge and delivering exceptional results. This empowers creativity, allowing for greater customization and expression in every project undertaken on a Mac.
Navigating the Font Landscape: Understanding Font Types
Before you start downloading fonts, it’s beneficial to understand the different file formats you’ll encounter. While macOS is highly compatible with most common font types, knowing their characteristics can help you make informed choices and troubleshoot potential issues.
TrueType Fonts (TTF): The Ubiquitous Standard
Developed by Apple in the late 1980s and later licensed to Microsoft, TrueType Fonts (TTF) became a widely adopted industry standard. They are known for their scalability and excellent display quality across various screen resolutions and print sizes. TTF files contain both the screen font data and the printer font data in a single file, making them straightforward to use. Most free fonts you’ll find online are available in TTF format due to its widespread compatibility and ease of use. They are generally reliable and work seamlessly on macOS.
OpenType Fonts (OTF): The Modern Powerhouse
OpenType Fonts (OTF) emerged as a collaborative effort between Adobe and Microsoft, building upon the foundations of TrueType. OTF fonts offer several advantages, particularly for professional designers. They support a much larger character set, allowing for thousands of glyphs, including ligatures, alternate characters, small caps, old-style figures, and other typographic subtleties. This expanded character set provides greater typographic control and sophistication, which is invaluable for intricate design work and multilingual projects. OTF fonts also offer cross-platform compatibility, performing identically on both Mac and Windows operating systems. Due to their advanced features, many premium and professionally designed fonts are offered in OTF format.
Other Formats: Web Fonts and Legacy Types
While TTF and OTF are the most common font types for desktop installation, you might encounter others. Web fonts (like WOFF, WOFF2, EOT, SVG) are specifically optimized for web browsers and are not typically installed on your system for general application use, although some tools might convert them. Additionally, older font formats like PostScript Type 1 fonts exist, but their support is gradually being phased out by modern operating systems and applications. For desktop use on a Mac, focusing on TTF and OTF will cover the vast majority of your needs.
Step-by-Step: Installing Fonts on Your Mac
Installing fonts on your Mac is a straightforward process, primarily handled by the built-in Font Book application. There are a couple of main methods, both equally effective.
Method 1: The Simple Double-Click
This is often the quickest and easiest way to install a single font.
- Locate Your Font File: After downloading a font, it will typically be in your “Downloads” folder or wherever you saved it. Font files usually have
.ttfor.otfextensions. Sometimes they come in a.ziparchive; if so, double-click the.zipfile to decompress it and reveal the font files. - Double-Click the Font File: Simply double-click on the
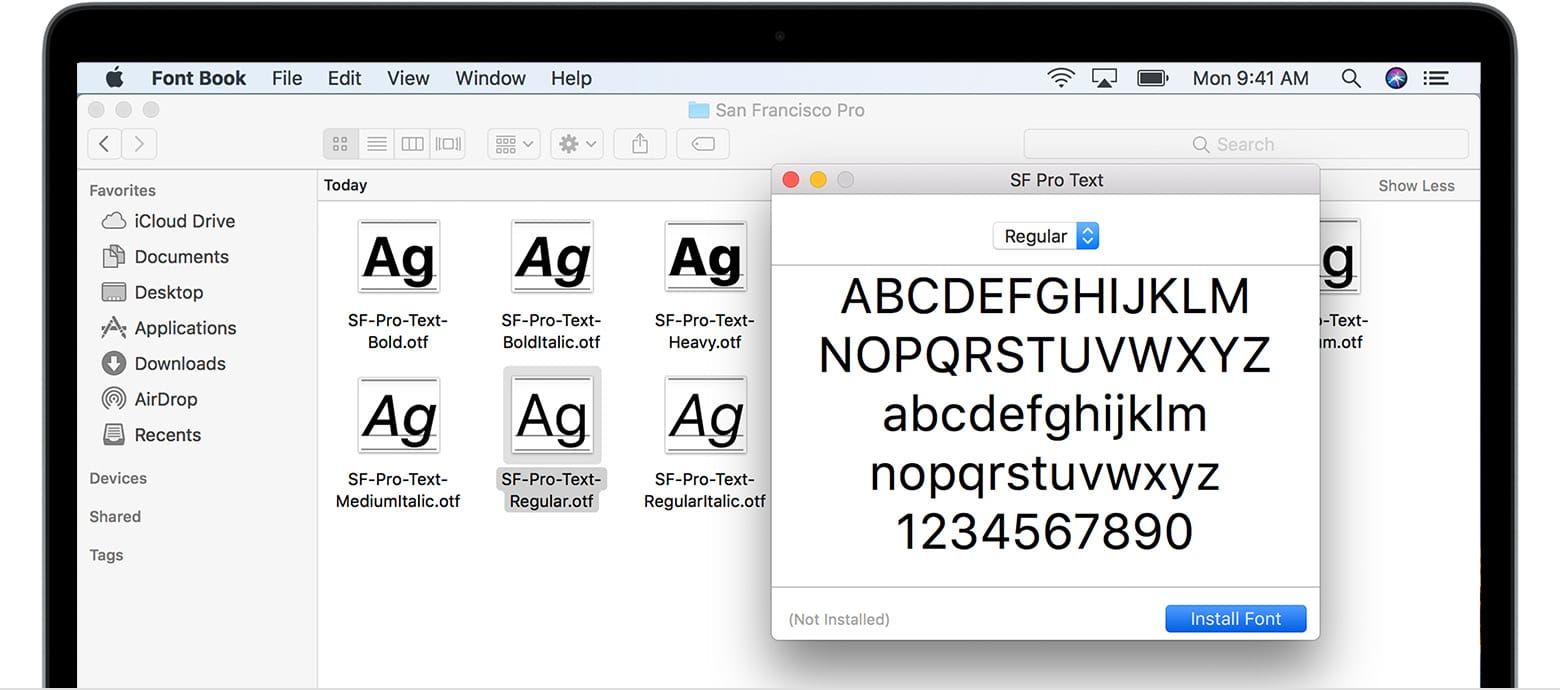
.ttfor.otffile. - Preview and Install: A “Font Preview” window will open, displaying the font in various sizes and styles. At the bottom right of this window, you’ll see an “Install Font” button. Click it.
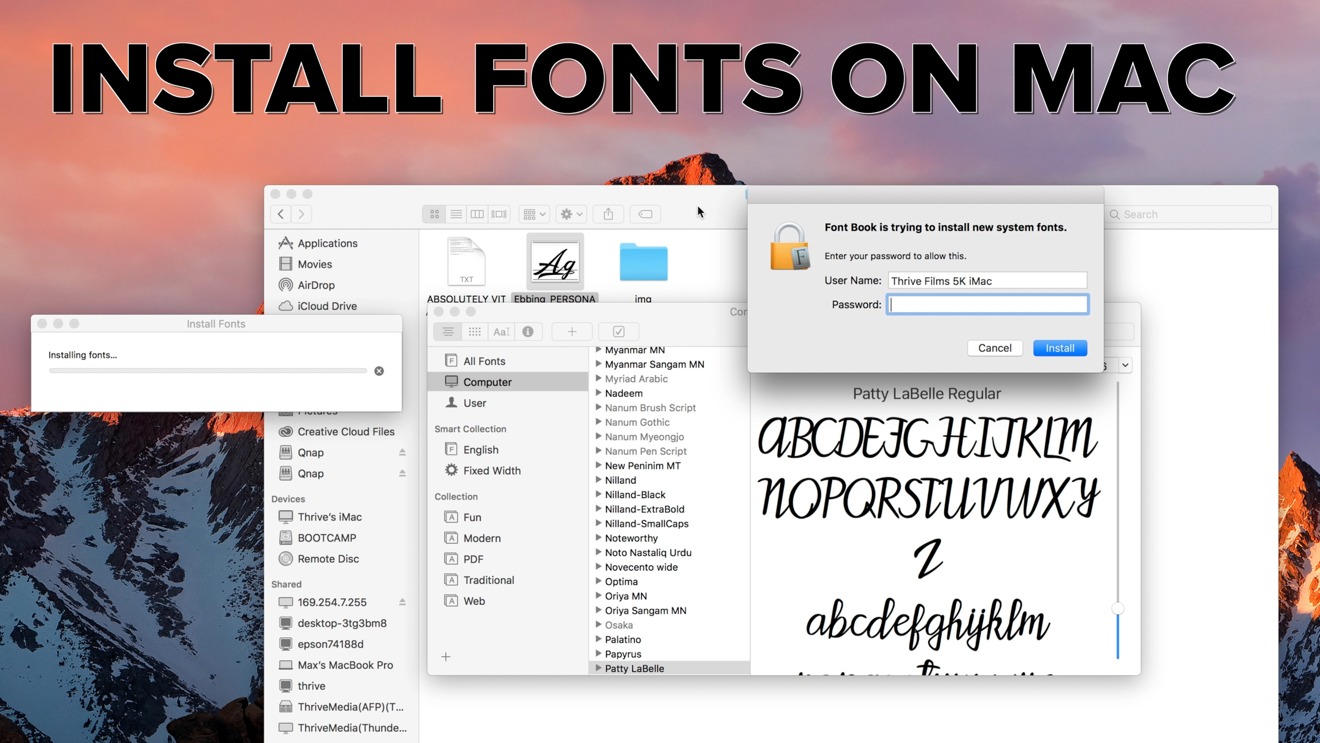
- Font Book Opens: Clicking “Install Font” will automatically open the Font Book application. It will quickly validate the font for any errors and then install it.
- Access Your New Font: Once installed, the font will be available for use in all your applications that support system fonts, such as Pages, Keynote, Microsoft Word, Adobe Photoshop, Illustrator, and many more.
Method 2: Using Font Book – Your Mac’s Native Font Manager
Font Book is macOS’s dedicated application for managing your font collection. It’s pre-installed on every Mac and offers more control than the double-click method, especially when installing multiple fonts or managing your library.
Adding Fonts via Font Book
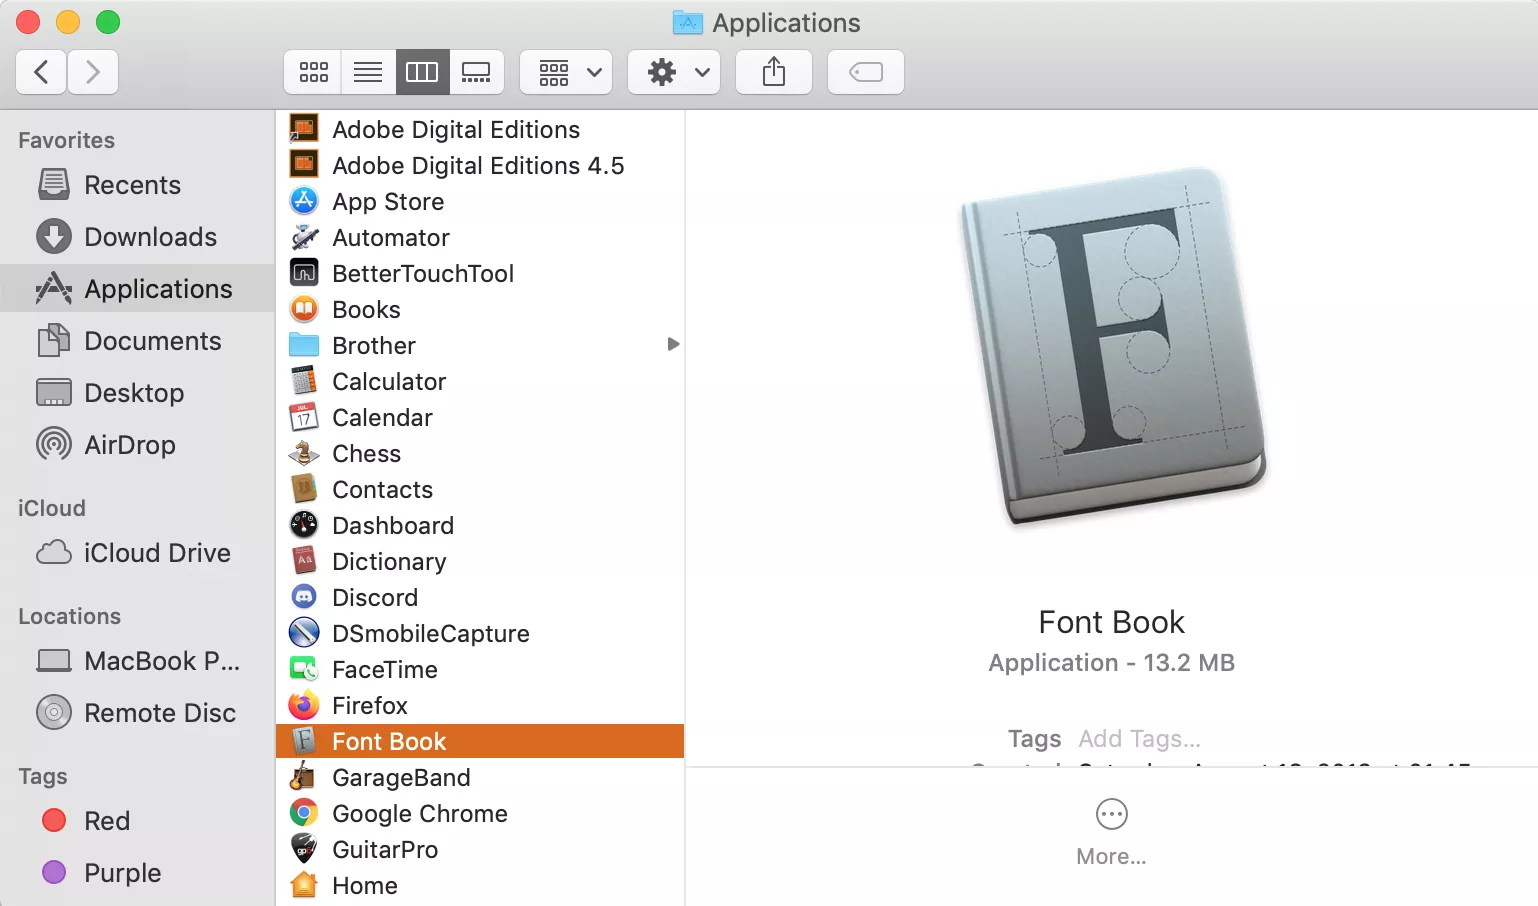
- Open Font Book: You can find Font Book in your “Applications” folder, or by searching for it using Spotlight (Cmd + Space and type “Font Book”).
- Add Fonts: Once Font Book is open, you have a few options to add fonts:
- Drag and Drop: The simplest way is to drag your
.ttfor.otffont files directly from Finder into the Font Book window. You can drop them onto the “All Fonts” section or a specific collection you’ve created. - Use the Add Button: Click the “Add” button (a
+icon) in the Font Book toolbar. This will open a standard Finder window, allowing you to navigate to and select the font files you wish to install. You can select multiple files by holding down the Command key while clicking. - File Menu: Go to
File > Add Fonts...from the menu bar and select your font files.
- Drag and Drop: The simplest way is to drag your
- Validate and Install: After adding, Font Book will perform a quick validation check. If it finds any issues (like corrupt files or duplicate fonts), it will prompt you. If all is well, the fonts will be added to your library and become available in your applications.
Validating Fonts
Font Book has a built-in font validation feature that checks for common issues such as corrupt data or critical errors that could cause problems with your system or applications.
- To manually validate fonts: Select the font(s) in Font Book, then go to
File > Validate Fonts. - Font Book will display a report. Green checkmarks indicate healthy fonts, yellow triangles suggest minor issues (often still usable), and red ‘X’ marks indicate severe problems that might prevent installation or cause instability. It’s generally best to avoid installing fonts with critical errors.
Installing Multiple Fonts Simultaneously
If you have a collection of fonts from a bundle or a project, installing them one by one can be tedious. Font Book makes this easy:
- Collect Your Fonts: Place all the font files (
.ttf,.otf) you want to install into a single folder on your desktop or in a temporary location. - Select All: Open the folder, select all the font files (Cmd + A or drag to select), and then drag them as a group into the Font Book window.
- Install: Font Book will prompt you to install them, validating each one in the batch. This is a significant productivity booster for designers and content creators who frequently work with new font sets.
Installing Third-Party Font Management Software
While Font Book is excellent for most users, creative professionals with vast font libraries (hundreds or thousands) might opt for third-party font management software like Adobe Fonts (integrated with Creative Cloud), FontBase, RightFont, or Universal Type Client. These tools offer advanced features such as cloud syncing, automatic activation/deactivation based on application needs, robust tagging, and conflict resolution, which can be invaluable for large-scale projects and teams. While beyond the scope of a basic installation guide, it’s worth noting these options exist for those who outgrow Font Book’s capabilities.
Sourcing Your Typography: Where to Find Quality Fonts
Once you know how to install fonts, the next logical question is where to find them. The world of typography offers a wealth of options, ranging from free resources to premium marketplaces, each with its own advantages and considerations, especially concerning licensing and cost (the ‘Money’ aspect).
Free Font Resources
There are numerous websites offering high-quality fonts for free, making them excellent starting points for personal projects, students, or those on a tight budget.
- Google Fonts: This is arguably the most popular and reliable source for free fonts. All fonts on Google Fonts are open-source and can be used for both personal and commercial projects without charge. They are well-designed, optimized for web use, and often include multiple weights and styles.
- DaFont and Font Squirrel: These platforms host a vast collection of fonts from various designers. While many are free for personal use, always check the licensing terms for commercial projects. Font Squirrel, in particular, curates fonts that are 100% free for commercial use.
- Freebie Sections of Design Marketplaces: Websites like Creative Market, MyFonts, or Fontfabric often offer free fonts or trials as part of their promotional efforts. These can be a great way to discover professional-grade typefaces.
When downloading free fonts, always pay close attention to the licensing information. “Free” doesn’t always mean “free for commercial use.” Some fonts are free for personal use only, while others require a donation or a specific license for business applications. Ignoring licensing can lead to legal issues down the line, affecting your brand and potentially costing you money.
Premium Font Marketplaces
For professional projects, unique brand identities, or specific typographic features (like extended character sets or specific language support), investing in premium fonts is often worthwhile. These fonts are typically designed by experienced type foundries and offer a higher level of craftsmanship, broader glyph support, and often more robust licensing terms.
- MyFonts: One of the largest and most well-known font marketplaces, offering millions of fonts from various foundries. You can find everything from classic designs to cutting-edge contemporary typefaces.
- Adobe Fonts (formerly Typekit): Included with Adobe Creative Cloud subscriptions, Adobe Fonts provides access to a vast library of high-quality fonts that can be synced directly to your Mac. This offers significant value for creative professionals already subscribed to Adobe’s ecosystem.
- Creative Market, Fontspring, and Independent Type Foundries: These platforms offer unique fonts, often from smaller design studios. Investing in these fonts directly supports type designers and can help differentiate your brand with less commonly used typefaces.
Purchasing premium fonts is an investment, similar to buying professional software or design assets. The cost can range from a few dollars for a single weight to hundreds or thousands for an entire font family with extensive licensing. However, the unique aesthetic, technical quality, and comprehensive legal licensing often justify the expenditure, especially when building a strong corporate identity or client-facing materials.
Understanding Licensing Agreements
This is a critical aspect often overlooked, but vital for protecting your brand and finances. Font licenses dictate how you can use a font (e.g., for personal use, commercial print, web use, app embedding, e-publications).
- Desktop License: The most common, allowing you to install the font on your computer for use in desktop applications.
- Webfont License: Required for embedding fonts on websites.
- App/ePub License: For use within mobile applications or electronic publications.
Always read the End-User License Agreement (EULA) carefully before using a font, especially for commercial purposes. Misusing a font without the proper license can lead to costly legal disputes and reputational damage for your brand. Treat font licenses as seriously as you would software licenses.
Managing Your Font Collection: Organization and Maintenance
As your font library grows, efficient management becomes essential for productivity and system performance. A cluttered font library can slow down applications, make it harder to find specific typefaces, and even cause system instability. Font Book provides robust tools to help you organize and maintain your fonts.
Activating and Deactivating Fonts
One of Font Book’s most useful features is the ability to activate and deactivate fonts.
- Deactivating Fonts: If you have many fonts but only use a few regularly, you can deactivate the ones you don’t need. This keeps them installed on your system but unavailable to applications, reducing system load and making your font menus less cluttered. To deactivate, select the font(s) in Font Book, then either click the checkbox next to its name (it will turn grey) or go to
Edit > Deactivate [font name]. - Activating Fonts: When you need a deactivated font again, simply select it in Font Book and click the checkbox to activate it, or go to
Edit > Activate [font name].
This feature is a game-changer for maintaining a lean and efficient font environment, boosting productivity by presenting only relevant options.
Deleting Unwanted Fonts
Sometimes you install a font and realize you’ll never use it, or it was part of a temporary project. Deleting unwanted fonts helps keep your system clean.
- Select Font(s): In Font Book, select the font(s) you wish to delete.
- Remove: Go to
File > Remove [font name]or press the Delete key. Font Book will ask for confirmation. - Confirm: Confirm the deletion. The font files will be moved to the Trash, which you can then empty.
Caution: Do not delete system fonts (those protected by macOS). Font Book will usually warn you if you attempt this, as deleting system fonts can cause serious problems with your operating system and applications.
Organizing with Collections
Font Book allows you to organize your fonts into custom collections, similar to playlists for music. This is incredibly useful for project-specific fonts, categorizing by style (e.g., “Serif for Headings,” “Handwritten Fonts”), or client work.
- Create a New Collection: In Font Book, click the
+button at the bottom of the “Collections” sidebar, or go toFile > New Collection. Give it a descriptive name. - Add Fonts to a Collection: Drag and drop fonts from your “All Fonts” list into your new collection. Fonts can belong to multiple collections without taking up extra disk space.
- Smart Collections: You can also create “Smart Collections” based on specific criteria like font type, style, or foundry. This provides dynamic organization, automatically updating as new fonts are added.
Best Practices for Font Management
- Be Selective: Don’t install every free font you find. A smaller, well-curated library is more effective than a massive, disorganized one.
- Backup Your Fonts: Keep a backup of your purchased and favorite free fonts in a separate, organized folder, perhaps on cloud storage or an external drive. This protects your investment and ensures you can reinstall them easily if needed.
- Regular Cleanup: Periodically review your font library in Font Book. Deactivate or delete fonts you no longer use.
- Understand Font Formats: Stick primarily to TTF and OTF for desktop use. Avoid installing ancient or obscure formats unless absolutely necessary and you understand the potential risks.
- Prioritize Performance: An excessively large active font library can sometimes impact the performance of certain applications, especially design software. Use activation/deactivation to keep only essential fonts active.
Troubleshooting Common Font Installation Issues
While font installation on a Mac is generally smooth, you might occasionally encounter problems. Knowing how to troubleshoot these issues can save you time and frustration, ensuring your creative workflow remains uninterrupted.
Fonts Not Appearing in Applications
This is the most common issue.
- Restart Applications: After installing new fonts, many applications (especially professional design software) need to be restarted to recognize them. Close and reopen the application where you expect to see the font.
- Check Font Book: Ensure the font is actually installed and active in Font Book. Look for a green checkmark next to its name. If it’s greyed out, it’s deactivated. If it’s missing, it wasn’t installed correctly.
- Clear Font Caches: Sometimes, macOS or individual applications can cache font information, preventing new fonts from appearing.
- For macOS: You can try restarting your Mac. For a more thorough clear, use the Terminal command:
sudo atsutil databases -remove(then restart your Mac). Be cautious when using Terminal commands. - For specific applications: Some applications have their own font cache clearing options (e.g., Adobe applications often have a “Clear Font Cache” utility or recommend clearing preferences).
- For macOS: You can try restarting your Mac. For a more thorough clear, use the Terminal command:
- Check Application Compatibility: Very rarely, an old application might not fully support certain newer font formats or features.
Corrupt or Damaged Fonts
If a font doesn’t display correctly, causes application crashes, or Font Book flags it during validation, it might be corrupt.
- Re-download the Font: The first step is to delete the problematic font (if installed) and re-download it from the original source. The file might have been corrupted during download.
- Validate in Font Book: Use Font Book’s
File > Validate Fontsfeature. If it shows a red ‘X’, it’s best not to install or to remove it. - Try a Different Source: If the font consistently shows as corrupt, try finding it from a different reputable source if possible.
- Check for Conflicts: Rarely, a font might conflict with another installed font, especially if they have similar internal names or are older versions.
Duplicate Font Management
Installing duplicate fonts can lead to confusion and unpredictable behavior in applications.
- Font Book’s Duplicate Resolver: Font Book automatically detects duplicates. When you add a font that’s already present, it will prompt you with options:
- Resolve Duplicates: This allows Font Book to disable or remove the duplicates, keeping only one active version. This is usually the best option.
- Install Anyway: Installs the duplicate, which is generally not recommended unless you have a specific reason (e.g., different versions of the same font family).
- Manual Resolution: You can manually review and disable/remove duplicates in Font Book by looking for fonts with a small warning icon.
System Performance and Font Overload
While modern Macs are powerful, having an excessive number of active fonts (especially if they are poorly designed or incompatible) can theoretically impact system and application performance.
- Deactivate Unused Fonts: As mentioned in the management section, actively using Font Book to deactivate fonts you don’t frequently use is crucial for maintaining optimal performance.
- Regular Cleanup: Periodically reviewing and deleting truly unwanted fonts helps reduce the overall size and complexity of your font library.
- Professional Font Managers: For those managing thousands of fonts, investing in a professional font manager (like FontBase or Universal Type Client) can significantly improve performance and organization by offering features like on-demand activation and intelligent caching.
Conclusion: Empowering Your Mac’s Typographic Potential
The ability to install and effectively manage fonts on your Mac is a foundational skill for anyone looking to personalize their digital environment or elevate their creative output. From the subtle nuances of readability to the bold statements of brand identity, fonts play an undeniable role in how we communicate and perceive information. By understanding different font types, utilizing Font Book’s powerful features, discerning reliable sources for new typefaces, and adhering to best practices for organization and troubleshooting, you unlock a vast creative potential.
Whether you’re a seasoned graphic designer investing in a unique premium typeface for a client’s corporate identity, a budding entrepreneur selecting the perfect font to represent your personal branding on a new website, or simply a Mac user who appreciates beautiful typography in their everyday documents, this guide provides the knowledge to navigate the world of fonts with confidence. Embrace the power of typography; install, manage, and create with purpose, transforming your Mac into an even more potent tool for expression and innovation.
aViewFromTheCave is a participant in the Amazon Services LLC Associates Program, an affiliate advertising program designed to provide a means for sites to earn advertising fees by advertising and linking to Amazon.com. Amazon, the Amazon logo, AmazonSupply, and the AmazonSupply logo are trademarks of Amazon.com, Inc. or its affiliates. As an Amazon Associate we earn affiliate commissions from qualifying purchases.