
In today’s fast-paced digital world, our vehicles are increasingly becoming extensions of our connected lives. Apple CarPlay stands at the forefront of this integration, transforming your car’s infotainment system into an intuitive, safe, and powerful extension of your iPhone. Whether you’re looking to upgrade an older vehicle or simply enhance your current driving experience, installing CarPlay can revolutionize how you interact with navigation, communication, and entertainment on the road. This comprehensive guide will walk you through everything you need to know, from understanding your options to executing a successful installation, ensuring you drive away with a modern, connected car.
The Allure of Apple CarPlay: Enhancing Your In-Car Experience
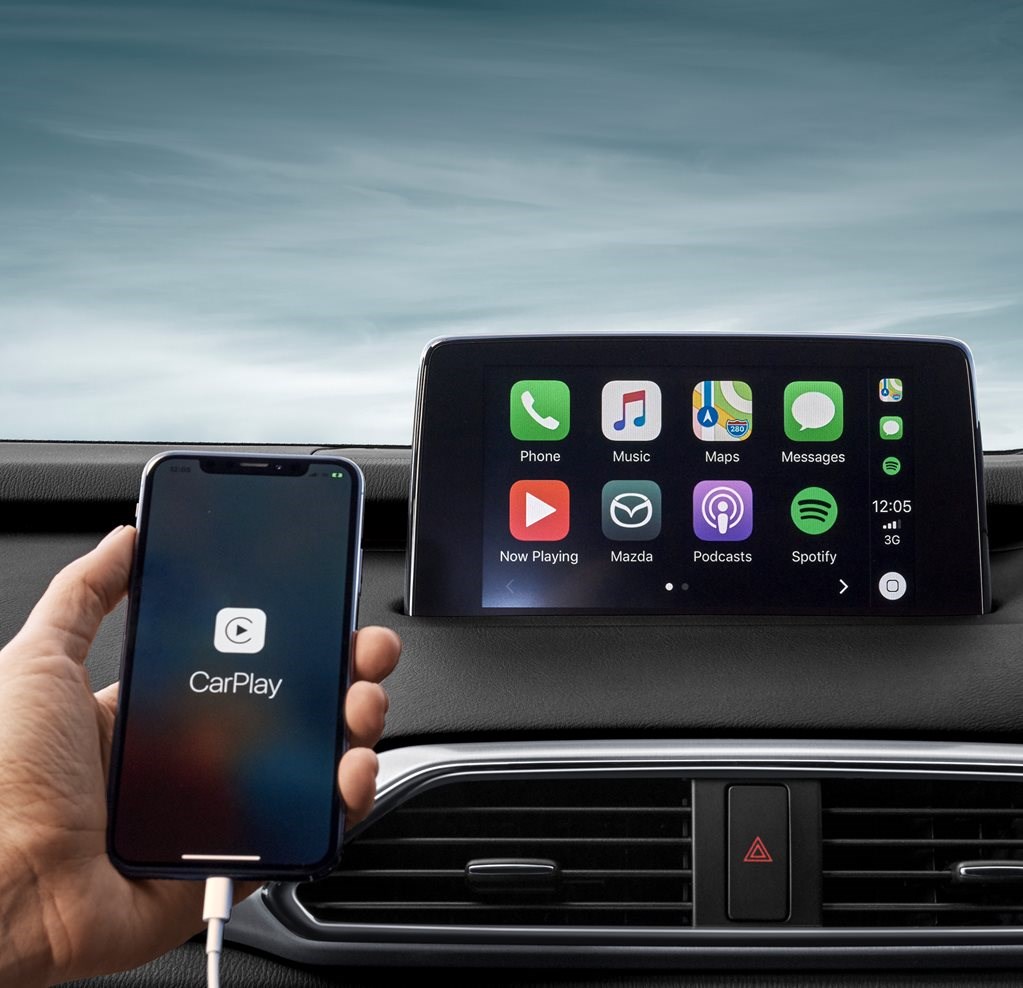
For many, the car journey is a significant part of the daily routine, and a seamless in-car experience is no longer a luxury but an expectation. Apple CarPlay addresses this need by bringing the familiar interface of your iPhone directly to your car’s dashboard display.
What is Apple CarPlay and Why Do You Need It?
Apple CarPlay is a smart, safer way to use your iPhone while you drive. It takes the things you want to do with your iPhone while driving and puts them right on your car’s built-in display. You can get turn-by-turn directions, make calls, send and receive messages, and listen to music, all in a way that allows you to stay focused on the road. Apple designs CarPlay with safety in mind. It uses your car’s native controls, whether they’re touchscreens, rotary dials, or Siri voice commands, to provide an intuitive experience that minimizes distraction.
The “why” is simple: convenience, safety, and access to modern technology. Traditional in-car systems often lag behind smartphone capabilities in terms of navigation accuracy, app integration, and user-friendliness. CarPlay bridges this gap, offering real-time traffic updates via Apple Maps, Google Maps, or Waze; hands-free communication through Siri; and access to your favorite audio apps like Spotify, Apple Music, and podcasts, all without fumbling with your phone. It’s a significant upgrade that brings your vehicle into the digital age, aligning with current technology trends and personal productivity tools that define our digital lives.
Key Benefits: Safety, Connectivity, and Entertainment
The advantages of integrating CarPlay into your vehicle are multifaceted:
- Enhanced Safety: The primary benefit is improved road safety. By mirroring essential iPhone functions onto your car’s display and enabling voice control via Siri, CarPlay drastically reduces the temptation to pick up your phone. This keeps your eyes on the road and hands on the wheel, directly contributing to safer driving habits. Its simplified interface presents only relevant information, preventing sensory overload.
- Seamless Connectivity: Stay connected without compromise. Make and receive calls, send and listen to messages, and manage your calendar directly from your car’s screen or with voice commands. This seamless integration ensures you never miss important communications, making your car an even more productive space, especially for those who spend a lot of time on the road for work or personal errands.
- Superior Navigation: Outdated in-car navigation systems are a common complaint. CarPlay allows you to use your preferred navigation app (Apple Maps, Google Maps, Waze, etc.) with up-to-the-minute traffic information, detailed route guidance, and live ETA updates. This means less stress, fewer wrong turns, and more efficient travel, saving you time and potentially fuel.
- Diverse Entertainment Options: Access your entire music library, podcasts, audiobooks, and streaming services. CarPlay supports a wide array of audio apps, ensuring your journeys are always accompanied by your preferred soundtrack or engaging content. The large display makes browsing playlists and selecting media incredibly easy.
- Future-Proofing Your Vehicle: As technology evolves, so do our expectations for in-car systems. Installing CarPlay can significantly increase the perceived value and modernity of your vehicle, potentially impacting its desirability on the resale market. It’s an investment in your car’s “brand” and user experience, demonstrating a commitment to advanced features that resonate with tech-savvy buyers.
Navigating Your Installation Options: Finding the Right CarPlay Solution
Before diving into the actual installation, it’s crucial to understand the various ways CarPlay can be integrated into your car. Your choice will depend on your vehicle’s existing setup, your budget, and your desired level of integration.
Upgrading with an Aftermarket Head Unit: Full System Replacement
The most common and often most comprehensive way to add CarPlay to an older vehicle is by replacing its existing head unit (car stereo) with a new aftermarket unit that supports CarPlay. This approach replaces the entire infotainment system.
- Wired vs. Wireless Considerations: Aftermarket head units come in both wired and wireless CarPlay versions.
- Wired CarPlay requires you to connect your iPhone via a USB cable. This offers a stable connection and simultaneously charges your phone. It’s typically more affordable.
- Wireless CarPlay connects via Wi-Fi and Bluetooth, allowing your phone to stay in your pocket or a charging pad. While more convenient, these units are generally more expensive and can drain your phone’s battery faster if not wirelessly charging. The choice often comes down to budget and personal preference for cable-free convenience.
- Single-DIN vs. Double-DIN Units: These terms refer to the standardized size of the opening in your car’s dashboard.
- Double-DIN units are roughly 7 inches wide by 4 inches tall and are the most common for modern touch screen CarPlay systems. They offer larger displays, often 6.2 inches to 10.1 inches, making them ideal for navigation and media.
- Single-DIN units are 7 inches wide by 2 inches tall. While smaller, many single-DIN units now feature a motorized flip-out screen that expands to a larger display when in use, offering CarPlay functionality even in cars with smaller dashboard openings.
Choosing the correct DIN size is critical for a seamless fit and aesthetic appeal.
Integrating a CarPlay Module or Adapter: Preserving Your Factory Aesthetics
For those who wish to retain their car’s original head unit and dashboard aesthetics, a CarPlay module or adapter offers a less invasive but equally effective solution. These devices typically “trick” your car’s existing display into showing the CarPlay interface.
- The Rise of Plug-and-Play Solutions: Many modern modules are designed for specific car makes and models, often connecting to existing wiring harnesses or even via USB. They essentially add CarPlay functionality without requiring a full head unit replacement. This is particularly appealing for luxury vehicles or those with highly integrated OEM systems where replacement is complex or undesirable.
- Compatibility and Functionality: These modules usually connect to the car’s existing display input (e.g., AUX, LVDS, or a dedicated video input). They often come with additional features like support for aftermarket reverse cameras, front cameras, and sometimes even Android Auto. However, compatibility is highly specific, and you must ensure the module is designed for your exact car model, year, and infotainment system version. Installation can range from relatively straightforward plug-and-play to requiring more intricate wiring behind the dashboard, often leveraging existing buttons for control.
Portable CarPlay Displays: The Non-Invasive Alternative
A third, increasingly popular option, particularly for older cars or those where permanent installation is not feasible or desired, is a portable CarPlay display.
These are standalone screens that mount on your dashboard or windshield, much like a portable GPS unit. They typically draw power from your car’s 12V (cigarette lighter) socket and connect to your iPhone wirelessly or via USB. Audio is usually routed through the unit’s built-in speaker, an AUX cable to your car stereo, or via an FM transmitter. While they don’t integrate seamlessly into the car’s dashboard, they offer the full CarPlay experience with minimal installation effort and maximum portability, often at a lower cost. This represents a pragmatic “tech solution” for instant connectivity without permanence.
Preparing for Installation: Essential Checks and Tools
Regardless of the CarPlay solution you choose, thorough preparation is key to a smooth and successful installation. Skipping these steps can lead to frustration, damage, or even electrical issues.
Verifying Compatibility and Gathering Components
Before you even think about unscrewing anything, confirm that your chosen CarPlay unit or module is compatible with your specific car model and year. This often involves checking online databases, manufacturer websites, or consulting with automotive electronics specialists. You’ll also need:
- The CarPlay Unit/Module: The star of the show.
- Wiring Harness Adapter (if replacing head unit): This crucial component connects your new head unit to your car’s factory wiring without cutting and splicing. Look for a plug-and-play adapter specific to your car’s make and model.
- Antenna Adapter (if replacing head unit): Your car’s radio antenna might have a different connector than your new head unit.
- Dash Kit/Bezel (if replacing head unit): This fills the gap between your new head unit and your car’s dashboard opening, ensuring a factory-like fit and finish.
- Steering Wheel Control Interface (if desired): Allows your car’s existing steering wheel buttons to control the new CarPlay unit.
- Reverse Camera (optional): If you’re adding one, ensure it’s compatible.
Tools of the Trade: What You’ll Need
Having the right tools makes all the difference:
- Trim Removal Tools: Essential plastic pry tools to safely remove dashboard panels and trim pieces without scratching or damaging them. Metal screwdrivers are usually too aggressive.
- Screwdriver Set: Phillips and flat-head screwdrivers, possibly Torx bits, to remove screws holding the factory head unit and trim.
- Wire Strippers/Crimpers (if custom wiring is needed): For making secure electrical connections, though a good wiring harness adapter should minimize this.
- Electrical Tape or Heat Shrink Tubing: For insulating connections.
- Zip Ties or Cable Ties: To manage and secure wiring, preventing rattles and ensuring a tidy installation.
- Multimeter (optional but recommended): For checking electrical connections and identifying wires (e.g., constant power, accessory power, ground).
- Work Light: To illuminate tight spaces behind the dashboard.
- Owner’s Manual/Wiring Diagram: Extremely helpful for identifying factory wiring.

Safety First: Disconnecting the Power
This is a non-negotiable step. Always disconnect your car’s negative battery terminal before starting any electrical work. This prevents short circuits, protects your car’s electrical system, and safeguards you from accidental shocks. Wait a few minutes after disconnecting to allow any residual power in capacitors to discharge.
Step-by-Step Installation Guides: Bringing CarPlay to Life
While the specifics will vary based on your car and chosen CarPlay system, here’s a general overview of the installation process for the most common scenarios.
Installing an Aftermarket Head Unit: A Detailed Walkthrough
This method involves completely replacing your car’s existing stereo system.
- Removing the Old System:
- Carefully use your trim removal tools to pry off any dashboard panels, vents, or trim pieces that conceal the screws holding the factory head unit. Work slowly and patiently to avoid damage.
- Once the trim is removed, unbolt or unscrew the factory head unit.
- Gently pull the unit out, disconnect all wiring harnesses (power, speaker, antenna, etc.), and set it aside.
- Wiring Explained: Power, Ground, Speakers, and Accessories:
- This is the most critical step. Connect your new head unit’s wiring harness to the aftermarket wiring harness adapter. Match colors (e.g., yellow to yellow for constant power, red to red for accessory power, black to black for ground).
- Connect the speaker wires (e.g., white/white-black for front left, gray/gray-black for front right, green/green-black for rear left, purple/purple-black for rear right).
- If using a steering wheel control interface, follow its specific instructions for connection. This often involves connecting a single data wire to a specific input on the head unit and powering the interface itself.
- Connect the antenna adapter.
- If installing a reverse camera, run its video cable from the camera’s location (usually near the license plate) to the back of the head unit and connect its power wire to a reverse light circuit.
- Carefully bundle and secure all wiring with zip ties to prevent rattling and ensure a neat installation.
- Mounting and Reassembly:
- Attach the new head unit to the dash kit/bezel.
- Connect the now-prepared wiring harness from your new head unit to your car’s factory harnesses.
- Gently slide the new head unit into the dashboard opening, ensuring no wires are pinched.
- Bolt or screw the unit into place.
- Reconnect the car’s battery and perform an initial test of the unit. Check power, audio, CarPlay functionality, steering wheel controls, and camera inputs.
- If everything works, carefully reattach all dashboard trim pieces, ensuring they snap back into place correctly.
Integrating a CarPlay Module or Adapter: A Simpler Path
This method retains your factory screen but adds CarPlay functionality.
- Accessing the Head Unit or Display Connections:
- Similar to replacing a head unit, you’ll need to remove dashboard trim and panels to gain access to the back of your factory head unit or display. The specific access points will vary significantly by vehicle.
- Module Placement and Wiring:
- Connect the CarPlay module’s wiring harness according to its specific instructions. This often involves “tapping into” or “passing through” existing wiring connections for the factory display or head unit. Some modules may require connecting to the car’s CAN-bus system.
- Connect any additional wires for microphones, USB ports, or cameras provided by the module.
- Find a secure, out-of-the-way location behind the dashboard for the module itself, ensuring it won’t rattle or interfere with other components.
- Testing and Finalizing:
- Before reassembling, reconnect the car’s battery and test the CarPlay module. Ensure the factory system still functions, and that you can switch to the CarPlay interface (usually by holding down a specific factory button) and operate all its functions.
- Once confirmed, disconnect the battery, tidy up all wiring, and reassemble the dashboard trim.
Post-Installation and Troubleshooting: Ensuring Seamless Operation
Once the physical installation is complete, a few steps remain to get CarPlay running perfectly.
Initial Setup and Configuration
- First Power-Up: After reconnecting your car’s battery, turn on the ignition. Your new head unit or module should power up.
- Pairing Your iPhone: For wireless CarPlay, you’ll need to pair your iPhone via Bluetooth first, then accept the prompt to enable CarPlay. For wired, simply connect your iPhone via USB.
- Audio Source: Ensure your head unit’s audio output is selected correctly. If using an aftermarket unit, it will be the primary source. For modules, you might need to select an AUX input on your factory system.
- Steering Wheel Controls: If you installed an interface, configure it through the head unit’s settings menu to ensure your steering wheel buttons map correctly to CarPlay functions (volume, track skip, call answer/end).
Common Issues and How to Resolve Them
Even with careful installation, minor glitches can occur.
- No Power/Unit Not Turning On: Double-check the main power connections (constant 12V and accessory 12V). Ensure the negative battery terminal is securely reconnected. Check relevant fuses.
- No Audio: Verify speaker wire connections. Ensure the correct audio source is selected on your head unit. Check volume levels on both the head unit and your iPhone.
- CarPlay Not Connecting:
- Wired: Try a different USB cable (Apple certified cables are best). Ensure the USB port on the head unit is active for CarPlay.
- Wireless: Check Bluetooth and Wi-Fi connections on your iPhone and head unit. Forget and re-pair the devices. Ensure your iPhone’s CarPlay settings allow connection to your new system.
- Steering Wheel Controls Not Working: Recheck the steering wheel control interface wiring and configuration settings within the head unit.
- Screen Glitches/Freezing: Perform a soft reset of the head unit (consult its manual). Ensure firmware is up to date.
- Poor Microphone Quality: Check the microphone’s placement; it should be as close to the driver as possible, away from vents or road noise. Ensure it’s securely plugged into the head unit.
Maximizing Your CarPlay Experience
Once everything is working, explore the customization options within your iPhone’s CarPlay settings (Settings > General > CarPlay). You can rearrange app icons, enable or disable apps, and manage Siri settings for optimal in-car use. Keep your iPhone’s iOS updated, as Apple frequently releases improvements and new features for CarPlay.
The Investment in Connectivity: Costs, Value, and Smart Choices
Upgrading to CarPlay isn’t just a tech enhancement; it’s also a financial decision with tangible benefits. Understanding the costs and potential returns can help you make an informed choice.
Understanding the Financial Aspect: DIY vs. Professional Installation
The cost of installing CarPlay varies significantly.
- Aftermarket Head Units: These can range from $200 for basic wired units to over $1000 for high-end wireless models with larger screens and advanced audio processing. Don’t forget the cost of necessary accessories like wiring harnesses, dash kits, and steering wheel control interfaces, which can add another $50-$200.
- CarPlay Modules/Adapters: These often fall into the $200-$600 range, depending on vehicle compatibility and features.
- Portable CarPlay Displays: These are typically the most budget-friendly, ranging from $100-$300.
- Professional Installation: If you’re not comfortable with DIY, a professional installation can add $100-$300 to the total cost. While this is an additional expense, it ensures correct wiring, optimal performance, and peace of mind, potentially saving you from costly mistakes or frustrating troubleshooting. For complex modules or higher-end vehicles, professional installation is often recommended to maintain factory warranties and prevent damage.
From a “Money” perspective, a DIY installation offers significant savings, positioning it as a smart side hustle or a way to stretch your personal finance budget. However, weigh the time investment and potential for error against the professional fee.
Choosing the Best CarPlay System for Your Budget and Needs
Consider these factors when making your purchase:
- Budget: Determine how much you’re willing to spend.
- Vehicle Integration: Do you want a factory-like look (aftermarket head unit with a dash kit or a module) or are you fine with a mounted screen (portable display)?
- Features: Do you need wireless CarPlay, a specific screen size, advanced audio options, or camera inputs?
- DIY Comfort Level: Are you confident in your ability to tackle the installation yourself, or would professional help be a better investment?
- Future-Proofing: While any CarPlay system modernizes your car, investing in a good quality unit or module will ensure longevity and better performance as iOS and CarPlay evolve.

Long-Term Value and Future-Proofing Your Ride
Installing CarPlay is more than just adding a gadget; it’s an enhancement that extends the useful life and perceived value of your vehicle. For older cars, it brings them up to modern standards of connectivity and safety, preventing them from feeling outdated in an era of rapid technological advancement. This investment in “Tech” also subtly impacts the “Brand” perception of your vehicle, making it more appealing to you and potential future buyers who prioritize integrated smart features. It’s a tangible upgrade that enhances daily usability and enjoyment, a worthwhile financial decision for any car owner looking to stay connected on the road.
aViewFromTheCave is a participant in the Amazon Services LLC Associates Program, an affiliate advertising program designed to provide a means for sites to earn advertising fees by advertising and linking to Amazon.com. Amazon, the Amazon logo, AmazonSupply, and the AmazonSupply logo are trademarks of Amazon.com, Inc. or its affiliates. As an Amazon Associate we earn affiliate commissions from qualifying purchases.