In the rapidly evolving digital landscape, where productivity, creativity, and efficiency are paramount, specialized tools play a crucial role in empowering users. Atezr, an innovative platform that has quickly garnered attention, represents a significant leap forward in [insert specific function, e.g., advanced digital content creation, high-performance data analytics, or AI-driven development environments]. Whether you’re a professional designer, a data scientist, a software developer, or an enthusiast keen on leveraging cutting-edge technology, integrating Atezr into your workflow on a laptop can unlock unprecedented capabilities and streamline complex tasks. This comprehensive guide will walk you through every step of installing Atezr, ensuring a smooth and successful setup so you can immediately harness its full potential.
Atezr isn’t just another application; it’s a testament to modern technological ingenuity, designed to enhance user experience through intuitive interfaces, robust features, and seamless integration with existing systems. Its brand promise centers around transforming challenging digital endeavors into accessible, efficient processes, ultimately delivering a superior return on investment for both time and resources. For individuals and businesses alike, embracing such advanced software solutions like Atezr is not merely an upgrade but a strategic move towards future-proofing one’s digital toolkit and staying competitive in a fast-paced environment. This tutorial will equip you with the knowledge to overcome any potential hurdles and confidently get Atezr up and running on your laptop.
Preparing Your Laptop for Atezr Installation
Before diving into the installation process, proper preparation of your laptop is crucial. This proactive approach minimizes potential issues, ensures compatibility, and lays the groundwork for Atezr to operate at its peak performance. Think of it as preparing a canvas before painting a masterpiece; the better the foundation, the more flawless the final result. Overlooking these preliminary steps can lead to frustrating errors, performance bottlenecks, or even data loss.
Understanding Atezr’s System Requirements
The first and most critical step is to verify that your laptop meets Atezr’s minimum and recommended system specifications. Atezr, being a powerful application that often leverages advanced computational resources (especially if it involves AI or complex rendering), demands specific hardware and software configurations. These typically include:
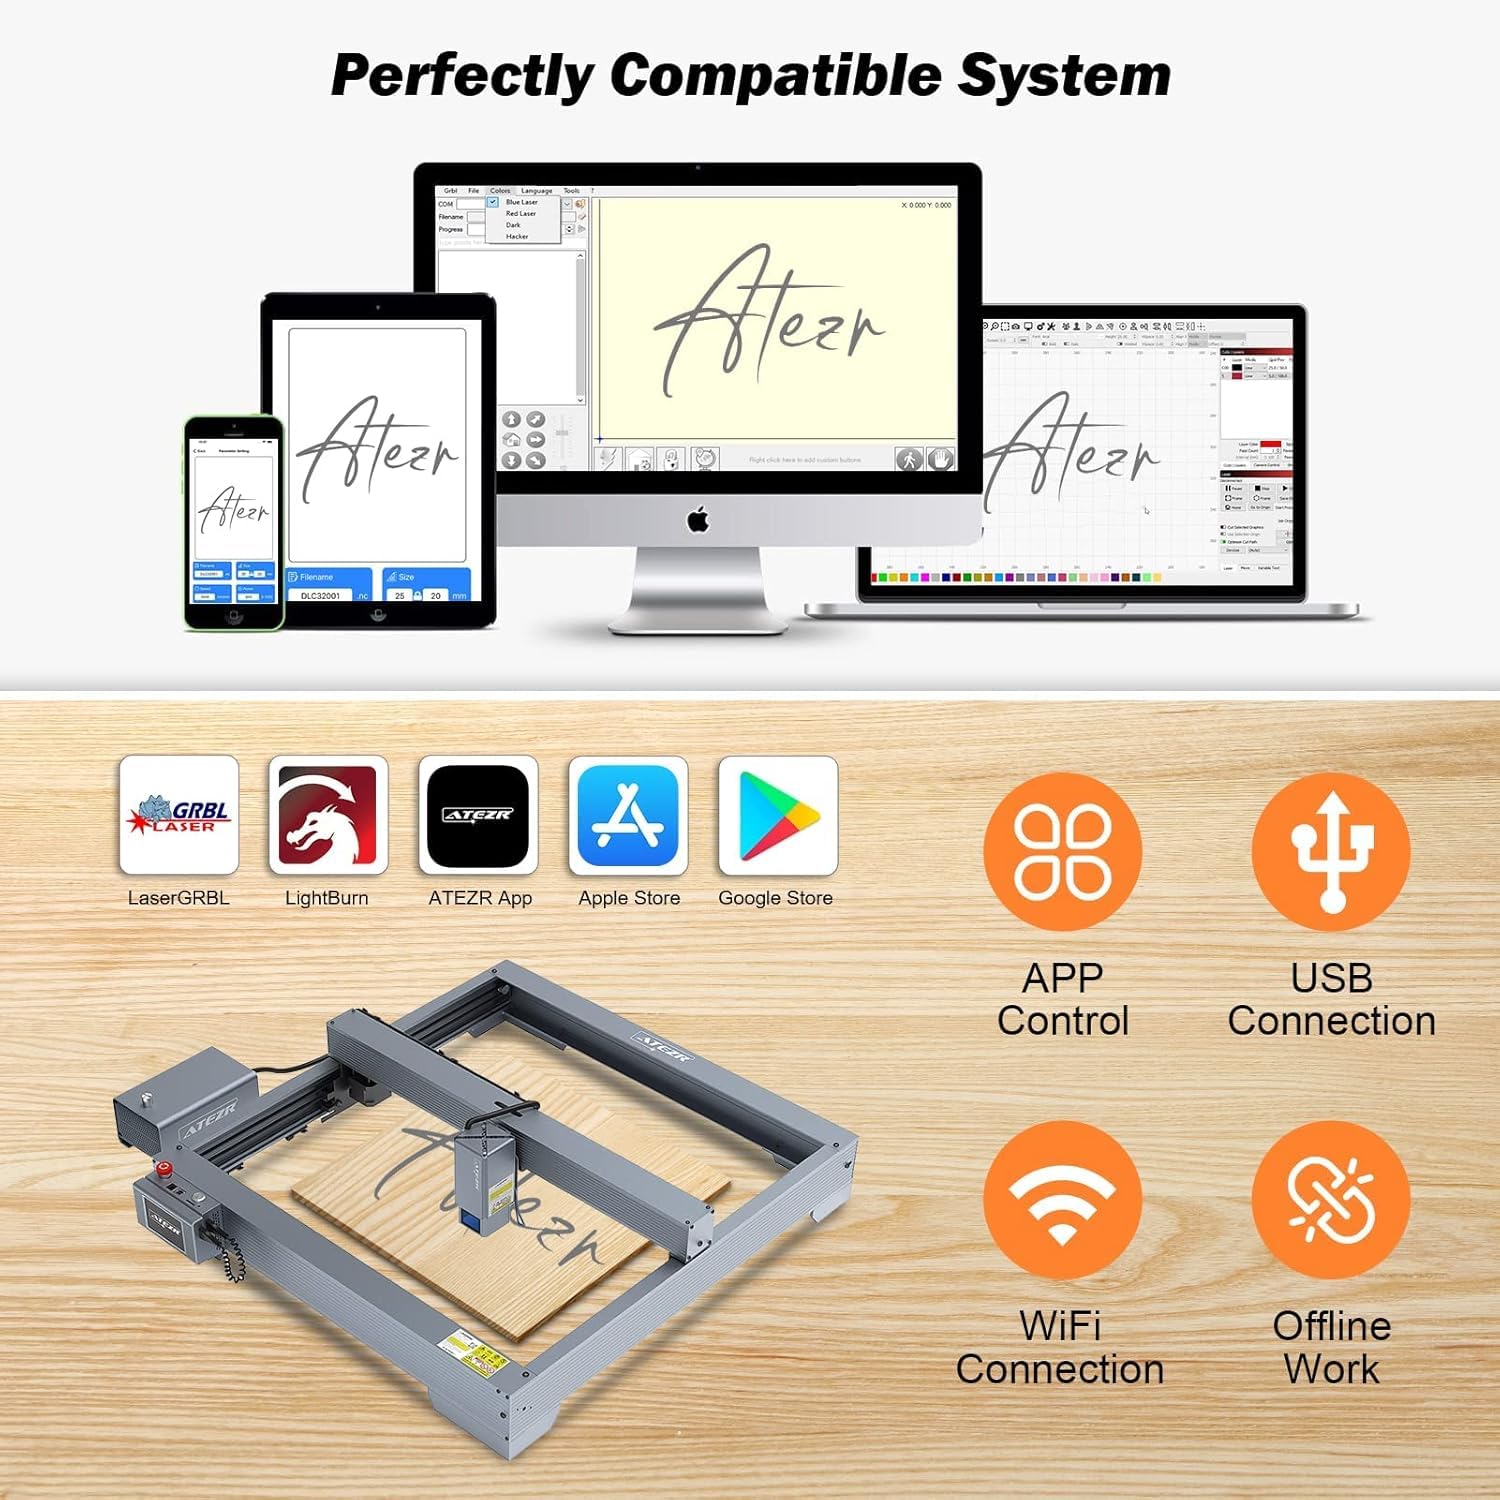
- Operating System (OS) Compatibility: Atezr usually supports major operating systems like Windows (Windows 10/11) and macOS (latest versions). Verify the specific versions supported. Running Atezr on an unsupported OS can lead to instability or complete failure.
- Processor (CPU): A multi-core processor (e.g., Intel Core i5/i7/i9 or AMD Ryzen 5/7/9) with a decent clock speed is often a prerequisite. For intensive tasks, a higher core count and better single-core performance will significantly improve Atezr’s responsiveness.
- Random Access Memory (RAM): Atezr often benefits immensely from ample RAM. While 8GB might be a minimum, 16GB or even 32GB (for professional users or heavy workloads) is frequently recommended to handle large datasets, complex projects, or multiple concurrent operations without slowdowns.
- Storage: SSD (Solid State Drive) is almost always recommended over traditional HDDs for faster boot times, application loading, and project saves. Ensure you have sufficient free disk space, not just for the initial installation (which might be several gigabytes) but also for temporary files, project data, and future updates. A general rule of thumb is to have at least 20-30GB of free space beyond the installation size.
- Graphics Processing Unit (GPU): If Atezr involves graphical rendering, video editing, 3D modeling, or AI acceleration, a dedicated GPU (e.g., NVIDIA GeForce RTX or AMD Radeon RX series) with adequate VRAM (e.g., 4GB or more) will be essential for smooth performance and utilizing hardware acceleration features. Integrated graphics might suffice for basic tasks but will likely struggle with demanding workloads.
- Internet Connection: A stable internet connection is often required for downloading the installer, activation, updates, cloud synchronization, and accessing online resources or community support.
Checking these specifications against your laptop’s configuration is a non-negotiable step. You can typically find your laptop’s specs in System Information on Windows or About This Mac on macOS. Ignoring these requirements can lead to a subpar user experience, frustration, and potential data corruption.
Essential Pre-Installation Checklist
Once you’ve confirmed compatibility, a few preparatory actions will further smooth the installation journey:
- Back Up Critical Data: This is paramount. While software installations are generally safe, unforeseen issues (like power outages during installation or rare software conflicts) can occur. Use an external drive, cloud service (like Google Drive, OneDrive, Dropbox), or a reliable backup utility to safeguard all your important documents, projects, and personal files. This ensures peace of mind and protection against data loss.
- Free Up Disk Space: Beyond meeting the storage requirements, having extra free space on your primary drive (where Atezr will be installed) can prevent installation failures and contribute to better overall system performance. Delete old files, uninstall unused applications, and empty your Recycle Bin/Trash.
- Update Existing Drivers and OS: Ensure your operating system is fully updated to the latest stable version. Similarly, update your graphics drivers, chipset drivers, and any other relevant hardware drivers. Outdated drivers are a common cause of software conflicts and performance issues, especially for applications like Atezr that rely heavily on underlying hardware capabilities.
- Temporarily Disable Antivirus/Firewall: Modern antivirus software is robust, but sometimes its real-time scanning can interfere with legitimate software installations, flagging certain components as suspicious or locking files. Temporarily disabling your antivirus or firewall during the installation process only can prevent such conflicts. Remember to re-enable them immediately after Atezr is successfully installed to maintain your digital security. Exercise caution and only do this when downloading from official, trusted sources.
- Ensure Stable Power Supply: For laptops, ensure your battery is fully charged or, even better, keep it plugged into a stable power source during the entire installation process. An unexpected power loss during a critical phase of installation can corrupt files and render the application or even your OS unstable.
- Close Unnecessary Applications: Before running the installer, close any open applications that are not essential. This frees up RAM and CPU resources, dedicating them to the installation process and minimizing the chance of conflicts or slowdowns.
Step-by-Step Installation of Atezr on Windows and macOS
The installation process for Atezr will vary slightly depending on your operating system. Below are detailed instructions for both Windows and macOS laptops, covering the typical steps involved.
Installation Process for Windows Laptops
Windows remains the dominant OS for many professional and personal laptops, and Atezr’s installation here is generally straightforward:
- Download the Installer: Navigate to the official Atezr website or your trusted software repository and download the Atezr installer file (typically an
.exefile). Ensure you’re downloading the correct version for your system (e.g., 64-bit). - Run as Administrator: Locate the downloaded
.exefile. Right-click on it and select “Run as administrator.” This grants the installer the necessary permissions to make changes to your system files and registry. You may be prompted by User Account Control (UAC) to confirm this action; click “Yes.” - Navigate the Setup Wizard:
- Welcome Screen: The Atezr Setup Wizard will usually begin with a welcome screen. Click “Next” to proceed.
- License Agreement: Carefully read the End-User License Agreement (EULA). You must accept these terms to continue the installation. Check the “I accept the terms in the License Agreement” box and click “Next.”
- Choose Installation Location: The wizard will suggest a default installation path (e.g.,
C:Program FilesAtezr). While this is generally fine, you can click “Browse” or “Change” to select a different location if you prefer, such as a drive with more free space. Click “Next.” - Select Components (Optional): Some installers offer custom installation options, allowing you to choose which components of Atezr to install (e.g., core application, optional plugins, language packs, desktop shortcuts). For most users, “Typical” or “Complete” installation is recommended. If you’re unsure, stick with the default. Click “Next.”
- Ready to Install: A summary of your chosen settings will be displayed. Review them and click “Install” to begin the file transfer and configuration process.
- Monitor Installation Progress: The installer will copy files, create registry entries, and set up Atezr. This process can take several minutes, depending on your system’s speed and the size of the application. Do not close the window or interrupt your system during this phase.
- Completion and Initial Launch: Once the installation is complete, a “Finish” or “Close” button will appear. The wizard might also offer an option to “Launch Atezr now.” Check this box if you want to open the application immediately. Click “Finish” to exit the installer. A desktop shortcut (if selected) and a Start Menu entry for Atezr should now be available.
Installation Process for macOS Laptops
Installing applications on macOS is often simplified, leveraging a drag-and-drop mechanism or a dedicated installer:
- Download the Installer: Download the Atezr installer, which is typically a
.dmg(Disk Image) file, from the official website. - Mount the DMG File: Locate the downloaded
.dmgfile in your Downloads folder and double-click it. This will “mount” the disk image, opening a new Finder window that usually contains the Atezr application icon and an “Applications” folder alias. - Install the Application:
- Drag and Drop: The most common method is to simply drag the Atezr application icon from the mounted disk image window directly into the “Applications” folder alias displayed in the same window. This copies the application to your main applications directory.
- Dedicated Installer (less common for apps, more for drivers): If the DMG contains an installer package (
.pkg), double-click it and follow the on-screen prompts, which are similar to Windows (license agreement, installation location, etc.).
- Eject the Disk Image: After copying the application, drag the Atezr disk image icon from your desktop or the Finder sidebar to the Trash can (which will change to an “Eject” icon) to safely unmount it. You can then delete the original
.dmgfile from your Downloads folder. - Handling Gatekeeper Warnings (First Launch): The first time you launch Atezr, macOS Gatekeeper might prompt a warning that the application was downloaded from the internet. Click “Open” to confirm you trust the source. For applications from unidentified developers, you might need to go to
System Settings(orSystem Preferences) >Privacy & Securityand click “Open Anyway” next to the Atezr app listing. - Permissions: Atezr might request various permissions (e.g., access to Documents, Photos, Microphone, Screen Recording, Accessibility) depending on its functionalities. Grant these permissions as required for full functionality. You can manage these later in
System Settings>Privacy & Security.
Handling Driver and Peripheral Setup (If Atezr is Hardware-Related)
If Atezr is the software companion to a physical gadget or peripheral (e.g., a high-performance drawing tablet, an external GPU enclosure, or a specialized input device), there are additional steps:
- Connect the Device: Only connect the Atezr peripheral to your laptop after the core software/drivers are installed, unless the instructions specifically state otherwise. Use the recommended port (e.g., USB-C, Thunderbolt).
- Driver Installation: The Atezr software package usually includes the necessary drivers. If not, you might need to download specific drivers from the Atezr support website. Install these drivers following their respective setup wizards.
- Firmware Updates: Many advanced peripherals require firmware updates for optimal performance, stability, and new features. Check within the Atezr application or a dedicated utility for firmware update options and follow the instructions carefully.
- Calibration/Configuration: For devices like drawing tablets, calibration might be necessary to ensure accurate input. The Atezr software suite will typically provide tools for this, allowing you to customize button functions, pressure sensitivity, display mapping, and other device-specific settings.
Post-Installation: Configuring Atezr for Optimal Performance
Installing Atezr is just the first step. To truly unlock its power and integrate it seamlessly into your workflow, some post-installation configuration and optimization are essential. These steps will ensure you’re maximizing your investment and productivity gains.
Initial Launch and Account Setup
Upon the first launch of Atezr, you’ll likely be guided through an initial setup wizard:
- Account Creation/Login: Many modern applications, especially those with cloud features or subscription models, require you to create an Atezr account or log in with an existing one. This might be necessary for licensing, cloud synchronization, accessing online resources, or community features.
- Activation: Depending on your purchase model (perpetual license, subscription), you might need to enter a product key or link your account to an active subscription to activate the software. Follow the on-screen instructions carefully.
- Initial Configuration: Atezr might prompt you to choose basic settings like interface language, theme, or privacy preferences. Take a moment to review these to personalize your initial experience.
Customizing Settings and Preferences
Atezr is designed to be highly customizable. Delving into its preferences will allow you to tailor the software to your specific needs and optimize your workflow:
- Interface Customization: Adjust themes, color schemes, font sizes, and panel layouts to create a comfortable visual environment.
- Performance Settings: Explore options related to memory usage, cache sizes, GPU acceleration, and background processing. Allocating more resources to Atezr can significantly improve its speed for demanding tasks.
- Shortcuts and Hotkeys: Learning and customizing keyboard shortcuts can drastically speed up your work. Atezr likely offers extensive options to map functions to your preferred key combinations.
- Integration with Other Tools: Check if Atezr offers plugins or direct integration with other applications you use (e.g., cloud storage, design software, development tools). This can create a more cohesive and efficient ecosystem.
- Privacy and Data Sync: Review privacy settings related to data collection, usage analytics, and cloud synchronization. Ensure these align with your preferences and organizational policies, especially for sensitive projects.
Updating Atezr and Its Components
Software is a living entity, constantly being refined and improved. Regular updates are critical for several reasons:
- New Features: Atezr developers frequently release updates that introduce new functionalities, tools, and capabilities, expanding what you can achieve with the platform.
- Bug Fixes: Updates often resolve existing bugs, glitches, and performance issues, leading to a more stable and reliable experience.
- Security Patches: In an era of increasing cyber threats, security updates are vital. They patch vulnerabilities that could be exploited, protecting your data and system.
- Compatibility: Updates ensure Atezr remains compatible with the latest operating system versions, hardware, and other software you use.
Configure Atezr to check for updates automatically or make a habit of periodically checking manually through the application’s menu (e.g., Help > Check for Updates).
Integrating Atezr into Your Workflow
The true value of Atezr lies in its ability to enhance your productivity and creativity. Here are a few tips to effectively integrate it into your daily tasks:
- Start Small: Begin with familiarizing yourself with core features before tackling complex projects.
- Utilize Tutorials and Documentation: Atezr’s official website, user forums, and in-app tutorials are invaluable resources for learning best practices and advanced techniques.
- Join the Community: Engaging with other Atezr users can provide insights, troubleshooting tips, and inspiration. Many platforms have active communities that offer peer support.
- Experiment and Explore: Don’t be afraid to try new features or different approaches. Atezr is a powerful tool, and mastering it comes through experimentation.
- Review Your Workflow: Periodically assess how Atezr is impacting your efficiency. Identify areas where you can optimize its use or combine it more effectively with other tools in your digital arsenal.
Troubleshooting Common Atezr Installation and Usage Issues
Even with careful preparation, sometimes issues arise. Knowing how to troubleshoot common problems can save you time and frustration, getting you back to leveraging Atezr quickly.
Installation Failures
- “Installation Failed” / “Error Code X”:
- Permission Issues: Ensure you ran the installer as an administrator (Windows) or granted necessary permissions (macOS).
- System Requirements: Double-check that your laptop meets all minimum system requirements.
- Antivirus Interference: Temporarily disable your antivirus/firewall during installation, then re-enable immediately after.
- Corrupted Installer: Redownload the Atezr installer from the official website. A corrupted download can lead to installation errors.
- Disk Space: Verify you have sufficient free disk space.
- Incomplete Installation: If Atezr doesn’t appear in your applications list or crashes on launch, try uninstalling any partial installation (via
Apps & featureson Windows or moving to Trash on macOS) and then restarting your laptop before attempting a clean reinstallation.
Performance Lag and Crashes
- System Resources: Atezr can be resource-intensive. Close unnecessary background applications. Monitor your CPU, RAM, and GPU usage (Task Manager on Windows, Activity Monitor on macOS) while Atezr is running. If resources are maxed out, consider upgrading hardware or optimizing Atezr’s performance settings.
- Outdated Drivers: Ensure your graphics drivers, chipset drivers, and other relevant hardware drivers are up to date. This is a very common cause of performance issues with demanding applications.
- Software Conflicts: Temporarily disable other third-party software that runs in the background to see if it resolves the issue. Some utilities or overlays can conflict.
- Corrupted Installation: If performance issues are persistent and severe, a clean reinstallation of Atezr might be necessary.
- Project Size/Complexity: If issues occur with specific projects, consider optimizing those projects (e.g., reducing file sizes, simplifying complex operations, using efficient assets).
Device Recognition Issues (for Hardware-Bound Atezr)
If Atezr controls a physical peripheral and the device isn’t recognized:
- Cable Connection: Ensure the cable connecting the peripheral to your laptop is securely plugged into both ends. Try a different port or even a different cable if possible.
- Power Supply: Verify the peripheral has adequate power if it’s externally powered.
- Driver Status: Check Device Manager on Windows or System Information > USB/Thunderbolt on macOS to see if the device is listed and if its drivers are installed correctly (no yellow exclamation marks). Reinstall the device drivers if necessary.
- Firmware: Ensure the device’s firmware is up to date.
- Restart: Sometimes a simple restart of both your laptop and the peripheral can resolve recognition issues.
Seeking Support
When self-troubleshooting doesn’t resolve the problem:
- Atezr Community Forums: Many software providers maintain active online communities where users share tips, solutions, and get help from experienced users. Search the forums for your specific issue.
- Official Support Channels: Contact Atezr’s official customer support. They often have dedicated teams to assist with installation and technical issues. Provide them with as much detail as possible, including error messages, steps taken, and your system specifications.
- Documentation and FAQs: Review Atezr’s official documentation, user manuals, and Frequently Asked Questions (FAQs) sections on their website. These resources often contain solutions to common problems.
By following these comprehensive steps, you are well on your way to a successful Atezr installation and an optimized user experience.
In conclusion, installing Atezr on your laptop is a gateway to enhancing your digital capabilities, whether for creative pursuits, complex analytics, or advanced development. By meticulously preparing your system, following the installation steps specific to your operating system, and dedicating time to post-installation configuration, you ensure that Atezr operates seamlessly and delivers maximum value. This careful approach not only prevents common technical hiccups but also secures your investment in a tool designed to elevate productivity and foster innovation. As you integrate Atezr into your daily tasks, remember to leverage its customization options, stay updated with the latest releases, and tap into its community resources. Embracing Atezr means embracing a future-forward approach to technology, positioning you at the forefront of efficiency and digital excellence.
aViewFromTheCave is a participant in the Amazon Services LLC Associates Program, an affiliate advertising program designed to provide a means for sites to earn advertising fees by advertising and linking to Amazon.com. Amazon, the Amazon logo, AmazonSupply, and the AmazonSupply logo are trademarks of Amazon.com, Inc. or its affiliates. As an Amazon Associate we earn affiliate commissions from qualifying purchases.