The landscape of modern software development and data science has shifted significantly toward streamlined, reproducible workflows. For developers and data scientists working within the macOS ecosystem, Anaconda has emerged as the gold-standard distribution for Python and R programming. By bundling essential libraries, a robust package manager, and a user-friendly graphical interface, Anaconda simplifies the often-complex task of environment management. Whether you are building machine learning models, performing statistical analysis, or developing complex web applications, knowing how to properly install and configure Anaconda on your Mac is a foundational skill.
In this guide, we will explore the technical nuances of the Anaconda distribution, provide a detailed walkthrough of the installation process for both Intel and Apple Silicon (M1/M2/M3) architectures, and discuss post-installation best practices to ensure your development environment remains optimized and scalable.
Understanding Anaconda and Its Role in the Modern Tech Ecosystem
Before diving into the installation steps, it is essential to understand what Anaconda represents in the broader technology stack. Anaconda is not merely a version of Python; it is a comprehensive distribution specifically tailored for scientific computing and data science.
What is Anaconda?
At its core, Anaconda is an open-source distribution that simplifies package management and deployment. It includes the Conda package manager, which allows users to install, run, and update complex data science libraries like NumPy, Pandas, Scikit-learn, and TensorFlow with minimal friction. Unlike standard Python installations, Anaconda handles “dependency hell”—a common scenario where different projects require conflicting versions of the same library—by utilizing isolated virtual environments.
Why Use Anaconda on macOS?
macOS is a favorite among developers due to its Unix-based architecture and powerful hardware. However, the system-level Python that comes pre-installed on Mac is often outdated and reserved for OS operations. Modifying the system Python can lead to catastrophic OS errors. Anaconda provides a sandboxed environment that exists independently of the system software. Furthermore, with the advent of Apple Silicon, Anaconda has optimized its distribution to leverage the ARM64 architecture, ensuring that data-intensive tasks run natively and efficiently on newer MacBook Pro and Air models.
Pre-Installation Considerations for Mac Users
A successful installation begins with choosing the right version of the software for your specific hardware. Apple’s transition from Intel processors to their proprietary M-series chips has changed the way developers approach software installation.
System Requirements and Compatibility
Before downloading the installer, identify your Mac’s processor. You can do this by clicking the Apple icon in the top-left corner and selecting “About This Mac.”
- Intel Macs: Require the 64-Bit Graphical Installer (x86).
- Apple Silicon (M1, M2, M3): Require the 64-Bit (M1) Graphical Installer (ARM64).
Using the ARM64 version on an M-series Mac is crucial for performance. While macOS can run Intel-based software through Rosetta 2 translation, native ARM64 support ensures that your Python scripts and machine learning training sessions utilize the full power of the Neural Engine and unified memory architecture.
Graphical Installer vs. Command-Line Installer
Anaconda offers two primary ways to install the distribution on macOS:
- Graphical Installer (.pkg): This is the most popular method for most users. It provides a standard wizard-driven interface, similar to installing any other Mac application.
- Command-Line Installer (.sh): This method is preferred by power users and system administrators. It allows for more granular control over the installation path and is ideal for those who are already comfortable using the Terminal.
For the purpose of this guide, we will focus on the Graphical Installer, as it provides the most seamless experience for the majority of users.
Step-by-Step Installation Guide
Following these steps will ensure that Anaconda is correctly integrated into your macOS environment without interfering with existing tools.
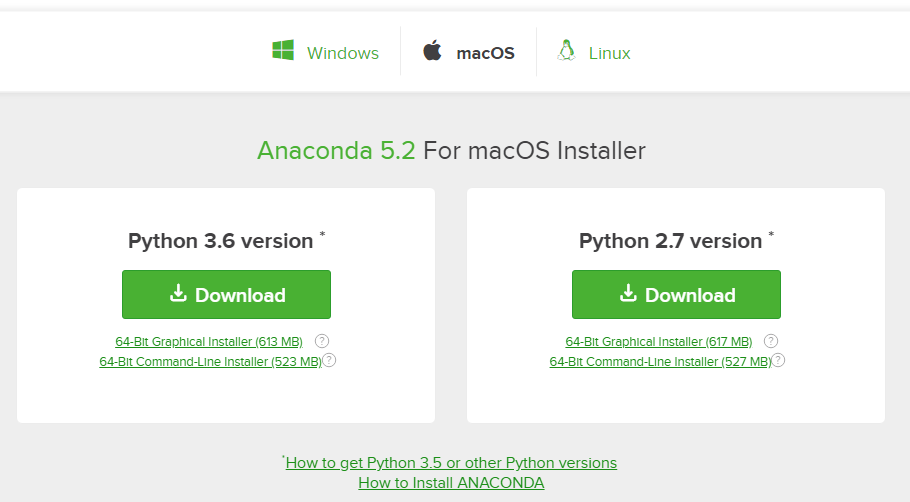
Downloading the Installer
Begin by navigating to the official Anaconda website. The site typically auto-detects your operating system. Ensure you select the “macOS” tab. Look for the “Download” button, but be careful to select the correct “Apple Silicon” or “Intel” version as determined in the previous section. The file will be a .pkg installer, usually several hundred megabytes in size due to the high volume of pre-loaded libraries.
Executing the Graphical Installation
Once the download is complete, locate the file in your “Downloads” folder and double-click it to begin.
- Introduction: Click “Continue” to proceed past the splash screen.
- Read Me: This section provides important release notes. Click “Continue.”
- License Agreement: Review the terms and conditions. Click “Continue” and then “Agree” to the license.
- Installation Type: You will be asked whether you want to install for “Just Me” or “All Users.” It is highly recommended to select “Install for me only” to avoid requiring administrative permissions for future package updates.
- Destination Select: Choose your primary hard drive. By default, Anaconda installs in your user home directory (e.g.,
/Users/yourname/anaconda3). - Installation: Click “Install.” You may be prompted for your Mac’s login password or Touch ID to authorize the process.
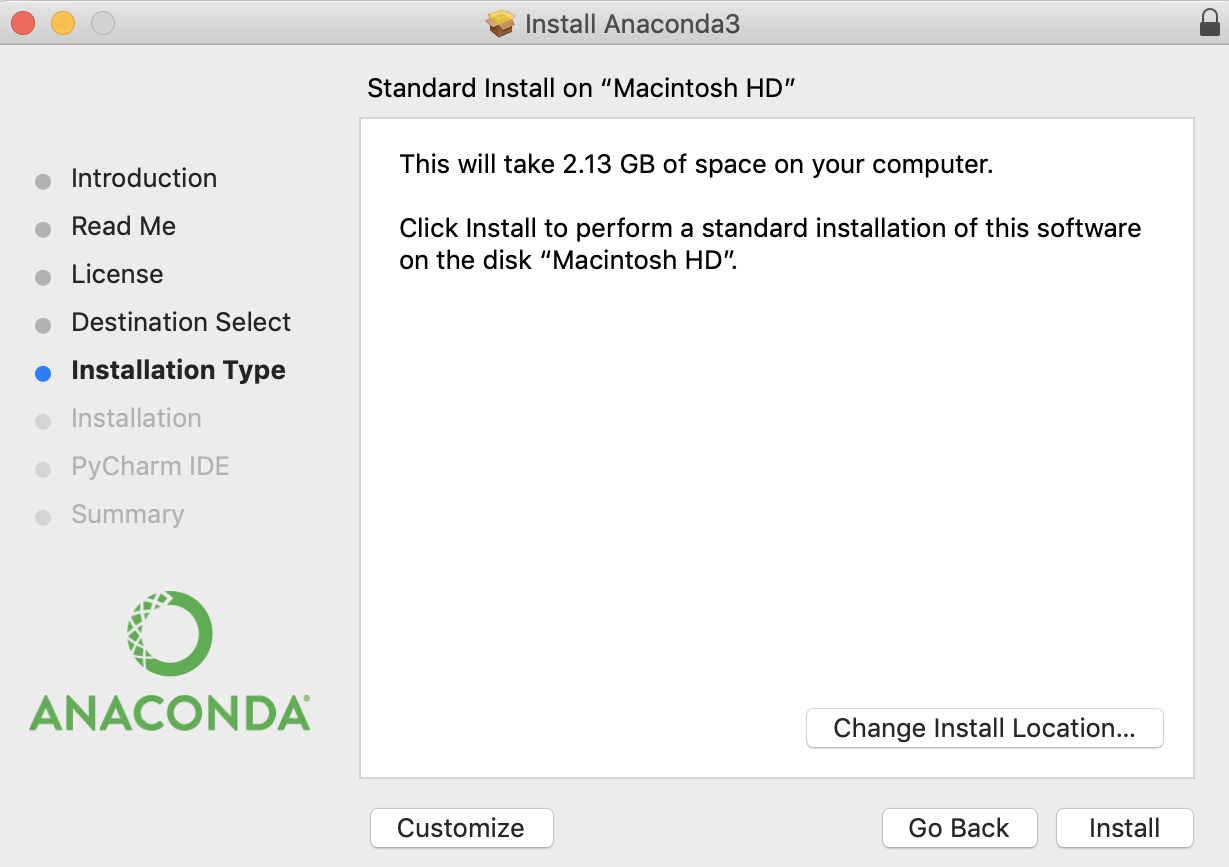
The installation may take several minutes as the software unpacks the vast array of scientific packages included in the distribution.
Verifying the Installation via Terminal
After the installer finishes, it is vital to verify that the installation was successful and that the conda command is recognized by your system’s shell. Open the Terminal app (found in Applications > Utilities) and type the following command:
conda list
If the installation was successful, the Terminal will display a list of all installed packages and their versions. If you see a “command not found” error, you may need to restart your Terminal or manually initialize the shell by running source ~/anaconda3/bin/activate followed by conda init.
Post-Installation: Mastering Environments and Navigator
Installation is only the first step. To truly harness the power of Anaconda on your Mac, you must understand how to interact with its two primary interfaces.
Managing Virtual Environments with Conda
One of the most significant mistakes new users make is installing all their packages into the “base” environment. This leads to version conflicts over time. Instead, you should create a unique environment for every project.
To create a new environment for a specific project, use the command:
conda create --name my_project_env python=3.11
To enter that environment, use:
conda activate my_project_env
This ensures that any changes you make or packages you install remain isolated from the rest of your system, a hallmark of professional software development.
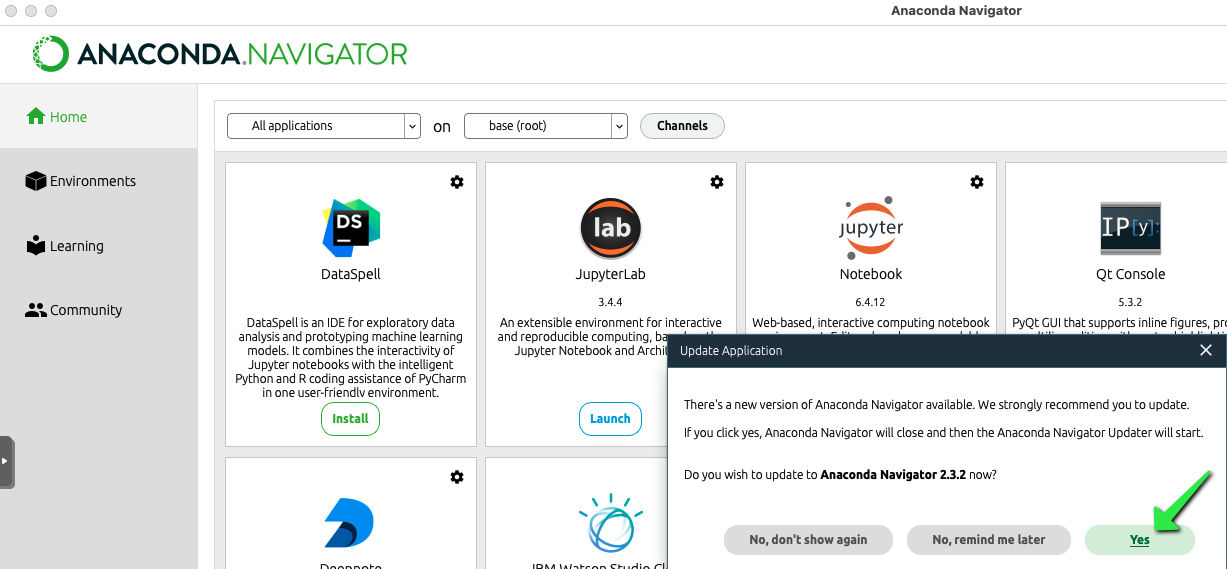
Exploring Anaconda Navigator and Integrated Tools
For those who prefer a visual interface over the command line, Anaconda Navigator is an essential tool. It is a desktop graphical user interface (GUI) that allows you to launch applications and manage conda packages, environments, and channels without using terminal commands.
Within Navigator, you can easily launch:
- Jupyter Notebook: The industry standard for interactive data science and sharing code/visualizations.
- Spyder: A powerful Scientific Python Development Environment with advanced editing, interactive testing, and debugging features.
- VS Code: A popular code editor that integrates perfectly with Anaconda environments.
Troubleshooting and Optimization Tips
Even with a smooth installation, macOS users may encounter specific quirks related to pathing and permissions.
Common Installation Hurdles on macOS
A frequent issue involves the Zsh shell (the default shell on macOS since Catalina). If the conda command isn’t working, it usually means the Anaconda path wasn’t automatically added to your .zshrc file. You can fix this by running the installer’s “Initialize” step again or manually adding the export path to your shell configuration file.
Another common hurdle is related to “Gatekeeper,” Apple’s security feature. If macOS prevents the installer from running because it is from an “unidentified developer,” go to System Settings > Privacy & Security and click “Open Anyway” at the bottom of the pane.
Keeping Your Distribution Updated
The tech world moves fast, and Anaconda releases updates frequently to address security vulnerabilities and improve performance. To keep your entire distribution up to date, run the following commands in your Terminal periodically:
conda update conda
conda update --all
This ensures that the package manager itself and all installed libraries are at their latest stable versions, allowing you to take advantage of the latest features in the Python ecosystem.
By following this guide, you have transformed your Mac into a high-powered workstation capable of tackling the most demanding data science tasks. With Anaconda installed, you are no longer just a user of software; you are a creator equipped with the premier tools of the modern digital age. Whether your journey leads you into artificial intelligence, financial modeling, or academic research, your foundation is now solid.
aViewFromTheCave is a participant in the Amazon Services LLC Associates Program, an affiliate advertising program designed to provide a means for sites to earn advertising fees by advertising and linking to Amazon.com. Amazon, the Amazon logo, AmazonSupply, and the AmazonSupply logo are trademarks of Amazon.com, Inc. or its affiliates. As an Amazon Associate we earn affiliate commissions from qualifying purchases.