
In the ever-evolving landscape of digital entertainment, few things offer the transformative power of game modding. For many, the ability to customize and enhance their favorite gaming experiences is paramount. Among the most popular platforms for this kind of modification is Minecraft, a sandbox game renowned for its vast creative potential. At the heart of Minecraft modding lies Forge, a powerful API (Application Programming Interface) that acts as a bridge between the game’s core code and the multitude of community-created mods. If you’re looking to inject new life into your Minecraft world, learn about new mechanics, or simply explore a universe of user-generated content, mastering Forge installation is your first, crucial step.
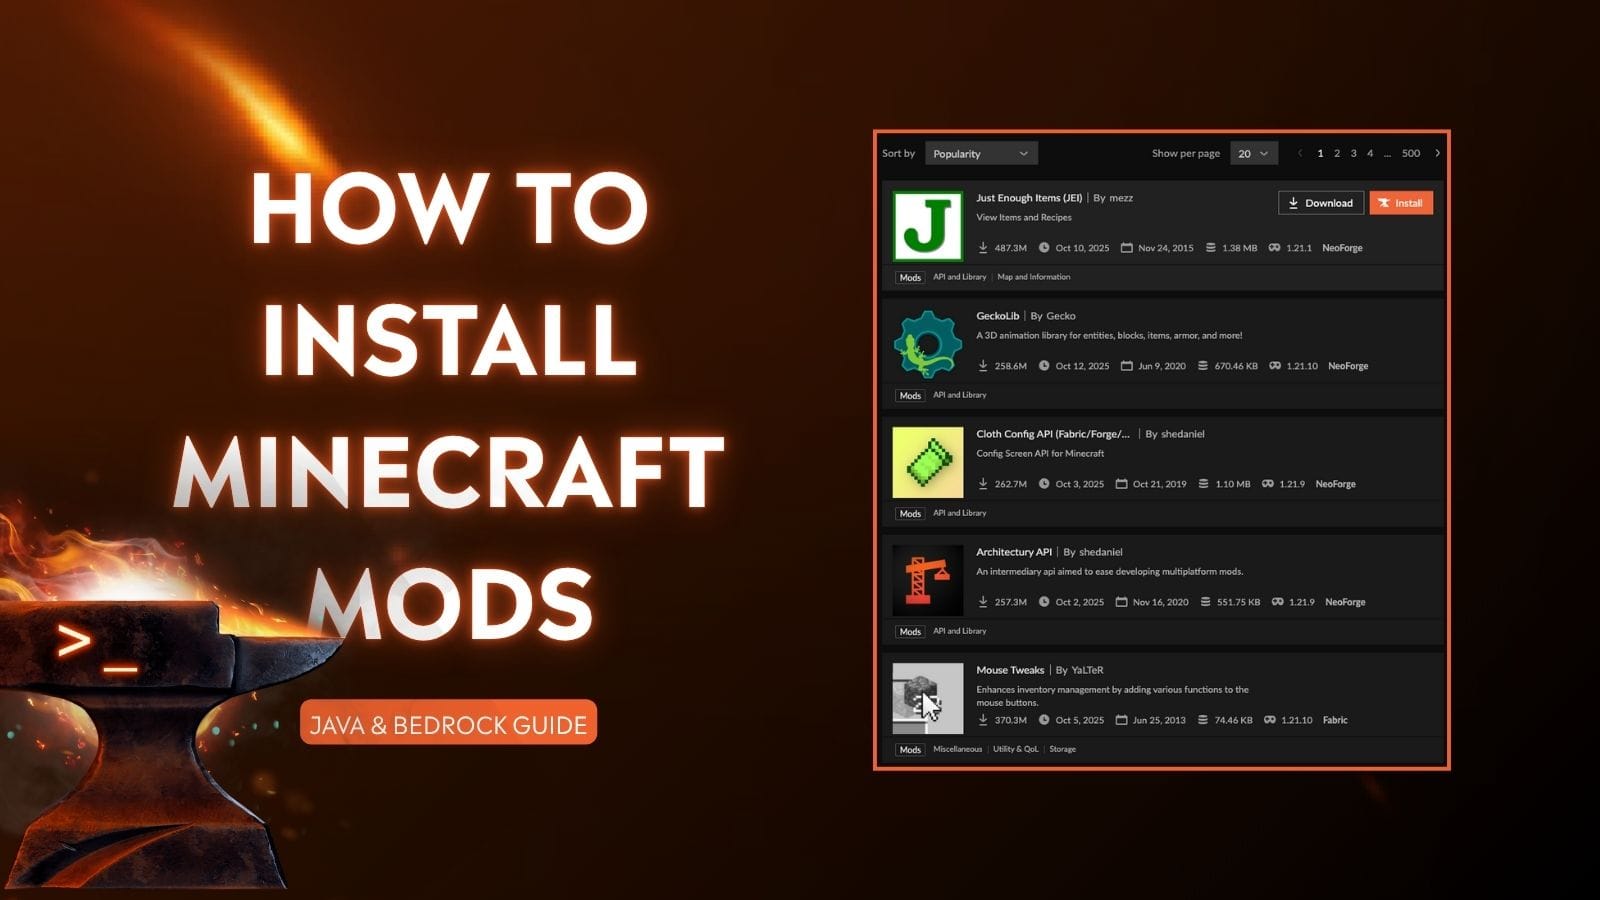
This guide will walk you through the process of installing Forge, transforming your Minecraft experience from its vanilla state into a playground of endless possibilities. We’ll break down each step with clarity, ensuring that even those new to modding can confidently navigate the process. Beyond the technicalities, we’ll also touch upon the broader implications of this process, from the burgeoning creator economy within gaming to the essential digital security considerations that accompany downloading any external software.
Understanding Minecraft Forge: The Foundation of Modding
Before diving into the installation process, it’s essential to understand what Minecraft Forge is and why it’s so indispensable for modding. Think of Forge as a universal adapter for Minecraft mods. Without it, most mods simply wouldn’t be able to interact with the game’s underlying code. Forge provides a standardized framework, allowing mod developers to create content that is compatible across different versions of Minecraft. This standardization is key to the vast and vibrant modding community we see today.
Why Use Forge?
The primary reason to install Forge is to enable the use of mods. These mods can range from minor cosmetic changes to complete overhauls of gameplay. For instance, you might find mods that:
- Add New Blocks and Items: Imagine introducing new ores, tools, weapons, or even functional machinery into your world.
- Introduce New Creatures and Biomes: Explore uncharted territories filled with unique flora and fauna, expanding the world’s diversity.
- Implement New Game Mechanics: Experience advanced farming systems, complex magic spells, or entirely new combat mechanics.
- Enhance Visuals: Improve graphics, add shaders, and create breathtaking visual experiences.
- Introduce Quality-of-Life Improvements: Streamline inventory management, add better maps, or enhance user interface elements.
Essentially, Forge unlocks a universe of creativity that goes far beyond what Mojang, the developers of Minecraft, can provide in the base game. It empowers players to tailor their gaming experience to their exact preferences, fostering a deep sense of ownership and engagement.
The Importance of Version Compatibility
A critical aspect of using Forge, and indeed any mod, is understanding version compatibility. Minecraft is regularly updated, and each update can change the game’s underlying code. Forge, in turn, must be updated to be compatible with specific Minecraft versions. Therefore, when you download Forge, you must ensure it matches the exact version of Minecraft you intend to play. Similarly, the mods you download must also be designed for that specific Forge and Minecraft version. This meticulous attention to detail prevents crashes and ensures a smooth modded experience.
Preparing for Installation: Essential Prerequisites
Before you embark on the journey of installing Forge, a little preparation goes a long way. This involves ensuring you have the right version of Minecraft installed and understanding where your game files are located. These seemingly minor steps can prevent common installation hiccups and ensure a seamless setup.
Installing the Correct Minecraft Version
The first and most crucial prerequisite is having the correct version of Minecraft installed on your computer. As mentioned, Forge is version-specific. If you plan to install Forge for Minecraft 1.19.2, for example, you need to have that exact version of Minecraft installed and runnable.
- Using the Minecraft Launcher: The easiest way to manage different Minecraft versions is through the official Minecraft Launcher.
- Open the Minecraft Launcher.
- Click on “Installations” at the top.
- Click on the “New Installation” button.
- In the “Version” dropdown menu, select the specific Minecraft version you need (e.g., 1.19.2).
- Give your new installation a name (e.g., “Forge 1.19.2”).
- Click “Create.”
- Now, when you go to the “Play” tab, you can select this new installation from the dropdown menu next to the “Play” button before launching the game.
By creating a dedicated installation for the version you intend to mod, you ensure that your base game remains unaffected and that Forge can be installed correctly for that specific environment.
Locating Your Minecraft Game Directory
Your Minecraft game directory is where all the game files, including mods and configuration settings, are stored. Knowing its location is vital for installing Forge and later for placing your downloaded mods. The default locations vary slightly depending on your operating system:
- Windows: Press
Win + Rto open the Run dialog, type%appdata%.minecraftand press Enter. - macOS: Open Finder, click “Go” in the menu bar, select “Go to Folder…”, and type
~/Library/Application Support/minecraft. - Linux: The Minecraft directory is typically located at
~/.minecraft.
Once you’ve navigated to this directory, you’ll see various subfolders. The mods folder, where you’ll place your downloaded mods, is usually created automatically by Forge after the initial installation.
Installing Minecraft Forge: Step-by-Step Guide
With your prerequisites in order, you’re ready to install Minecraft Forge. This process is straightforward and involves downloading the Forge installer and running it.
Step 1: Download the Correct Forge Installer
- Visit the Official Forge Website: Navigate to the official Minecraft Forge website (https://files.minecraftforge.net/).
- Select Your Minecraft Version: On the left-hand side of the page, you’ll see a list of Minecraft versions. Click on the specific version you are targeting (e.g., 1.19.2).
- Choose the Recommended or Latest Build: For most users, the “Recommended” build is the most stable and tested. The “Latest” build might have newer features but could be less stable. Download the installer for the recommended build.
- Click “Installer”: You will be taken to a download page with a timer and advertisements. Crucially, do NOT click on any ads. Wait for the timer to count down, and then click the “Skip” button that appears in the top-right corner. This will download the Forge installer
.jarfile.
Step 2: Run the Forge Installer
- Locate the Downloaded File: Find the downloaded Forge installer
.jarfile (e.g.,forge-1.19.2-43.2.0-installer.jar) in your Downloads folder. - Ensure Minecraft is Closed: Make sure Minecraft is not running.
- Double-Click the Installer: Double-click the downloaded
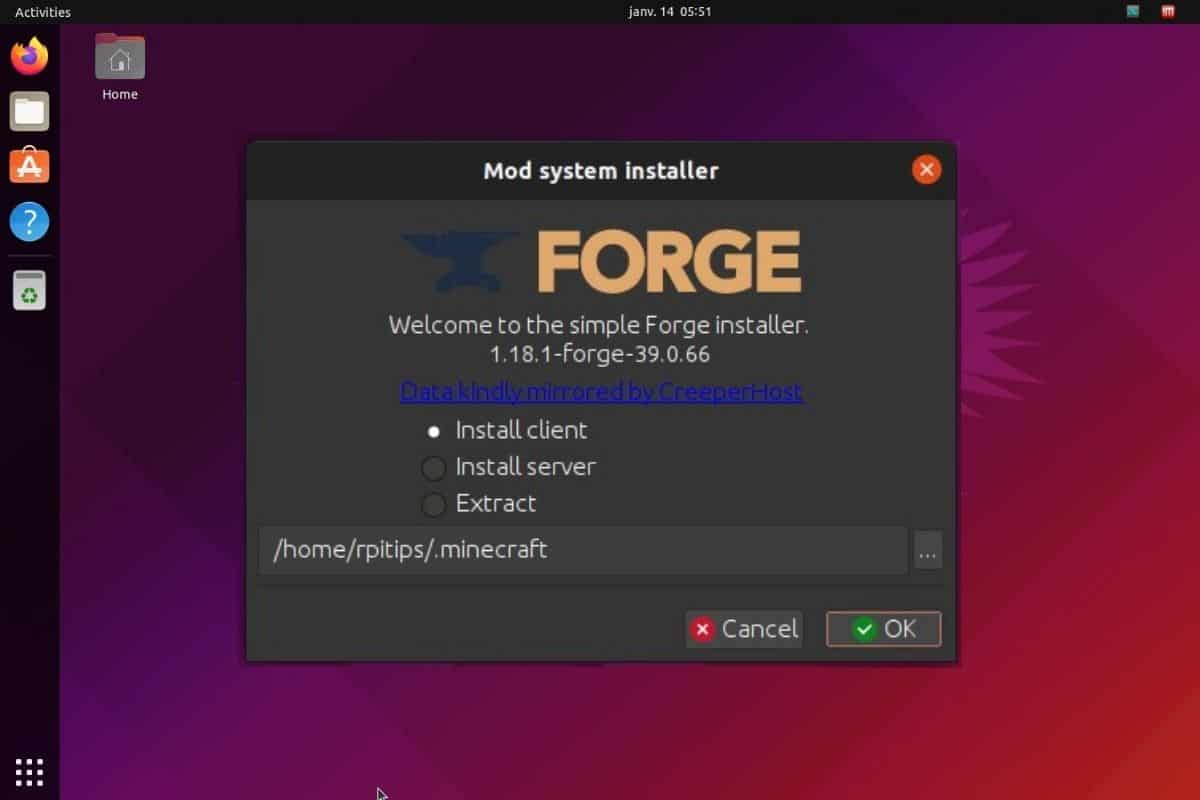
.jarfile. If you don’t see an option to open.jarfiles with Java, you might need to ensure you have Java Runtime Environment (JRE) installed. You can download it from Oracle’s official website. - Select “Install Client”: The Forge installer window will appear. Ensure that “Install client” is selected. This is the default option and what you need to play modded Minecraft.
- Choose the Game Directory (Optional but Recommended): The installer will usually detect your Minecraft game directory automatically. However, it’s good practice to verify that the path shown is correct. If it’s not, click the “…” button to browse and select your
.minecraftfolder. - Click “OK”: Click the “OK” button to begin the installation. The installer will download necessary files and set up Forge.
- Confirmation: You will see a success message indicating that Forge has been installed. Click “OK.”
Step 3: Launching Minecraft with Forge
- Open the Minecraft Launcher: Launch the official Minecraft Launcher.
- Select the Forge Profile: In the dropdown menu next to the “Play” button, you should now see a new profile created by Forge (e.g.,
forge-1.19.2). Select this profile. - Click “Play”: Click the “Play” button. Minecraft will launch with Forge installed. You might notice a few new messages or a slightly different loading screen.
- Verify Installation: Once the game has loaded, check the main menu. You should see a “Mods” button that wasn’t there before. Clicking this button will show you a list of installed mods (initially just Forge itself).
Congratulations! You have successfully installed Minecraft Forge.
Adding Mods to Forge: Expanding Your Game
With Forge installed, the real fun begins: adding mods. This process involves downloading mods compatible with your Forge version and placing them in the correct folder.
Finding and Downloading Mods
The internet is brimming with websites hosting Minecraft mods. However, it’s crucial to download from reputable sources to avoid malware and ensure you’re getting genuine, well-maintained mods.
-
Reputable Mod Websites:
- CurseForge: (https://www.curseforge.com/minecraft/mc-mods) This is the largest and most popular platform for Minecraft mods. It’s well-organized and generally safe.
- Modrinth: (https://modrinth.com/mods/minecraft) A newer, increasingly popular alternative to CurseForge, offering a clean interface and a focus on open-source.
-
When Downloading:
- Check Compatibility: Always verify that the mod is for the exact Minecraft and Forge version you are using.
- Read Descriptions: Pay attention to any installation instructions, dependencies (other mods required for this one to work), and known issues mentioned by the mod author.
- Beware of Adware: Similar to downloading Forge, be cautious of download buttons that look like ads on less reputable sites. Always look for the direct download link provided by the mod author.
- File Type: Mods usually come as
.jarfiles.
Installing Mods into the mods Folder
- Locate Your
modsFolder: Navigate back to your Minecraft game directory (%appdata%.minecrafton Windows,~/Library/Application Support/minecrafton macOS,~/.minecrafton Linux). - Create the
modsFolder (If Necessary): If a folder namedmodsdoesn’t already exist, create it. Forge will create this folder for you when you first launch it after installation. - Copy Mod Files: Take the downloaded mod
.jarfiles and copy them directly into themodsfolder. You don’t need to extract them. - Launch Minecraft: Launch Minecraft using your Forge profile. As the game loads, Forge will detect the
.jarfiles in themodsfolder and load them.
You should now be able to enjoy your newly installed mods! If a mod isn’t showing up or the game crashes, double-check that the mod is compatible with your Minecraft and Forge version, and that you don’t have any missing dependencies.
Troubleshooting Common Issues and Best Practices
Even with careful preparation, you might encounter issues when modding Minecraft. Understanding common problems and adhering to best practices can save you a lot of frustration.
Common Issues and Solutions
-
Game Crashes on Startup: This is the most frequent problem.
- Version Mismatch: The most common cause is a mod designed for a different Minecraft or Forge version. Double-check all your mods.
- Missing Dependencies: Some mods require other mods to function. Read the mod’s description carefully for any prerequisites.
- Corrupted Mod File: Try re-downloading the mod.
- Too Many Mods: While Forge is powerful, there’s a limit to how much the game can handle. If you’ve added many mods at once, try removing some to see if the issue resolves.
- Conflicting Mods: Occasionally, two mods might interfere with each other. This is harder to diagnose and often requires trial and error by removing mods one by one.
-
Mods Not Appearing in Game:
- Incorrect Folder: Ensure the
.jarfiles are directly in themodsfolder and not in subfolders. - Wrong Version: Again, verify compatibility.
- Corrupted Forge Installation: Try re-installing Forge.
- Incorrect Folder: Ensure the
-
Lag and Performance Issues:
- Resource-Intensive Mods: Some mods, especially those that add complex new graphics or mechanics, can impact performance. Consider disabling them or looking for performance-friendly alternatives.
- OptiFine: While OptiFine is a popular performance-enhancing mod, it sometimes conflicts with Forge. There are Forge-compatible versions of OptiFine (often called “OptiFine for Forge”) or alternatives like Sodium. Always research compatibility.

Digital Security and Responsible Modding
When downloading and installing any software, especially from community sources, digital security is paramount.
- Stick to Reputable Sources: As emphasized, always download mods and Forge from official or well-known community sites like CurseForge and Modrinth.
- Scan Downloaded Files: It’s a good practice to scan downloaded
.jarfiles with your antivirus software before placing them in themodsfolder. - Beware of “Modpacks”: While convenient, some pre-packaged modpacks from untrusted sources can contain malware. Stick to reputable modpack launchers or build your own carefully.
- Keep Software Updated: Ensure your Java Runtime Environment (JRE) and your operating system are up-to-date.
By following these guidelines and troubleshooting steps, you can enjoy the incredible world of Minecraft modding with confidence. Forge is your gateway to a universe of endless creativity, transforming your gameplay into something uniquely your own.
aViewFromTheCave is a participant in the Amazon Services LLC Associates Program, an affiliate advertising program designed to provide a means for sites to earn advertising fees by advertising and linking to Amazon.com. Amazon, the Amazon logo, AmazonSupply, and the AmazonSupply logo are trademarks of Amazon.com, Inc. or its affiliates. As an Amazon Associate we earn affiliate commissions from qualifying purchases.