In an era where automotive technology is advancing at an unprecedented pace, features once considered luxurious add-ons are quickly becoming standard expectations. Among these, the rear-view camera stands out as a paramount innovation, transforming the landscape of driving safety and convenience. No longer confined to premium vehicles, these systems now offer an accessible upgrade for almost any car, helping drivers navigate tight parking spaces, avoid obstacles, and significantly reduce the risk of accidents. Yet, as with any technological enhancement for your vehicle, the primary question for many prospective buyers remains: “How much will it cost to install a rear camera?”
This article aims to provide a comprehensive breakdown of the financial commitment involved, exploring not just the direct costs but also the underlying factors that influence pricing. We will delve into the nuances of different camera technologies, the advantages and disadvantages of DIY versus professional installation, and how your choices can impact both your wallet and your peace of mind. Drawing insights from the spheres of technology, personal finance, and even brand perception, we’ll equip you with the knowledge needed to make an informed decision, ensuring your investment enhances your driving experience without breaking the bank.
Understanding the Core Components of Rear Camera Costs
The total cost of installing a rear camera is typically a sum of two main components: the camera unit itself and the labor required for installation. However, within each of these categories, a multitude of variables can cause significant price fluctuations. Understanding these elements is crucial for accurate budgeting and selecting a system that aligns with your needs and financial capacity.
The Camera Unit Itself: Price by Technology and Features
The market for rear cameras is vast and diverse, offering everything from basic, no-frills models to advanced, feature-rich systems. The technology embedded within these units is the primary driver of their price.
- Basic Wired Cameras (Typically $30 – $100): These are the most straightforward and affordable options. They require a physical cable connection from the camera, usually mounted at the rear license plate or bumper, to a display unit inside the cabin. While installation can be more involved due to the wiring, their reliability is often superior as they avoid wireless interference. Features are usually limited to a basic wide-angle view and perhaps some static parking guidelines.
- Wireless Cameras (Typically $50 – $200): Offering greater installation flexibility, wireless cameras transmit video signals to the display via Wi-Fi or Bluetooth. This significantly reduces the complexity of routing cables through the vehicle’s interior. However, wireless signals can sometimes be susceptible to interference, leading to lag or intermittent video feeds. Price variations depend on signal strength, range, and display quality.
- Integrated Display Options:
- Mirror Clip-on Displays (Add $20 – $80 to camera cost): These popular choices replace your existing rearview mirror or clip directly onto it, displaying the camera feed within the mirror itself. They are aesthetically pleasing and don’t clutter your dashboard.
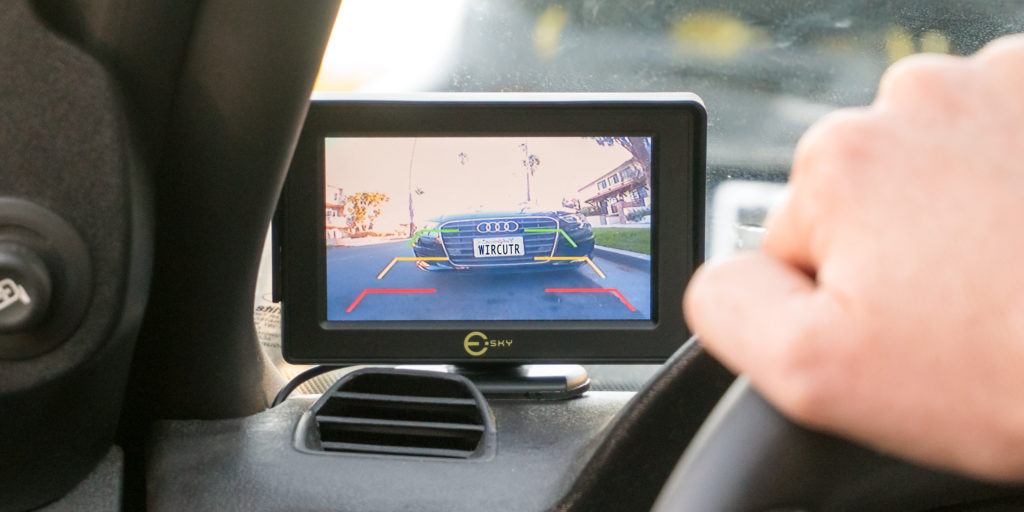
- Dash Mount Monitors (Add $20 – $70 to camera cost): Separate monitors can be mounted on your dashboard, offering a dedicated screen for the camera feed. Sizes vary, with larger screens generally costing more.
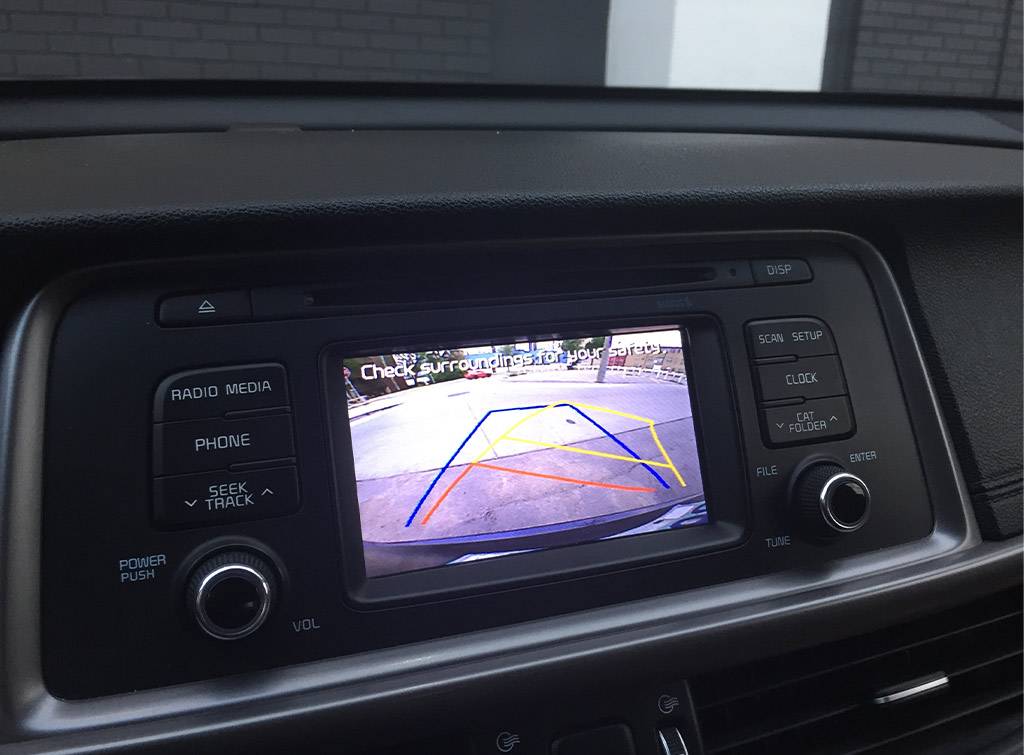
- OEM Screen Integration (Requires specialized kits, potentially $100 – $400+ for adapters): For vehicles with existing in-dash infotainment screens, specialized interface kits allow the aftermarket camera feed to display on the factory screen. This offers the most seamless and factory-like integration but can be significantly more complex and costly due to the specific adapters and wiring harnesses required for different car brands and models. This is where “Tech” meets “Brand” in a significant way, as compatibility and specific brand protocols dictate the cost and feasibility.
- Advanced Features (Each feature adds to the cost, ranging from $10 – $100+): Beyond basic video, modern rear cameras can come packed with sophisticated functionalities:
- Night Vision/Low-Light Performance: Utilizes infrared or enhanced sensors for clear images in dark conditions.
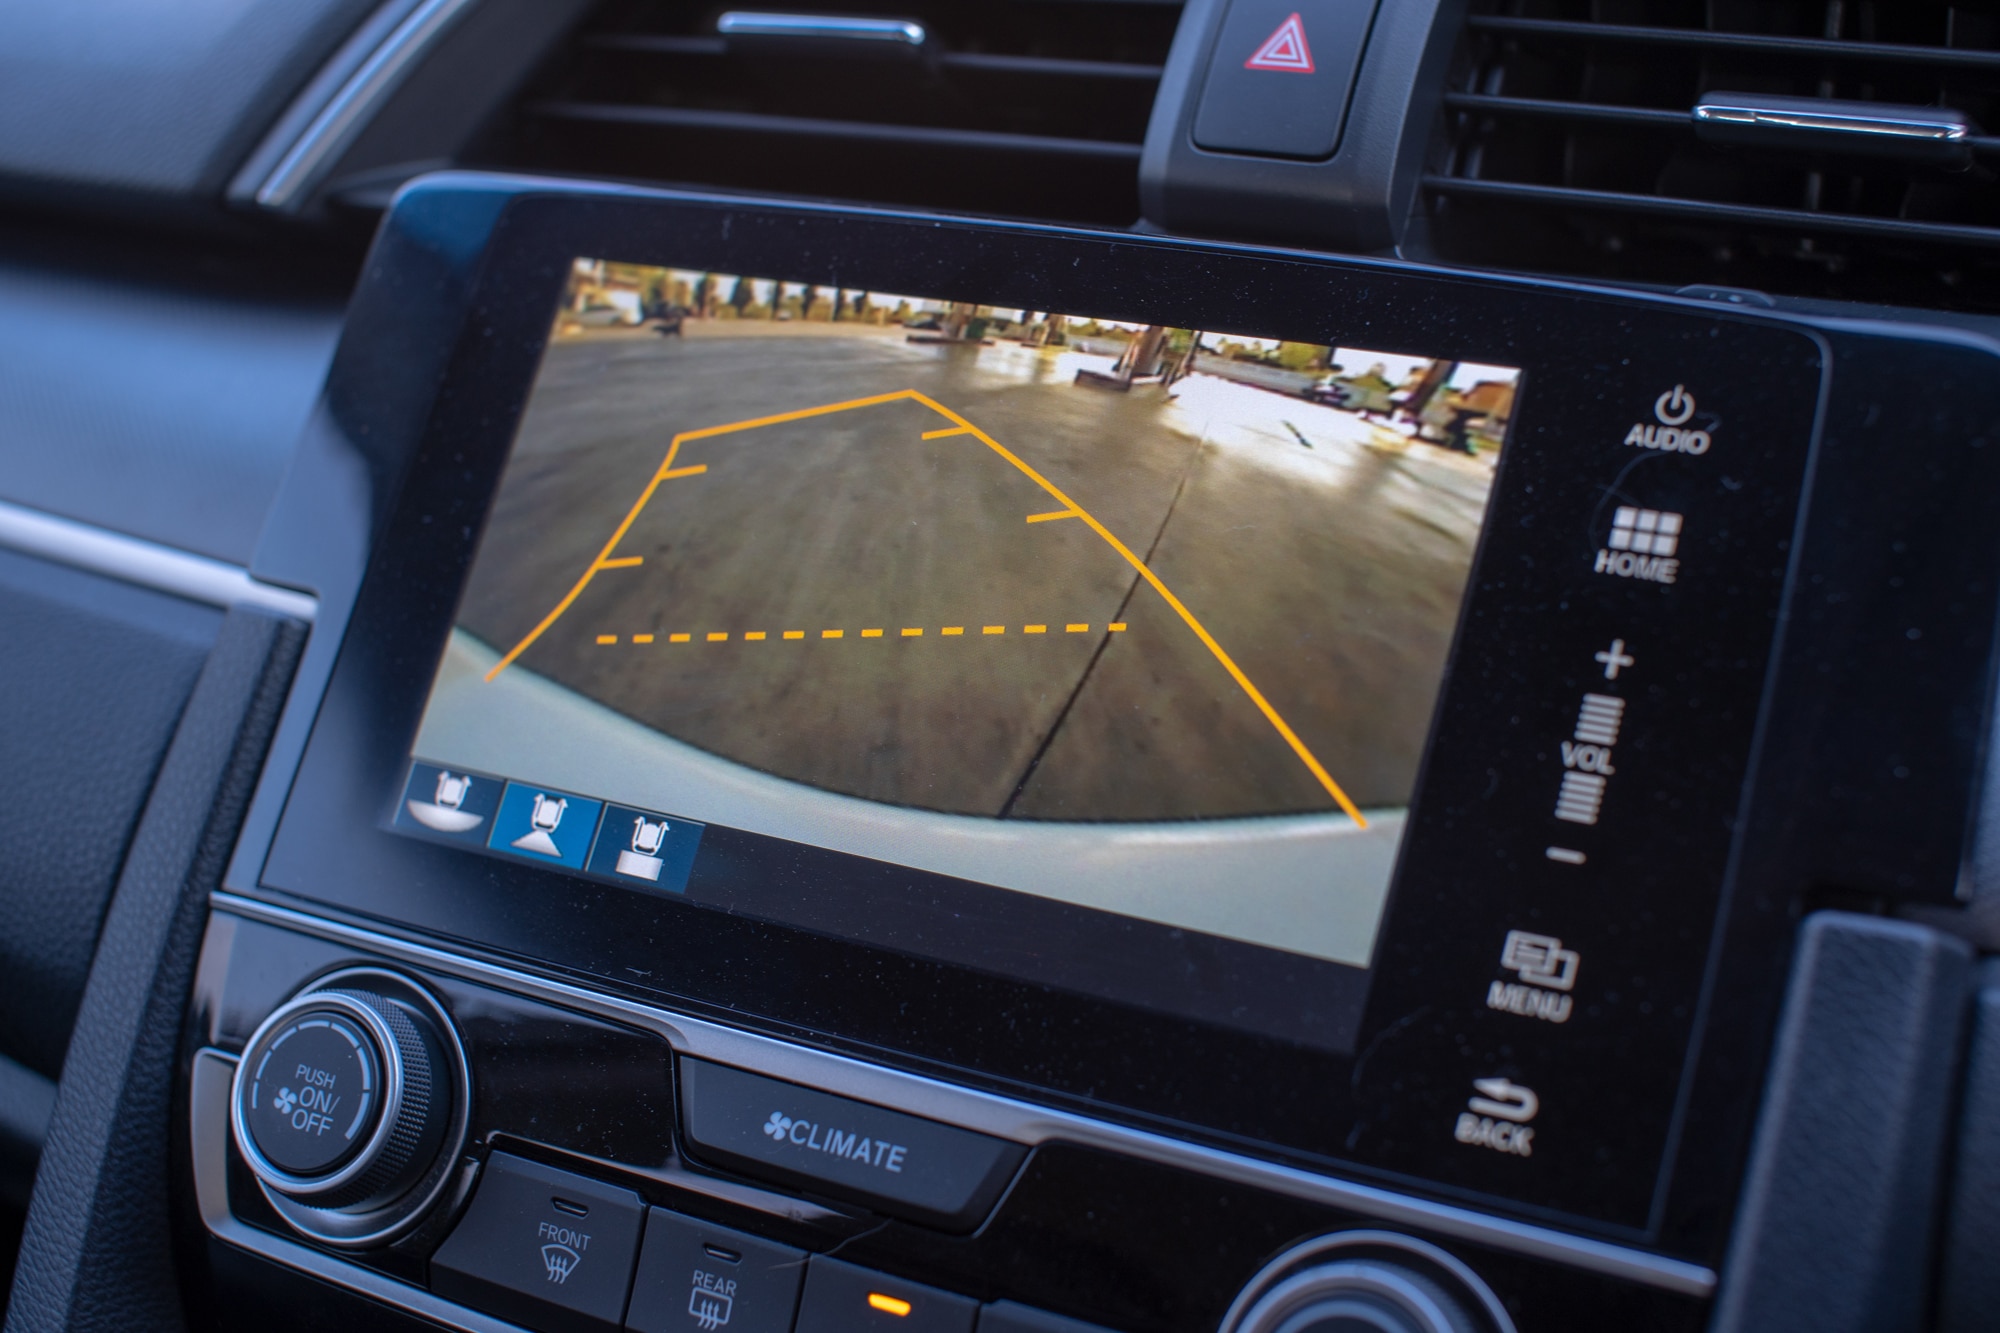
- Dynamic Parking Lines: Lines that move with your steering wheel input, guiding you into parking spaces more accurately.
- Wide-Angle Lenses (150-170 degrees): Provide a broader field of view to minimize blind spots.
- HDR (High Dynamic Range): Improves image quality in challenging lighting conditions (e.g., strong sunlight or deep shadows).
- Dash Cam Integration: Some units double as front and rear dash cams, offering continuous recording for security and evidence in case of an accident. This crosses over into digital security, a key aspect of “Tech.”
- Proximity Sensors/Object Detection: While more common in factory-installed systems, some advanced aftermarket units offer basic alerts for nearby objects.
When considering the camera unit, the “Brand” factor also plays a significant role. Reputable brands like Esky, AUTO-VOX, Garmin, and Pioneer often command higher prices but typically offer superior build quality, more reliable performance, better customer support, and longer warranties. Investing in a known brand can provide peace of mind and potentially save you money in the long run by avoiding frequent replacements or troubleshooting.
Professional Installation Labor: What Drives the Price?
While the camera unit is a tangible product, the labor cost is where the most significant variability often lies. This cost is determined by who installs it, the complexity of your vehicle, and the time required.
- Hourly Rates: Different service providers charge different hourly rates.
- Dealerships ($100 – $150+ per hour): Often the most expensive option, but they possess specific expertise for your vehicle make and model, ensuring compatibility and often using OEM parts if available.
- Independent Auto Shops ($70 – $120 per hour): A good middle-ground. These shops have general automotive expertise and can handle a wide range of vehicles. Their pricing is usually competitive.
- Car Audio/Electronics Specialists ($80 – $130 per hour): These professionals often have the most experience with integrating aftermarket electronics. They excel at clean wiring, seamless display integration, and troubleshooting complex systems. If you’re opting for a sophisticated system, they might be your best bet for optimal performance.
- Vehicle Complexity: Modern vehicles, with their intricate wiring harnesses and integrated electronic systems (CAN-BUS), can make installation more challenging. Luxury vehicles or those with highly integrated infotainment systems often require more specialized tools and knowledge, increasing labor time. Older vehicles might be simpler to wire but could pose challenges with finding suitable mounting points or power sources.
- Time Required: A basic wired camera installation might take 1-2 hours, while a complex wireless system integrated into an existing OEM screen could take 3-5 hours or even more. Factors influencing time include:
- Routing of Wires: How easily wires can be hidden through trim panels, under carpets, and into the dashboard.
- Power Source Tapping: Tapping into reverse lights for activation, or a constant power source for dash cam functionality.
- Display Integration: Mounting the monitor cleanly or integrating it into the existing head unit.
- Trim Removal and Reinstallation: The difficulty of carefully removing and reattaching interior and exterior trim pieces without damage.
- Geographic Location: Labor rates are heavily influenced by the cost of living and average wages in a particular region. Installation in a major metropolitan area will generally be more expensive than in a rural one.
Considering these factors, professional installation labor for a rear camera can range from $100 for a very simple setup to $500 or more for complex integrations on high-end vehicles.
DIY vs. Professional Installation: Weighing Costs, Skills, and Benefits
One of the most significant decisions you’ll face is whether to tackle the installation yourself or entrust it to a professional. This choice directly impacts the “Money” aspect, but also brings considerations of “Tech” (your aptitude for it) and even “Brand” (the reputation of your DIY work vs. a professional’s).
The DIY Route: Saving Money, Investing Time
For the mechanically inclined and tech-savvy individual, a DIY installation can be a highly rewarding and cost-effective endeavor.
- Pros:
- Significant Labor Cost Savings: This is the primary driver. By doing it yourself, you eliminate the entire labor cost component, which can easily range from $100 to $500+.
- Personal Satisfaction: There’s a sense of accomplishment in successfully upgrading your vehicle with your own hands.
- Learning Experience: You gain a deeper understanding of your vehicle’s electrical system and interior components.
- Control Over Installation: You can take your time to ensure wiring is routed exactly as you prefer and components are mounted precisely.
- Cons:
- Requires Tools and Technical Knowledge: You’ll need basic automotive tools (screwdrivers, trim removal tools, wire strippers, multimeter) and a good understanding of automotive electrical systems. Lack of knowledge can lead to frustration or, worse, damage.
- Risk of Errors and Damage: Improper wiring can blow fuses, drain your battery, or even damage your vehicle’s electrical system. Incorrect trim removal can break clips or scratch interior panels.
- Time Consuming: What a professional might do in 2-3 hours could take an amateur a full day or more, especially if encountering unexpected challenges.
- No Warranty on Labor: If something goes wrong, you’re on your own for troubleshooting and repairs.
- Potential Voiding of Warranty: While generally rare for simple accessory installs, improper modification of a new vehicle’s electrical system could theoretically impact certain warranty claims.
- Aesthetics: A DIY job, if not done meticulously, might result in visible wires or improperly reinstalled trim, detracting from your car’s interior.
The cost implication for DIY is primarily the cost of the camera unit itself, plus any tools you might need to purchase. If you already have the tools, you’re looking at a budget of $30 – $300+ for the camera.
Opting for Professional Service: Peace of Mind at a Price
For those who prefer a hassle-free experience, lack the necessary skills or tools, or simply value a professional finish, professional installation is the way to go.
- Pros:
- Expert Installation: Professionals have the tools, training, and experience to install cameras correctly and efficiently. They know how to route wires discreetly, tap into power sources safely, and integrate the display seamlessly.
- Warranty on Labor: Reputable installers will offer a warranty on their work, providing peace of mind in case of issues post-installation. This is a crucial “Brand” aspect of their service.
- Clean Integration: Wires will be hidden, and components will be mounted securely and aesthetically.
- Troubleshooting Support: If the camera malfunctions or doesn’t work as expected, you can return to the installer for diagnosis and repair.
- No Risk of Vehicle Damage: Professionals are insured against damage to your vehicle during installation.
- Cons:
- Higher Overall Cost: This is the trade-off for convenience and expertise.
- Dependence on Installer Quality: While most professionals are competent, it’s essential to choose a reputable shop. Poor installation can lead to problems down the line.
Where to Get it Installed:
- Dealerships: Best for brand-specific expertise, especially for newer vehicles or those requiring complex OEM screen integration. Expect the highest costs.
- Independent Auto Shops: A good all-around choice for general installation. Prices are usually fair, and many skilled technicians work in these shops.
- Car Audio/Electronics Specialists: Often the best choice for complex aftermarket systems. They specialize in vehicle electronics, ensuring optimal performance and clean integration. Their expertise in “Tech” is unparalleled.
The “Brand” of the installer is just as important as the camera brand. Look for shops with excellent reviews, certifications, and a strong track record. A professional, well-regarded installer offers not just a service but also a guarantee of quality and expertise that protects your investment.
Factors Beyond the Basic: Hidden Costs and Value Additions
While the camera unit and installation labor form the bulk of the cost, there are other considerations that can impact your budget, along with intangible benefits that add significant value.
Vehicle-Specific Challenges and Additional Parts
Sometimes, a seemingly simple installation can become more complex due to your vehicle’s design or desired functionality, leading to additional costs.
- CAN-BUS Integration: Newer vehicles often use a Controller Area Network (CAN-BUS) system to manage electronic components. Integrating an aftermarket camera, especially if you want it to activate automatically when reversing or display on an OEM screen, might require specific CAN-BUS adapters or decoders. These are specialized “Tech” components that can cost anywhere from $50 to $200+.
- Wiring Harnesses and Adapters: Depending on your car’s model and the camera system chosen, you might need specific wiring harnesses, power converters, or signal filters to ensure compatibility and prevent electrical interference. These small parts, while individually inexpensive ($5-$30 each), can add up.
- Fuse Tap Kits: For a clean power source without cutting factory wires, fuse tap kits are often used. These are usually inexpensive but add to the parts list.
- Specialized Tools: While professionals have them, DIYers might need to buy specialty trim removal tools to avoid damaging interior panels, which can be an initial investment.
- Dash Cam Functionality Upgrade: If you decide to add recording capabilities (a full front-and-rear dash cam system), the cost of the unit will naturally increase, often integrating higher-quality sensors and larger storage capacities. This moves into the “Digital Security” aspect of “Tech.”
The Long-Term Financial and Safety Returns
Beyond the upfront expenses, installing a rear camera offers substantial long-term benefits that justify the investment. These returns often touch upon “Money,” “Tech,” and even “Brand” in the context of your vehicle’s value and your personal safety.
- Enhanced Safety and Accident Prevention: This is arguably the most significant benefit. Rear cameras dramatically reduce blind spots, making it easier to spot children, pets, bicycles, or other vehicles behind you. According to statistics, rear cameras can reduce backing-up accidents by a significant margin. Avoiding even one minor fender bender can easily offset the installation cost in terms of repair bills, insurance deductibles, and lost time. This is a direct “Money” saving through “Tech” implementation.
- Reduced Insurance Premiums (Potentially): Some insurance providers offer discounts for vehicles equipped with safety features like rear cameras. While not universal, it’s worth inquiring with your insurer, as even a small reduction can add up over years. This directly impacts your “Money.”
- Increased Resale Value: A professionally installed, high-quality rear camera system can be a desirable feature for potential buyers, potentially increasing your vehicle’s resale value. It shows that you’ve invested in safety and modern amenities, enhancing the “Brand” (image) of your car in the used market.
- Convenience and Stress Reduction: Parking in tight spots, backing out of driveways, or navigating crowded areas becomes significantly easier and less stressful. This intangible benefit improves your daily driving experience.
- Evidence in Incidents (with Dash Cam Integration): If your rear camera is part of a dash cam system, it provides invaluable video evidence in the event of an accident, hit-and-run, or even vandalism. This can expedite insurance claims, protect you from false accusations, and offer crucial digital security.
Making an Informed Decision: Budgeting and Choosing the Right Fit
Navigating the options for rear camera installation requires careful consideration of your budget, your vehicle’s specifics, and your desired level of functionality.
Setting Your Budget: What to Expect
To give you a clearer picture, here’s a general cost breakdown, keeping in mind that these are broad estimates:
- Basic DIY Installation (Camera Only): $30 – $150
- Includes: A simple wired or basic wireless camera.
- Excludes: Any professional labor or specialized tools.
- Professional Installation (Basic Wired/Wireless Camera): $130 – $400
- Includes: A decent quality camera unit ($30-$100) plus 1-2 hours of labor ($100-$300).
- Suitable for: Drivers seeking fundamental reversing assistance without many advanced features.
- Professional Installation (Mid-Range System with Display/Features): $300 – $600
- Includes: A quality camera with better resolution, night vision, or dynamic lines ($100-$250), coupled with a mirror or dash monitor, and 2-3 hours of labor ($200-$350).
- Suitable for: Drivers wanting enhanced safety features and a cleaner, more integrated display.
- Professional Installation (Advanced System with OEM Integration/Dash Cam): $500 – $1000+
- Includes: A high-end camera, potentially integrated with a full front-and-rear dash cam system ($200-$400+), specific OEM interface modules ($100-$400), and 3-5+ hours of complex labor ($300-$600+).
- Suitable for: Drivers with newer vehicles seeking seamless integration with existing infotainment, comprehensive recording capabilities, and all advanced safety features. This option heavily leverages specialized “Tech” solutions.
Key Considerations Before Purchase and Installation
Before you commit, take these steps to ensure you get the best value for your money and a system that truly meets your needs:
- Vehicle Compatibility: Research cameras and installation methods specifically for your make, model, and year. Some cars have unique challenges or existing wiring that can be leveraged.
- Desired Features vs. Budget: Prioritize the features most important to you. Do you need dynamic parking lines, or is a basic view sufficient? Is night vision crucial for your parking environment? Balancing “Tech” needs with your “Money” is key.
- Installer Reputation and Warranty: If going professional, thoroughly research shops. Read reviews, check for certifications, and always ask about their labor warranty. A reputable installer is an investment in quality and peace of mind, bolstering their “Brand” image.
- Review Products and Installers: Utilize online resources, forums, and customer reviews to evaluate different camera brands and local installers. This research, an aspect of digital literacy and information gathering, is crucial for making smart “Tech” and “Money” decisions.
- Future-Proofing: Consider if the system can be upgraded or expanded later. For example, some modular systems allow you to add a front camera or a recording unit down the line.
The “Brand” Aspect: Quality, Reliability, and Support
In both the camera unit and installation service, “Brand” signifies quality and reliability.
- Camera Brands: Investing in reputable camera brands (e.g., Garmin, Pioneer, Esky, Auto-Vox) often means better image sensors, durable components, more robust wireless signals (if applicable), and consistent performance. These brands have a “Tech” reputation to uphold, which translates to better product support and warranty coverage. Opting for a no-name, ultra-cheap camera might save a few dollars upfront but could lead to poor performance, short lifespan, and ultimately, more “Money” spent on replacements.
- Installer Brands/Reputation: The “brand” of your installer – whether it’s a dealership, an independent shop, or a car audio specialist – is built on their expertise, customer service, and the quality of their work. A highly-rated installer provides confidence that the job will be done correctly, cleanly, and with proper support should issues arise. They are safeguarding not just their reputation but also your investment and the safety of your vehicle.
Conclusion
Installing a rear camera is no longer a luxury but a sensible upgrade that significantly enhances driving safety, convenience, and potentially the long-term value of your vehicle. While the initial question of “How much to install a rear camera?” might seem straightforward, the answer, as we’ve explored, is multi-faceted, influenced by choices in technology, installation method, and specific vehicle requirements.
From the diverse array of camera units offering varying levels of “Tech” sophistication to the differing labor costs associated with professional installation, understanding these components is paramount for effective “Money” management. Whether you opt for the cost savings and personal challenge of a DIY project or the peace of mind and professional finish of expert service, the investment ultimately pays dividends in accident prevention, reduced stress, and potentially even insurance savings. By carefully considering your budget, researching product “brands” and installer reputations, and prioritizing the features most important to your driving habits, you can make an informed decision that elevates your automotive experience for years to come. It’s an investment in safety, a smart financial choice, and a step towards a more technologically advanced driving future.
aViewFromTheCave is a participant in the Amazon Services LLC Associates Program, an affiliate advertising program designed to provide a means for sites to earn advertising fees by advertising and linking to Amazon.com. Amazon, the Amazon logo, AmazonSupply, and the AmazonSupply logo are trademarks of Amazon.com, Inc. or its affiliates. As an Amazon Associate we earn affiliate commissions from qualifying purchases.