
In the digital age, where screens dominate our daily interactions, the humble printer still holds an indispensable place in homes and offices worldwide. From important documents and tax forms to creative projects and cherished photographs, a reliable printer remains a cornerstone of productivity. Among the myriad of brands, HP stands out as a pervasive presence, known for its diverse range of printers catering to every need. However, even the most advanced HP printer is rendered useless without its lifeblood: the ink cartridge.
Replacing an ink cartridge might seem like a straightforward task, yet for many, it can be a source of minor frustration or uncertainty. Whether you’re a seasoned tech enthusiast or a casual user, understanding the proper procedure for installing an ink cartridge on your HP printer is crucial for maintaining optimal print quality, extending your printer’s lifespan, and ensuring your productivity remains uninterrupted. This comprehensive guide will walk you through the entire process, from preparation to troubleshooting, while also touching upon broader aspects related to technology, personal finance, and even brand considerations that savvy users should be aware of.
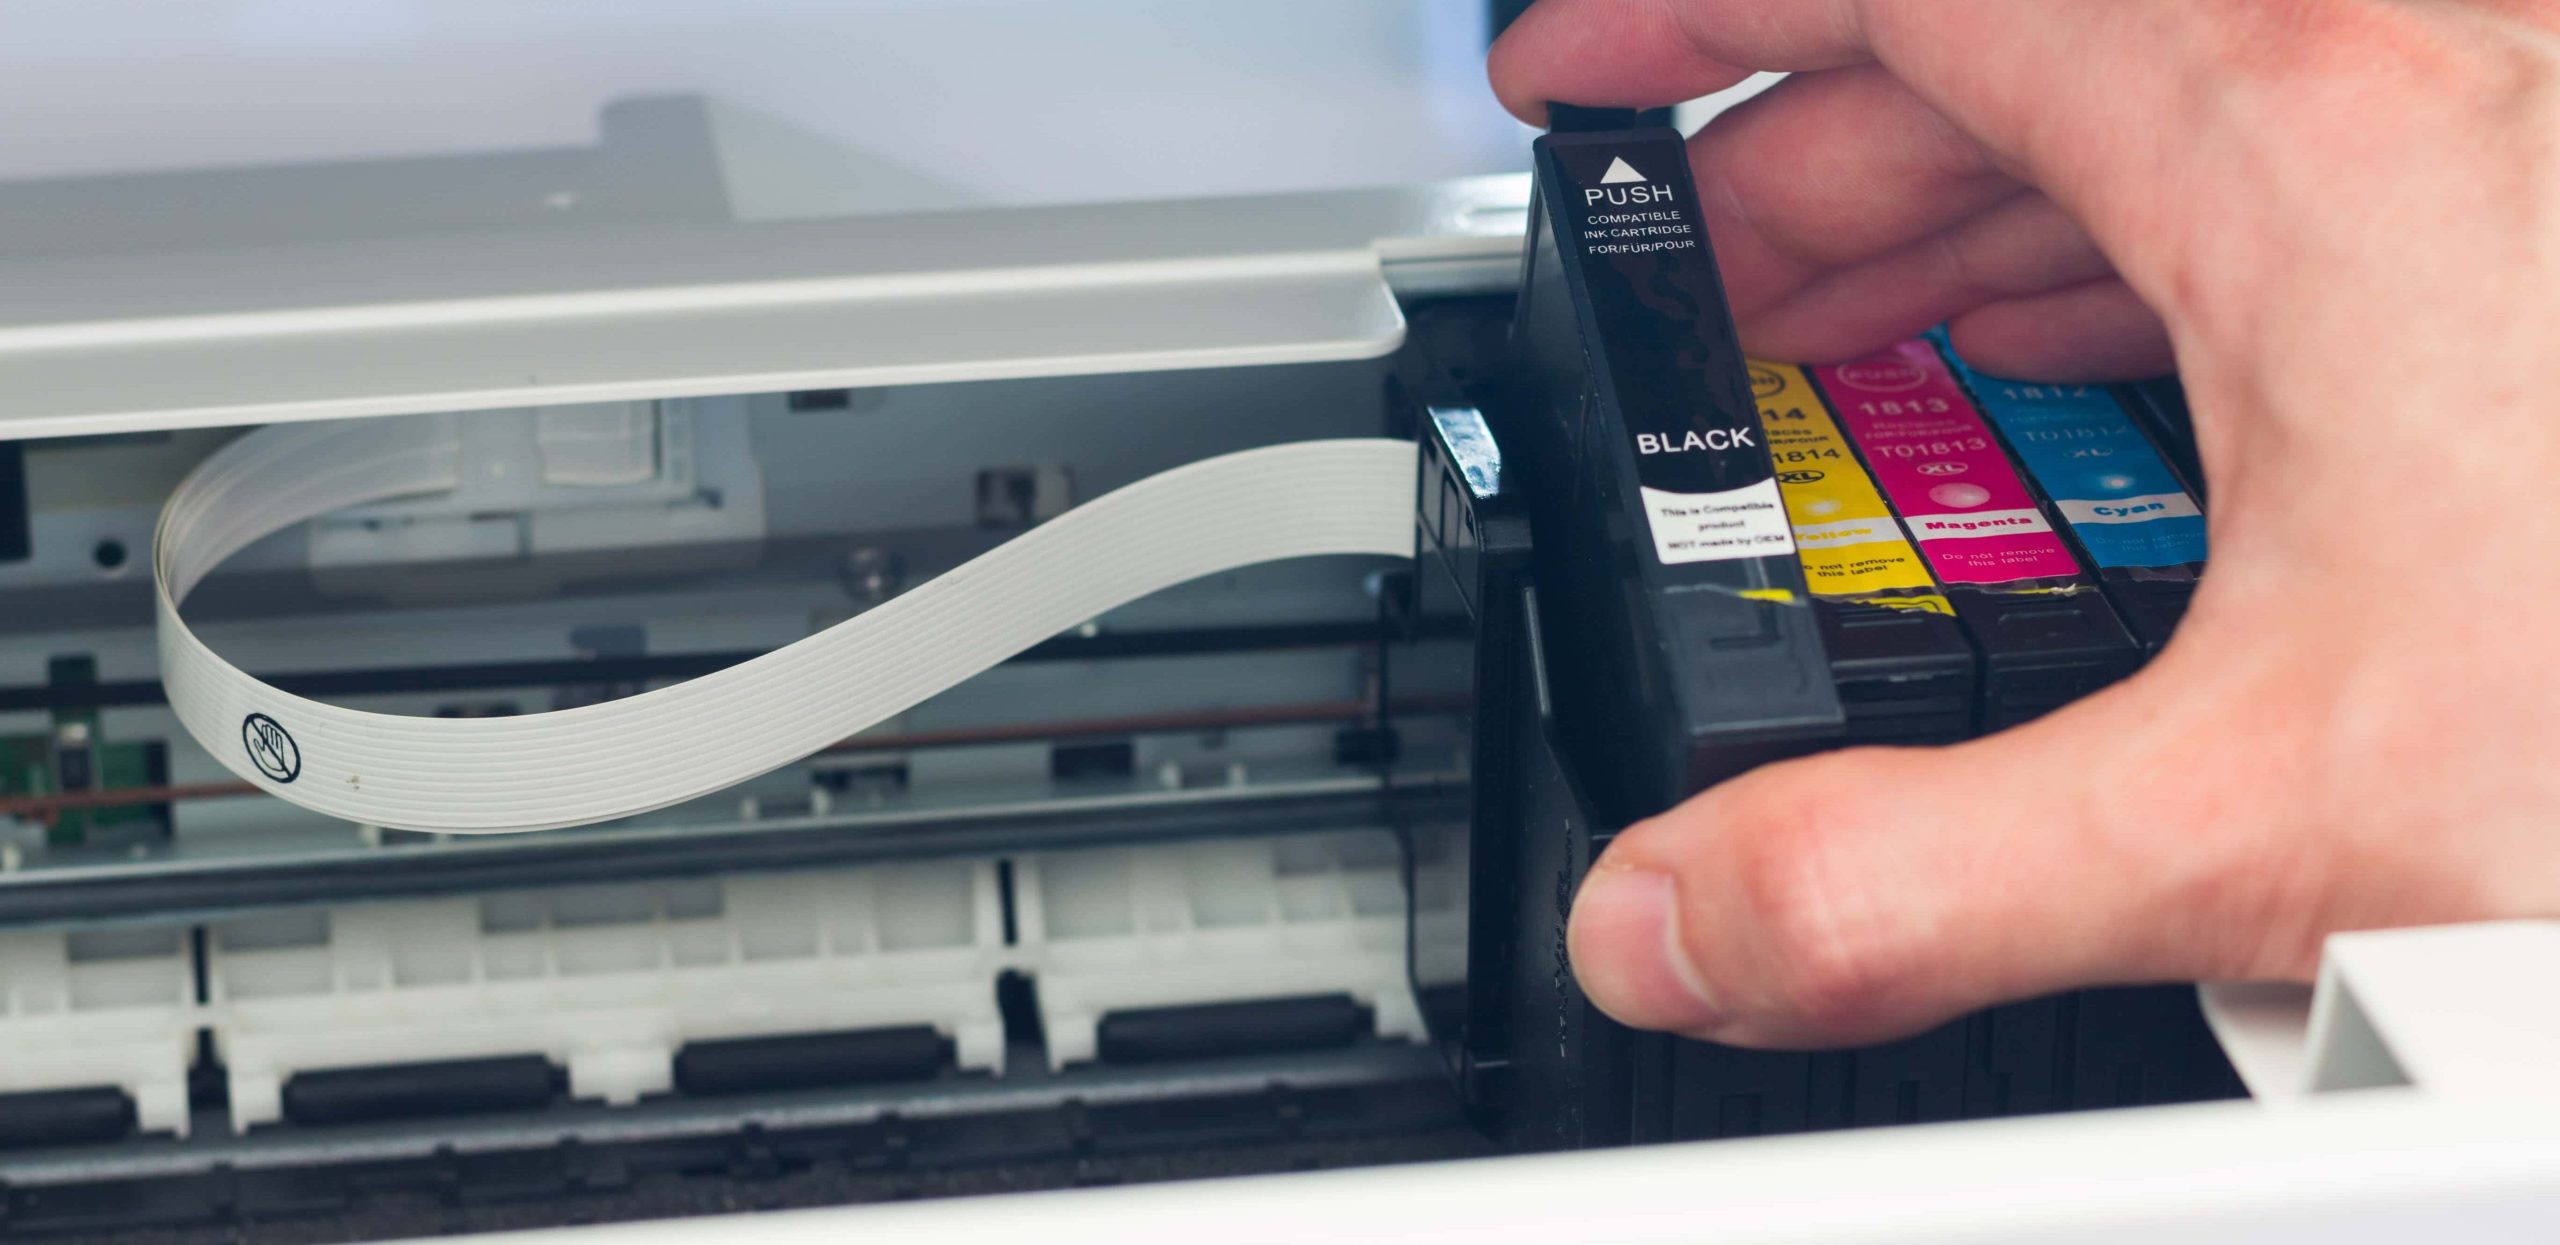
Beyond merely following instructions, this article aims to empower you with the knowledge to make informed decisions about your printing needs, connecting the seemingly simple act of changing an ink cartridge to wider discussions on digital security, the economy of consumables, and the environmental footprint of our tech choices. Let’s delve in and transform a potentially daunting task into a quick, confident, and cost-effective routine.
The Essential Pre-Installation Checklist: Preparing for a Seamless Swap
Before you even think about opening your printer, a little preparation goes a long way. A well-prepared workspace and the right supplies can prevent common frustrations and ensure a smooth installation process. This initial stage is not just about convenience; it’s about safeguarding your device, ensuring compatibility, and making smart choices that impact your wallet and the environment.
Gathering Your Arsenal: What You’ll Need
The first step is to collect everything you’ll require. This might seem obvious, but overlooking a single item can halt your progress.
- New HP Ink Cartridges: This is, of course, the most critical item. Ensure you have the correct cartridge numbers for your specific HP printer model. These numbers are typically found on the old cartridge, inside the printer, or in your printer’s manual. We’ll delve deeper into compatibility shortly, but always double-check.
- Your HP Printer’s Manual (Optional but Recommended): While this guide provides general instructions, your specific printer model might have unique quirks or tray designs. The manual is an invaluable resource for model-specific details. If you don’t have a physical copy, most HP manuals are readily available for download on their official support website – a testament to the comprehensive digital support infrastructure modern tech brands provide.
- Lint-Free Cloth or Paper Towels: Ink can be messy. Having something to wipe up potential drips or residue is essential. A lint-free cloth is preferable to avoid leaving fibers inside the printer.
- A Clean, Well-Lit Workspace: Good lighting allows you to see clearly, and a clean surface prevents dust or debris from entering your printer’s delicate internal mechanisms.
Safety First: Power Down and Protect
Working with electronics always carries a degree of risk, however small. Taking simple safety precautions protects both you and your printer.
- Power Off and Unplug: Always turn off your HP printer and, ideally, unplug it from the wall socket before performing any internal maintenance. This prevents accidental power surges, reduces the risk of electric shock, and ensures the printer’s carriage (the part that holds the cartridges) remains stationary, preventing injury or damage. This is a fundamental digital security practice, protecting your hardware from unforeseen electrical issues.
- Handle with Care: Ink cartridges contain sensitive electronic contacts and print nozzles. Avoid touching these areas with your fingers. The oils and dirt from your skin can clog the nozzles or interfere with the electrical connection, leading to poor print quality or cartridge recognition errors. When discussing ‘Brand,’ HP’s reputation relies on the quality of its output, and user error in handling cartridges can unfairly tarnish that perception.
- Mind Static Electricity: In drier climates or environments, static electricity can be a concern for electronics. While modern printers are somewhat resilient, it’s good practice to ground yourself by touching a metal object before handling sensitive components.
Compatibility Corner: Ensuring the Right Fit
This is where the ‘Money’ and ‘Brand’ aspects significantly intertwine with ‘Tech.’ Using the correct cartridge is non-negotiable for optimal performance and printer longevity.
- Check the Model Number: Every HP printer model requires specific ink cartridges. The cartridge numbers are usually clearly printed on the old cartridges, inside the printer’s access door, or in the printer’s documentation. Forgetting this step is a common and costly mistake, leading to incompatible purchases.
- Original HP Ink vs. Third-Party/Refilled Cartridges: This is a crucial decision for many users.
- Original HP Ink: These are manufactured by HP and designed specifically for their printers. They typically offer the best print quality, reliability, and are often covered by HP’s warranty. The brand assurance here is high, guaranteeing the intended performance. From a ‘Money’ perspective, they are generally more expensive upfront but can save money in the long run by preventing printer damage and delivering consistent results, avoiding reprints.
- Third-Party/Compatible Cartridges: These are produced by other manufacturers and designed to work with HP printers. They are often significantly cheaper. While some third-party cartridges perform admirably, quality can vary wildly. Risks include poor print quality, leakage, and potential printer damage that might void your HP warranty. This presents a ‘Money’ saving opportunity but with potential ‘Tech’ risks and a dilution of the ‘Brand’ experience HP intends to deliver.
- Refilled Cartridges: These involve refilling empty original cartridges. While environmentally friendly and often the cheapest option, they carry similar risks to third-party cartridges, with potential for inconsistent ink quality, leakage, and damage.
Making an informed choice here means balancing immediate cost savings against long-term reliability and print quality – a classic financial decision in the tech world.
Step-by-Step Cartridge Installation: A Guided Walkthrough
With your supplies gathered and safety precautions in place, you’re ready to proceed with the actual installation. Follow these steps carefully to ensure a successful cartridge swap and get back to printing in no time.
Accessing the Ink Cartridge Bay
The first physical step is to open your printer to access the internal components where the cartridges reside.
- Turn On Your Printer: If you unplugged it, plug it back in and power it on. This is usually necessary for the print carriage to move into the service position.
- Open the Cartridge Access Door/Cover: This is typically located on the front or top of the printer. Refer to your printer’s manual if you’re unsure. On most HP models, opening this door will automatically cause the print carriage to slide to the center, making the cartridges accessible.
- Wait for the Carriage to Stop Moving: The print carriage contains the print heads and the ink cartridges. It will move into position and then stop. Do not try to force it or obstruct its movement, as this can damage the printer’s delicate internal mechanisms, impacting its tech performance.
Removing the Old Cartridge (If Applicable)
If you’re replacing an empty cartridge, you’ll need to remove it first. If you’re installing new cartridges for the first time, you can skip this step.
- Identify the Cartridge to Replace: The printer’s display might indicate which cartridge is low or empty, or you can visually inspect them.
- Gently Press Down or Pull the Latch: HP printers use various mechanisms to secure cartridges. Some have a latch that needs to be gently pressed down or pulled open. Others simply require you to press the cartridge inward slightly to release it.
- Pull the Old Cartridge Out: Once released, carefully pull the old cartridge straight out of its slot. Be prepared for a small amount of ink residue.
- Dispose of Responsibly: Many HP cartridges are recyclable. Consider recycling programs offered by HP or local electronics recycling centers. This aligns with broader ‘Brand’ responsibility and environmental ‘Tech’ sustainability trends, making a small but important contribution to reducing e-waste.
Unboxing and Preparing the New Cartridge
The new cartridge comes with protective packaging that needs to be removed carefully.
- Remove from Packaging: Take the new cartridge out of its box and plastic wrap.
- Remove Protective Tape/Clip: New HP cartridges usually have a protective tape or clip covering the electrical contacts and/or the print nozzles. This is typically a bright orange or yellow tape. Only remove the tape/clip indicated. Do not remove any other labels or copper-colored contacts. Removing the wrong part can damage the cartridge or invalidate its warranty.
- Avoid Touching Contacts and Nozzles: As mentioned earlier, avoid touching the copper-colored electrical contacts or the print nozzles. These are crucial for the cartridge’s functionality and print quality.
Inserting the New Cartridge with Confidence
This is the moment of truth. Proper insertion ensures the printer recognizes the cartridge and can draw ink effectively.
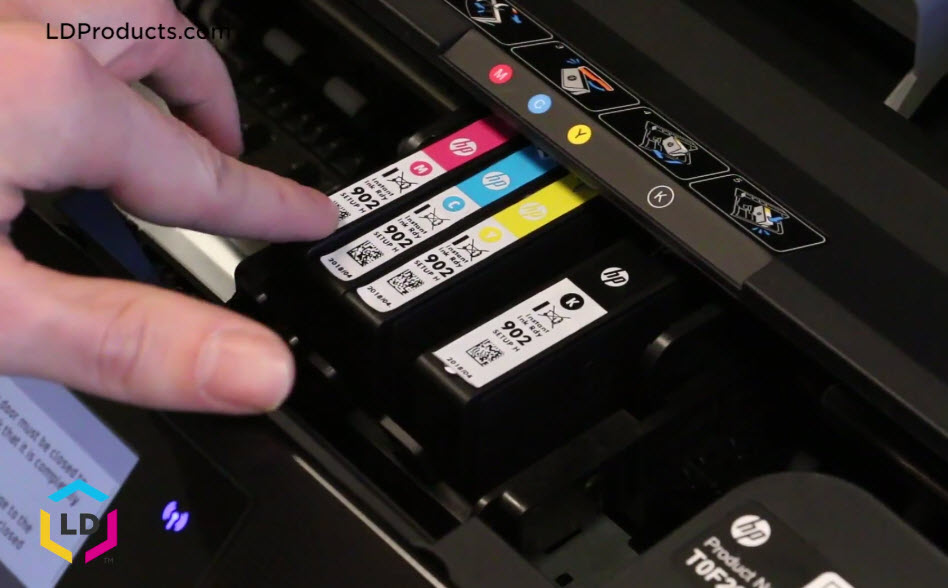
- Match the Cartridge to its Slot: Each cartridge has a designated slot, usually color-coded or clearly labeled (e.g., “Black,” “Cyan,” “Magenta,” “Yellow”). Ensure you are inserting the correct cartridge into the correct slot. HP’s design usually makes it difficult to insert the wrong cartridge into the wrong slot, but always double-check.
- Slide the Cartridge In: Hold the new cartridge with the nozzles facing towards the printer and the electrical contacts towards the back. Slide it gently into its designated slot.
- Push Until It Clicks: Push the cartridge firmly until it snaps or clicks into place. You should feel a distinct lock. If it doesn’t click, it might not be properly seated, which can lead to “cartridge not recognized” errors. Do not force it; if it’s resistant, re-check its alignment. This ‘Tech’ interaction relies on precise mechanical alignment.
Closing Up and Powering On
Once all cartridges are installed, it’s time to finalize the process.
- Close the Cartridge Access Door/Cover: Gently close the door or cover you opened earlier.
- Wait for Printer Initialization: The printer might go through an initialization cycle, which can involve some whirring noises as it prepares the new ink for printing. The printer’s display might show “Initializing” or “Calibrating.”
- Check Printer Status: Once initialization is complete, the printer’s display should indicate that all cartridges are installed and ready for use. If there are any errors, proceed to the troubleshooting section.
Post-Installation Procedures and Troubleshooting Common Hiccups
Installing the cartridge is often just the beginning. To ensure pristine print quality and address potential issues, a few extra steps and a basic understanding of troubleshooting are invaluable. This section delves into the nuances that elevate a simple cartridge swap into a refined technical maintenance routine, contributing to your overall ‘Productivity’ and safeguarding your ‘Money’ from wasted ink or paper.
The Critical Alignment Process
After installing new ink cartridges, especially if you’ve replaced multiple colors or a black cartridge, your HP printer will often recommend or automatically initiate an alignment process. This isn’t just a suggestion; it’s a critical step for print quality.
- Why Alignment Matters: The print heads, which are either integrated into the cartridges or part of the printer itself, must precisely apply ink to the paper. Over time, or with new cartridges, their alignment can drift. An alignment process prints a test page and uses the printer’s internal sensors to adjust the print heads for optimal accuracy. Without proper alignment, you might experience blurry text, misaligned colors, or streaky images. This directly impacts the ‘Brand’ perception of any document you produce and can make even professional work look amateurish.
- How to Initiate Alignment:
- Automatic Prompt: Many HP printers will automatically prompt you to align the cartridges after installation. Follow the on-screen instructions on the printer’s control panel.
- Manual Initiation: If no prompt appears, you can usually start the alignment process through the printer’s control panel menu (look for “Tools,” “Maintenance,” or “Setup”) or through the HP Smart app or software installed on your computer. HP Smart app is a fantastic ‘Tech’ tool, providing comprehensive printer management from your mobile device or desktop.
- Follow On-Screen Instructions: The printer will print an alignment page. Depending on your model, you might need to place this page on the scanner glass for the printer to scan and complete the alignment, or the printer might simply calibrate based on the printed pattern.
Common Issues and Quick Fixes
Even with careful installation, sometimes issues arise. Knowing how to quickly address them saves time and prevents unnecessary frustration, boosting your ‘Productivity’.
- “Cartridge Not Recognized” or “Low Ink” Errors:
- Re-seat the Cartridge: The most common fix. Open the access door, gently push the cartridge back in until it clicks. Sometimes, it wasn’t fully seated.
- Clean Contacts: Power down the printer. Carefully remove the problematic cartridge. Using a lint-free cloth lightly dampened with distilled water, gently wipe the copper electrical contacts on both the cartridge and inside the printer carriage. Allow them to dry completely before reinserting. Make sure no moisture remains.
- Restart Printer: Sometimes a simple power cycle (turning off the printer, waiting 30 seconds, then turning it back on) can resolve software glitches.
- Check for Protective Tape: Double-check that all protective tape/clips have been removed from the new cartridge.
- Firmware Update: Ensure your printer’s firmware is up to date via the HP Smart app or HP’s website. Outdated firmware can sometimes cause compatibility issues with newer cartridges. This highlights the ongoing ‘Tech’ maintenance required for modern gadgets.
- Poor Print Quality (Streaks, Faded Colors, Missing Colors):
- Run Print Head Cleaning: This utility, available through your printer’s control panel or the HP Smart app, flushes the print nozzles and can clear minor clogs. You might need to run it a few times. Be aware that cleaning cycles consume ink, so use them judiciously.
- Perform Alignment: As discussed above, misalignment is a frequent culprit for quality issues.
- Check Ink Levels: Verify that other cartridges aren’t also low or empty.
- Paper Type: Ensure you’re using the correct paper type setting in your print software. Incorrect settings can lead to poor ink saturation.
- Ink Leaking:
- This is rare with genuine HP cartridges but more common with third-party or refilled ones. If it happens, immediately power down and unplug the printer. Carefully remove the leaking cartridge (wearing gloves if possible) and clean any spilled ink inside the printer with a lint-free cloth. Replace the cartridge. If the leakage is severe or recurring, it might indicate a faulty cartridge or printer damage. This directly impacts ‘Money’ as it wastes ink and potentially damages the printer, highlighting the risks associated with non-OEM supplies.
Best Practices for Cartridge Longevity and Printer Health
Beyond installation, how you manage your cartridges and printer contributes to its overall lifespan and efficiency.
- Regular Usage: Print something at least once a week, even if it’s just a test page. This helps prevent ink from drying out and clogging the print nozzles, a common ‘Tech’ problem.
- Proper Storage of Spare Cartridges: Store unopened ink cartridges in their original, sealed packaging in a cool, dark place. Avoid extreme temperatures or direct sunlight. This preserves their integrity and saves you ‘Money’ by ensuring they are viable when needed.
- Keep Printer Clean: Regularly dust the exterior of your printer. While less critical for ink issues, a clean environment contributes to overall device health.
Beyond the Cartridge: Maximizing Your HP Printer Experience
The act of installing an ink cartridge, while fundamentally a technical task, opens doors to broader considerations that impact your finances, your environmental footprint, and your overall productivity in a technologically advanced world.
Smart Ink Choices: Balancing Cost and Quality
The debate between OEM (Original Equipment Manufacturer) and compatible/refilled cartridges is largely a ‘Money’ vs. ‘Brand’ dilemma, with significant ‘Tech’ implications.
- HP Instant Ink: For users with consistent printing needs, HP’s Instant Ink subscription service offers a compelling alternative. Instead of buying cartridges, you pay a monthly fee based on the number of pages you print, and HP automatically ships new cartridges when yours run low. This model shifts the focus from cartridge cost to per-page cost, often resulting in significant savings for moderate to heavy users. It’s a prime example of a ‘Money’ saving innovation leveraging ‘Tech’ (printer monitoring) and ‘Brand’ trust.
- Cost-Benefit Analysis: When considering third-party options, weigh the initial savings against potential issues like poor print quality, reduced page yield, and the risk of printer damage or voided warranties. For critical documents or professional output, the reliability and quality assurance of genuine HP ink often justify the higher price. For casual, non-critical printing, compatible cartridges might offer sufficient performance. This critical financial decision requires careful consideration of individual needs and risk tolerance.
The Environmental and Ethical Aspect of Printer Consumables
Every ink cartridge eventually becomes waste. Our choices have an environmental impact, and major brands like HP are increasingly addressing this, tying into ‘Brand’ reputation and ‘Tech’ sustainability.
- Recycling Programs: HP offers robust recycling programs for its ink cartridges. They provide free shipping labels or drop-off locations for used cartridges, ensuring they are responsibly processed and repurposed. This initiative not only reduces landfill waste but also conserves resources by allowing materials to be reused. Supporting brands with strong sustainability practices reflects a growing consumer awareness and responsibility.
- Conscious Consumption: By participating in recycling and considering the lifecycle of consumables, users contribute to a more sustainable tech ecosystem. Opting for high-yield cartridges, when available, can also reduce the frequency of replacements and associated waste. This ties into a broader societal shift towards environmental responsibility, where tech brands are under pressure to demonstrate ethical practices.
Integrating Your Printer into a Smart Productivity Ecosystem
Modern printers are far more than mere paper output devices; they are integral components of a connected digital workflow, leveraging ‘Tech’ for enhanced ‘Productivity’.
- HP Smart App: This versatile app allows you to set up your printer, print from virtually anywhere, scan documents to various cloud services, order ink, and even troubleshoot issues directly from your smartphone or tablet. It transforms the printer from a static peripheral into an active participant in your mobile and cloud-based workflow, enhancing productivity and convenience.
- Wireless Printing and Cloud Integration: Most new HP printers support Wi-Fi connectivity, enabling seamless printing from multiple devices without cables. Integration with cloud services like Google Drive or Dropbox allows for direct scanning to and printing from these platforms, streamlining document management and collaboration. This showcases how printer technology continues to evolve, aligning with broader digital trends and tools.
- Digital Security and Printer Networks: In a professional context, integrating your printer into a secure network is vital. Modern HP printers come with security features to protect data transmitted to and from the device. Understanding these features and ensuring your printer is on a secure network is an often-overlooked aspect of ‘Digital Security,’ especially as printers are increasingly targeted in cyberattacks.
Conclusion
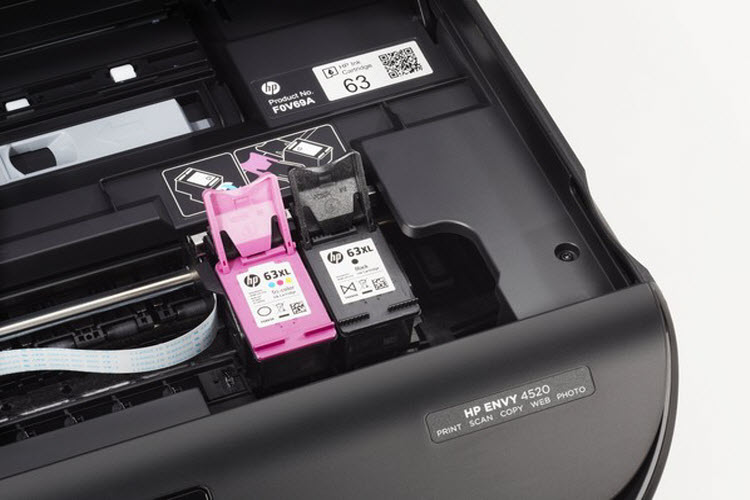
Installing an ink cartridge on your HP printer is a routine maintenance task that, when approached with the right knowledge and tools, can be completed quickly and efficiently. By following the steps outlined in this guide – from careful preparation and precise installation to post-installation alignment and proactive troubleshooting – you ensure your printer consistently delivers high-quality output.
Beyond the mechanics, this process is an opportunity to engage with broader themes that shape our interaction with technology. Making informed decisions about genuine versus compatible ink impacts your personal finances and supports your chosen brand. Participating in recycling programs contributes to environmental sustainability and aligns with responsible tech consumption. And by leveraging apps like HP Smart, you integrate your printer into a modern, productive digital ecosystem.
Your HP printer is a valuable tool, and knowing how to properly care for it extends its life, maintains its performance, and ultimately enhances your productivity. So, the next time your printer flashes that “low ink” warning, you’ll be armed with confidence, expertise, and a holistic understanding of how this seemingly simple task fits into your larger tech, money, and brand landscape. Happy printing!
aViewFromTheCave is a participant in the Amazon Services LLC Associates Program, an affiliate advertising program designed to provide a means for sites to earn advertising fees by advertising and linking to Amazon.com. Amazon, the Amazon logo, AmazonSupply, and the AmazonSupply logo are trademarks of Amazon.com, Inc. or its affiliates. As an Amazon Associate we earn affiliate commissions from qualifying purchases.