Python is a powerful, versatile, and widely used programming language that has become a cornerstone for developers, data scientists, and tech enthusiasts alike. Whether you’re aiming to build web applications, automate repetitive tasks, delve into machine learning, or simply embark on your coding journey, installing Python on your Windows machine is your essential first step. This comprehensive guide will walk you through the entire process, ensuring a smooth and successful installation, so you can start coding in no time.
Understanding Python: Why You Need It
Before diving into the installation process, it’s beneficial to understand why Python is such a popular choice. Its readability, extensive libraries, and strong community support make it an excellent language for beginners and experienced programmers. Python’s applications are vast, spanning across:
- Web Development: Frameworks like Django and Flask make building dynamic websites and web applications efficient.
- Data Science and Machine Learning: Libraries such as NumPy, Pandas, Scikit-learn, and TensorFlow have made Python the go-to language for data analysis, visualization, and artificial intelligence.
- Automation: Python scripts can automate almost any repetitive task on your computer, saving you time and effort.
- Software Development: From desktop applications to complex systems, Python’s flexibility allows for a wide range of software creation.
- Game Development: With libraries like Pygame, you can even develop your own games.
The ability to perform these diverse tasks is a testament to Python’s design and the robust ecosystem built around it. For anyone looking to enter the tech world, learn new skills, or boost their productivity, mastering Python is a significant advantage.
Getting Started: Downloading Python for Windows
The first step in installing Python on your Windows system is to download the official installer. It’s crucial to obtain Python from the official Python Software Foundation (PSF) website to ensure you’re getting a legitimate and secure version.
Choosing the Right Python Version
When you visit the official Python website, you’ll likely see options for the latest stable release and potentially older versions. For most users, it’s recommended to download the latest stable release. This version will have the most recent features, security patches, and bug fixes.
As of late 2023 and early 2024, Python 3.10, 3.11, and 3.12 are considered the most current and actively supported major versions. Python 2 is no longer supported and should be avoided for new projects.
Navigating the Official Python Website
-
Go to the Official Python Website: Open your web browser and navigate to python.org.
-
Locate the Downloads Section: Hover over the “Downloads” tab in the navigation menu.
-
Select Windows: From the dropdown menu, click on “Windows.” This will take you to the download page specifically for Windows versions of Python.
-
Choose the Latest Stable Release: You will see a prominent button or link for the latest Python 3 release. Click on it. For example, you might see “Download Python 3.12.1” or a similar designation.
-
Select the Correct Installer: On the download page for the specific Python version, scroll down to the “Files” section. Here, you’ll find various installer options. For most Windows users, you’ll want to choose one of the following:
- Windows installer (64-bit): This is the most common choice for modern Windows operating systems (Windows 7 and later, 64-bit versions).
- Windows installer (32-bit): If you have a very old or specific 32-bit Windows installation, you would choose this. However, 64-bit is standard for most current machines.
Click on the appropriate installer link to begin the download. The file will be an executable (
.exe) file.
Verifying Your Download
Once the download is complete, it’s a good practice to verify the integrity of the downloaded file. While not strictly necessary for most users, it can be done by checking the file size or, for advanced users, by comparing checksums if provided on the download page.
Installing Python on Windows: A Step-by-Step Guide
With the Python installer downloaded, you’re ready to proceed with the installation. The installer is designed to be user-friendly, but paying attention to a few key options will ensure a successful setup.
Running the Python Installer
- Locate the Downloaded File: Find the
.exefile you downloaded in your “Downloads” folder or wherever your browser saves files. - Run as Administrator (Recommended): Right-click on the installer file and select “Run as administrator.” This grants the installer the necessary permissions to make changes to your system, which can prevent potential issues during installation.
- The Python Setup Wizard: The Python installer will launch, presenting you with the initial setup screen.
Crucial Installation Options
This is the most important part of the installation process. Carefully review the options presented:
-
“Install launcher for all users (recommended)” and “Add python.exe to PATH”: It is highly recommended that you check BOTH of these boxes.
- “Install launcher for all users (recommended)”: This option installs the
py.exelauncher, which allows you to run different Python versions side-by-side and manage them easily from the command line. - “Add python.exe to PATH”: This is absolutely critical. Adding Python to your system’s PATH environment variable allows you to run Python commands (like
pythonorpip) directly from any command prompt or PowerShell window, from any directory. Without this, you would have to navigate to the Python installation directory every time you want to run a Python script or command.
- “Install launcher for all users (recommended)”: This option installs the
-
“Install Now” vs. “Customize installation”:
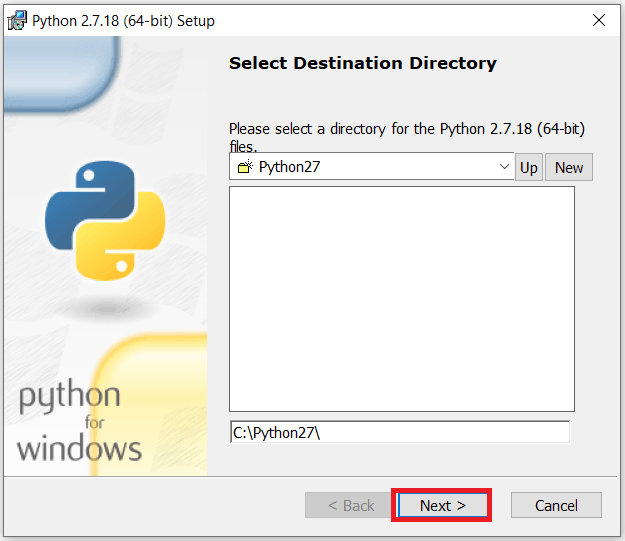
- “Install Now”: This option will install Python with default settings in a standard location (usually
C:Users<YourUsername>AppDataLocalProgramsPythonPythonXXorC:Program FilesPythonXX). For most users, this is perfectly adequate and the easiest option. - “Customize installation”: This option allows you to choose specific features to install, change the installation directory, and configure advanced options. You would typically only choose this if you have specific requirements, such as installing Python in a custom location or excluding certain optional components.
- “Install Now”: This option will install Python with default settings in a standard location (usually
For the vast majority of users, checking “Add python.exe to PATH” and then clicking “Install Now” is the recommended path.
Completing the Installation
- Proceed with Installation: After making your selections, click “Install Now.”
- User Account Control (UAC) Prompt: Windows may ask for your permission to allow the installer to make changes to your device. Click “Yes.”
- Installation Progress: The installer will now begin copying files and setting up Python on your system. This process typically takes a few minutes.
- Setup was successful: Once the installation is complete, you will see a “Setup was successful” message.
- Disable path length limit (Optional but Recommended): You might see an option to “Disable path length limit.” Clicking this will change a Windows setting that may otherwise prevent Python or its packages from working correctly with very long file paths. It’s generally a good idea to click this if it appears, especially if you plan to work with many libraries or complex project structures.
- Close the Installer: Click the “Close” button.
Verifying Your Python Installation
After the installation is complete, it’s essential to verify that Python has been installed correctly and that it’s accessible from your command line.
Using the Command Prompt or PowerShell

-
Open Command Prompt or PowerShell:
- Press the Windows key on your keyboard.
- Type
cmd(for Command Prompt) orpowershelland press Enter. Alternatively, you can search for them in the Start Menu.
-
Check Python Version: In the command window, type the following command and press Enter:
python --versionIf Python is installed correctly and added to your PATH, you should see the version number of Python that you just installed (e.g.,
Python 3.12.1). -
Check Pip Version: Pip is the package installer for Python. It’s installed automatically with Python and is used to install third-party libraries and modules. To check its version, type:
pip --versionYou should see output indicating the pip version and the Python version it’s associated with.
-
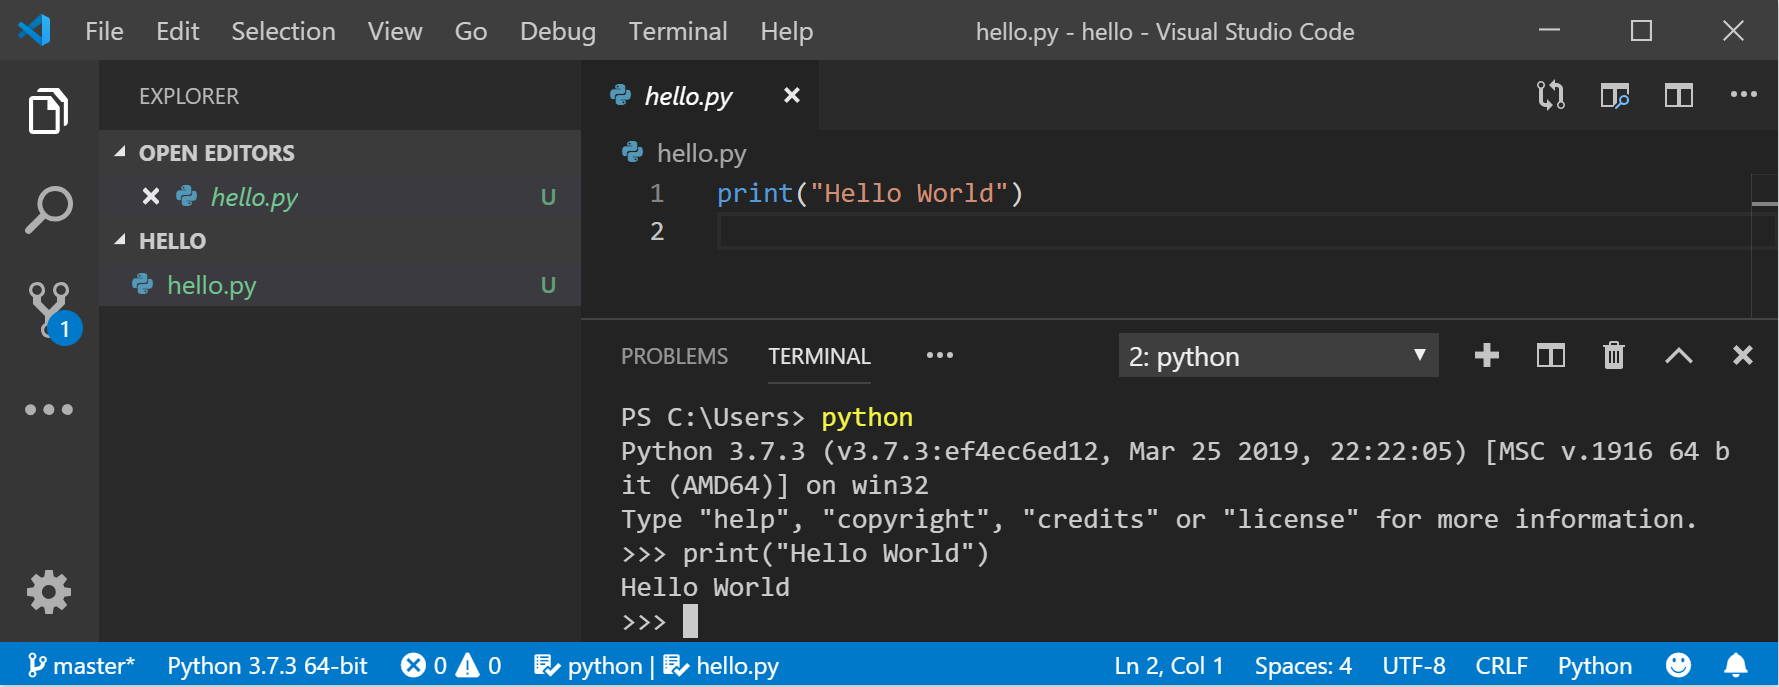
Launch the Python Interpreter: You can also start an interactive Python session by typing:
pythonThis will launch the Python interpreter, indicated by the
>>>prompt. You can type Python code here and see immediate results. To exit the interpreter, typeexit()and press Enter, or pressCtrl + Zfollowed by Enter.
Troubleshooting Common Issues
-
“python is not recognized as an internal or external command”: This is the most common error and almost always means that Python was not added to your PATH environment variable during installation. If you encounter this, you have two main options:
- Reinstall Python: Uninstall Python, and then run the installer again, making absolutely sure to check the “Add python.exe to PATH” box.
- Manually Add to PATH: You can manually add Python to your PATH. This is a more advanced step and involves editing your system’s environment variables. Search online for “how to add python to path windows manually” for detailed instructions.
-
Multiple Python Versions: If you have multiple Python versions installed, using
pythonmight launch an older version. In such cases, it’s best to use thepylauncher:py -3.11to run Python 3.11py -3.12to run Python 3.12
Next Steps: Your Python Journey Begins
Congratulations! You have successfully installed Python on your Windows machine. This opens up a world of possibilities for learning, creating, and innovating. Here are some suggested next steps to help you on your Python journey:
1. Explore the Python Standard Library
Python comes with a rich “batteries included” standard library that offers modules for a wide range of tasks, from working with files and the operating system to networking and data manipulation. Familiarize yourself with some common modules like os, sys, math, datetime, and json.
2. Learn the Basics of Python Programming
If you’re new to Python, it’s time to learn the fundamental concepts:
- Variables and Data Types: Integers, floats, strings, booleans, lists, tuples, dictionaries.
- Operators: Arithmetic, comparison, logical operators.
- Control Flow:
if/elif/elsestatements,forloops,whileloops. - Functions: Defining and calling functions.
- Object-Oriented Programming (OOP) Concepts: Classes, objects, inheritance (optional for beginners but powerful).
There are numerous free online resources, tutorials, and courses available to help you learn Python. Websites like Codecademy, freeCodeCamp, and the official Python Tutorial are excellent starting points.
3. Install Third-Party Packages with Pip
As mentioned, pip is your tool for installing libraries that aren’t part of the standard library. For example, if you want to work with a popular web framework like Flask:
pip install Flask
Or for data analysis with Pandas:
pip install pandas
Explore the vast ecosystem of Python packages on the Python Package Index (PyPI) at pypi.org.
4. Choose Your Development Environment (IDE or Text Editor)
While you can write Python code in any text editor, using an Integrated Development Environment (IDE) or a feature-rich code editor can significantly enhance your productivity. Popular choices include:
- Visual Studio Code (VS Code): A free, powerful, and highly customizable code editor with excellent Python support through extensions.
- PyCharm: A dedicated Python IDE offering advanced features for debugging, code analysis, and project management. It has a free Community Edition.
- Jupyter Notebooks/Lab: Excellent for data science and interactive coding, allowing you to run code in cells and see outputs immediately.
By following these steps, you’ll have a solid foundation for using Python on your Windows computer. The learning curve for Python is relatively gentle, and its wide applicability makes it a rewarding skill to acquire. Happy coding!
aViewFromTheCave is a participant in the Amazon Services LLC Associates Program, an affiliate advertising program designed to provide a means for sites to earn advertising fees by advertising and linking to Amazon.com. Amazon, the Amazon logo, AmazonSupply, and the AmazonSupply logo are trademarks of Amazon.com, Inc. or its affiliates. As an Amazon Associate we earn affiliate commissions from qualifying purchases.