
In an increasingly digital world, the performance and reliability of your primary computer are paramount. Whether you’re a professional managing client projects, an entrepreneur building an online business, or a savvy individual keen on optimizing personal finance, a fast, secure, and efficient operating system is the bedrock of your digital productivity. Over time, even the most robust systems can become sluggish, bogged down by accumulated software, temporary files, and perhaps even remnants of malware. This is where a clean installation of Windows 10 comes in, offering a rejuvenating reset that can dramatically improve your system’s speed, security, and overall responsiveness.

This comprehensive guide will walk you through every step of performing a fresh Windows 10 installation. Beyond just the technical how-to, we’ll explore why this process is a vital maintenance step for anyone invested in technology, digital security, and even their personal brand and financial well-being through optimized productivity. Think of it as spring cleaning for your digital life – an essential ritual that ensures your tech toolkit is always sharp, secure, and ready to tackle whatever comes next.
Why a Fresh Windows 10 Installation is More Than Just a Tech Fix
Before diving into the intricate steps, let’s understand the profound impact a clean Windows 10 installation can have. It’s not merely a technical procedure; it’s a strategic move that aligns with key principles of modern digital living, touching upon technology trends, digital security, personal branding, and financial acumen.
Revitalizing Performance and Embracing Technology Trends
One of the most immediate and tangible benefits of a fresh Windows 10 install is the dramatic performance boost. Over months or years, software installations, updates, and everyday use can clutter your system registry, fragment your hard drive, and accumulate countless temporary files. This digital debris acts like a drag on your system, slowing down boot times, application launches, and overall responsiveness. A clean slate eliminates this digital clutter, allowing Windows to run as smoothly and efficiently as it did the day you first bought your machine.
For those tracking technology trends, a responsive system is crucial. New software, AI tools, and demanding applications often require optimal system resources. A clean install ensures your hardware is performing at its peak, ready to handle the latest advancements without being held back by a tired operating system. It means your machine can better support new apps for productivity, graphic design, video editing, or even the latest advancements in AI-driven tools, keeping you at the forefront of technological adoption.
Enhancing Digital Security and Productivity
Digital security is a non-negotiable aspect of our online lives. A clean installation mitigates various security risks. It eliminates dormant malware, adware, or other malicious software that might have evaded detection over time. By starting fresh, you ensure that your operating system and core files are pristine, providing a robust foundation for your chosen antivirus and digital security measures. This reduces vulnerabilities and protects your sensitive data, an invaluable asset in an era of constant cyber threats.
From a productivity standpoint, a clean, fast, and secure system is a direct investment in your efficiency. Slow computers lead to lost time, frustration, and reduced output. Imagine waiting an extra 30 seconds for an application to load, or enduring frequent crashes. These small inefficiencies compound over time, eating into valuable work hours. For freelancers, online entrepreneurs, or anyone whose income relies on their digital tools, a system that performs flawlessly translates directly into saved time, higher output, and ultimately, greater earning potential. A sluggish machine is a money drain; a crisp one is a revenue enabler.
The Subtle Impact on Your Personal Brand
While less obvious, a well-maintained, high-performing computer subtly influences your personal and professional brand. In today’s interconnected world, your digital tools are an extension of yourself. If you’re frequently delayed by technical glitches during video calls, struggle with slow software during presentations, or miss deadlines due to system crashes, it can subtly undermine your reliability and professionalism.
A system that runs smoothly, loads applications instantly, and handles multitasking effortlessly projects an image of competence and efficiency. For those building a personal brand – whether as a consultant, a content creator, or an expert in their field – a reliable digital workspace is a silent but powerful testament to their dedication to quality and punctuality. It ensures you’re always ready to perform at your best, reflecting positively on your corporate identity and reputation.
The Essential Pre-Installation Checklist: Prepare for a Seamless Transition
The success of a clean Windows 10 installation hinges significantly on meticulous preparation. Skipping these crucial steps can lead to data loss, frustrating delays, or a less-than-optimal post-installation experience. Think of this phase as laying the groundwork for a solid financial investment; proper planning now saves significant headaches and potential costs later.
1. Back Up All Your Critical Data (Non-Negotiable!)
This is arguably the most critical step. A clean installation involves wiping your primary hard drive, meaning all data on it will be irrevocably deleted. This includes documents, photos, videos, music, applications, browser bookmarks, and anything else stored on your C: drive.
- External Hard Drive: The most common and reliable method. Copy all essential files and folders to an external HDD or SSD.
- Cloud Storage: Services like OneDrive, Google Drive, Dropbox, or iCloud are excellent for backing up documents and smaller files. Ensure everything you need is synced before you begin.
- System Image (Optional but Recommended): For advanced users, creating a full system image using Windows’ built-in tools or third-party software allows you to revert to your current state if anything goes wrong, though this isn’t suitable if you want a truly “clean” slate.
- Application Data: Don’t forget saved games, browser profiles, email archives (PST files for Outlook), and any other application-specific data. Some applications have export functions for settings or data.
Pro-Tip for Productivity: While backing up, take the opportunity to declutter. Delete old, unnecessary files. This minimalizes what you need to restore later and ensures your new system starts truly fresh.
2. Gather Essential Drivers and Software
Once Windows is reinstalled, your computer might lack the necessary drivers for key hardware components like your network adapter, graphics card, or chipset. Without network drivers, you won’t be able to connect to the internet to download anything else!
- Download Drivers: Visit your computer manufacturer’s website (e.g., Dell, HP, Lenovo, ASUS) or individual component manufacturers (e.g., NVIDIA, AMD, Intel) and download the latest drivers for your specific model onto a USB flash drive. Focus on:
- Chipset Drivers: Crucial for motherboard communication.
- Network Drivers: Both Wi-Fi and Ethernet, to ensure internet connectivity.
- Graphics Drivers: For optimal display performance.
- Audio Drivers: For sound.
- Software Product Keys/Installers: Compile a list of all essential software you’ll need to reinstall (e.g., Microsoft Office, Adobe Creative Suite, specialized business applications, games). Locate their product keys or licenses. Download installation files for applications that aren’t readily available online.
3. Obtain Windows 10 Installation Media
You’ll need a bootable USB drive or DVD containing the Windows 10 installation files.
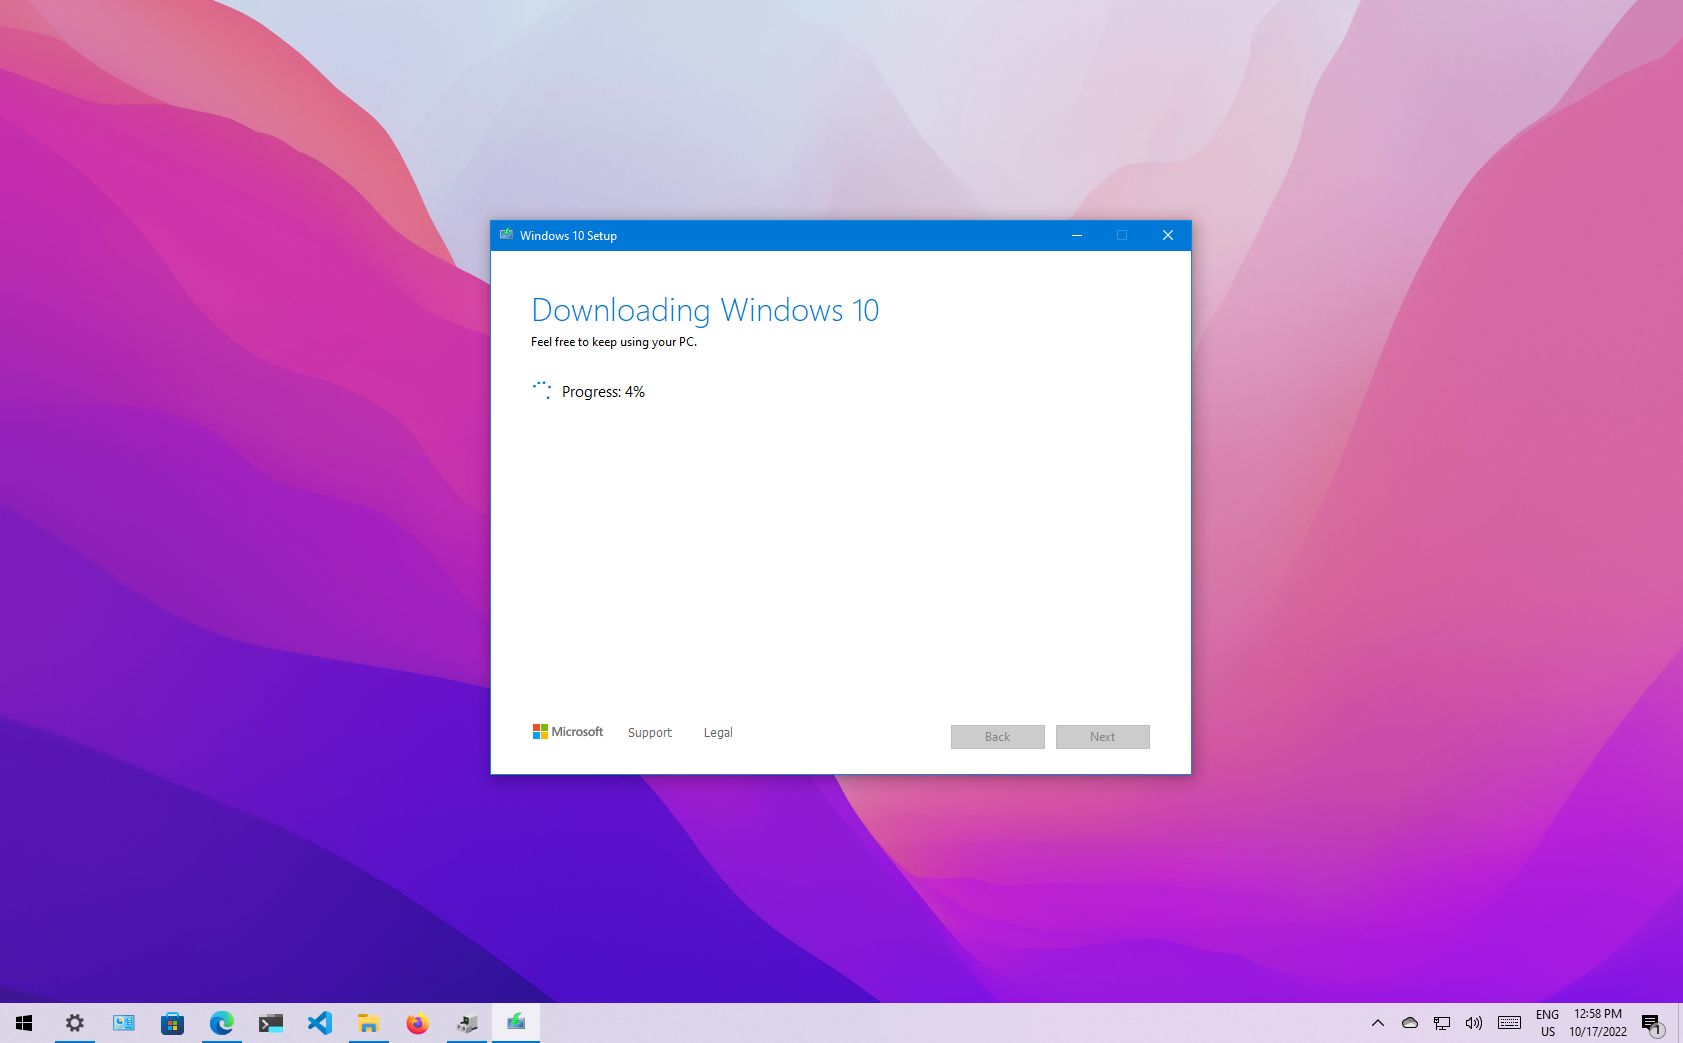
- Microsoft Media Creation Tool: This is the easiest and most recommended method.
- Go to Microsoft’s official Windows 10 download page.
- Download and run the Media Creation Tool.
- Select “Create installation media (USB flash drive, DVD, or ISO file) for another PC.”
- Choose your language, edition (Windows 10), and architecture (64-bit is standard for most modern PCs).
- Select “USB flash drive” and insert an empty USB drive with at least 8GB capacity. The tool will format the drive and copy the necessary files.
4. Locate Your Windows 10 Product Key
While often not required during installation (especially for PCs that came with Windows 10 pre-installed, as activation is tied to hardware), it’s good practice to have it.
- OEM PCs: If Windows 10 came pre-installed, your license is usually tied to your motherboard and will automatically reactivate once online.
- Retail Purchases: If you bought a retail copy, the key will be on a sticker, in an email, or linked to your Microsoft account.
- Digital Licenses: If you upgraded from an activated Windows 7/8/8.1, you likely have a digital license tied to your Microsoft account. Logging in after installation will activate Windows.
5. Check Hardware Compatibility and System Requirements
Most modern PCs easily meet Windows 10 requirements, but it’s worth a quick check, especially for older hardware. You’ll need:
- Processor: 1 gigahertz (GHz) or faster compatible processor or System on a Chip (SoC)
- RAM: 1 gigabyte (GB) for 32-bit or 2 GB for 64-bit
- Hard disk space: 16 GB for 32-bit OS or 20 GB for 64-bit OS
- Graphics card: DirectX 9 or later with WDDM 1.0 driver
- Display: 800×600
Ensure your laptop is plugged into a power source throughout the process to avoid interruptions.
The Installation Process: A Step-by-Step Guide to Your New OS
With all preparations complete, you’re ready to initiate the clean installation. This stage involves interacting directly with the Windows Setup wizard, making crucial decisions about drive partitioning, which will define your new system’s foundation.
1. Boot from Your Installation Media
Your computer needs to start from the USB drive or DVD, not its internal hard drive.
- Restart your PC: As it boots, repeatedly press the key to enter your BIOS/UEFI settings or the Boot Menu. Common keys include F2, F10, F12, DEL, or ESC (consult your PC’s manual if unsure).
- Change Boot Order: In the BIOS/UEFI, navigate to the “Boot” tab or similar section. Set your USB drive or DVD-ROM drive as the primary boot device. Save changes and exit.
- Boot from Media: Your computer should now boot from the installation media, and you’ll see the Windows Setup loading files.
2. Windows Setup Wizard: Initial Configuration
- Language, Time, Keyboard: On the first screen, select your preferred language, time and currency format, and keyboard layout. Click “Next.”
- Install Now: Click the “Install now” button.
- Product Key: If prompted, enter your Windows 10 product key. If you have a digital license or expect automatic activation, you can click “I don’t have a product key” and select the appropriate Windows 10 edition (Home or Pro) that matches your license.
- License Terms: Read and accept the Microsoft Software License Terms. Click “Next.”
3. Choosing Installation Type: The “Clean” Decision
- Which type of installation do you want? This is the most crucial step for a clean install. Select “Custom: Install Windows only (advanced).”
- Avoid “Upgrade: Install Windows and keep files, settings, and applications” as this will not provide a truly clean slate.
4. Drive Selection and Partitioning (Warning: Data Deletion Ahead!)
This step allows you to manage your hard drives and partitions. This is where you will delete old Windows installations and associated data.
- Identify Your Drive: Carefully identify the drive where you want to install Windows 10. This is usually “Drive 0” if you have one main drive. Be extremely cautious here; selecting the wrong drive will wipe data from it.
- Delete Partitions: To achieve a truly clean installation, you must delete existing partitions. Select each partition associated with your old Windows installation (e.g., “Primary,” “System,” “Recovery” partitions on “Drive 0”) and click “Delete.” Confirm when prompted. Your goal is to turn the entire drive into “Unallocated Space.”
- If you have multiple drives and only want to clean install on your primary drive, ensure you only delete partitions on that specific drive.
- Create New Partition (Optional): You can simply select the “Unallocated Space” and click “Next.” Windows will automatically create the necessary partitions and begin installation.
- Alternatively, if you want to create a separate partition for data (e.g., a D: drive), you can select the “Unallocated Space,” click “New,” specify the size for your Windows partition (e.g., 200GB), click “Apply,” and then repeat for the remaining unallocated space for your data partition.
- Select Installation Drive: Select the newly created “Primary” partition (or the largest partition created automatically) and click “Next” to begin the installation.
5. Installation Progress and First Boot
Windows will now copy files, install features, updates, and perform several reboots. This process can take anywhere from 15 minutes to an hour or more, depending on your system’s speed. Do not turn off your computer during this stage.
6. Out-of-Box Experience (OOBE): Initial Setup
After the final reboot, you’ll be greeted by the Windows Out-of-Box Experience. This involves configuring basic settings:
- Region and Keyboard Layout: Select your country/region and keyboard layout.
- Network Connection: Connect to a Wi-Fi network or plug in an Ethernet cable. An internet connection is crucial for updates and activating Windows.
- Account Setup:
- Microsoft Account: Sign in with your Microsoft account (recommended for digital licenses and cloud sync).
- Local Account: If you prefer not to use a Microsoft account, look for options like “Offline account” or “Domain join instead” (the wording varies with updates) to create a local user account.
- Privacy Settings: Review and adjust your privacy settings for location, diagnostics, tailored experiences, etc. Microsoft generally defaults to more data sharing, so customize these to your comfort level.
- Cortana: Choose whether to enable or disable Cortana.
Post-Installation Essentials: Optimizing Your Fresh System
Congratulations! You’ve successfully installed a fresh copy of Windows 10. The hard part is over, but a few critical steps remain to truly optimize your system for peak performance, security, and productivity. This is where your investment in preparation truly pays off.
1. Run Windows Update Repeatedly
Immediately after you reach the desktop, the first thing to do is update Windows. This ensures you have the latest security patches, feature enhancements, and often, critical drivers that Windows Update can automatically detect.
- Go to Settings > Update & Security > Windows Update.
- Click “Check for updates.”
- Install all available updates, and then restart your computer.
- Repeat this process several times until no more updates are found. This is vital for digital security and overall system stability.
2. Install Drivers (Manually if Needed)
While Windows Update often installs generic or even specific drivers, it’s highly recommended to install the latest, manufacturer-provided drivers you downloaded in the preparation phase.
- Start with Chipset Drivers, then Network Drivers (if Windows Update didn’t provide good ones), Graphics Drivers, and finally Audio and any other specific device drivers.
- Installing manufacturer drivers ensures optimal performance and full feature sets for your hardware.
3. Install Essential Security Software
Windows Defender offers basic protection, but many users prefer a more robust antivirus solution.
- Install your preferred antivirus software (e.g., Norton, McAfee, Bitdefender, Kaspersky, ESET).
- Ensure it’s updated and performing regular scans.
- Consider a firewall beyond Windows Defender’s built-in one if your security suite offers it. This is a key aspect of digital security and protecting your financial assets from potential breaches.
4. Reinstall Your Applications and Restore Your Data
Now you can begin to make your new system feel like home.
- Install Core Applications: Start with your most frequently used applications – your web browser, office suite, communication tools, and any specialized software for work or hobbies. Use the installers you gathered during preparation.
- Restore Data: Copy your backed-up files from your external drive or cloud storage back to your new system. Organize them logically from the start to maintain a clean digital workspace.
5. Optimize and Personalize Your Experience
- Power Settings: For desktops, set your power plan to “High performance.” For laptops, adjust it based on your battery life needs.
- Uninstall Bloatware: Some pre-built PCs or even a fresh Windows install might include unwanted apps. Use Settings > Apps > Apps & features to uninstall anything you don’t need, further streamlining your system.
- Personalize: Set your wallpaper, theme, and desktop icons. Customize your Start menu and taskbar for quick access to frequently used applications.
- Browser Setup: Re-sync your browser bookmarks, extensions, and settings.
Conclusion: A Powerful Foundation for Your Digital Future
Performing a clean installation of Windows 10 is a foundational exercise in digital maintenance. It’s an investment of time that pays dividends in performance, security, and peace of mind. By following this comprehensive guide, you’ve not only revitalized your computer but also strategically positioned yourself to leverage the latest technology trends, enhance your digital security, boost your productivity (and thus your earning potential), and subtly strengthen your personal and professional brand.
Your freshly installed Windows 10 system is now a blank canvas, ready to be molded into a highly efficient and secure workspace. It’s a testament to proactive management of your digital assets – an essential skill in our fast-paced, tech-driven world. Embrace the speed, revel in the responsiveness, and enjoy the robust security of your optimized machine, knowing you’ve laid a powerful foundation for all your future digital endeavors.
aViewFromTheCave is a participant in the Amazon Services LLC Associates Program, an affiliate advertising program designed to provide a means for sites to earn advertising fees by advertising and linking to Amazon.com. Amazon, the Amazon logo, AmazonSupply, and the AmazonSupply logo are trademarks of Amazon.com, Inc. or its affiliates. As an Amazon Associate we earn affiliate commissions from qualifying purchases.