In the ever-evolving landscape of digital media, efficient handling of audio and video files is paramount. Whether you’re a content creator, a developer, a student, or simply someone who frequently interacts with multimedia, the need to convert, manipulate, or stream various formats is a common challenge. This is where FFmpeg steps in – a robust, open-source multimedia framework that stands as an indispensable tool for nearly any digital task involving audio and video. For macOS users, integrating this powerful utility into your workflow might seem daunting at first, but with the right steps, it’s a straightforward process that unlocks a world of possibilities.
This guide will walk you through the most recommended and user-friendly method for installing FFmpeg on your Mac: using Homebrew. We’ll cover everything from prerequisites to verification and even touch upon basic usage, ensuring you’re well-equipped to leverage FFmpeg’s full potential.
Understanding FFmpeg: The Multimedia Powerhouse
Before diving into the installation process, it’s crucial to understand what FFmpeg is and why it’s so widely celebrated in the tech community. At its core, FFmpeg is a comprehensive, cross-platform solution for recording, converting, and streaming audio and video. It comprises a set of command-line programs designed for processing multimedia files, making it incredibly versatile.
Think of it as the Swiss Army knife for audio and video. It can handle almost any multimedia format you throw at it, performing a vast array of tasks:
- Format Conversion: Transcode video and audio files from one format to another (e.g., MP4 to MOV, WAV to MP3).
- Extraction: Extract audio streams from video files, or individual frames as images.
- Editing: Trim, merge, concatenate, or rotate video clips.
- Scaling and Resizing: Adjust video resolutions to fit different screens or platforms.
- Streaming: Stream live video and audio over networks.
- Metadata Manipulation: Add, remove, or modify metadata in multimedia files.
- Codec Support: Supports a colossal number of codecs and containers, ensuring compatibility across virtually all platforms and devices.
For Mac users, FFmpeg seamlessly integrates into the Unix-like environment of macOS, providing command-line access to its powerful features. This makes it an ideal tool for automating tasks through scripts, integrating with other software, or simply performing quick, precise edits that graphical user interfaces might overcomplicate. Its open-source nature means it’s constantly updated and supported by a global community of developers, ensuring its continued relevance and functionality.
Prerequisites for FFmpeg Installation on Mac
To ensure a smooth and successful FFmpeg installation, we need to lay some groundwork. The most recommended method involves using Homebrew, a popular package manager for macOS. Homebrew simplifies the installation of software packages, much like an app store for your command line, managing dependencies and updates efficiently.
What is Homebrew and Why Use It?
Homebrew is often referred to as “the missing package manager for macOS.” It allows you to install thousands of open-source tools and utilities that Apple doesn’t include by default but are essential for developers, system administrators, and advanced users. Instead of manually downloading, compiling, and configuring software from source code (which can be a complex and error-prone process), Homebrew automates these steps.
Key advantages of using Homebrew:
- Simplicity: Install complex software with a single command.
- Dependency Management: Homebrew automatically handles installing any required libraries or tools that FFmpeg needs.
- Updates: Easily update installed packages to their latest versions.
- Cleanliness: Installs software into its own prefix and symlinks them into
/usr/local(or/opt/homebrewfor Apple Silicon Macs), keeping your system clean and organized. - Community Support: A large and active community means problems are usually well-documented and solutions readily available.
For these reasons, Homebrew is the de facto standard for installing command-line tools like FFmpeg on macOS.
Installing Homebrew on macOS
If you don’t already have Homebrew installed, follow these simple steps:
- Open Terminal: You can find Terminal in
Applications/Utilitiesor by searching for it using Spotlight (Cmd + Space, then type “Terminal”). - Execute the Homebrew installation script: Copy and paste the following command into your Terminal window and press Enter:
bash

/bin/bash -c "$(curl -fsSL https://raw.githubusercontent.com/Homebrew/install/HEAD/install.sh)"
This command downloads and executes the Homebrew installation script directly from GitHub. - Follow the prompts: The script will explain what it’s about to do and may ask for your macOS user password to grant necessary permissions. Type your password (it won’t show characters as you type) and press Enter. The installation process might take a few minutes, depending on your internet speed and system performance.
- Complete the installation: Once the script finishes, it might provide instructions to add Homebrew to your PATH, especially on newer macOS versions or Apple Silicon Macs. Typically, this involves running a command like
echo 'eval "$(/opt/homebrew/bin/brew shellenv)"' >> ~/.zprofileorecho 'eval "$(/usr/local/bin/brew shellenv)"' >> ~/.zprofileand theneval "$(/opt/homebrew/bin/brew shellenv)"to immediately apply the changes. Make sure to follow any specific instructions printed in your Terminal.
After installation, you can verify Homebrew is working by typing brew help or brew --version.
Ensuring Xcode Command Line Tools are Installed
Homebrew relies on Apple’s Xcode Command Line Tools, which provide essential utilities like git and compilers necessary for building software. While Homebrew’s installer often prompts you to install these if they’re missing, it’s good practice to ensure they are present.
To install or verify them, open Terminal and run:
xcode-select --install
If the tools are not installed, a pop-up window will appear asking if you want to install them. Click “Install” and agree to the terms. If they are already installed, you’ll get a message indicating that the command line tools are already available.
With Homebrew and Xcode Command Line Tools in place, your Mac is ready for FFmpeg.
Method 1: The Recommended Way – Installing FFmpeg with Homebrew
Now that Homebrew is set up, installing FFmpeg is remarkably simple. This method ensures you get a well-configured FFmpeg build with common codecs and libraries, optimized for your macOS system.
Updating Homebrew Before Installation
It’s always a good idea to update Homebrew before installing new packages. This ensures that Homebrew itself is up-to-date and has the latest package definitions (formulas), preventing potential conflicts or issues with outdated software information.
- Update Homebrew’s package list:
bash

brew update
This command fetches the latest Homebrew formulas from GitHub. - Upgrade existing packages (optional but recommended):
bash

brew upgrade
This command upgrades all currently installed Homebrew packages to their latest stable versions. While not strictly necessary for FFmpeg installation, keeping your packages updated is good for system health and security.
Installing FFmpeg via Homebrew
Once Homebrew is updated, installing FFmpeg is a single command:
brew install ffmpeg
Press Enter, and Homebrew will begin the process. This command will:
- Resolve Dependencies: Homebrew will automatically detect and install any libraries or tools that FFmpeg requires but are not yet on your system (e.g.,
x264for H.264 encoding,lamefor MP3 encoding,opusfor Opus audio). - Download and Compile (if necessary): It will download the FFmpeg source code and its dependencies, then compile them for your specific macOS architecture (Intel or Apple Silicon). This step can take a significant amount of time, depending on your internet speed and processor.
- Install FFmpeg: Once compiled, FFmpeg and its associated tools will be installed into your Homebrew cellar and linked into your system’s PATH.
Modern Homebrew builds of FFmpeg typically include support for a wide range of popular codecs and formats by default. Unlike older Homebrew versions where you might have needed --with- flags to specify extra libraries (e.g., brew install ffmpeg --with-fdk-aac), current brew install ffmpeg usually pulls in all commonly used dependencies automatically. This simplifies the process and ensures a robust build.
Verifying Your FFmpeg Installation
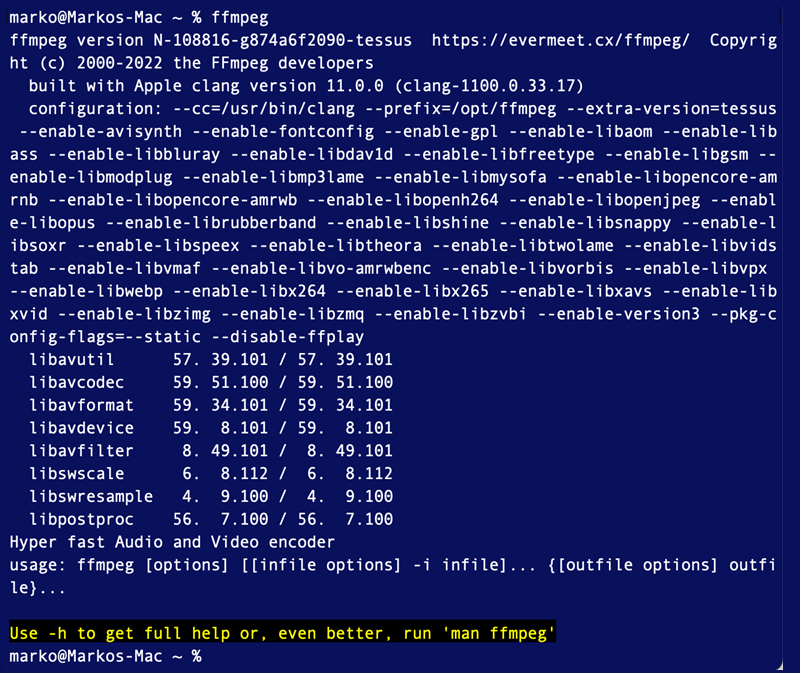
After the installation process completes, it’s crucial to verify that FFmpeg is correctly installed and accessible from your Terminal. This step confirms that the FFmpeg executable is in your system’s PATH and ready to use.
-
Check the FFmpeg version:
Open Terminal and type:ffmpeg -versionIf FFmpeg is installed correctly, this command will output detailed information about the FFmpeg version, configuration, build date, and supported libraries. You should see a version number (e.g.,
ffmpeg version n5.1.2-tessil/homebrew) and various build options.
If you receive acommand not founderror, it means FFmpeg isn’t in your shell’s PATH. This usually indicates an issue with the Homebrew installation or the shell’s configuration, which we will address in the troubleshooting section. -
Locate the FFmpeg executable (optional):
To see where Homebrew installed the FFmpeg executable, you can use thewhichcommand:
bash

which ffmpeg
This should return a path like/usr/local/bin/ffmpeg(for Intel Macs) or/opt/homebrew/bin/ffmpeg(for Apple Silicon Macs). This confirms that your shell is finding the correct executable.
If both commands execute successfully and provide meaningful output, congratulations! FFmpeg is now fully installed on your Mac and ready for action.
Basic FFmpeg Usage and Commands
With FFmpeg successfully installed, you can start leveraging its power. Remember that FFmpeg operates via command-line interface, meaning you’ll type commands directly into Terminal. Here are a few common use cases and their respective FFmpeg commands to get you started:
Converting Video Formats
One of FFmpeg’s most common uses is converting video files from one format to another.
- Example: Convert MP4 to MOV
bash

ffmpeg -i input.mp4 output.mov
-i input.mp4: Specifiesinput.mp4as the input file.output.mov: Specifiesoutput.movas the output file. FFmpeg automatically infers the output format from the file extension.
FFmpeg will use sensible default codecs for the output format. You can also specify codecs explicitly for more control:
- Example: Convert MP4 to WebM with VP9 video and Opus audio codecs
bash

ffmpeg -i input.mp4 -c:v libvpx-vp9 -c:a libopus output.webm
-c:v libvpx-vp9: Sets the video codec to VP9.-c:a libopus: Sets the audio codec to Opus.
Extracting Audio from Video
Need to pull an audio track from a video file? FFmpeg makes it simple.
- Example: Extract MP3 audio from a video file
bash

ffmpeg -i video.mp4 -vn audio.mp3
-vn: Disables video recording (meaning no video output).audio.mp3: The output audio file in MP3 format.
Resizing Videos
Adjusting video dimensions for different platforms or optimizing file size is another frequent task.
- Example: Resize a video to 640 pixels wide, maintaining aspect ratio
bash

ffmpeg -i input.mp4 -vf scale=640:-1 output.mp4
-vf scale=640:-1: Applies a video filter (-vf) for scaling.scale=640:-1means set the width to 640 pixels and automatically calculate the height (-1) to maintain the original aspect ratio.
Concatenating Files
Merging multiple video or audio files can be done efficiently with FFmpeg. This often requires creating a text file listing the files to concatenate.
- Example: Concatenate several video files (file1.mp4, file2.mp4, file3.mp4) into one
- Create a text file (e.g.,
mylist.txt) with the following content:
file 'file1.mp4'

file 'file2.mp4'

file 'file3.mp4'
- Run the FFmpeg command:
bash

ffmpeg -f concat -safe 0 -i mylist.txt -c copy output.mp4
-f concat: Specifies the concatenation demuxer.-safe 0: Necessary for file paths that might be outside the current directory.-i mylist.txt: Usesmylist.txtas the input source.-c copy: Direct streams copy (no re-encoding), which is fast and maintains original quality.
- Create a text file (e.g.,
These examples are just the tip of the iceberg. FFmpeg has an extensive set of options and filters that allow for incredibly complex and precise multimedia manipulations. The key is to start with basic commands, understand their components, and gradually explore more advanced features as your needs grow.
Troubleshooting Common FFmpeg Installation Issues
While Homebrew makes installation straightforward, occasionally users might encounter issues. Here are some common problems and their solutions:
“ffmpeg: command not found” Errors
This is the most frequent issue and typically means that the directory where FFmpeg is installed is not included in your shell’s PATH environment variable.
-
Solution 1: Re-run Homebrew’s
brew shellenvinstructions:
After Homebrew installation, it often prints instructions to add Homebrew to your shell’s environment. If you missed these, or if your shell profile got corrupted, you can usually re-add them.
For Apple Silicon Macs:echo 'eval "$(/opt/homebrew/bin/brew shellenv)"' >> ~/.zprofile eval "$(/opt/homebrew/bin/brew shellenv)"For Intel Macs (if Homebrew isn’t in
/usr/local/binalready):echo 'eval "$(/usr/local/bin/brew shellenv)"' >> ~/.zprofile eval "$(/usr/local/bin/brew shellenv)"Then close and reopen your Terminal, or run
source ~/.zprofile. -
Solution 2: Check Homebrew Doctor:
Runbrew doctorin your Terminal. Homebrew Doctor checks your system for potential problems and offers suggestions for how to fix them. It can identify issues with permissions, outdated components, or misconfigurations that might affect how Homebrew links executables.
Dependency Conflicts or Build Failures
Sometimes, during brew install ffmpeg, you might encounter errors related to dependencies failing to compile or conflicts with existing libraries.
-
Solution 1: Clean and Retry:
Start by clearing Homebrew’s cache and trying again:brew cleanup brew update brew upgrade brew install ffmpegbrew cleanupremoves old downloads and temporary files that might be causing issues. -
Solution 2: Consult
brew doctor(again):
brew doctoris your first line of defense. It often highlights specific issues with permissions or broken symlinks that are preventing packages from installing correctly. -
Solution 3: Force Relinking:
If FFmpeg seems installed but isn’t working, or if other dependencies are causing issues, you might try to force Homebrew to relink everything:
bash

brew unlink ffmpeg

brew link ffmpeg
Also, ifbrew doctorcomplains about specific permissions in/usr/localor/opt/homebrew, you might need to adjust ownership:
bash

sudo chown -R $(whoami) $(brew --prefix)/*
Be careful withsudo chownand ensure you understand what you’re doing.
Outdated FFmpeg Versions
If you previously installed FFmpeg and need the latest features or bug fixes, ensure your installation is up to date.
- Solution: Upgrade via Homebrew:
bash

brew update

brew upgrade ffmpeg
This will fetch the latest Homebrew formulas and then upgrade your FFmpeg installation to the newest available version.
Beyond Homebrew: Other Installation Methods (Brief Mention)
While Homebrew is overwhelmingly the preferred method due to its simplicity and robust dependency management, other options exist for more advanced users or specific scenarios:
- Direct Download (Pre-compiled Binaries): You can download pre-compiled FFmpeg binaries directly from the official FFmpeg website or trusted third-party sources. This bypasses Homebrew but requires manual placement of the executable in your system’s PATH and manual management of updates. This method is less recommended for general users due to the lack of dependency management.
- Compiling from Source: For developers or users who need very specific configurations, codecs, or experimental features not available in Homebrew’s default build, compiling FFmpeg from its source code is an option. This process is complex, requires significant technical expertise, and involves installing build tools, configuring compile flags, and resolving dependencies manually. It offers maximum customization but is prone to errors and time-consuming.
For the vast majority of macOS users, sticking with Homebrew will provide the best balance of power, ease of use, and stability.
Conclusion
Installing FFmpeg on your Mac transforms your machine into a powerful multimedia workstation. With Homebrew, the process is streamlined and efficient, allowing you to quickly gain access to an indispensable tool for video and audio manipulation. From simple format conversions to complex editing tasks and streaming, FFmpeg empowers digital creators and tech enthusiasts with unparalleled control over their media files.
By following this comprehensive guide, you’ve not only installed a critical piece of software but also gained insight into its fundamental workings and potential. Embrace the command line, experiment with the vast array of FFmpeg commands, and unlock a new level of productivity in your digital workflow. The world of multimedia is now at your fingertips.
aViewFromTheCave is a participant in the Amazon Services LLC Associates Program, an affiliate advertising program designed to provide a means for sites to earn advertising fees by advertising and linking to Amazon.com. Amazon, the Amazon logo, AmazonSupply, and the AmazonSupply logo are trademarks of Amazon.com, Inc. or its affiliates. As an Amazon Associate we earn affiliate commissions from qualifying purchases.