
The moment you unbox a brand-new PC is filled with anticipation. Whether it’s a sleek custom-built gaming rig, a powerful workstation, or a compact personal laptop, the potential it holds is immense. But before you can dive into the latest games, creative projects, or productivity tasks, there’s a crucial first step: installing the operating system. For the vast majority of users worldwide, that means installing Windows.
While the prospect of setting up an operating system from scratch might seem daunting, especially for those new to the world of computing, it’s a fundamental skill that empowers you to take full control of your hardware. A clean installation of Windows not only ensures optimal performance right from the get-go but also provides a pristine digital environment, free from bloatware and potential conflicts that can arise from pre-installed systems. It’s the ultimate fresh start, laying a solid foundation for all your digital endeavors.
This comprehensive guide will walk you through every step of the process, transforming your unconfigured machine into a fully functional, high-performance computing powerhouse. From initial preparations and navigating the BIOS/UEFI settings to the core installation and crucial post-setup optimizations, we’ll cover it all. By the end of this tutorial, you’ll not only have Windows up and running smoothly but also a deeper understanding of your PC’s inner workings, empowering you to troubleshoot and maintain it like a pro. In the realm of technology, understanding how to install and configure your core software is paramount for digital security, productivity, and leveraging the full potential of your investment.
Preparation is Key: Laying the Groundwork for a Seamless Installation
Before you even think about hitting the power button, proper preparation is paramount. Rushing into an OS installation without the necessary tools and knowledge can lead to frustration, wasted time, and potential data loss (though less of a concern on a truly new PC). This foundational step ensures a smooth, efficient, and error-free installation process, setting you up for success.
Gathering Your Essential Tools and Information
The success of your Windows installation hinges on having the right materials at your fingertips. Think of this as gathering your toolkit before starting a complex project – without the right wrench, you’ll be stuck.
- Windows Installation Media: This is the most critical item. You’ll need a bootable USB drive (at least 8GB, preferably 16GB) or a DVD containing the Windows installer.
- Creating a Bootable USB: The easiest and most recommended method is to use Microsoft’s official Media Creation Tool. You can download this free utility directly from the Microsoft website. Once downloaded, run the tool, accept the terms, select “Create installation media (USB flash drive, DVD, or ISO file) for another PC,” choose your language, edition (Windows 10 or 11), and architecture (usually 64-bit), and then select “USB flash drive” as the media type. The tool will then download the Windows ISO and create the bootable drive for you. Ensure any data on the USB drive is backed up, as this process will erase it.
- Downloading an ISO (Advanced): If you prefer to use a third-party tool like Rufus to create your bootable USB, you’ll first need to download the Windows ISO file directly from Microsoft’s website.
- Windows Product Key (Optional, but Recommended): While you can often install Windows without immediately entering a product key, you will eventually need one to activate your copy and unlock all features. Your product key is typically found on a sticker on your PC (if pre-built), in an email if purchased digitally, or with the retail packaging. Keep it handy.
- Internet Access: While not strictly required during the initial file copying phase, an internet connection will be essential shortly after installation for crucial updates, driver downloads, and online account setup. Wired Ethernet is often more reliable during initial setup than Wi-Fi.
- Peripheral Devices: Ensure your keyboard, mouse, and monitor are properly connected and functioning. For some custom builds, a wired keyboard might be necessary during BIOS navigation if Bluetooth drivers aren’t yet loaded.
- Driver Downloads (Proactive Step): Although Windows often includes generic drivers, having the latest specific drivers for your motherboard’s chipset, graphics card, network adapter (Wi-Fi and Ethernet), and any specialized peripherals from your PC manufacturer’s support website downloaded onto a separate USB drive can save immense time and prevent headaches post-installation. This is particularly important for network drivers, as you won’t be able to download anything without internet access.
BIOS/UEFI Configuration: Setting the Stage for Booting
Your PC’s BIOS (Basic Input/Output System) or its modern successor, UEFI (Unified Extensible Firmware Interface), is the firmware that initializes hardware components before the operating system loads. To install Windows from your bootable USB or DVD, you must instruct your PC to boot from that media first, rather than trying to find an OS on your internal drives.
- Accessing BIOS/UEFI: Turn on your PC and immediately start pressing the designated key repeatedly. This key varies by manufacturer but is commonly
Delete,F2,F10,F12, orEsc. You’ll usually see a message on the screen during startup, like “Press DEL to enter Setup” or “Press F2 for BIOS.” If you miss it, simply restart and try again. - Navigating the Interface: BIOS menus are typically navigated with arrow keys and Enter, while UEFI interfaces often support mouse input and feel more like a graphical operating system. Look for sections labeled “Boot,” “Boot Order,” “Boot Priority,” or “Startup.”
- Changing the Boot Order: Within the Boot section, you’ll see a list of bootable devices. Your goal is to move your USB drive (it might appear as “USB-HDD,” “USB Device,” or specifically name your USB drive’s brand) or your DVD drive to the top of the boot priority list. This tells the PC to check that device for an operating system installer first.
- Disabling Secure Boot (If Necessary): For Windows 11, Secure Boot is often a requirement. For Windows 10 or older systems, or if you encounter issues, you might need to temporarily disable Secure Boot or enable a “Legacy” or “CSM (Compatibility Support Module)” mode if your system isn’t detecting the modern UEFI bootloader on your USB. Generally, for a fresh Windows 10/11 install on modern hardware, leaving Secure Boot enabled and using UEFI mode is preferred.
- Saving Changes and Exiting: Once you’ve adjusted the boot order, navigate to the “Exit” tab or option. Select “Save Changes and Exit” or “Exit Saving Changes.” Your PC will then restart, attempting to boot from your chosen installation media.
If all goes well, you should see the Windows logo or a prompt like “Press any key to boot from USB…” This signifies that your preparation was successful, and you’re ready for the main event.
The Installation Process: A Step-by-Step Walkthrough
With your PC now configured to boot from the installation media, the actual process of installing Windows begins. This section will guide you through the on-screen prompts, ensuring you make the correct selections for a clean and optimized setup.
Initial Setup and Drive Partitioning
The first few screens are about setting up the basic environment for Windows and preparing your storage drive.
- Boot from Installation Media: After restarting, if prompted, press any key to boot from your USB drive or DVD. You’ll then see the Windows logo, followed by the initial setup screens.
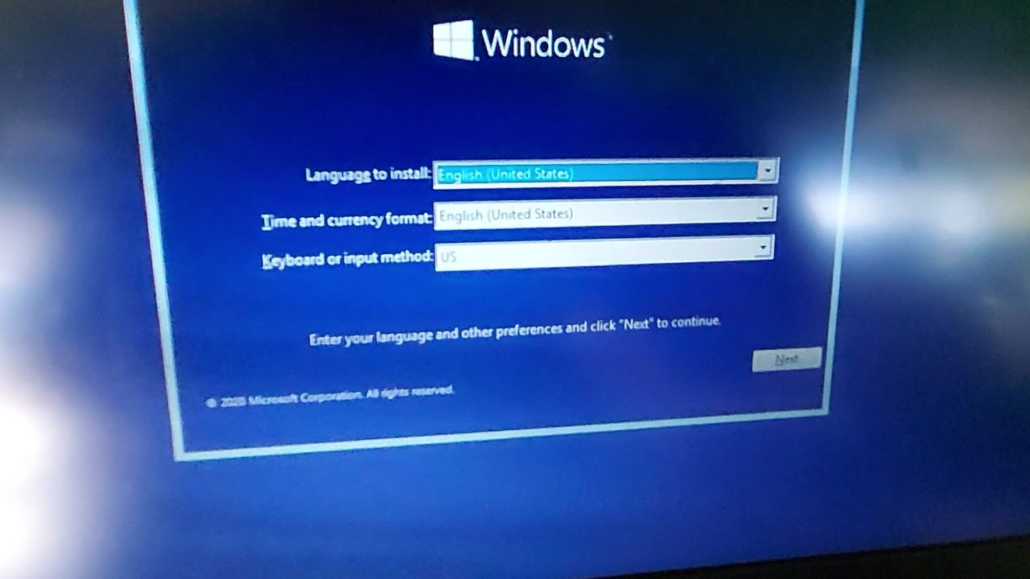
- Language, Time, and Keyboard Selection: The first screen will ask you to choose your language, time and currency format, and keyboard or input method. Make your selections and click “Next.”
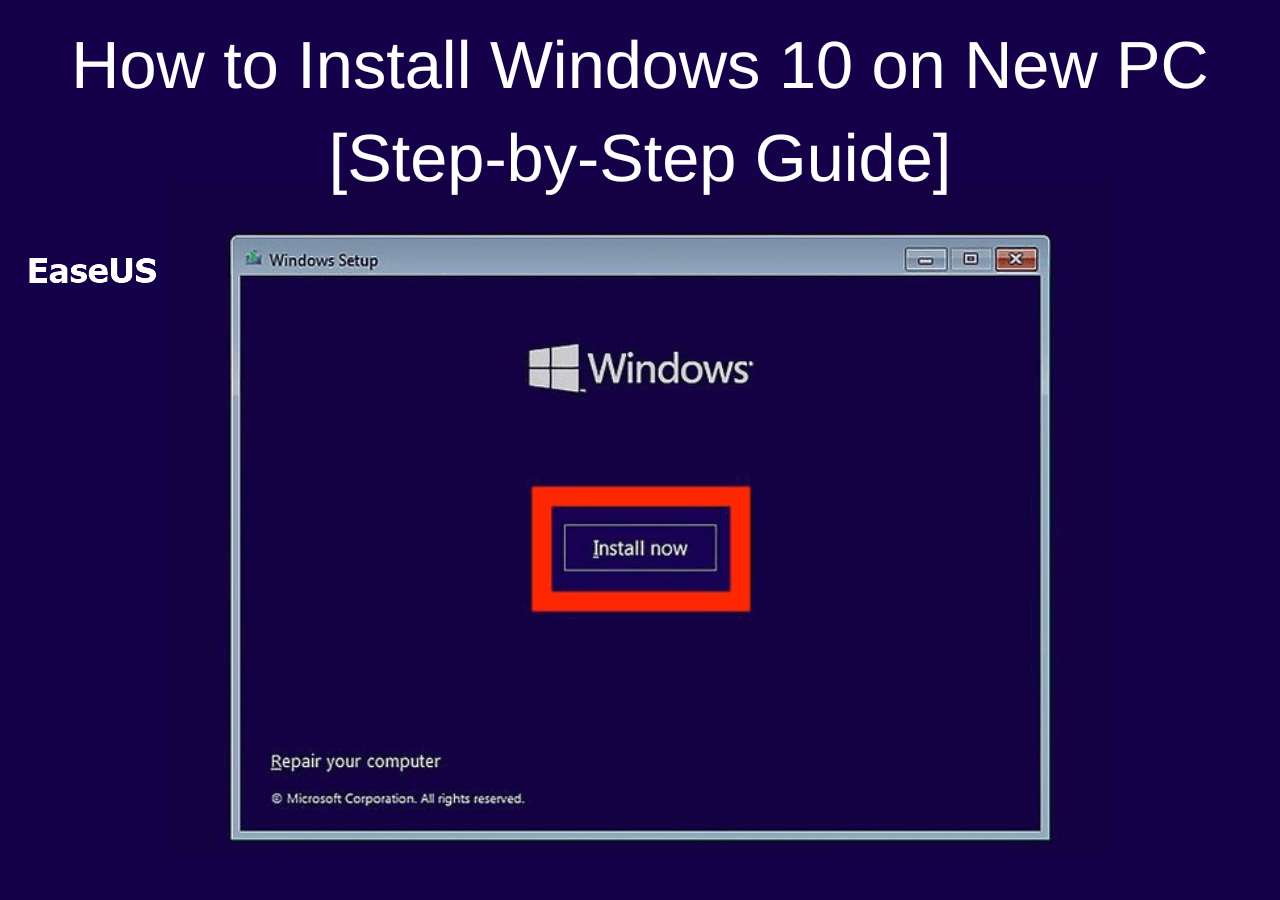
- Install Now: On the next screen, click the large “Install now” button.
- Enter Product Key (or Skip): Windows will prompt you to enter your product key.
- If you have it, enter it now and click “Next.”
- If you don’t have it yet or plan to activate later, click “I don’t have a product key” (for Windows 10) or “Skip for now” (for Windows 11). You can always activate Windows after installation.
- Choose Operating System (If Applicable): If your installation media contains multiple versions of Windows (e.g., Home and Pro), select the one you have a license for or intend to use. Click “Next.”
- Accept License Terms: Read through the Microsoft Software License Terms. If you agree, check the “I accept the license terms” box and click “Next.”
- Choose Installation Type: This is a crucial step for a clean install.
- Select “Custom: Install Windows only (advanced)”. Do not choose “Upgrade” as it’s meant for upgrading an existing OS and can carry over old issues. “Custom” ensures a fresh installation.
- Drive Partitioning: This screen shows all the drives and partitions detected on your PC. Since this is a new PC, you might see an “Unallocated Space” drive or perhaps a single large partition from the manufacturer.
- For a Truly New, Blank Drive: You’ll likely see one entry labeled “Drive 0 Unallocated Space.” Select this unallocated space and click “New.” Windows will suggest the maximum available size. You can accept this to create a single partition for Windows, or you can create smaller partitions if you plan to separate your OS from your data (e.g., a C: drive for Windows and D: drive for files). Click “Apply.” Windows will then inform you that it needs to create additional system partitions (like a Recovery partition, EFI System Partition, and MSR). Click “OK.”
- If You See Existing Partitions (e.g., from a pre-installed OS you want to wipe): Select each existing partition (e.g., “Drive 0 Partition 1,” “Drive 0 Partition 2,” etc.) one by one and click “Delete.” Confirm any prompts. Once all partitions related to the drive you want to install Windows on are deleted, you’ll be left with “Drive 0 Unallocated Space.” Then, proceed as described above: select the unallocated space, click “New,” “Apply,” and “OK.”
- Important: Carefully select the correct drive if you have multiple storage devices connected. Installing Windows on the wrong drive will erase its contents.
- Select Installation Partition: Once your partitions are created, select the primary partition you want to install Windows on (usually the largest one, or the one you designated as C: drive if you created multiple). Click “Next.”
Core Installation and Initial Configuration
Windows will now begin the core installation process, copying files and setting up system components. This stage involves multiple automatic reboots.
- Copying Windows Files: The installer will copy all necessary Windows files from your installation media to your chosen drive. This can take some time, depending on your PC’s speed and the USB drive’s performance.
- Installing Features and Updates: After copying, Windows will install features, drivers, and any initial updates. Your PC will restart several times during this phase. Let it restart naturally. Do not remove your installation media until you see the setup screens for personalizing Windows.
- Regional Settings: Once the core installation is complete, you’ll be greeted by an initial setup screen, often accompanied by Cortana’s voice (if using Windows 10/11). Confirm your region/country and click “Yes.”
- Keyboard Layout: Select your preferred keyboard layout. You can also add a second layout if needed. Click “Yes.”
- Network Connection: Windows will prompt you to connect to a network.
- Wired: If you have an Ethernet cable connected, it should automatically detect and connect.
- Wi-Fi: If using Wi-Fi, select your network from the list, enter the password, and click “Connect.” An internet connection is highly recommended here, as it allows Windows to check for critical updates and facilitate account setup.
- Account Setup (Microsoft Account vs. Local Account):
- Microsoft Account (Recommended for most): Windows will strongly encourage you to sign in with or create a Microsoft account. This links your PC to cloud services, OneDrive, app store purchases, and settings sync across devices. Enter your email/phone/Skype and password.
- Local Account (Privacy-focused/Offline): If you prefer not to use a Microsoft account, you can typically choose an option like “Offline account” or “Domain join instead” (for Pro versions) to create a local user account. Note that options to create a local account can sometimes be hidden or less prominent, especially in Windows 11.
- Create PIN: For easier and more secure logins, Windows will suggest creating a PIN. This is generally a good idea.
- Privacy Settings: You’ll be presented with several privacy settings (e.g., Location, Find my device, Diagnostic data, Tailored experiences). Review these carefully and toggle them according to your preferences for data sharing with Microsoft. Click “Accept” or “Next” after making your choices.
- Cortana Setup (Windows 10) / Other Preferences: You might be asked to set up Cortana (you can decline), or choose preferences for advertising IDs, voice recognition, and other features. Make your selections.
- Final Preparations: Windows will then spend a few more minutes “getting things ready” – preparing your desktop, setting up apps, and so on. This screen might show messages like “This might take a few minutes” or “Don’t turn off your PC.”
Finally, you will be welcomed to your brand-new Windows desktop!
Post-Installation Essentials: Optimizing Your New Windows Environment
Reaching the desktop is just the beginning. To truly unlock the potential of your new PC and ensure it runs flawlessly, securely, and efficiently, there are several crucial steps to take. These post-installation optimizations are vital for performance, stability, and digital security, aligning perfectly with our website’s focus on tech tutorials and productivity.
Driver Installation and System Updates
Drivers are the vital software components that allow your operating system to communicate with your hardware. Outdated or missing drivers can lead to performance issues, hardware malfunctions, and system instability.
- Run Windows Update: The very first thing you should do is open the Start Menu, type “Windows Update,” and check for updates. Windows Update will download and install critical security patches, feature updates, and often provides many basic drivers for your hardware. Restart your PC as prompted and keep checking for updates until no more are available. This process might take a while and involve multiple reboots, but it’s essential for system stability and security.
- Install Manufacturer-Specific Drivers: While Windows Update handles many drivers, it often provides generic versions. For optimal performance, especially for graphics cards, chipsets, and specialized peripherals, you should always install the latest drivers directly from your PC or component manufacturer’s website.
- Motherboard Chipset Drivers: Visit your motherboard manufacturer’s website (e.g., ASUS, MSI, Gigabyte, ASRock) and navigate to the support page for your specific motherboard model. Download and install the latest chipset drivers.
- Graphics Card Drivers: If you have a dedicated graphics card (NVIDIA GeForce, AMD Radeon), download the latest drivers directly from NVIDIA’s or AMD’s website. These drivers are critical for gaming, video editing, and overall display performance.
- Network Drivers (Wi-Fi/Ethernet): If your internet isn’t working perfectly after Windows Update, you’ll need these. If you proactively downloaded them to a separate USB drive, install them now. Otherwise, you might need to use another device to download them.
- Other Peripherals: Install drivers for any specialized hardware like sound cards, webcams, printers, or external devices that require specific software.
- Verify in Device Manager: To ensure all your hardware is properly recognized and has the correct drivers, open the Start Menu, type “Device Manager,” and open it. Look for any devices with a yellow exclamation mark or question mark. These indicate missing or problematic drivers. You can often right-click on such a device and select “Update driver” to let Windows search, or manually point it to a driver you downloaded.
Essential Software and Security Measures
Once your drivers are sorted and the system is up-to-date, it’s time to equip your PC with the tools you need for work, play, and protection. This stage heavily impacts your digital security and productivity.
- Antivirus and Anti-Malware Software: Windows Defender (now Microsoft Defender Antivirus) is built into Windows and provides a robust baseline level of protection. Ensure it’s active and up-to-date. For enhanced security, some users opt for third-party solutions. Regardless of your choice, never run without active protection. This is crucial for “Digital Security,” a core aspect of our tech coverage.
- Web Browser: While Microsoft Edge is included, you’ll likely want to install your preferred web browser (e.g., Google Chrome, Mozilla Firefox, Brave, Opera). Download it, set it as your default, and import your bookmarks/settings.
- Productivity Suite: For work or school, a productivity suite is indispensable.
- Microsoft Office: If you have a license, download and install applications like Word, Excel, PowerPoint, and Outlook.
- Free Alternatives: LibreOffice or Google Workspace (accessed via browser) are excellent free alternatives for basic document, spreadsheet, and presentation needs.
- Backup Solution: Plan for the inevitable. Set up a regular backup strategy. This could be:
- Cloud Storage: OneDrive, Google Drive, Dropbox, iCloud.
- External Hard Drive: Use Windows’ built-in File History or a third-party backup utility.
- A robust backup strategy is an investment in your data’s safety and prevents catastrophic loss, crucial for both personal and business finance, especially when “Online Income” or “Side Hustles” rely on your digital assets.
- Password Manager: To maintain strong, unique passwords for all your online accounts and enhance your “Digital Security,” install a reputable password manager (e.g., LastPass, Bitwarden, 1Password).
- Ad Blocker (Browser Extension): For a cleaner, faster, and more secure browsing experience, install an ad-blocker extension (e.g., uBlock Origin) in your chosen browser.
- System Utilities: Consider installing tools like 7-Zip (for file compression/decompression), VLC Media Player (for versatile media playback), and potentially a system monitoring tool for advanced users.
Personalization and Productivity Enhancements
Now that your PC is stable and secure, it’s time to make it truly yours and optimize it for maximum “Productivity.”
- Personalize Your Desktop: Right-click on the desktop and choose “Personalize” to change your background, accent colors, lock screen, and theme. Organize your desktop icons, pin frequently used apps to the taskbar, and customize the Start Menu layout.
- Power Settings: Navigate to Power & Sleep settings (found in System settings or via Control Panel). Adjust your power plan to “Balanced” or “High Performance” (if on a desktop) to ensure your PC doesn’t throttle performance unnecessarily. Configure when your screen turns off and when the PC goes to sleep.
- Storage Sense (Windows 10/11): This feature automatically frees up space by deleting temporary files, old downloads, and files in your Recycle Bin. Turn it on and configure its settings via “Settings > System > Storage.” Regular disk cleanup helps maintain performance.
- Task Manager and Resource Monitor: Familiarize yourself with these tools (Ctrl+Shift+Esc to open Task Manager). They are invaluable for monitoring system performance, identifying resource-hungry applications, and troubleshooting slowdowns. Understanding how to manage processes and startup apps can significantly boost your PC’s responsiveness.
- File Explorer Options: Configure File Explorer to show hidden files, file extensions, and other preferences that make navigating your file system more efficient.
- Accessibility Features: Explore Windows’ built-in accessibility options if you have specific needs (e.g., Narrator, Magnifier, High Contrast themes).
- Cloud Sync for Documents: If you use cloud storage, ensure your important document folders (Documents, Pictures, Desktop) are set up to sync automatically. This provides an additional layer of backup and seamless access across devices, vital for anyone engaged in “Online Income” or managing their “Brand Strategy” where immediate access to files is key.
Troubleshooting Common Installation Issues
Even with meticulous preparation, sometimes things don’t go perfectly. Knowing how to identify and address common problems can save you from calling tech support.
Boot Errors and Driver Conflicts
- “No Boot Device Found” / “Operating System Not Found”:
- Cause: The PC isn’t finding a bootable OS or can’t locate the installation media.
- Solution: Re-enter BIOS/UEFI and verify the boot order. Ensure the USB drive is properly inserted and recognized. If you removed the USB after the first reboot, reinsert it and let Windows continue. Check that your hard drive is detected in BIOS. If installing Windows 11, ensure Secure Boot and UEFI mode are enabled.
- Blue Screen of Death (BSOD) During Installation:
- Cause: Often due to faulty hardware (RAM, bad sector on SSD/HDD), incompatible drivers, or a corrupt installation media.
- Solution: Restart the installation. If it persists, try recreating the installation media. Test your RAM with a utility like MemTest86 (bootable from USB). Ensure your CPU and GPU temperatures are stable if you suspect overheating.
- Drivers Not Installing Correctly / Devices Not Recognized:
- Cause: Incorrect driver version, Windows Update overriding manual drivers, or hardware fault.
- Solution: Use Device Manager to identify problematic devices. Try uninstalling the current driver and reinstalling the manufacturer’s specific driver. Disable automatic driver updates in Windows Update temporarily if it’s causing conflicts.
Activation Problems and Performance Hiccups
- Windows Not Activating:
- Cause: Incorrect product key, key already in use on another PC, or no internet connection.
- Solution: Double-check your product key. Ensure you have a stable internet connection. If you previously upgraded from an older Windows version, your digital license might activate automatically after connecting to your Microsoft account. If problems persist, use the “Troubleshoot” option in Activation settings or contact Microsoft support.
- Slow Performance Post-Install:
- Cause: Missing drivers (especially graphics or chipset), too many startup programs, or background Windows updates still running.
- Solution: Ensure all drivers are installed and up-to-date. Check Task Manager’s “Startup” tab and disable unnecessary programs. Let Windows Update complete all background downloads and installations. Run a disk cleanup.
- Internet Connectivity Issues:
- Cause: Missing or incorrect network drivers, Wi-Fi password issues, or router problems.
- Solution: Install the correct Ethernet/Wi-Fi drivers from your manufacturer’s website. Double-check your Wi-Fi password. Restart your router and modem. Use Windows’ built-in Network Troubleshooter.
For any persistent or complex issues, online forums, manufacturer support websites, and professional IT services are valuable resources. Don’t hesitate to seek help if you’re stuck; a well-functioning PC is an investment in your productivity and digital life.

Conclusion: Empowering Your Digital Journey with a Pristine Windows Installation
You’ve successfully navigated the intricate process of installing Windows on your new PC. From the initial meticulous preparations, through the step-by-step installation, to the crucial post-setup optimizations, you’ve transformed a blank slate into a powerful, personalized, and secure computing platform. This journey is more than just installing software; it’s about gaining a deeper understanding of your machine and taking control of your digital environment.
A clean Windows installation provides an unparalleled foundation for all your technological pursuits. It ensures peak performance for your applications, fortifies your digital security against threats, and streamlines your workflow, directly enhancing your productivity whether you’re gaming, creating content, or managing your finances. This initial investment of time in setting up your system correctly will pay dividends in long-term stability and efficiency.
Remember, your PC is a dynamic tool. Keep it updated, maintain your drivers, back up your data, and continually explore ways to optimize its performance and personalize your experience. This guide has equipped you with the knowledge to not only get started but also to confidently manage the core of your digital life. Now, go forth and explore the vast possibilities your new, perfectly configured Windows PC has to offer! For more expert insights into technology trends, software reviews, digital security, and productivity tools, continue exploring the rich resources available on our website.
aViewFromTheCave is a participant in the Amazon Services LLC Associates Program, an affiliate advertising program designed to provide a means for sites to earn advertising fees by advertising and linking to Amazon.com. Amazon, the Amazon logo, AmazonSupply, and the AmazonSupply logo are trademarks of Amazon.com, Inc. or its affiliates. As an Amazon Associate we earn affiliate commissions from qualifying purchases.