The Silent Killer of Automotive Performance
In the intricate ecosystem of an internal combustion engine, the ignition system plays a pivotal role. It’s the conductor that orchestrates the explosive marriage of fuel and air, translating electrical energy into the precise spark that ignites the combustion process. At the heart of this process, particularly in modern vehicles, lies the ignition coil pack. More than just a component, it’s a crucial transformer, boosting the low voltage from the battery to the high voltage required to jump the spark plug gap. When a coil pack falters, the symphony of a smooth-running engine devolves into a jarring cacophony of misfires, poor performance, and ultimately, costly damage. Understanding what a bad coil pack looks like, both visually and in terms of its symptoms, is paramount for any vehicle owner seeking to maintain optimal performance and avoid expensive repairs.
While the term “looks like” might initially suggest a purely visual inspection, the reality of identifying a failing coil pack is a multifaceted approach. It encompasses observable physical degradation, but more importantly, the tell-tale signs that manifest in the engine’s behavior and diagnostic codes. This article will delve into the physical characteristics of a compromised coil pack, the common symptoms that signal its demise, and the diagnostic processes that confirm its failure, all within the realm of automotive technology.
Physical Manifestations of Coil Pack Degradation
A coil pack, at its core, is an electromagnetic device consisting of primary and secondary windings, an iron core, and a protective casing. Like any electromechanical component exposed to the harsh environment of an engine bay – characterized by heat, vibration, and moisture – it can degrade over time. Recognizing these physical indicators can provide an early warning before a complete failure occurs, allowing for proactive maintenance.
Cracks and Physical Damage to the Casing
The outer housing of a coil pack is typically made of a durable plastic or epoxy material designed to insulate and protect the internal components. However, prolonged exposure to extreme temperature fluctuations, vibration, and even minor impacts can lead to structural compromise.
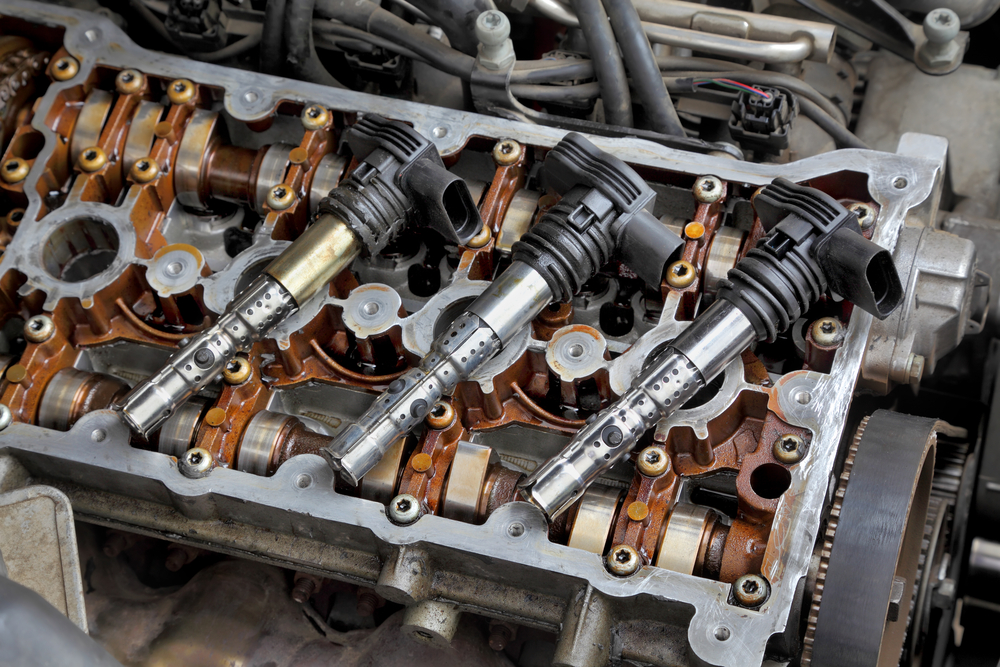
The Importance of Visual Inspection
When a coil pack begins to fail, the most readily apparent sign is often visible damage to its exterior. Inspecting the coil packs, usually located directly atop or in close proximity to the spark plugs, can reveal a wealth of information. Look for:
- Hairline Cracks: These are often the first indication of material fatigue. They may appear as thin, spiderweb-like fissures on the plastic casing. These cracks can allow moisture and contaminants to seep in, further accelerating corrosion and short circuits within the coil.
- Chipped or Broken Edges: Mishandling during installation or removal, or even vibration-induced wear, can result in chipped or broken edges on the coil pack’s housing. These imperfections compromise the seal and expose sensitive internal components to the elements.
- Burn Marks and Discoloration: Overheating is a common culprit behind coil pack failure. If a coil pack is working excessively hard or experiencing an internal short, it can generate excessive heat. This can manifest as brown or black burn marks on the plastic casing, often concentrated around the areas where heat dissipates most readily or where electrical arcing has occurred. The plastic itself may appear discolored, brittle, or warped.
- Swelling or Bulging: In some cases, extreme heat or internal pressure buildup can cause the plastic casing to swell or bulge outwards. This deformation is a clear sign that the coil pack is no longer structurally sound and its internal components are likely compromised.
Accessing and Inspecting Coil Packs
Accessing coil packs varies significantly by vehicle make and model. In many modern vehicles, individual coil packs are mounted directly over each spark plug, often concealed by a plastic engine cover. Removing this cover is usually the first step. For older vehicles or those with distributor-based ignition systems, the coil pack might be a single unit located elsewhere, connected to spark plug wires. Regardless of the configuration, a careful and systematic approach is crucial. Always ensure the engine is cool before beginning any inspection, and consult your vehicle’s service manual for specific instructions on removing engine covers or accessing ignition components.
Signs of Electrical Corrosion and Contamination
The engine bay is a hostile environment, and electrical connections are particularly vulnerable to the ingress of moisture, oil, and other contaminants. These can lead to corrosion and electrical shorts, which are common precursors to coil pack failure.
Corrosion on Electrical Terminals
The electrical connectors that supply power to the coil pack are critical points of contact. Over time, exposure to moisture and road salt (in areas prone to winter weather) can cause these terminals to corrode.
- Green or White Powdery Residue: The most common sign of electrical corrosion is the presence of a green or white powdery substance on the metal terminals of the coil pack connector and its corresponding wiring harness. This residue is a byproduct of electrochemical reactions and indicates that the metal is oxidizing.
- Dull or Discolored Metal: Even without visible powder, the metal terminals might appear dull, tarnished, or discolored. This indicates a loss of conductivity and a potential for increased resistance, which can impede the flow of electrical current.
- Loose or Damaged Connectors: Vibration and age can cause the plastic housing of the electrical connector to become brittle and crack, leading to loose connections. Bent or pushed-out pins within the connector can also prevent proper electrical contact.
Internal Contamination
While less visible from the outside, internal contamination can be a silent killer. Oil leaks from valve cover gaskets or other engine components can drip onto the coil packs, and over time, this oil can degrade the insulation within the coil.
- Oily Residue: If you notice an oily residue on or around the base of the coil pack, particularly where it seals against the cylinder head, this is a concern. The oil can seep into the internal workings of the coil, causing electrical shorts or insulation breakdown.
- Dirt and Debris Accumulation: General dirt and debris accumulation around the coil packs, especially in areas where moisture can collect, can also contribute to electrical issues over time, acting as a pathway for conductivity.
Behavioral Symptoms of a Failing Coil Pack
Beyond the physical, the most undeniable indicators of a bad coil pack are the symptoms it produces in the vehicle’s operation. These are the audible and tangible signs that the engine is not firing on all cylinders, and often, these symptoms will align with diagnostic trouble codes (DTCs) reported by the vehicle’s Engine Control Unit (ECU).
Engine Misfires and Rough Idling
A misfire occurs when one or more cylinders fail to ignite the fuel-air mixture, or ignite it improperly. A faulty coil pack is a primary cause of misfires, as it cannot deliver the necessary high-voltage spark.
The Misfire Phenomenon
- Engine Hesitation and Stumbling: When accelerating, a vehicle with a misfiring cylinder may hesitate or stumble, as if it’s struggling to gain speed. This is because the engine is not producing its full power output.
- Rough Idle: At idle, a misfire is often most noticeable. The engine may vibrate excessively, sound uneven, or even feel like it’s “loping.” You might feel a distinct tremor through the steering wheel and chassis.
- Reduced Power and Acceleration: Overall, the vehicle will feel sluggish, with diminished power and a slower acceleration response. The engine is essentially running on fewer cylinders than it’s designed to.
- Check Engine Light Illumination: Modern vehicles are equipped with sophisticated diagnostic systems. A misfire will almost invariably trigger the illumination of the “Check Engine” light on the dashboard.
Diagnosing Misfires with OBD-II
The On-Board Diagnostics II (OBD-II) system is a standard feature on vehicles manufactured since 1996. A mechanic or a DIY enthusiast with an OBD-II scanner can retrieve DTCs from the ECU.

- Specific Misfire Codes: Misfire codes are typically categorized by cylinder. For instance, P0301 indicates a misfire in cylinder 1, P0302 in cylinder 2, and so on. If a particular cylinder consistently registers a misfire code, it strongly suggests an issue with the ignition system components for that cylinder, most commonly the coil pack or spark plug.
- Generic Misfire Codes: There are also generic misfire codes like P0300, which indicates a random or multiple cylinder misfire. While this can point to an ignition issue, it could also suggest a more widespread problem like a vacuum leak or fuel delivery issue. However, if the misfires are not random and consistently affect specific cylinders, the coil pack becomes the prime suspect.
Fuel Efficiency and Emissions Concerns
A misfiring engine is an inefficient engine. When a cylinder isn’t firing correctly, fuel is injected but not burned, leading to wasted fuel and increased emissions.
The Impact on Fuel Economy
- Decreased Miles Per Gallon (MPG): The most direct consequence of an inefficiently running engine is a noticeable drop in fuel economy. You’ll find yourself visiting the gas station more frequently, even with normal driving habits. This is because the engine is consuming more fuel to achieve the same level of performance.
- Unburned Fuel: When combustion doesn’t occur properly in a cylinder, raw fuel can be expelled into the exhaust system. This not only wastes fuel but can also lead to other issues.
Elevated Emissions and Exhaust Smells
- Catalytic Converter Damage: The unburned fuel entering the exhaust system can overheat and damage the catalytic converter, an expensive component responsible for reducing harmful emissions.
- Smell of Unburned Fuel: In severe cases, you might even detect the distinct smell of unburned fuel from the exhaust pipe, especially when the engine is cold. This is a strong indicator that combustion is not complete in one or more cylinders.
- Emissions Test Failures: A vehicle with a significant misfire problem is highly likely to fail an emissions inspection due to elevated levels of pollutants in its exhaust.
Diagnostic Procedures and Confirmation
While visual cues and performance symptoms are strong indicators, definitive diagnosis of a bad coil pack often requires a combination of systematic testing and diagnostic tools.
Spark Testing and Voltage Checks
The fundamental purpose of a coil pack is to generate high voltage. Testing its ability to do so is a direct way to assess its functionality.
The Spark Plug Removal Method
A common DIY method involves removing a spark plug from a suspect cylinder. The coil pack is then reconnected to the spark plug, and the coil pack is grounded against the engine block. With the ignition system powered up (but the engine not running), a helper can crank the engine briefly.
- Observing the Spark: A healthy coil pack will produce a strong, blue spark that jumps the gap of the spark plug. If the spark is weak, intermittent, yellow, or completely absent, it strongly suggests a problem with that coil pack.
- Safety Precautions: This method requires extreme caution. High voltage can be dangerous. Ensure you are wearing insulated gloves and avoid touching any electrical components while the ignition is active. Never crank the engine for more than a few seconds at a time.
Using a Spark Tester
A more sophisticated and safer method involves using a dedicated spark tester. This tool connects between the spark plug and the coil pack and indicates the presence and strength of the spark.
- Consistent and Reliable Readings: Spark testers provide a more consistent and reliable indication of spark quality than simply observing the spark directly. They can help differentiate between a weak spark and no spark at all.
- Integrated Diagnostic Tools: Many advanced diagnostic tools can also measure the voltage output of the coil pack directly, providing precise data on its performance.
Resistance Testing with a Multimeter
Coil packs have internal windings with specific electrical resistances. Measuring these resistances with a multimeter can reveal internal shorts or open circuits.
Understanding Primary and Secondary Resistance
- Primary Resistance: This refers to the resistance of the primary winding, which receives the low voltage from the ECU. This resistance is typically very low, often less than 1 ohm.
- Secondary Resistance: This refers to the resistance of the secondary winding, which generates the high voltage. This resistance is significantly higher, typically in the range of 5,000 to 15,000 ohms, depending on the coil design.
- Consulting Specifications: To perform an accurate resistance test, you will need to consult your vehicle’s service manual or a reputable online database for the specific resistance values for your vehicle’s coil packs.
Interpreting Multimeter Readings
- Open Circuit (Infinite Resistance): If the multimeter reads “OL” (over limit) or infinite resistance for either the primary or secondary windings, it indicates an open circuit, meaning the winding is broken internally, and the coil pack is definitely bad.
- Low Resistance (Short Circuit): If the resistance readings are significantly lower than specified, it suggests a short circuit within the windings, where the electricity is bypassing the intended path. This will also render the coil pack faulty.
- Resistance Out of Specification: Even if there isn’t a complete open or short, if the resistance readings fall outside the manufacturer’s specified range, it indicates that the coil pack is operating outside its intended parameters and is likely failing.
Professional Diagnostic Scan Tools
For comprehensive diagnosis and confirmation, professional automotive scan tools offer advanced capabilities beyond basic OBD-II readers.
Live Data Streaming
- Misfire Counters: Advanced scan tools can stream live data from the ECU, including misfire counters for each cylinder. This allows technicians to monitor misfires in real-time and correlate them with specific engine operating conditions.
- Ignition System Status: These tools can also display information related to the ignition system’s operation, such as coil dwell times and voltage feedback, providing deeper insights into potential issues.

Actuation Tests and Component Swapping
- Coil Pack Actuation: Some advanced scan tools can perform actuation tests, allowing the technician to command individual coil packs on and off. This can help isolate a faulty coil by observing the engine’s behavior as each coil is tested.
- Component Swapping: A common diagnostic strategy is to swap suspected faulty components between cylinders. If a misfire code associated with cylinder 3 suddenly appears for cylinder 1 after swapping the coil packs, it confirms that the coil pack originally from cylinder 3 is indeed faulty. This method is particularly effective when dealing with multiple suspect components.
By understanding the physical signs of wear and tear, recognizing the behavioral symptoms, and employing systematic diagnostic procedures, vehicle owners and technicians can accurately identify and address failing coil packs, ensuring the continued health and performance of the automotive system.
aViewFromTheCave is a participant in the Amazon Services LLC Associates Program, an affiliate advertising program designed to provide a means for sites to earn advertising fees by advertising and linking to Amazon.com. Amazon, the Amazon logo, AmazonSupply, and the AmazonSupply logo are trademarks of Amazon.com, Inc. or its affiliates. As an Amazon Associate we earn affiliate commissions from qualifying purchases.