
In the digital age, our computers are the epicenters of our productivity, creativity, and connectivity. Whether you’re a seasoned tech enthusiast building a new machine, an individual looking to refresh an aging laptop, or someone troubleshooting persistent software issues, knowing how to install an operating system (OS) is a fundamental skill. It’s akin to laying the very foundation of your digital house – a critical step that dictates the stability, security, and performance of everything that follows.
This comprehensive guide is designed to demystify the OS installation process, transforming what might seem like a daunting technical challenge into an empowering journey. We’ll navigate through the essential preparations, tackle the core installation steps, and cover crucial post-installation optimizations. By understanding these steps, you not only gain control over your computing environment but also unlock a deeper appreciation for the technology that powers your daily life, aligning perfectly with the ‘Tech’ focus of our platform, from software tutorials to digital security best practices.
Preparing for a Seamless OS Installation: The Foundation of Success
Before you even think about hitting the “install” button, meticulous preparation is key. Rushing into an OS installation without proper groundwork can lead to frustrating errors, data loss, and wasted time. This preparatory phase is where we ensure all prerequisites are met, safeguarding your valuable information and setting the stage for a smooth process.
Understanding Your Hardware and System Requirements
Every operating system has specific hardware requirements that dictate whether it can run efficiently, or even at all, on your machine.
- Processor (CPU): Most modern OSes require a 64-bit processor. Check the clock speed and core count. Windows 11, for instance, has specific generation requirements for Intel and AMD CPUs.
- Random Access Memory (RAM): This is your computer’s short-term memory. While an OS might technically run on 4GB of RAM, 8GB is generally recommended for a smooth user experience, and 16GB or more is ideal for demanding tasks like gaming, video editing, or running multiple applications simultaneously.
- Storage (HDD/SSD): The OS needs space to reside. Solid State Drives (SSDs) are vastly superior to traditional Hard Disk Drives (HDDs) in terms of speed and responsiveness, dramatically improving boot times and application loading. Most OSes require at least 64GB of free space, but a 256GB SSD is a practical minimum for the OS and essential applications, with 500GB-1TB being more common.
- Graphics Card (GPU): While most modern CPUs have integrated graphics sufficient for basic use, a dedicated GPU is crucial for gaming, graphic design, and video production. Ensure your drivers will be available for your chosen OS.
- Motherboard: The central hub connecting all components. Check its compatibility with your CPU and RAM, and ensure it supports modern features like UEFI (Unified Extensible Firmware Interface) for newer OS versions.
Knowing your system’s specifications helps you choose the right OS version and avoid performance bottlenecks. Tools like dxdiag on Windows or “About This Mac” on macOS can provide these details, or you can check your PC manufacturer’s website.
Backing Up Your Data: A Non-Negotiable Step
This cannot be stressed enough: Always back up your data before installing an operating system. A clean OS installation typically involves formatting the drive, which permanently erases all existing data. Even if you plan to install the OS on a separate partition, accidents happen, and it’s best to be prepared. This critical step directly ties into digital security and data integrity.
- What to back up: Documents, photos, videos, music, project files, browser bookmarks, emails, and any other personal or work-related data. Don’t forget application-specific settings or save files for games.
- Methods of backup:
- External Hard Drive: A reliable and often fast local solution.
- Cloud Storage: Services like Google Drive, OneDrive, Dropbox, or iCloud offer convenient off-site backups, accessible from anywhere. Ensure you have enough storage space.
- Network Attached Storage (NAS): For more advanced users, a personal cloud solution that can store large amounts of data.
- USB Drives: Suitable for smaller, critical files.
Verify your backups by attempting to access some files from the backup location. The peace of mind that comes with a secure backup is invaluable.
Acquiring Your Chosen Operating System
The method of obtaining your OS varies depending on your choice:
- Microsoft Windows: You typically purchase a license key and download an ISO file (a disc image) directly from Microsoft’s website. Tools like the “Media Creation Tool” simplify the process of downloading the correct version and creating a bootable USB drive. Ensure you have a legitimate product key.
- Apple macOS: macOS is exclusive to Apple hardware. If you’re reinstalling, you can usually download the latest compatible version directly from the App Store on an existing macOS installation or use macOS Recovery (Cmd+R during boot) to reinstall the OS that came with your Mac or the latest compatible version.
- Linux Distributions: Linux is open-source and comes in various “distributions” (distros) like Ubuntu, Fedora, Mint, Debian, and Manjaro. Most are free to download as ISO files from their respective project websites. This offers incredible flexibility for users focused on specific productivity workflows or development environments.
For Windows and Linux, you’ll need a stable internet connection for the download and a USB flash drive (at least 8GB, preferably 16GB or more) to create your bootable installation media.
Creating Bootable Installation Media
Once you have the ISO file of your chosen OS, the next step is to transfer it to a USB drive in a way that makes the drive “bootable.”
- For Windows (using Microsoft’s Media Creation Tool): This tool handles both the download and the creation of the bootable USB drive automatically. It’s the recommended method for simplicity.
- For Windows and Linux (using third-party tools):
- Rufus (Windows only): A popular and powerful utility for creating bootable USB drives from ISOs. It offers various options for partition schemes (MBR vs. GPT) and boot modes (BIOS vs. UEFI), which we’ll discuss shortly.
- Balena Etcher (Cross-platform – Windows, macOS, Linux): Known for its user-friendly interface and reliability. Simply select your ISO, select your USB drive, and flash.
- For macOS: If creating a bootable installer on macOS, you’ll use the
createinstallmediacommand in Terminal after downloading the macOS installer from the App Store. This requires an existing macOS system.
Always double-check that you’ve selected the correct USB drive to avoid accidentally overwriting another storage device. Once created, the USB drive will contain all the necessary files to start the OS installation process.
Navigating the Pre-Installation Environment: BIOS/UEFI Settings
With your bootable media ready, the next hurdle is to tell your computer to boot from it instead of its internal hard drive. This involves accessing and configuring your system’s firmware, either the older BIOS (Basic Input/Output System) or the more modern UEFI (Unified Extensible Firmware Interface).
Accessing Your System’s Firmware Settings
To enter BIOS/UEFI setup, you need to press a specific key immediately after powering on your computer. This key varies by manufacturer:
- Dell: F2 or F12
- HP: F10 or Esc
- Lenovo: F1, F2, Fn+F2, or Enter
- Acer: F2 or Del
- Asus: Del or F2
- MSI: Del
- Custom Builds: Usually Del or F2, depending on the motherboard manufacturer (ASUS, Gigabyte, MSI, ASRock).
Watch for a message on the screen during startup, often in the bottom corner, indicating which key to press. You might need to repeatedly tap the key as soon as you power on the PC.
Configuring Boot Order and Other Essential Settings
Once in the BIOS/UEFI interface, navigate using your keyboard (arrow keys, Enter, Esc). The layout and options vary greatly, but you’re looking for a “Boot” or “Startup” tab.
- Boot Order (Boot Priority): This setting determines the sequence in which your computer tries to load an operating system. You need to prioritize your USB drive (it might be listed as “USB HDD,” “USB-FDD,” or by the brand of your USB drive) above your internal hard drive/SSD.
- UEFI vs. Legacy/CSM: Modern OSes like Windows 10/11 and recent Linux distributions are designed for UEFI booting, which offers faster startup, better security features (like Secure Boot), and support for larger hard drives (GPT partition scheme). If your OS or hardware is older, you might need to use “Legacy” or “CSM (Compatibility Support Module)” mode. Generally, stick with UEFI if possible.
- Secure Boot: A UEFI feature that enhances security by preventing unauthorized operating systems and software from loading during startup. While beneficial, it can sometimes interfere with Linux installations or older hardware. If you encounter issues booting a Linux distro, you might need to temporarily disable Secure Boot in the UEFI settings.
- Disable Fast Boot/Fast Startup: This can sometimes prevent the computer from recognizing the bootable USB drive properly. Disabling it (especially in Windows settings, not just BIOS) is often a good troubleshooting step.
- SATA Mode: Ensure your SATA controller is set to AHCI (Advanced Host Controller Interface) mode, especially if installing on an SSD, for optimal performance.
After making changes, always “Save and Exit” (often F10) to apply them. Your computer should then reboot and attempt to boot from your USB drive.
The Core Installation Process: Step-by-Step
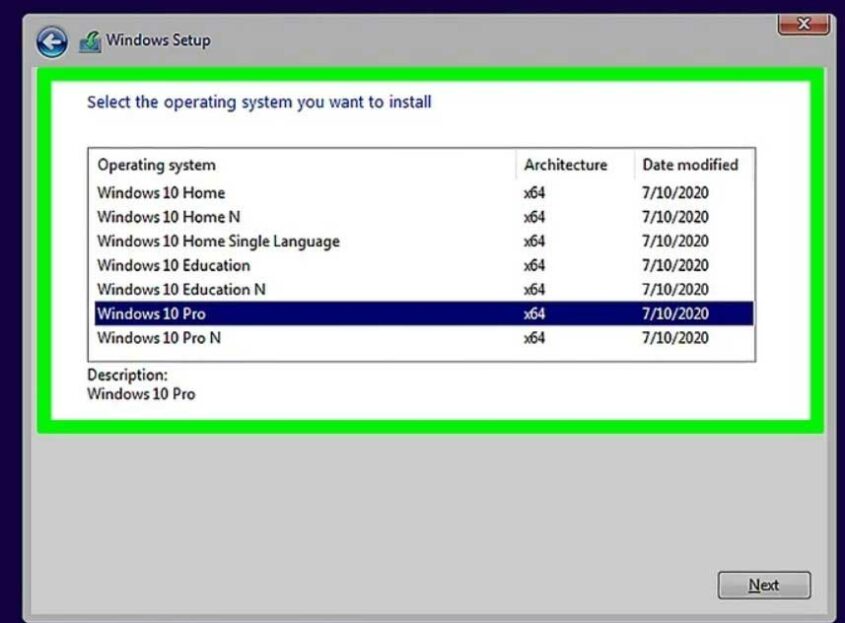
With your system configured to boot from the installation media, you’re ready for the main event. While the visual interfaces differ between Windows, macOS, and Linux, the underlying logical steps are remarkably similar.
Initiating the Setup and Language Selection
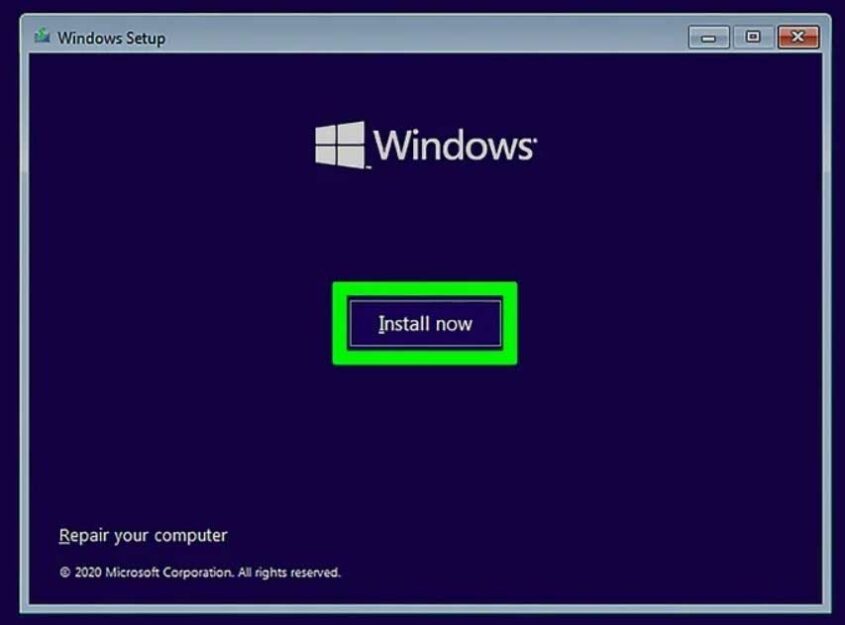
Upon successful booting from your USB drive, you’ll typically be greeted by a welcome screen:
- Language, Time, and Keyboard Layout: Select your preferred settings. This is crucial for localizing your OS experience.
- “Install Now” or “Try without installing”: For Linux distributions, you often have the option to “try” the OS from the USB drive without installing it, which is great for testing compatibility and getting a feel for the environment. For Windows, you’ll proceed directly to “Install Now.”
- License Agreement: Read and accept the terms and conditions.
Disk Partitioning and Drive Selection

This is arguably the most critical step, as incorrect choices here can lead to data loss.
- Installation Type:
- Clean Installation: This is the most common and recommended method for a fresh start. It involves deleting all existing partitions on your target drive and letting the installer create new ones. This effectively erases all data, emphasizing the importance of your backup.
- Upgrade/Keep Files: Some OSes (especially Windows) offer an option to upgrade an existing installation while attempting to keep your files and applications. While convenient, it can sometimes lead to lingering issues from the old OS.
- Dual-Booting: If you want to run two operating systems on the same machine (e.g., Windows and Linux), you’ll need to create a separate partition for the new OS. This requires careful planning to resize existing partitions without data loss.
- Drive Selection: You’ll see a list of detected drives and their partitions. Carefully identify the drive you wish to install the OS on. If performing a clean install, select the drive and choose to “Delete” all existing partitions, then select the resulting “Unallocated Space” and click “Next” or “Install.” The installer will automatically create the necessary system partitions (e.g., EFI System Partition, Recovery Partition, Primary Partition).
- Partitioning Scheme (GPT vs. MBR): Modern systems use GPT (GUID Partition Table) for UEFI booting, supporting larger drives and more partitions. Older systems and Legacy BIOS booting use MBR (Master Boot Record). The installer usually defaults to the correct scheme based on your boot mode (UEFI/Legacy).
Take your time with this step. If unsure, stop and seek guidance. Erasing the wrong drive is a common and irreversible mistake.
User Account Creation and Basic Configuration
Once the OS files are copied and basic setup is complete, the system will often reboot and prompt you for initial user information:
- User Name and Password: Create your primary user account. Always use a strong, unique password. This is fundamental for digital security.
- Computer Name: A unique identifier for your computer on a network.
- Time Zone and Region: Set these for accurate system time and regional settings.
- Privacy Settings (Windows): Windows installations often present various privacy options regarding data sharing, advertising IDs, and diagnostic data. Review these carefully and adjust them according to your preferences.
- Network Connection: Connect to your Wi-Fi or wired network. This allows the OS to download essential updates during or immediately after installation.
- Account Login (Windows/macOS): You might be prompted to log in with a Microsoft account or Apple ID, which can integrate cloud services and settings synchronization. While convenient, some users prefer local accounts for privacy.
The Waiting Game: Installation Progress
After these initial configurations, the OS installer will begin copying files, installing features, and performing final setup tasks. This phase is largely automated.
- Multiple Reboots: Expect your computer to restart several times during this process. This is normal.
- Do Not Power Off: Crucially, do not power off or unplug your computer during this stage, as it can corrupt the installation and lead to an unbootable system.
- Patience: Depending on your hardware (especially SSD vs. HDD) and the OS, this part can take anywhere from 15 minutes to an hour or more.
Once complete, your computer will boot into your brand-new operating system for the first time!
Post-Installation Essentials: Optimizing Your New OS
Installing the OS is just the first step. To ensure optimal performance, stability, and security, a series of post-installation tasks are vital. This phase focuses on fine-tuning your system, installing necessary software, and hardening your digital defenses, directly enhancing your productivity and security posture.
Driver Installation and Updates
Drivers are software components that allow your operating system to communicate with your hardware (graphics card, motherboard chipset, network adapter, sound card, peripherals, etc.). Without the correct drivers, your hardware might not function at all, or might perform poorly.
- Check Device Manager (Windows): Open Device Manager (search for it in the Start Menu) and look for any devices with yellow exclamation marks. These indicate missing or improperly installed drivers.
- Manufacturer Websites: The most reliable source for the latest drivers is the website of your hardware manufacturers (e.g., NVIDIA, AMD, Intel for graphics and chipsets; motherboard manufacturer for other components). Download and install them manually.
- Windows Update: Modern Windows versions often automatically detect and install many drivers. After connecting to the internet, run Windows Update multiple times until no more updates are found.
- Linux: Most Linux distributions come with excellent out-of-the-box driver support. For proprietary graphics drivers (NVIDIA, some AMD), you might need to enable them via the “Additional Drivers” utility or command line.
- macOS: Drivers are typically handled entirely by macOS updates, requiring no manual intervention.
Outdated or missing drivers can lead to system instability, crashes, and suboptimal performance, directly impacting your productivity.
System Updates and Security Patches
Keeping your operating system up-to-date is paramount for both security and stability. Software vulnerabilities are constantly discovered, and OS developers release patches to fix them.
- Windows Update: Navigate to Settings > Update & Security > Windows Update. Check for updates and install all available ones. Configure active hours to prevent reboots during your work.
- Linux: Use the package manager (e.g.,
sudo apt update && sudo apt upgradefor Debian/Ubuntu-based systems) to keep your system and installed software current. - macOS: Go to System Settings > General > Software Update.
Regularly updating your OS protects your system from emerging threats, addresses bugs, and often introduces new features and performance improvements. This is a cornerstone of digital security.
Essential Software Installation and Personalization
Now that your OS is stable and secure, it’s time to install the applications you’ll use daily and personalize your environment.
- Web Browser: Chrome, Firefox, Edge, Brave, etc.
- Office Suite: Microsoft Office, LibreOffice (free and open-source), Google Workspace (web-based).
- Communication Tools: Slack, Zoom, Microsoft Teams, Discord.
- Media Players: VLC Media Player, Spotify, etc.
- Security Software: Even with built-in defenses, consider a reputable antivirus/anti-malware solution if desired (though Windows Defender is robust).
- Productivity Tools: Depending on your needs, this could include graphic design software, video editors, IDEs for development, or specialized business applications.
- Personalization: Customize your desktop background, theme, sound settings, display resolution, and taskbar/dock layout to enhance your user experience and productivity.
For Linux users, package managers make software installation incredibly easy and secure. For Windows and macOS, download software from official websites or trusted app stores.
Setting Up a Robust Digital Security Perimeter
A fresh OS install is the perfect opportunity to establish strong security practices from day one.
- Firewall Configuration: Ensure your operating system’s built-in firewall is active and configured correctly. It controls incoming and outgoing network traffic, preventing unauthorized access.
- Antivirus/Anti-Malware: Even if you rely on the built-in Windows Defender, ensure it’s up-to-date and performing regular scans. Consider additional layers of protection if your threat model requires it.
- Strong Passwords: Reiterate the importance of strong, unique passwords for your user account and all online services. Consider a password manager.
- Regular Backups (Reiterate): Continue your backup routine. An OS installation is just the start; regular data backups protect against future failures.
- User Account Control (UAC) / Admin Privileges: Understand the importance of running as a standard user for daily tasks and only elevating privileges when necessary to prevent malicious software from making system-wide changes.
These steps create a resilient computing environment, safeguarding your data and privacy, and are essential components of robust digital security.
Common Pitfalls and Troubleshooting Tips
Even with the best preparation, unexpected issues can arise during or after an OS installation. Knowing how to troubleshoot common problems can save you a lot of time and frustration.
Installation Media Not Booting
- Check Boot Order: Re-enter BIOS/UEFI and confirm your USB drive is prioritized in the boot order.
- Faulty USB Drive/Corrupt ISO: Try using a different USB drive or re-downloading the ISO file. Recreate the bootable media with a tool like Rufus or Etcher.
- UEFI/Legacy Mismatch: Ensure your bootable media was created for the correct boot mode (UEFI or Legacy) that your BIOS is configured for. If you’re using UEFI, ensure “Secure Boot” is temporarily disabled if it’s causing issues.
- USB Port Issues: Try a different USB port, preferably a USB 2.0 port if you’re having trouble with USB 3.0 ports on older motherboards.
Disk Partitioning Issues
- “Windows cannot be installed to this disk. The selected disk has an MBR partition table.” (or GPT equivalent): This indicates a mismatch between your boot mode (UEFI requires GPT, Legacy BIOS requires MBR) and the current partition scheme of your drive.
- Solution 1 (Clean Install): During partitioning, delete all partitions on the target drive until it’s “Unallocated Space.” The installer will then correctly initialize it for the chosen boot mode.
- Solution 2 (Convert Disk): You can convert the disk’s partition style using
diskpartfrom the command prompt during setup (press Shift+F10 on Windows installation screen), but this will erase all data.
- “No drives found”: This can happen if your storage controller drivers are not natively included in the OS installer. You might need to download them (e.g., from your motherboard manufacturer) and load them during the installation process.
Driver Compatibility Problems
- No Network/Internet After Install: A common issue. You’ll need to use another device to download your Ethernet or Wi-Fi adapter drivers from your PC or motherboard manufacturer’s website onto a USB drive, then transfer and install them on the new OS.
- Display Issues (Low Resolution, No Graphics Acceleration): Download and install the latest graphics drivers from NVIDIA, AMD, or Intel.
- Sound Not Working: Check Device Manager for sound card driver issues and update as needed.
Performance Lag After Installation
- Missing Drivers: As mentioned, ensure all essential drivers are installed.
- Background Updates: Allow the OS to complete all initial updates and downloads. This can be resource-intensive.
- Bloatware: Some OEM (Original Equipment Manufacturer) installations come with pre-installed software (bloatware) that can slow down your system. Consider a clean installation or manually uninstall unnecessary programs.
- Indexing/Search: After a fresh install, the OS might be busy indexing your files for faster searching, which can consume resources. This typically resolves itself over time.
For any specific error messages, a quick online search is your best friend. Forums and official support documentation often provide detailed solutions for common problems.
Conclusion: Empowering Your Digital Journey
Successfully installing an operating system is more than just a technical feat; it’s an act of empowerment. It gives you intimate control over the very heart of your computer, ensuring it runs efficiently, securely, and tailored to your specific needs. From meticulously preparing your hardware and safeguarding your data with robust backups to navigating the intricacies of BIOS/UEFI settings and optimizing your post-installation environment, each step is crucial.
By following this comprehensive guide, you’ve not only learned the “how-to” but also gained a deeper understanding of the “why” behind each action, strengthening your foundational knowledge in software and digital security. This skill translates directly into enhanced productivity, offering a clean, responsive, and secure platform for all your computing endeavors. Whether for personal projects, academic pursuits, or professional tasks, a well-installed and maintained operating system is your most valuable digital asset. Embrace the power of a fresh start, and enjoy the optimized performance that comes with mastering your own technology.
aViewFromTheCave is a participant in the Amazon Services LLC Associates Program, an affiliate advertising program designed to provide a means for sites to earn advertising fees by advertising and linking to Amazon.com. Amazon, the Amazon logo, AmazonSupply, and the AmazonSupply logo are trademarks of Amazon.com, Inc. or its affiliates. As an Amazon Associate we earn affiliate commissions from qualifying purchases.