
Few upgrades offer as dramatic a performance boost to an aging or even new laptop as installing a Solid State Drive (SSD). If you’ve been grappling with sluggish boot times, applications that crawl, or interminable file transfers, then an SSD isn’t just an upgrade; it’s a transformation. This comprehensive guide will walk you through the entire process, empowering you to unlock your laptop’s full potential. For anyone passionate about Tech, seeking enhanced productivity, or making smart financial decisions to extend the life of their gadgets, mastering this skill is invaluable. Forget the frustrations of a slow machine and embrace the lightning-fast responsiveness of an SSD-powered device.
The Transformative Power of SSDs: Why Upgrade?
Upgrading to an SSD is more than just swapping out a component; it’s investing in a significantly improved user experience that touches every aspect of your digital life. It directly impacts your productivity, system reliability, and even your personal finance by extending the lifespan of your current hardware.
Unlocking Blazing Speed and Responsiveness
The most immediate and noticeable benefit of an SSD is its unparalleled speed. Unlike traditional Hard Disk Drives (HDDs), which rely on spinning platters and read/write heads, SSDs use flash memory. This fundamental difference eliminates mechanical bottlenecks, leading to:
- Instant Boot-Up: Your operating system will load in mere seconds, rather than minutes. Imagine starting your workday without the frustrating wait for your laptop to become usable.
- Lightning-Fast Application Loading: Programs like Photoshop, video editors, or even web browsers will launch and operate significantly quicker. This translates to less waiting and more doing, directly boosting your workflow efficiency.
- Rapid File Transfers: Moving large files, installing software, or even saving documents becomes a seamless, almost instantaneous process. No more staring at progress bars!
This enhanced responsiveness doesn’t just feel good; it demonstrably increases your productivity, allowing you to accomplish more in less time, whether you’re managing a side hustle, working remotely, or simply enjoying your digital leisure.
Enhanced Durability and Reliability
Beyond speed, SSDs offer superior physical attributes that contribute to the overall robustness of your laptop:
- No Moving Parts: This is a game-changer. Without delicate platters or read/write heads, SSDs are far more resistant to physical shock, such as accidental drops or bumps – a common hazard for laptops. This significantly reduces the risk of data loss due to mechanical failure, providing greater peace of mind regarding your digital security.
- Quieter Operation: The absence of moving parts also means SSDs operate silently. Say goodbye to the whirring and clicking sounds of an HDD, contributing to a more pleasant and distraction-free work environment.
- Lower Power Consumption: SSDs generally draw less power than HDDs, which can translate into slightly longer battery life for your laptop – a crucial advantage for those on the go.
This increased durability and reliability mean a longer, more trouble-free life for your laptop, safeguarding both your data and your investment.
A Smart Investment for Productivity and Personal Finance
From a financial perspective, an SSD upgrade is often one of the most cost-effective ways to revitalize an existing laptop. Instead of shelling out hundreds or even thousands for a brand-new device, a relatively inexpensive SSD can breathe new life into an older machine, providing a performance boost comparable to modern laptops. This is a prime example of smart personal finance, maximizing the value of your existing assets.
For professionals, entrepreneurs, or anyone engaged in online income generation or side hustles, the productivity gains from an SSD are tangible. Less time spent waiting means more time spent working, creating, or connecting, directly impacting your earning potential. It’s an investment that pays dividends in both time and efficiency. By strategically upgrading components, you uphold your commitment to efficient technology without breaking the bank.
Essential Preparations: Setting the Stage for Success
Before you even think about unscrewing a single panel, thorough preparation is paramount. This stage involves understanding your laptop’s compatibility, gathering the necessary tools, and, most importantly, safeguarding your valuable data. Rushing this phase can lead to compatibility issues, lost data, or even damage to your device.
Choosing the Right SSD for Your Laptop
The market offers several types of SSDs, and compatibility is key. Understanding your laptop’s specifications is crucial:
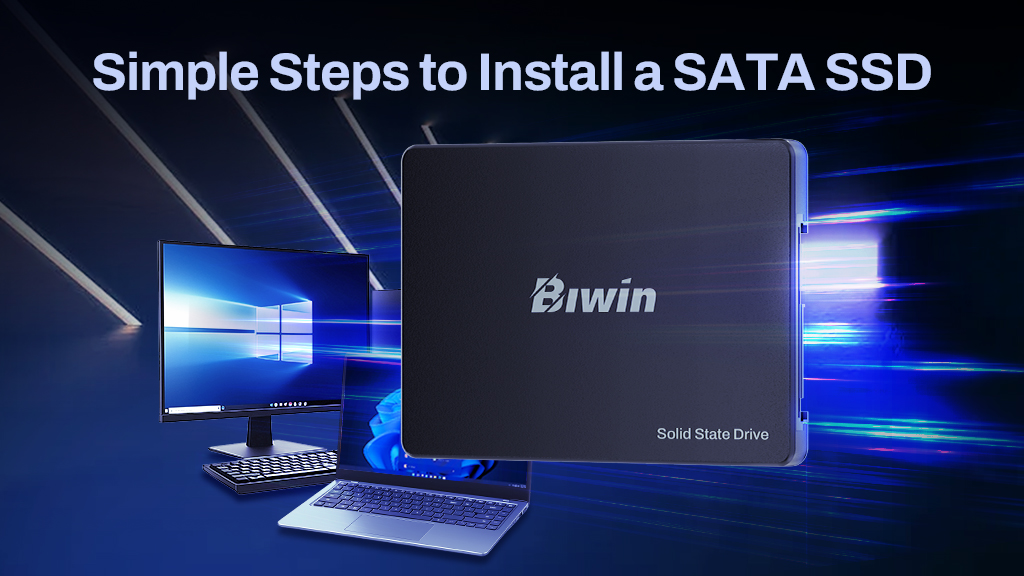
- 2.5-inch SATA SSDs: These are the most common type and are direct replacements for traditional 2.5-inch HDDs found in most laptops. They connect via a SATA data and power cable. Their universal form factor makes them a popular choice for older laptops.
- M.2 SATA SSDs: These drives are smaller, resembling a stick of RAM, and plug directly into an M.2 slot on your motherboard. They use the SATA interface, meaning their speeds are comparable to 2.5-inch SATA drives.
- M.2 NVMe SSDs: Also in the M.2 form factor, NVMe (Non-Volatile Memory Express) drives utilize the PCIe bus, offering significantly faster speeds than SATA SSDs. If your laptop has an M.2 slot that supports NVMe (often indicated as “PCIe” or “NVMe PCIe”), this is the fastest option available.
How to Check Compatibility:
- Consult your laptop’s manual: This is the most reliable source for determining what type of storage it supports.
- Inspect your current drive: If you have a 2.5-inch HDD, a 2.5-inch SATA SSD is a safe bet. If you see a small “stick” drive, research your laptop model to determine if it’s M.2 SATA or NVMe.
- Online search: A quick search for “[Your Laptop Model] SSD upgrade” will often yield user forums and guides detailing compatible SSD types and sizes.
Capacity Considerations:
Think about your current storage usage and future needs. SSDs come in various capacities (250GB, 500GB, 1TB, 2TB, etc.). While larger capacities offer more space, they also cost more. Aim for at least 500GB for a comfortable experience, but 1TB or more is advisable for content creators, gamers, or those with extensive media libraries. Reputable brands like Samsung, Crucial, Western Digital, and Kingston are known for their reliability and performance, representing solid choices for a tech-savvy user.
Gathering Your Toolkit
Having the right tools makes the process smoother and minimizes the risk of damage:
- Small Phillips Head Screwdriver: Essential for opening most laptops and removing drive caddies. Some laptops may require a Torx screwdriver.
- Plastic Prying Tools (Spudger): These are invaluable for gently separating plastic clips and panels without scratching or marring your laptop’s casing. Avoid using metal objects, which can cause damage.
- Anti-Static Wrist Strap: Critical for protecting delicate electronic components from electrostatic discharge (ESD), which can permanently damage your laptop’s internals. If you don’t have one, frequently touch a grounded metal object (like a metal table leg or an unpainted computer chassis) to discharge static electricity from your body.
- External USB Enclosure or SATA-to-USB Adapter: If you plan to clone your existing drive, you’ll need this to connect your new SSD to your laptop before installation.
- USB Flash Drive (8GB+): Required for creating a bootable operating system installer (Windows, macOS, Linux) if you choose to perform a fresh installation rather than cloning.
- Tweezers (Optional): Handy for manipulating tiny screws or cables in tight spaces.
- A Clean, Well-Lit Workspace: Essential for organizing small parts and ensuring clear visibility.
Safeguarding Your Data: The Critical Backup
This is the most crucial step. Never proceed with hardware installation without backing up your data. A successful upgrade is irrelevant if your precious photos, documents, and projects are lost. This underscores the importance of digital security.
- Full System Backup: Use your operating system’s built-in backup tools (e.g., Windows Backup and Restore, macOS Time Machine) or third-party software to create a complete image of your current drive. Store this backup on an external hard drive or cloud service.
- Critical File Backup: Even if you plan a full system backup, also manually copy essential files to an external drive or cloud storage (e.g., Google Drive, OneDrive, Dropbox).
- Cloning vs. Fresh Installation:
- Cloning: This process creates an exact copy of your old drive, including the operating system, applications, and all your files, directly onto the new SSD. It’s faster for getting back up and running, but it also carries over any existing software issues or clutter. You’ll need cloning software (e.g., Macrium Reflect Free, EaseUS Todo Backup) and the external adapter mentioned above.
- Fresh Installation: This involves installing a clean copy of your operating system onto the new SSD. It’s more time-consuming as you’ll need to reinstall all your applications and drivers, but it results in a pristine, optimized system free of old software baggage. This is often recommended for maximum performance.
Powering Down and Static Protection
Before touching any internal components:
- Completely shut down your laptop. Do not just close the lid or put it to sleep.
- Unplug the power adapter.
- Remove the battery (if user-removable): For many modern laptops, the battery is internal and requires opening the casing to disconnect. If so, disconnect it as one of your very first steps after gaining access. This prevents accidental power surges or shorts during the installation.
- Wear an anti-static wrist strap or frequently discharge static electricity. This prevents damage to sensitive components from static electricity. Work on a non-conductive surface, away from carpets.
The Installation Journey: A Step-by-Step Guide
With preparations complete, it’s time to embark on the physical installation. Take your time, follow each step carefully, and refer to your laptop’s specific service manual if you encounter any difficulties.
Accessing Your Laptop’s Internals
- Flip the laptop over: Place it on your clean, well-lit workspace with the bottom panel facing up.
- Locate and remove all screws: Most laptops have numerous small screws securing the bottom panel. Pay close attention to different screw lengths or types, and consider drawing a simple diagram or using a magnetic mat to keep track of where each screw came from. This is critical for proper reassembly.
- Gently pry open the bottom panel: Once all screws are removed, use your plastic spudger to carefully work your way around the edges of the laptop. You’ll likely hear small clicks as plastic clips release. Be patient and avoid excessive force to prevent breaking the clips.
- Disconnect the battery (if internal): Once the back panel is off, locate the battery connector (usually a small ribbon cable or plug). Gently disconnect it from the motherboard. This is a vital safety step to prevent electrical short circuits while working inside the laptop.
Removing the Old Drive
The location and mounting of your old drive will depend on its type:
- For 2.5-inch HDDs/SSDs:
- Locate the 2.5-inch drive bay. It’s often secured within a metal or plastic caddy.
- Carefully disconnect the SATA data and power cables from the drive.
- Unscrew any mounting screws holding the caddy or drive in place.
- Gently lift and slide out the old drive. You may need to remove the caddy from the old drive and attach it to your new SSD.
- For M.2 SSDs:
- Locate the M.2 slot on the motherboard. It typically holds a small “stick” secured by a single screw at one end.
- Unscrew the retaining screw at the end of the M.2 drive.
- The drive will pop up slightly. Gently slide it out of the slot.
Installing Your New SSD
This is where your new, faster storage takes its place:
- For 2.5-inch SATA SSDs:
- If your old drive was in a caddy, attach the caddy to your new 2.5-inch SSD. Ensure the screw holes align.
- Carefully slide the new SSD (with its caddy) into the drive bay.
- Secure the caddy with the mounting screws you removed earlier.
- Reconnect the SATA data and power cables firmly to the new SSD.
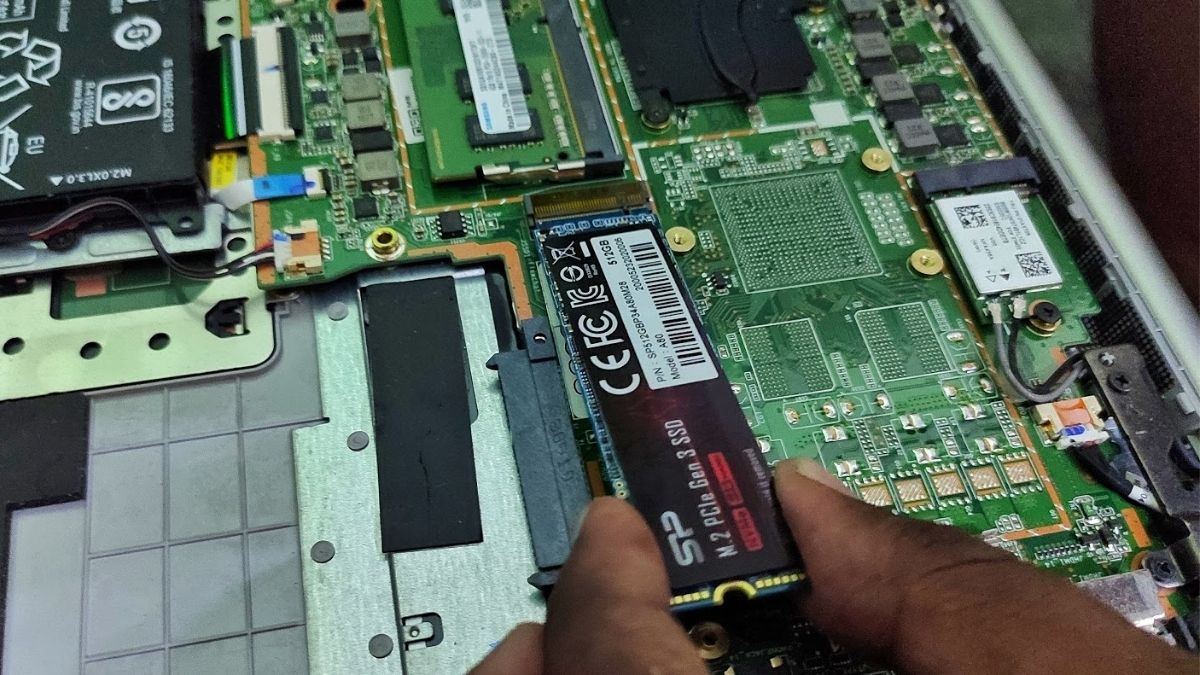
- For M.2 SSDs (SATA or NVMe):
- Hold the new M.2 SSD by its edges, aligning the notch on the SSD with the key in the M.2 slot on the motherboard.
- Gently slide the SSD into the slot at a slight angle (around 30 degrees) until it’s fully seated.
- Push the end of the SSD down towards the motherboard and secure it with the single retaining screw.
Reassembly and Initial Boot
- Reconnect the battery: Once the new SSD is securely in place, carefully reconnect the battery connector to the motherboard.
- Replace the bottom panel: Align the bottom panel with the laptop chassis, gently press around the edges to snap the plastic clips back into place, and then reinsert all the screws, ensuring they go into their original locations. Do not overtighten the screws.
- Power on and verify BIOS recognition: Plug in your laptop’s power adapter and press the power button. Immediately enter your laptop’s BIOS/UEFI settings (usually by pressing F2, F10, F12, DEL, or ESC during startup, depending on your manufacturer). Navigate to the storage or boot section to confirm that your new SSD is recognized. If it is, congratulations!
Software Setup: Cloning or Fresh Installation
This final phase prepares your new SSD for use:
- If you chose Cloning:
- If you haven’t already, connect your new SSD to your laptop using the external enclosure/adapter.
- Boot your laptop from your old drive.
- Launch your cloning software (e.g., Macrium Reflect).
- Follow the software’s instructions to clone the contents of your old drive to your new SSD. This can take some time.
- Once cloning is complete, shut down your laptop, swap the old drive for the new SSD (if you installed it externally), and then boot up. Your laptop should now boot from the new, faster SSD as if nothing changed. You might need to adjust the boot order in the BIOS if it doesn’t boot correctly.
- If you chose Fresh Installation:
- Create a bootable USB installer for your desired operating system (Windows Media Creation Tool, macOS Disk Maker, Linux Live USB tools).
- Insert the bootable USB into your laptop.
- Boot your laptop, and press the key to enter the boot menu (often F12, F10, or ESC). Select your USB drive as the boot device.
- Follow the on-screen instructions to install the operating system. When prompted, select your new SSD as the destination drive and format it if necessary.
- After the OS is installed, download and install all necessary drivers (chipset, graphics, Wi-Fi, etc.) from your laptop manufacturer’s website.
- Reinstall your essential applications and restore your backed-up files.
Post-Installation & Optimization: Maximizing Your SSD’s Potential
Your laptop is now supercharged with an SSD! But a few final steps can ensure you get the most out of your upgrade and maintain its peak performance for years to come. This aligns with a proactive approach to tech management and digital longevity.
Verifying Performance and Health
- Check Disk Management: In Windows, open “Disk Management” (search for it in the Start menu). Ensure your SSD is correctly partitioned and recognized as a primary drive.
- Run Speed Tests: Use benchmarking tools like CrystalDiskMark (for Windows) or Blackmagic Disk Speed Test (for macOS) to confirm the impressive read/write speeds of your new SSD. This visual confirmation is incredibly satisfying!
- Monitor SSD Health: Software like CrystalDiskInfo (Windows) or SMART Utility (macOS) can read your SSD’s SMART data, providing insights into its health, temperature, and remaining lifespan. Regular checks can give you peace of mind.
Essential SSD Maintenance Tips
Unlike HDDs, SSDs require different maintenance practices to ensure optimal performance and longevity:
- Enable TRIM: TRIM is a command that helps your operating system tell the SSD which data blocks are no longer in use and can be wiped. This prevents performance degradation over time. Windows and macOS typically enable TRIM by default for SSDs, but you can verify its status.
- Avoid Defragmentation: Never defragment an SSD. Defragmentation is designed for HDDs with mechanical parts and actually shortens the lifespan of an SSD by performing unnecessary write cycles. Your OS should automatically detect the SSD and disable defrag for it.
- Leave Some Free Space: Aim to keep at least 15-20% of your SSD’s capacity free. This provides space for over-provisioning and wear-leveling algorithms to operate effectively, which are crucial for maintaining performance and extending the drive’s life.
- Keep Firmware Updated: Periodically check the manufacturer’s website for firmware updates for your specific SSD model. Firmware updates can improve performance, fix bugs, and enhance compatibility.
Leveraging Your Old Drive
Don’t let your old HDD go to waste! Purchase an inexpensive external drive enclosure, and transform your old internal hard drive into a portable external storage device. This is a smart financial move, giving you extra space for backups, media, or files without buying a new external drive. It’s a prime example of optimizing your tech assets.
Conclusion
Congratulations! You’ve successfully installed an SSD in your laptop, unlocking a new level of speed, responsiveness, and reliability. This upgrade is a testament to smart tech choices, significantly boosting your productivity and extending the life of your device – a savvy move for both your digital workflow and your personal finance. Embrace the instant boot-ups, rapid application launches, and seamless multitasking that your SSD-powered laptop now offers. Enjoy the transformation!
aViewFromTheCave is a participant in the Amazon Services LLC Associates Program, an affiliate advertising program designed to provide a means for sites to earn advertising fees by advertising and linking to Amazon.com. Amazon, the Amazon logo, AmazonSupply, and the AmazonSupply logo are trademarks of Amazon.com, Inc. or its affiliates. As an Amazon Associate we earn affiliate commissions from qualifying purchases.