
In the vibrant world of digital design, typography is far more than just a means to convey text; it’s a powerful artistic element that shapes perception, dictates mood, and defines brand identity. For countless designers, photographers, marketers, and digital artists, Adobe Photoshop stands as the quintessential tool for bringing visual concepts to life. While Photoshop comes equipped with a vast library of default fonts, the true magic often happens when you venture beyond the standard offerings, integrating custom fonts that perfectly encapsulate your creative vision or align with a specific client’s branding guidelines.
The ability to seamlessly install and utilize unique typefaces can elevate a design from mundane to magnificent, ensuring your work stands out in a crowded digital landscape. Whether you’re crafting a captivating social media graphic, designing a stunning website banner, or developing a comprehensive corporate identity, the right font can make all the difference. This comprehensive guide will walk you through the entire process, from understanding font types and sourcing high-quality assets to installing them system-wide and finally, deploying them within Photoshop to transform your projects. We’ll delve into step-by-step instructions for both Windows and macOS users, troubleshoot common issues, and even explore the broader strategic importance of typography in an age where visual communication reigns supreme. Get ready to unlock an entirely new dimension of creative expression within Photoshop.
The Foundation: Understanding Fonts and Where to Find Them
Before you can begin to transform your designs with bespoke typography, it’s crucial to understand what fonts are, the different formats they come in, and where to reliably source them. This foundational knowledge will ensure a smooth installation process and help you make informed decisions that benefit your projects both creatively and legally.
What Are Font Files? TTF vs. OTF
When you download a font, you’ll typically encounter files with specific extensions: .ttf or .otf. These are the two most common and widely supported font formats, each with its own history and advantages.
TrueType Font (TTF): Developed by Apple in the late 1980s and later adopted by Microsoft, TTF fonts are perhaps the most common format. They are essentially a single file that contains both the screen font and the printer font data, meaning they render well on screen and print consistently. TTF fonts are widely compatible across operating systems (Windows, macOS, Linux) and are generally robust for everyday use. Their widespread adoption makes them a reliable choice for most designers, particularly for web and desktop applications. The technology behind TTF allows for intricate character outlines, hinting instructions for rendering at various sizes, and comprehensive character sets, making them versatile for a broad range of design applications.
OpenType Font (OTF): Created by Adobe and Microsoft, OTF is a more advanced and flexible font format built upon the foundation of TrueType. The key advantage of OpenType fonts lies in their capacity for advanced typographic features. These can include ligatures (where two or more characters are combined into a single glyph), small caps, old-style figures, stylistic alternates, swashes, and other glyph variations that add a layer of sophistication and bespoke quality to text. OTF fonts can contain either TrueType outlines or PostScript outlines (the latter often preferred by professional designers and print houses for their precision and smoother curves at larger sizes). This makes OTF particularly appealing for designers who require fine-tuned control over typography for print, branding, and complex editorial layouts. While both formats are generally excellent, OTF often provides more expansive creative possibilities for professional design work due to its rich feature set. Understanding these distinctions can help you choose the right font format for your specific project needs, especially when dealing with high-fidelity branding or print collateral.
Curating Your Typography Collection: Free vs. Premium Sources
The digital landscape offers a treasure trove of fonts, ranging from freely available options to meticulously crafted premium typefaces. The choice between them often hinges on your budget, the specific needs of your project, and crucially, licensing considerations.
Free Font Websites: For hobbyists, students, or projects with limited budgets, free font websites are an invaluable resource. Platforms like Google Fonts offer a vast library of high-quality, open-source fonts that are not only free for personal and commercial use but are also optimized for web performance, making them a popular choice for web designers. DaFont and Font Squirrel are other perennial favorites, housing thousands of user-contributed and commercially free fonts. Font Squirrel, in particular, meticulously curates its collection to ensure all listed fonts come with clear commercial-use licenses. While the sheer volume is appealing, it’s important to exercise caution: not all free fonts are created equal in terms of quality or licensing. Always double-check the license for each font you download, especially if you intend to use it for client work or commercial projects. Some fonts are free for personal use but require a license for commercial application, which can impact your “Money” aspect if you inadvertently use a paid font without permission.
Premium Font Marketplaces: When professionalism, exclusivity, and advanced typographic features are paramount, premium font marketplaces are the go-to. Adobe Fonts, included with an Adobe Creative Cloud subscription, provides access to thousands of high-quality fonts that can be easily synced and used across all Adobe applications, including Photoshop. This seamless integration is a significant productivity booster for designers already invested in the Adobe ecosystem, offering a curated collection with robust licensing. Beyond Adobe, platforms like MyFonts, Creative Market, and Fontspring host an extensive array of professionally designed typefaces from independent foundries and renowned typographers. Investing in premium fonts often means gaining access to entire font families with multiple weights, styles, and advanced OpenType features, providing a coherent and sophisticated typographic system for branding projects. While these come with a cost, the investment often pays dividends in terms of design quality, unique brand identity, and the peace of mind that comes with clear, legally sound commercial licenses. For businesses focusing on “Brand” strategy, premium fonts are often non-negotiable, as they contribute significantly to a distinctive and memorable visual identity. Understanding and respecting font licenses is not just a legal obligation but also supports the creators behind these essential design assets.
The Installation Process: Integrating Fonts into Your System
Once you’ve found the perfect font files (TTF or OTF) for your project, the next step is to install them onto your operating system. This is a crucial phase, as Photoshop, like most design software, relies on the fonts being available at the system level rather than being embedded directly within the application. The process is straightforward, though it varies slightly between Windows and macOS.
For Windows Users: A Step-by-Step Guide
Installing fonts on a Windows machine is a simple process that can be accomplished in a couple of ways, making your new typefaces available to all applications on your system, including Photoshop.
- Downloading the Font File: Begin by downloading the font file(s) from your chosen source. These are often packaged within a
.ziparchive to compress them and group multiple files (e.g., different weights or styles of a font family). - Extracting ZIP Files: If your downloaded font is in a
.zipformat, you’ll need to extract its contents. Locate the.zipfile (usually in your “Downloads” folder), right-click on it, and select “Extract All…” Follow the prompts to choose a destination folder (the default is usually fine) and click “Extract.” This will create a new folder containing your.ttfor.otffont files. - Installing via File Explorer (Quick Method):
- Open the folder where you extracted your font files.
- Locate the
.ttfor.otffont file(s). If there are multiple files for different weights (e.g., MyFont-Regular.ttf, MyFont-Bold.ttf), you’ll need to install each one separately or select them all. - Right-click on the individual font file (or a selection of files).
- From the context menu, choose “Install”. This is the quickest way to install a font for the current user.
- Alternatively, you can choose “Install for all users” if you want the font to be available to anyone who uses that computer, requiring administrator privileges.
- Installing via Windows Settings (Control Panel Method): This method offers a more centralized way to manage your fonts.
- Open “Settings” (Windows key + I).
- Navigate to “Personalization” > “Fonts”.
- Alternatively, you can search for “Fonts” in the Windows search bar.
- Once in the Fonts settings, you’ll see a panel that allows you to drag and drop font files to install them.
- Simply drag your
.ttfor.otffile(s) from the extracted folder directly into the designated “Drag and drop to install fonts” area in the Fonts settings window. Windows will automatically install them. - You can also browse for fonts manually by clicking “Add fonts” and navigating to your font files.
After installation, Windows will process the font, and it should immediately become available to most applications. However, for applications like Photoshop that might have been open during the installation, a restart may be necessary to recognize the new fonts.
For macOS Users: Effortless Font Integration
macOS offers an incredibly user-friendly method for installing fonts, primarily through its integrated Font Book application. The process is typically smoother and more centralized than on Windows.
- Downloading and Unzipping: Just like with Windows, start by downloading your desired font. If it’s in a
.zipfile, double-clicking it will usually decompress it automatically, revealing the.ttfor.otffiles. - Installing via Font Book (Recommended Method):
- Navigate to the folder containing your unzipped font file(s).
- Double-click on the
.ttfor.otffont file. This action will automatically open the Font Book application and display a preview of the font. - In the Font Book window that appears, you’ll see a button labeled “Install Font”. Click this button.
- Font Book will then perform a quick validation check (to ensure the font isn’t corrupted) and install it into your system’s font library. If there are any issues with the font, Font Book will alert you.
- Direct Installation (Drag and Drop):
- You can also open the Font Book application directly (found in your Applications folder).
- Once Font Book is open, you can simply drag and drop your
.ttfor.otffont file(s) from your Finder window directly into the Font Book window. - Font Book will then proceed with the validation and installation process as described above.
Once installed via Font Book, the fonts are available system-wide for all applications, including Photoshop. Similar to Windows, if Photoshop was already open during the installation, you might need to restart it for the newly added fonts to appear in its font menus. macOS’s Font Book is also a powerful tool for managing your font collection, allowing you to enable/disable fonts, resolve duplicate fonts, and organize them into collections, which can be a huge asset for keeping your “Tech” workflow efficient and clean.
Activating and Utilizing Your New Fonts in Photoshop
With your custom fonts now successfully installed at the system level, the final steps involve making them accessible within Adobe Photoshop and seamlessly integrating them into your design workflow. This section will guide you through refreshing Photoshop’s font library, using your new typefaces, and troubleshooting any issues that might arise.

Making Your Fonts Available: The Photoshop Refresh
One of the most common hiccups users encounter after installing a new font is that it doesn’t immediately show up in Photoshop’s font list. This isn’t a bug, but rather how most professional design applications manage their resources.
Restarting Photoshop (and why it’s necessary): Photoshop, like many complex software applications, typically loads its resources, including its list of available system fonts, when it first launches. If you install a font while Photoshop is already open, the application won’t automatically rescan your system for new additions. Therefore, the simplest and most effective solution is to close Photoshop completely and then relaunch it.
Upon restarting, Photoshop performs a new scan of your system’s font directories, discovers the recently installed fonts, and adds them to its internal database. Once it reopens, your new font(s) should be readily available in the character panel and font dropdown menus, ready for you to use in your projects. This step is crucial for maintaining an efficient “Tech” workflow, as it ensures all available assets are properly loaded and recognized by the software.
Designing with Your Custom Typography
With Photoshop relaunched and your new fonts recognized, you’re ready to infuse your designs with fresh typography.
- Opening Photoshop and a Project: Launch Adobe Photoshop and either open an existing document or create a new one (File > New).
- Using the Type Tool: In the Photoshop toolbar (usually on the left side), select the Type Tool (represented by a ‘T’ icon). You can also press
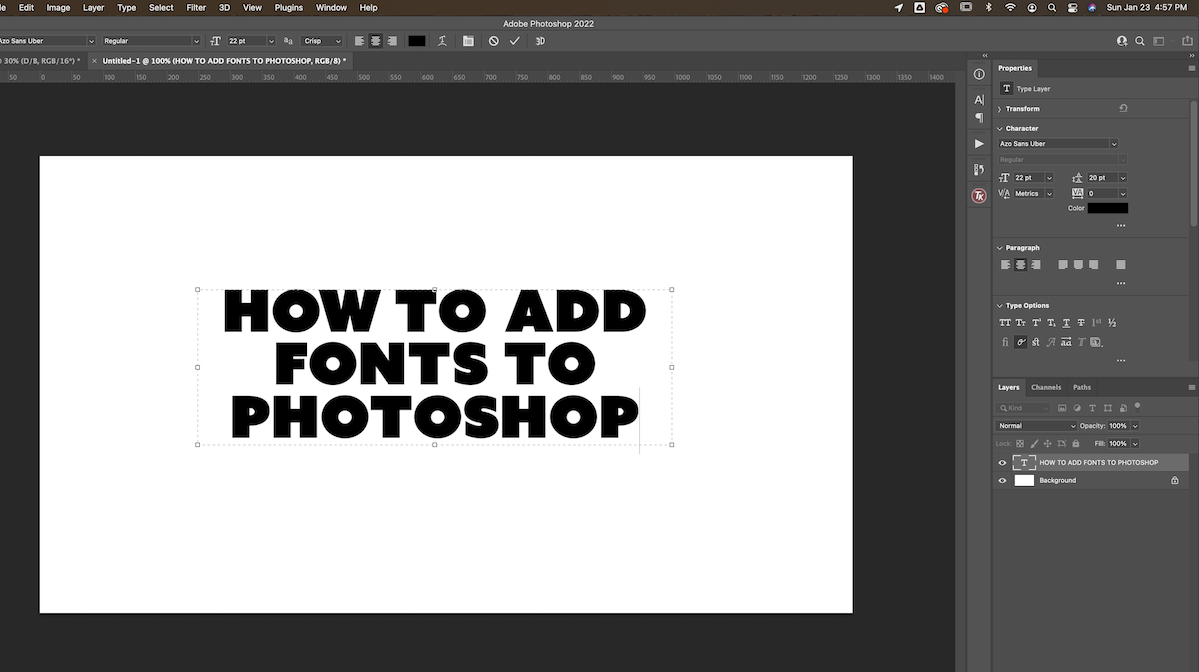
Ton your keyboard as a shortcut. - Creating a Text Layer: Click anywhere on your canvas with the Type Tool selected. This will automatically create a new text layer. You’ll see a placeholder text (often “Lorem Ipsum”) appear, and the Character and Options panels will become active.
- Selecting Your Installed Font:
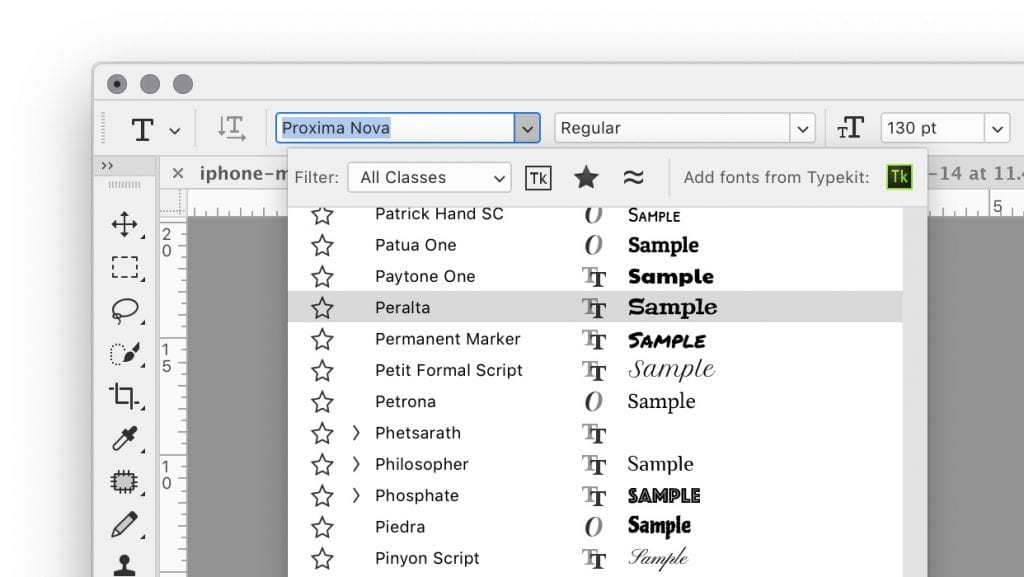
- In the Options Bar at the top of the Photoshop interface (when the Type Tool is active), you’ll see a dropdown menu displaying the current font.
- Click this dropdown menu to reveal a list of all available fonts. You can either scroll through the list to find your new font alphabetically or, more efficiently, start typing the name of your font into the font selection box. Photoshop’s intelligent search will narrow down the options as you type.
- Select your newly installed font from the list.
- Styling and Customizing Text: Once selected, type out your desired text. You can then use the Character Panel (Window > Character) and the Options Bar to further customize your text:
- Font Size: Adjust the size to fit your design.
- Color: Change the text color.
- Leading, Kerning, and Tracking: Fine-tune the spacing between lines, specific character pairs, and overall letter spacing, respectively. These granular controls are essential for professional “Brand” consistency and readability.
- Font Style: If your font family includes multiple styles (e.g., Light, Regular, Semibold, Bold, Italic), you can select these from a separate dropdown right next to the font name in the Options Bar or Character Panel.
- Applying Effects: Don’t forget Photoshop’s powerful layer styles (blending options, shadows, glows, etc.) to further enhance your typography.
By following these steps, you can seamlessly integrate your custom fonts into any Photoshop project, opening up a world of creative possibilities for your designs.
Troubleshooting Common Font Issues
While the font installation process is generally smooth, you might occasionally encounter minor issues. Knowing how to troubleshoot these can save you time and frustration.
- Font Not Appearing:
- Did you restart Photoshop? This is the most common reason. Close and reopen Photoshop.
- Is the font correctly installed on your system? Double-check your system’s font directory (Windows: Settings > Personalization > Fonts; macOS: Font Book) to ensure the font is listed there.
- Is the font file corrupted? Try redownloading the font from its source. Sometimes, incomplete downloads can lead to corrupt files that won’t install or display correctly.
- Font conflicts: Very rarely, two fonts with similar internal names can cause conflicts. macOS Font Book is good at detecting duplicates. On Windows, you might need to manually check your font folder (C:WindowsFonts) if you suspect this.
- Font Appears, But Glyphs Are Missing or Incorrect:
- Incorrect encoding: Ensure you’re using the correct character set. This is rare for common Western languages but can occur with specialized fonts or languages.
- Limited font version: Some free fonts might be “demo” versions that only include a limited character set. Check the font’s documentation or source.
- Performance Issues or Photoshop Crashing After Font Installation:
- Too many fonts: While modern systems can handle thousands of fonts, having an excessive number (especially if many are poorly designed) can occasionally slow down applications or even the operating system. Consider using a font manager (discussed below) to activate fonts only when needed.
- Corrupted system font cache: Both Windows and macOS maintain font caches. A corrupted cache can sometimes cause display issues.
- Windows: You can try clearing the font cache by going to
services.msc, stopping the “Windows Font Cache Service,” deleting files inC:WindowsServiceProfilesLocalServiceAppDataLocalFontCache, and then restarting the service and your computer. - macOS: You can clear the font cache using third-party utilities or by restarting your Mac in Safe Mode, which often clears caches automatically.
- Windows: You can try clearing the font cache by going to
- Licensing Concerns: While not a technical issue, ensure you have the appropriate license for commercial use, especially if you’re using fonts for client work or projects that generate income (“Money” aspect). Misusing font licenses can lead to legal complications down the line, affecting your “Brand” reputation.
By systematically going through these troubleshooting steps, you can quickly resolve most font-related issues and maintain a smooth, efficient design workflow within Photoshop.
Beyond Basic Installation: Optimizing Your Font Workflow
Installing fonts is merely the first step. To truly harness the power of typography in your digital creations and maintain a professional “Tech” workflow, it’s beneficial to understand the strategic impact of fonts and explore advanced management techniques. This ensures your designs are not only visually appealing but also strategically sound.
The Strategic Importance of Typography in Branding and Design
In the realm of digital marketing and design, typography is a cornerstone of effective visual communication. Its impact extends far beyond mere aesthetics, playing a critical role in shaping perceptions, conveying messages, and establishing a consistent “Brand” identity.
- Visual Identity and Consistency: A well-chosen typeface is often the most recognizable element of a brand, alongside its logo. Think of iconic brands like Coca-Cola, Nike, or Google; their typography is instantly identifiable and synonymous with their identity. Using a consistent set of fonts across all touchpoints—website, social media, marketing materials, print—reinforces brand recognition and trust. Custom fonts can give a brand a unique voice, helping it stand out from competitors and establish a distinct personality. This deliberate choice and consistent application of typography are paramount for strong brand strategy.
- Readability and User Experience: The primary function of text is to be read. A beautifully designed font that is difficult to read due to poor kerning, inadequate line height, or overly intricate letterforms defeats its purpose. Good typography prioritizes legibility and readability, ensuring that the message is conveyed clearly and efficiently. This directly impacts user experience (UX), making content more accessible and enjoyable to consume. For web design and app interfaces, selecting fonts optimized for digital screens is crucial for maintaining user engagement and reducing cognitive load.
- Emotional Resonance: Fonts carry emotional weight and psychological associations. A serif font might evoke feelings of tradition, trustworthiness, and sophistication, making it suitable for law firms or luxury brands. A sans-serif font often communicates modernity, clarity, and approachability, popular in tech and contemporary branding. Script fonts can suggest elegance, creativity, or personal touch, while bold, blocky fonts convey strength and impact. Designers strategically choose typefaces to align with the desired emotional response and the core values of the brand or message they are trying to communicate. This subtle yet powerful influence of typography is a key element in shaping customer perception and driving emotional connection, directly impacting the “Brand” value.
Understanding these strategic dimensions elevates typography from a simple stylistic choice to a powerful tool in your design arsenal, capable of enhancing meaning, fostering connection, and strengthening brand presence in the digital marketplace.
Advanced Font Management Tools
As your font collection grows, manually managing them can become cumbersome. This is where dedicated font management tools come into play, offering a more organized and efficient “Tech” workflow. These tools are especially valuable for professionals who work with numerous client projects, each potentially requiring a different set of fonts.
-
Dedicated Font Managers: Applications like FontBase, Suitcase Fusion (now Universal Type Server), RightFont, and NexusFont (for Windows) provide robust features for organizing, previewing, activating, and deactivating fonts. Instead of installing every font system-wide (which can slow down your computer and applications), these managers allow you to:
- Organize into Collections: Group fonts by project, client, style, or foundry.
- Preview Extensively: See how fonts look with custom text, at different sizes, and with various stylistic variations.
- Activate/Deactivate on Demand: Only enable the fonts you need for your current project, keeping your system lean and Photoshop’s font list manageable. This significantly improves application performance and system responsiveness.
- Resolve Duplicates and Conflicts: Automatically detect and manage duplicate fonts or potential conflicts, ensuring a stable environment.
- Cloud Syncing: Some premium managers offer cloud synchronization, allowing you to access your font library across multiple devices.
For designers juggling multiple “Brand” identities and projects, a dedicated font manager becomes an indispensable part of their “Tech” toolkit, ensuring efficiency and consistency.
-
Adobe Fonts Integration: For Adobe Creative Cloud subscribers, Adobe Fonts (formerly Typekit) offers a seamless and powerful font management experience integrated directly into Photoshop and other Adobe apps. Instead of downloading and manually installing fonts, you simply “activate” them within the Adobe Fonts website or directly from Photoshop’s font dropdown menu (look for the “Find More” tab in the Character Panel). Activated fonts are then automatically synced to your Creative Cloud desktop app and become available across all your Adobe applications. This eliminates the need for manual installation, ensures legal licensing (as they are included with your CC subscription), and provides a vast, high-quality library of typefaces optimized for design. This level of integration represents the pinnacle of “Tech” efficiency for designers working within the Adobe ecosystem, simplifying font acquisition and management to a mere click.
Embracing these advanced font management strategies can dramatically streamline your design process, improve system performance, and empower you to manage your typographic assets with precision, ultimately contributing to a more professional and productive creative career.
Conclusion
Mastering the art of installing and utilizing custom fonts in Photoshop is a fundamental skill for any designer looking to elevate their creative output. From understanding the nuances of TTF and OTF file formats to meticulously installing them on your operating system, and finally, activating them within Photoshop, each step contributes to a more expansive and refined design palette. We’ve journeyed through the practicalities of installation for both Windows and macOS, armed you with troubleshooting tips, and illuminated the profound impact typography has on brand identity, readability, and emotional connection.
The ability to seamlessly integrate unique typefaces not only enhances the aesthetic appeal of your designs but also provides a powerful tool for visual storytelling and consistent branding. Whether you’re a burgeoning designer experimenting with free fonts or a seasoned professional investing in premium typefaces for high-stakes client projects, the knowledge gained here will empower you to make informed decisions and execute your vision with precision. By venturing beyond the default fonts, you unlock an endless realm of creative possibilities, allowing your designs to truly speak volumes and resonate with your audience. So, go forth, explore the boundless world of typography, and let your Photoshop creations truly shine with a distinctive and captivating voice.
aViewFromTheCave is a participant in the Amazon Services LLC Associates Program, an affiliate advertising program designed to provide a means for sites to earn advertising fees by advertising and linking to Amazon.com. Amazon, the Amazon logo, AmazonSupply, and the AmazonSupply logo are trademarks of Amazon.com, Inc. or its affiliates. As an Amazon Associate we earn affiliate commissions from qualifying purchases.