Securing your property is paramount, whether it’s your cherished home or a bustling business. While many focus on digital fortifications in an age of ever-evolving cyber threats, the importance of robust physical security often gets overlooked. A strong, well-installed deadbolt lock on your door is the first line of defense against intruders, offering a level of protection that standard spring latch locks simply cannot match. For metal doors, which are increasingly popular for their durability and fire resistance, the installation process requires a keen understanding of materials and specialized techniques.

This comprehensive guide will walk you through every step of installing a deadbolt lock on a metal door, ensuring both security and a professional finish. We’ll delve into the necessary tools, precise measurements, and crucial installation steps, all while integrating insights from the realms of technology, branding, and personal finance to underscore the multifaceted value of this essential upgrade.
Why a Deadbolt is Essential for Your Metal Door
The decision to install a deadbolt goes beyond merely adding another lock; it’s an investment in your safety, peace of mind, and the overall integrity of your property. For metal doors, which are inherently strong, pairing them with a high-quality deadbolt creates a formidable barrier.
Enhanced Security for Your Property
Standard door locks typically feature a spring-loaded latch that can be vulnerable to forced entry techniques like “credit carding” or manipulation. A deadbolt, by contrast, operates with a solid metal bolt that extends deep into the door frame, providing superior resistance to prying, kicking, and picking. This fundamental difference dramatically increases the time and effort an intruder would need to gain entry, often deterring them entirely.
For commercial properties, a robust deadbolt on a metal door is non-negotiable, safeguarding valuable assets, sensitive data, and employee safety. In a residential setting, it protects your family and possessions. From a digital security perspective, while physical and digital security seem disparate, a strong physical perimeter protects the devices and networks within, acting as the first layer of defense against direct access attempts to your tech infrastructure. Think of it as a crucial component of your overall security ecosystem, complementing your firewalls and antivirus software by securing the physical gateway to your digital world.
Peace of Mind and Insurance Benefits
Knowing your home or business is adequately secured provides an invaluable sense of peace. This psychological benefit extends beyond mere comfort; it contributes to a feeling of control and safety, enhancing your daily life or work environment. Furthermore, many insurance providers offer discounts on homeowner’s or business insurance policies for properties equipped with high-security locks like deadbolts. This directly ties into the Money aspect of our discussion – a seemingly simple hardware upgrade can translate into tangible financial savings over time, making the initial investment even more worthwhile.
Moreover, in the unfortunate event of a break-in, a properly installed deadbolt can be critical in demonstrating due diligence to insurance companies, potentially simplifying claims processes and ensuring you receive full compensation for losses. It signals that you’ve taken proactive steps to protect your assets, aligning with sound personal finance and business finance principles of risk management.
Preparation: Gathering Your Tools and Understanding Your Metal Door
Successful deadbolt installation hinges on meticulous preparation. This involves not only gathering the right tools but also understanding the unique characteristics of a metal door. Unlike wood, metal doors require specific approaches to drilling and cutting, demanding precision to avoid damaging the door’s finish or structural integrity.
Essential Tools and Materials You’ll Need
Before you begin, ensure you have all the necessary items on hand. A quick trip to the hardware store for any missing pieces will save you frustration later.
- Deadbolt Lock Kit: Choose a high-quality deadbolt. Brands with a strong reputation for durability and security (a Brand Strategy consideration) are preferable. Look for certifications like ANSI Grade 1 for maximum security. The kit typically includes the lock cylinders, latch assembly, strike plate, and mounting screws.
- Power Drill: A corded or powerful cordless drill is essential.
- Hole Saw Kit: You’ll need two specific sizes:
- 2 1/8-inch (54mm) hole saw: For the main bore through the door face where the lock cylinder sits.
- 1-inch (25mm) hole saw: For the smaller hole in the door edge where the latch bolt extends.
- Wood Spade Bit (or Step Bit for Metal): A 7/8-inch or 1-inch bit for the latch bolt hole if a hole saw isn’t suitable for the door edge thickness, or a step bit specifically designed for cutting through metal without tearing.
- Chisel (Optional, but Recommended): For mortising (recessing) the latch plate and strike plate flush with the door and frame. While some metal doors don’t allow for deep chiseling, a sharp chisel can still help clean up edges or make shallow depressions if needed.
- Tape Measure: For accurate measurements.
- Pencil or Marker: For marking drill points.
- Safety Glasses and Gloves: Always prioritize personal safety.
- Center Punch: To create divots for accurate drill starting points on metal, preventing the drill bit from “walking.”
- Metal File (Optional): To smooth any rough edges created by drilling.
- Cutting Fluid or Lubricant: Crucial for drilling through metal to reduce heat and extend drill bit life.
- Utility Knife: For scoring lines if a chisel is not used for a mortise.
From a Tech perspective, investing in quality power tools with good ergonomics and precision features (e.g., variable speed, torque control) not only makes the job easier but also ensures a professional finish. These gadgets are fundamental to effective DIY projects.
Understanding the Nuances of Metal Door Installation
Metal doors present specific challenges and advantages. Their strength is a double-edged sword: while secure, it demands more robust drilling techniques. Unlike wood, which can be forgiving, metal requires precise drilling to prevent warping, burring, or damage to the door’s finish.
- Drilling Through Metal: Use sharp, high-quality drill bits (cobalt or titanium-coated are excellent for metal). Apply steady pressure and use cutting fluid to keep the bit cool and lubricated, preventing it from binding or dulling prematurely. Start with a slow drill speed and gradually increase as the bit bites.
- Preventing Scratches: Metal doors often have a painted or coated finish. Use painter’s tape around the areas you’ll be drilling and cutting to protect the surface from errant drill bits or tools.
- Door Core: Be aware that some metal doors are hollow or filled with foam insulation. While this doesn’t change the drilling technique much, it’s good to know what to expect once you penetrate the outer skin.
- Fire Ratings: If your metal door has a fire rating, ensure your deadbolt also meets the appropriate fire safety standards to maintain the door’s overall rating. This is critical for both safety and compliance, especially in commercial settings.
Step-by-Step Installation Guide
With your tools ready and an understanding of metal door specifics, you’re prepared to embark on the installation process. Precision at each step is key to a secure and smoothly operating deadbolt.
Marking and Drilling the Pilot Holes
Accuracy begins here. Incorrect measurements can lead to a misaligned lock or damage to the door.
- Determine Backset: The backset is the distance from the edge of the door to the center of the main bore hole. Standard backsets are 2 3/8 inches (60mm) or 2 3/4 inches (70mm). Most deadbolts are adjustable, but check your lock’s specifications. If you already have a pre-drilled doorknob, match its backset. Mark this distance on the door edge and the door face.
- Mark the Center Points:
- On the door face, measure up from the floor to your desired deadbolt height (typically 6-12 inches above the existing doorknob, or roughly 44 inches from the floor). Mark the horizontal center line. Then, measure in the backset distance from the door edge along this line to find the exact center for the 2 1/8-inch hole.
- On the door edge, locate the midpoint of the door’s thickness. Measure the same deadbolt height from the floor as on the door face. Mark the center point for the 1-inch hole (latch bolt).
- Center Punch the Marks: Using a center punch, create a small indentation at each marked center point (door face and door edge). This prevents the drill bit from slipping when you start drilling on the metal surface.
- Drill Pilot Holes: For the 2 1/8-inch hole, start by drilling a small pilot hole (e.g., 1/8-inch) through the door face, precisely at the center punch mark. Drill from both sides of the door to prevent tear-out if your metal door is hollow-core and thin-skinned. Repeat for the 1-inch hole on the door edge.
Creating the Main Bore and Latch Holes
This is where the specialized tools come into play. Take your time and use proper technique for clean cuts.
- Drill the Main Bore Hole: Attach the 2 1/8-inch hole saw to your drill. Place the pilot bit into the pilot hole on the door face. Apply cutting fluid. Begin drilling slowly and steadily, maintaining even pressure. For metal doors, it’s crucial to stop once the pilot bit emerges on the opposite side. Then, switch to the other side of the door and drill through until the holes meet. This technique ensures a clean, splinter-free (or rather, tear-free in metal) cut on both sides and prevents damage to the door finish.
- Drill the Latch Hole: Attach the 1-inch hole saw or the appropriate spade bit/step bit for metal to your drill. Align the pilot bit with the pilot hole you drilled on the door edge. Apply cutting fluid. Drill straight into the door edge until the hole connects with the main bore hole. Ensure the hole is deep enough to accommodate the latch mechanism completely. Smooth any rough edges with a file if necessary.
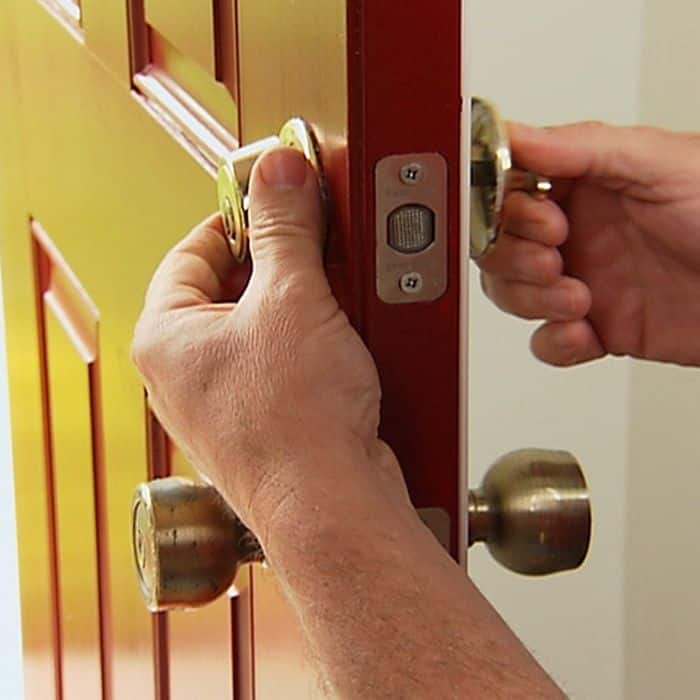
Installing the Latch Mechanism and Strike Plate
These components are vital for the deadbolt’s functionality and security.
- Insert the Latch Mechanism: Slide the deadbolt latch mechanism into the 1-inch hole on the door edge. Ensure the “UP” arrow (if present) points upwards, and the bolt faces the correct direction (extending outwards when locked).
- Mark and Mortise the Latch Plate: With the latch mechanism fully inserted, trace around the faceplate of the latch with a pencil. This outline indicates the area to be recessed. While traditional chiseling for a deep mortise isn’t always feasible or necessary on a thin metal door, you’ll still want the faceplate to sit as flush as possible. If the metal is thin enough, you might be able to carefully use a utility knife to score the outline and gently pry up the edges, or use a grinding attachment on a rotary tool for a shallow recess. In many metal door applications, the latch plate may simply be surface-mounted and fastened with screws, which is acceptable.
- Secure the Latch: Drill pilot holes for the latch plate screws and fasten the latch mechanism securely to the door edge.
- Install the Strike Plate:
- Close the Door: Extend the deadbolt into the door frame. Mark the exact top and bottom of the extended deadbolt on the door frame.
- Transfer Backset: Using your tape measure, transfer the backset measurement from the door to the door frame. Draw a horizontal line on the frame that aligns with the center of the deadbolt’s extension.
- Mark and Mortise: Align the strike plate with these marks, ensuring the bolt hole aligns perfectly. Trace around the strike plate. As with the latch plate, you may need to carefully chisel a shallow mortise into the door frame (if it’s wood) or simply mark and drill pilot holes for surface mounting if it’s a metal frame or a thin metal skin over wood. The goal is for the strike plate to sit flush, or as close to flush as possible, with the frame.
- Drill Bolt Hole: Using your 1-inch (or appropriate size) drill bit, drill a hole into the door frame where the deadbolt will extend. This hole should be deep enough for the entire bolt to extend when locked.
- Secure Strike Plate: Drill pilot holes and fasten the strike plate to the door frame with the provided screws. Ensure the screws are long enough to bite firmly into the stud behind the frame for maximum security. This adds to the money value by ensuring the lock’s full protective potential.
Assembling the Deadbolt Components
With the preliminary drilling and latch installation complete, it’s time to put the lock together.
- Install the Exterior Cylinder: Insert the exterior half of the deadbolt (with the keyway) into the 2 1/8-inch hole from the outside of the door. Make sure the spindle or tailpiece (the flat blade that operates the bolt) slides through the slot in the latch mechanism.
- Install the Interior Thumbturn/Lever: On the interior side, position the interior assembly, ensuring its spindle aligns with the tailpiece from the exterior cylinder. The two mounting posts from the exterior cylinder should pass through the holes in the interior assembly.
- Secure with Screws: Insert the mounting screws through the interior assembly and thread them into the mounting posts from the exterior cylinder. Tighten these screws gradually and evenly. Do not overtighten, as this can bind the mechanism or warp the door. Ensure the lock is straight and snug.
- Attach Escutcheons/Trim: If your deadbolt includes additional trim rings or escutcheons, install them according to the manufacturer’s instructions.
Testing and Final Adjustments
A secure lock is one that operates smoothly and consistently.
- Test with Door Open: Turn the thumbturn or insert the key and operate the deadbolt several times with the door open. The bolt should extend and retract smoothly without resistance. If it binds, check the alignment of the interior and exterior cylinders and ensure screws aren’t overtightened.
- Test with Door Closed: Close the door and operate the deadbolt. The bolt should easily slide into the hole in the strike plate.
- If it binds or doesn’t extend fully: The strike plate or the bolt hole in the frame might be misaligned. Adjust the strike plate position slightly or enlarge the bolt hole in the frame as needed. This usually involves removing the strike plate, enlarging the hole slightly with a file or drill, and then re-screwing the strike plate.
- Check for Play: Ensure there’s no excessive play or wobbling in the lock components.
- Clean Up: Remove any pencil marks or tape. Wipe down the door and lock hardware to remove any dust or metal shavings.
Advanced Tips and Troubleshooting for Metal Doors
Installing a deadbolt on a metal door can sometimes present unique challenges. Knowing how to troubleshoot and enhance your setup can elevate your security and user experience.
Overcoming Common Challenges with Metal Doors
- Drill Bit Dullness: Metal is hard on drill bits. If you notice your drill bit struggling or smoking, it’s likely dull. Replace it with a sharp, high-quality bit. Using cutting fluid is critical for longevity.
- Burrs and Rough Edges: Drilling through metal can leave sharp burrs. Use a metal file or sandpaper to smooth these edges, especially on the latch hole, to ensure the mechanism operates freely and safely.
- Misalignment: Even small misalignments can cause the deadbolt to stick. If the bolt isn’t entering the strike plate smoothly, re-evaluate the strike plate position. Sometimes, slightly elongating the screw holes in the strike plate can provide enough play for minor adjustments.
- Hollow Metal Doors: If your metal door is hollow, be careful not to crush the metal skin when tightening screws. Snug is good; overtightening is not.
- Pre-existing Holes: If you’re replacing an old lock and the existing holes are too large or oddly shaped, you might need a “deadbolt guard” or “reinforcement plate” to cover the imperfections and provide a solid mounting surface.
Integrating Smart Home Technology
For those keen on Tech Trends and Digital Security, consider upgrading to a smart deadbolt. These locks offer enhanced features that integrate seamlessly with your smart home ecosystem.
- Keyless Entry: Use keypads, smartphone apps, or even voice commands to unlock your door, eliminating the need for traditional keys.
- Remote Access: Lock or unlock your door from anywhere, granting access to family members or service providers even when you’re away. This is a massive boon for productivity and managing access for online income ventures like short-term rentals.
- Activity Logs: Monitor who enters and exits your property, providing an extra layer of security and accountability.
- Integration with Other Systems: Link your smart deadbolt with security cameras, alarm systems, or smart lighting for a truly automated and secure environment.
While the installation of a smart deadbolt follows similar mechanical steps as a traditional one, the added electronic components introduce a layer of digital security and convenience that aligns perfectly with a tech-focused mindset. This fusion of physical and digital security represents a powerful stride in protecting your investments.
Maintaining Your Deadbolt for Longevity
Proper maintenance extends the life of your deadbolt and ensures its continued reliability, safeguarding your money and brand reputation (if a business).
- Lubrication: Periodically (e.g., once a year) spray a small amount of graphite lubricant or a silicone-based lubricant specifically designed for locks into the keyway and the bolt mechanism. Avoid oil-based lubricants, which can attract dirt and grime.
- Tighten Screws: Over time, screws can loosen due to daily use. Periodically check and gently tighten all mounting screws on the deadbolt and strike plate.
- Cleanliness: Keep the keyway and surrounding areas clean. Dust and debris can impede the smooth operation of the lock.
- Professional Inspection: For critical security applications (e.g., commercial properties), consider a periodic professional inspection to ensure all lock mechanisms are functioning optimally. This proactive approach helps avoid costly emergency repairs and reinforces a reliable corporate identity.

Conclusion: Securing Your Investment with Confidence
Installing a deadbolt lock on a metal door is a highly rewarding DIY project that significantly boosts the security of your property. By meticulously following the steps outlined in this guide, from precise measurements and careful drilling to proper assembly and testing, you can achieve a professional and secure installation.
This endeavor is more than just a hardware upgrade; it’s a strategic move in personal finance and business finance by protecting your assets and potentially reducing insurance premiums. It leverages modern Tech Trends with the option of smart locks, offering unparalleled convenience and control. Furthermore, a well-secured property contributes to your personal brand as a responsible homeowner or strengthens your corporate identity as a secure business entity.
Empower yourself with the knowledge and tools to enhance your physical security. A properly installed deadbolt on your metal door will provide years of reliable protection, giving you the ultimate peace of mind and securing your investment with unwavering confidence.
aViewFromTheCave is a participant in the Amazon Services LLC Associates Program, an affiliate advertising program designed to provide a means for sites to earn advertising fees by advertising and linking to Amazon.com. Amazon, the Amazon logo, AmazonSupply, and the AmazonSupply logo are trademarks of Amazon.com, Inc. or its affiliates. As an Amazon Associate we earn affiliate commissions from qualifying purchases.