In an increasingly connected and safety-conscious world, the integration of smart technologies into our vehicles is no longer a luxury but a growing necessity. For truck owners, who often navigate larger blind spots and challenging parking scenarios, a backup camera is a paramount upgrade. This guide delves into the practicalities of installing a backup camera on your truck, while also exploring the broader implications for Tech, Brand, and Money that such an enhancement brings. From leveraging cutting-edge gadgets to making a wise financial investment and even subtly shaping your personal brand, understanding the full scope of this upgrade is crucial. Prepare to transform your truck’s rear-view capabilities, ensuring safer maneuvers, greater productivity, and a modern edge.
Why Every Truck Needs a Backup Camera: Safety, Productivity, and Value
The sheer size and robust design of trucks, while essential for their utility, inherently create significant blind spots that pose risks to drivers, pedestrians, and property. A backup camera mitigates these risks dramatically, offering a clear line of sight where traditional mirrors fall short. But the benefits extend far beyond mere accident prevention, touching upon areas vital to personal finance, technological integration, and even a vehicle’s perceived value.
Beyond Basic Safety: Preventing Accidents and Boosting Confidence
The primary driver for installing a backup camera is undoubtedly safety. Backing up a truck, whether a full-size pickup or a heavy-duty workhorse, can be a nerve-wracking experience, especially in crowded parking lots, driveways, or construction sites. Children, pets, cyclists, or even small objects can easily disappear from view, leading to potentially tragic accidents or costly damage. A backup camera provides a wide-angle view of the area directly behind your vehicle, eliminating dangerous blind spots and giving you a comprehensive understanding of your surroundings. This enhanced visibility translates directly into heightened driver confidence, allowing for smoother, quicker, and safer maneuvers, which in turn boosts productivity for professionals who rely on their trucks daily for hitching trailers, positioning at loading docks, or navigating tight job sites.
The Tech Advantage: Smart Features and Digital Security
Modern backup cameras are far more sophisticated than their early predecessors. Today’s systems leverage advanced Tech to offer features like high-definition video feeds, superior low-light performance with infrared (IR) night vision, and dynamic grid lines that move with your steering wheel to predict your truck’s trajectory. Some even integrate with existing infotainment systems, offer multi-camera views, or feature smart object detection capabilities that are becoming increasingly common with AI advancements.
When considering wireless systems, the aspect of digital security becomes relevant. While most consumer-grade wireless cameras operate on dedicated frequencies to minimize interference, it’s wise to choose reputable brands that prioritize secure, encrypted transmissions, preventing unauthorized access to your vehicle’s camera feed. This ensures not only privacy but also reliable performance, free from external interference that could compromise the system’s effectiveness. For the tech-savvy individual, exploring app-controlled systems that connect via Bluetooth or Wi-Fi to a smartphone or tablet opens up a world of possibilities for display customization and integration with other vehicle monitoring apps, streamlining your digital cockpit.
A Wise Investment: Enhancing Truck Value and Financial Returns
From a Money perspective, installing a backup camera is a sound financial decision. The initial outlay for a quality system and installation is often significantly less than the potential costs of even a minor fender-bender or, worse, a liability claim resulting from an accident. By proactively preventing such incidents, you protect your “money” in terms of potential repair costs, increased insurance premiums, and legal fees.
Furthermore, a well-integrated backup camera system enhances the overall Brand appeal and market value of your truck. In today’s automotive market, technology is a key selling point. A truck equipped with modern safety features is more attractive to potential buyers, potentially fetching a higher resale price. For businesses operating a fleet of trucks, equipping them with backup cameras demonstrates a commitment to safety and modern fleet management, enhancing the company’s reputation and potentially reducing operational risks and insurance liabilities. It signals a proactive approach to risk management, which can indirectly contribute to a stronger Brand Strategy.
Choosing the Right Backup Camera System for Your Truck
With a multitude of options available, selecting the perfect backup camera system for your truck requires careful consideration. The market offers a diverse range of gadgets and solutions, each with its own set of advantages and challenges. Understanding these nuances will ensure you invest in a system that aligns with your specific needs, budget, and technical preferences.
Wired vs. Wireless: Connectivity, Reliability, and Installation Nuances
The fundamental choice often boils down to a wired or wireless system, each presenting distinct installation and performance characteristics.
- Wired Systems: These connect the camera directly to the monitor via a physical cable running the length of the truck. Their primary advantage is reliability; they offer a stable, interference-free video signal. There’s no concern about signal dropouts or lag, making them ideal for those who prioritize consistent performance. However, installation is generally more complex and time-consuming, requiring careful routing of the cable through the truck’s chassis, interior, and firewall. This can be a more labor-intensive DIY project, but offers robust digital security through direct connection.
- Wireless Systems: These transmit the video signal from the camera to the monitor wirelessly, usually via Wi-Fi or a dedicated radio frequency. The main benefit here is ease of installation, as you largely eliminate the need to run long video cables from the rear to the front of the truck. This makes it a popular choice for beginners or those seeking a quicker setup. However, wireless systems can be susceptible to interference from other electronic devices, potentially leading to occasional signal disruptions or delays. Battery-powered wireless cameras further simplify installation but require periodic recharging or battery replacement. When selecting a wireless unit, reviewing its frequency stability and range is crucial for optimal Tech performance.
Display Options and Advanced Features: A Gadget Perspective
The way you view your camera feed significantly impacts usability. Options include:
- Mirror Monitors: These clip over your existing rearview mirror or replace it entirely, providing a discreet, factory-integrated look.
- Dash Monitors: Standalone screens that mount on your dashboard, offering flexible positioning and often larger display sizes.
- Integrated Infotainment Systems: Many modern trucks come with large touchscreens. Some aftermarket cameras can be wired directly into these systems, providing a seamless, OEM-like experience. This is often the most technologically sophisticated solution, requiring specific wiring harnesses or modules.
Beyond the display, consider advanced features that enhance usability:
- Resolution: Higher megapixel cameras offer clearer, more detailed images, especially beneficial for spotting small obstacles.
- Field of View (FOV): A wider angle (typically 120-170 degrees) provides a broader perspective of the rear, minimizing blind spots further.
- Night Vision: Infrared (IR) LEDs or advanced light-sensing technology are crucial for safe nighttime backing, a significant Tech advantage.
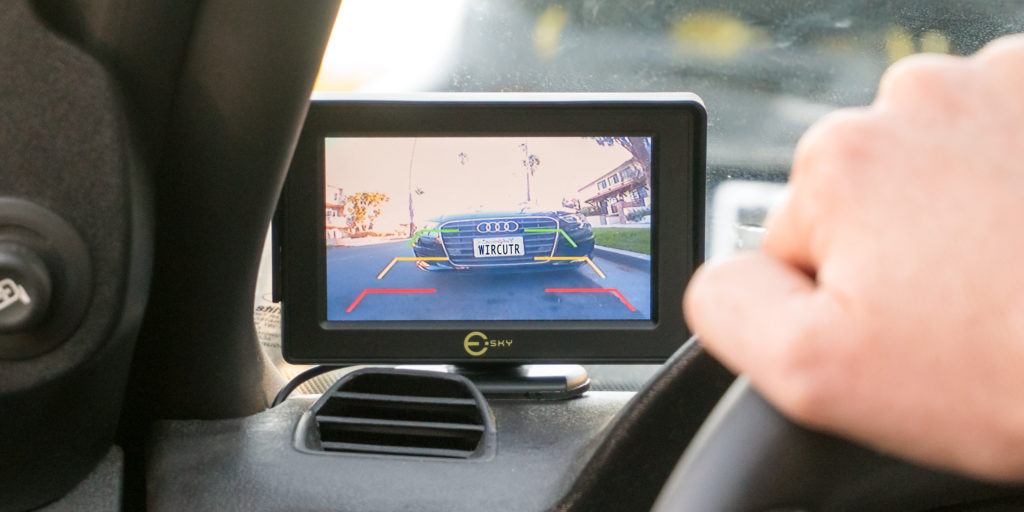
- Parking Lines/Grid Lines: Static or dynamic lines superimposed on the video feed help gauge distance and trajectory, making parking simpler.
- Waterproof Rating: Look for IP67 or IP68 ratings to ensure durability against harsh weather conditions.
Budgeting and Brand Reputation: A Money and Brand Strategy
When it comes to Money, backup camera systems vary widely in price, from under $50 for basic wireless kits to several hundred dollars for high-end integrated wired systems. Consider your budget, but also factor in the long-term value. Investing a little more upfront for a durable, feature-rich camera from a reputable Brand can save you headaches and replacement costs down the line.

Researching brand reputation is vital. Read user reviews and seek out tutorials from trusted sources. Brands known for their robust build quality, reliable performance, and excellent customer support generally offer better long-term value. A good warranty and readily available spare parts or technical assistance can also significantly enhance your ownership experience, reinforcing a positive perception of the brand you choose to trust with your truck’s safety.
The Step-by-Step Installation: A Tech-Savvy DIY Tutorial
Installing a backup camera on your truck can be a rewarding DIY project, offering significant savings compared to professional installation fees. This tutorial aims to guide you through the process, emphasizing precision, safety, and adherence to best practices, ensuring your new gadget performs flawlessly.
Gathering Your Arsenal: Tools and Kit Essentials
Before you begin, ensure you have all the necessary tools and components. A well-prepared workspace enhances productivity and safety.
Common Tools:
- Basic Hand Tools: Screwdrivers (Phillips and flathead), socket wrench set, pliers.
- Wire Tools: Wire strippers, wire crimpers, electrical tape, heat shrink tubing, soldering iron (optional, but recommended for robust connections).
- Drill: With various bits suitable for plastic and metal (if mounting requires drilling).
- Multimeter/Circuit Tester: Essential for identifying the correct power wires.
- Trim Removal Tools: Plastic pry tools to safely remove interior panels without damage.
- Zip Ties: For securing cables neatly.
- Work Light: For improved visibility in cramped spaces.
Camera Kit Components:
- Backup Camera: The unit itself, often with a mounting bracket.
- Monitor: If not integrating with an existing display.
- Wiring Harnesses: Including video cables and power cables.
- Mounting Hardware: Screws, bolts, adhesives.
- User Manual: Absolutely crucial for specific wiring diagrams and instructions.
Pre-Installation Prep: Planning and Digital Diagnostics
Thorough preparation is the bedrock of a successful installation.
- Read the Manual: This cannot be stressed enough. Each camera system and truck model has unique requirements. Familiarize yourself with the specific instructions for your kit.
- Test Components: Before running any wires, connect the camera and monitor to a 12V power source (like your truck battery or a portable jump starter) to ensure everything powers on and displays correctly. This prevents backtracking later.
- Disconnect Battery: For digital security and your personal safety, always disconnect the negative terminal of your truck’s battery before working with electrical components. This prevents accidental shorts and damage to your truck’s electrical system.
- Plan Cable Routing: Visualize the path the video and power cables will take from the camera at the rear to the monitor in the cab. Identify existing grommets, frame rails, or interior pathways that can be utilized to protect wires from heat, abrasion, and moisture.
Mounting the Camera and Running the Wires: Precision and Patience
This is often the most time-consuming part of the installation.
-
Mounting the Camera:
- Location: Common spots include above the license plate (often with a license plate frame camera), integrated into the tailgate handle (many trucks have aftermarket kits for this), or drilled into the bumper. Choose a spot that offers a clear, unobstructed view of the rear and is protected from damage.
- Secure Attachment: Ensure the camera is firmly mounted and angled correctly. If drilling is required, measure twice and drill once, then seal any drilled holes with silicone sealant to prevent water ingress.
-
Running Wires (Rear to Front):
- Camera Cable: Route the camera’s video cable from its mounting location into the truck’s cabin. This typically involves feeding it through an existing grommet near the tailgate or license plate lights.
- Under the Truck: Run the cable along the truck’s frame rail, securing it every 12-18 inches with zip ties. Avoid routing near hot exhaust pipes, moving suspension components, or sharp edges that could chafe the wire. Use conduit or loom for added protection.
- Into the Cab: Find an existing grommet in the firewall (often behind the dash or near the steering column) to pass the cable into the truck’s interior. If no suitable grommet exists, you may need to drill a small hole and install a new grommet, sealing it thoroughly.
- Interior Routing: Once inside the cab, route the cable discreetly under the carpet, along kick panels, or behind interior trim to reach the desired monitor location. Use trim removal tools to carefully pry open panels.
Powering Up: Connecting to Reverse Lights and Monitor
Correct electrical connections are vital for reliable operation.
-
Reverse Light Power (for Camera):
- Locate the reverse light wire in your truck’s taillight assembly. Use your multimeter to identify which wire carries 12V when the truck is in reverse. Have someone help you by shifting into reverse (with the parking brake engaged and engine off, or truck off completely) while you test.
- Tap into this wire using a T-tap connector or by carefully stripping a small section, soldering the camera’s power wire, and insulating with heat shrink or electrical tape. This ensures the camera powers on only when you engage reverse.
- Connect the camera’s ground wire to a clean metal surface on the truck chassis, ensuring a solid connection.
-
Monitor Power:
- Switched 12V Source: The monitor requires a switched 12V power source, meaning it only receives power when the ignition is on. Common points include an unused fuse slot (using a fuse tap), or tapping into an existing accessory wire like the cigarette lighter or radio power.
- Grounding: Connect the monitor’s ground wire to a secure chassis ground point under the dash.
-
Video Connection: Connect the camera’s video cable (typically an RCA connector) to the corresponding input on your monitor or infotainment system.
Finalizing the Setup: Testing, Troubleshooting, and Tidy-Up
The final steps involve verifying functionality and ensuring a professional finish.
- Initial Test: Reconnect the battery, turn the ignition to accessory mode, and engage reverse. Check that the monitor powers on and displays a clear image from the camera. Test all functions like grid lines and night vision.
- Troubleshooting Common Issues:
- No Signal/Black Screen: Check all power connections (camera, monitor), ensuring they are receiving 12V and are properly grounded. Verify the video cable is securely connected at both ends.
- Flickering Image/Interference: This is more common with wireless systems. Try repositioning the receiver/transmitter, or check for nearby sources of electromagnetic interference. For wired systems, ensure cables are not chafed or near high-voltage lines.
- Poor Image Quality: Check camera lens for dirt. Ensure proper power delivery; low voltage can affect image quality.
- Securing and Reassembling: Once satisfied with the functionality, neatly secure all loose wiring with zip ties to prevent rattling and damage. Reinstall all interior trim panels, ensuring a snug fit. Double-check all drilled holes are sealed.
- Calibration (if applicable): Some advanced systems allow for calibration of parking lines to accurately reflect your truck’s dimensions.
By following these detailed steps, you’ll not only successfully install your backup camera but also gain a deeper understanding of your truck’s electrical and interior systems, enhancing your productivity and technical skills.

Conclusion
Installing a backup camera on your truck is a transformative upgrade, blending enhanced safety with modern tech integration and delivering tangible financial benefits. You’ve embarked on a journey that not only equips your vehicle with a crucial gadget but also boosts your confidence behind the wheel, protects your investment, and potentially elevates your truck’s market appeal. By approaching this project as a comprehensive DIY tutorial, you’ve gained valuable skills and ensured a reliable, high-performance addition to your truck. Drive safer, smarter, and with complete peace of mind, knowing you’ve invested wisely in both your vehicle and your security.
aViewFromTheCave is a participant in the Amazon Services LLC Associates Program, an affiliate advertising program designed to provide a means for sites to earn advertising fees by advertising and linking to Amazon.com. Amazon, the Amazon logo, AmazonSupply, and the AmazonSupply logo are trademarks of Amazon.com, Inc. or its affiliates. As an Amazon Associate we earn affiliate commissions from qualifying purchases.