
Embarking on the journey with a brand-new computer is an exciting prospect. Whether it’s a sleek custom build, a barebones laptop, or a desktop machine delivered without an operating system, the initial setup phase is crucial. For many, Windows 10 remains the bedrock of their digital experience, offering a robust, familiar, and highly compatible ecosystem for work, entertainment, and creativity. While Windows 11 has entered the scene, Windows 10 continues to be a popular and well-supported operating system, especially given its broader hardware compatibility and refined stability. This comprehensive guide will walk you through every step of installing Windows 10 on your new PC, ensuring a smooth, secure, and optimized setup.
Why Windows 10 Remains a Smart Choice for Your New PC
Even with newer operating systems on the horizon, Windows 10 holds a significant place in the tech landscape. Its enduring popularity stems from a combination of factors that make it an excellent choice for a new PC, particularly for users prioritizing stability, broad software compatibility, and a wealth of familiar features. For those invested in Tech trends, Windows 10 represents a mature and highly optimized platform, supporting a vast array of hardware and software, from legacy applications to the latest productivity suites and AI tools.
One of the primary reasons to opt for Windows 10 is its proven track record. It’s a stable operating system that has received years of updates, bug fixes, and security enhancements, making it a reliable foundation for any new machine. This stability translates directly into productivity, as you’re less likely to encounter unexpected crashes or compatibility issues that can derail your workflow. From a Money perspective, investing your time and effort in setting up a stable Windows 10 system means less downtime and potentially avoiding costly troubleshooting or data recovery services down the line. Furthermore, its broad compatibility with existing peripherals, drivers, and applications means you often won’t need to purchase new software or hardware, offering significant savings.
For businesses and individuals focused on their Brand, a reliable and efficient operating system like Windows 10 ensures that your digital presence is always professional and uninterrupted. Whether it’s smooth video conferencing, seamless content creation, or robust digital security for your intellectual property, Windows 10 provides the infrastructure. The familiar user interface also reduces the learning curve for new employees or users, making onboarding smoother and contributing to overall efficiency. This blend of reliability, compatibility, and user-friendliness solidifies Windows 10’s position as a wise and pragmatic choice for any new PC owner.
The Essential Pre-Installation Checklist: Gather Your Tools and Knowledge
Before you even think about plugging in your new PC, a bit of preparation is key. This pre-installation checklist will ensure you have all the necessary components, information, and foresight to make the installation process as straightforward as possible. Skipping these initial steps can lead to frustrating delays or even potential data loss, so treat this phase with the diligence it deserves.
1. Understanding Windows 10 System Requirements
First, confirm your new PC meets the minimum requirements for Windows 10. While most modern hardware will easily exceed these, it’s good practice to verify:
- Processor: 1 gigahertz (GHz) or faster compatible processor or System on a Chip (SoC)
- RAM: 1 gigabyte (GB) for 32-bit or 2 GB for 64-bit
- Hard disk space: 16 GB for 32-bit OS or 32 GB for 64-bit OS
- Graphics card: DirectX 9 or later with WDDM 1.0 driver
- Display: 800×600 resolution
For optimal performance, especially if you plan on using demanding applications or multitasking, exceeding these minimums is highly recommended. More RAM, a faster processor, and an SSD (Solid State Drive) instead of an HDD (Hard Disk Drive) will dramatically improve your experience.
2. Procuring Your Windows 10 License Key
Windows 10 requires a valid license key for activation. You have several options for acquiring one:
- Retail Purchase: Purchase a full retail copy of Windows 10 Home or Pro from Microsoft or authorized retailers. This typically comes as a digital key or on a physical card.
- OEM License: If your new PC came pre-assembled (even without an OS), it might have an OEM (Original Equipment Manufacturer) license embedded in the BIOS/UEFI firmware. In this case, Windows 10 will often activate automatically upon internet connection.
- Digital Entitlement: If you previously had an activated copy of Windows 7, 8, or 8.1 on another machine and upgraded to Windows 10, or if you linked your Windows 10 license to your Microsoft account, you might have a digital entitlement. You can sign in with your Microsoft account during or after installation to activate.
While it’s possible to install Windows 10 without a key initially, it will operate with limited features and a persistent “Activate Windows” watermark. To fully leverage your system and ensure ongoing security updates, activation is essential. From a Money perspective, ensuring you have a legitimate license protects you from potential legal issues and guarantees access to critical security patches, which are invaluable for safeguarding your digital assets.
3. Preparing Your Installation Media: A USB Flash Drive
The most common and recommended method for installing Windows 10 on a new PC is using a bootable USB flash drive.
- USB Drive: You’ll need a USB flash drive with at least 8 GB of storage space. Ensure it’s empty or that you’ve backed up any important data from it, as the creation process will erase everything on the drive.
- Internet Connection: A stable internet connection is required to download the Windows 10 Media Creation Tool and the Windows 10 ISO file from Microsoft’s website.
- Another Working PC: You’ll need access to another functional computer (Windows, macOS, or Linux) to create the bootable USB drive.
4. Backing Up Important Data (If Applicable)
While this guide focuses on a “new PC,” sometimes “new” means installing Windows on a drive that previously held data you wish to keep. If you are repurposing an old drive, or if your new PC has multiple drives and one contains valuable information, ensure you back up all critical data to an external drive or cloud service BEFORE proceeding. The Windows installation process will format the primary drive, erasing everything on it. This crucial step aligns with best practices for Digital Security and avoids potential financial and emotional costs associated with data loss.
Crafting Your Windows 10 Installation Media: The Bootable USB Drive
With your preparations complete, the next critical step is creating the bootable USB drive that will house the Windows 10 installer. Microsoft provides an excellent, user-friendly tool for this purpose: the Media Creation Tool. This method is generally preferred over manually writing an ISO to a USB, as the tool handles all the complexities, including formatting and making the drive bootable.
1. Downloading the Media Creation Tool
On your working computer with an internet connection:
- Open your web browser and navigate to the official Microsoft Windows 10 download page. You can typically find this by searching for “Windows 10 download” on Google.
- Look for the section titled “Create Windows 10 installation media” and click the “Download tool now” button.
- Save the
MediaCreationToolxxxx.exefile (where xxxx is the version number) to your desktop or downloads folder.
2. Running the Media Creation Tool
Once downloaded:
- Locate the
MediaCreationToolxxxx.exefile and double-click it to run. - Accept the Microsoft software license terms.
- On the “What do you want to do?” screen, select “Create installation media (USB flash drive, DVD, or ISO file) for another PC” and click “Next.”
- Select Language, Architecture, and Edition: The tool will often suggest options based on your current PC. However, if you are installing Windows 10 on a different machine (e.g., a 64-bit PC instead of a 32-bit one), uncheck “Use recommended options for this PC” and choose your preferred language, Windows 10 edition (Home or Pro), and architecture (64-bit is most common for modern PCs, but check your new PC’s specifications if unsure). Click “Next.”
- Choose Media Type: Select “USB flash drive” and click “Next.”
- Select the USB Flash Drive: The tool will display a list of connected USB drives. Carefully select the correct USB drive from the list. Double-check this step! Selecting the wrong drive will erase its contents. Click “Next.”
The tool will now download the Windows 10 files and write them to your selected USB flash drive. This process can take a significant amount of time depending on your internet speed and the speed of your USB drive. Once completed, you will see a message stating “Your USB flash drive is ready.” Click “Finish.”
You now have a bootable Windows 10 installation USB drive, ready to bring your new PC to life. This piece of Tech wizardry is the key to unlocking your new machine’s potential.
Navigating the Installation Wizard: From First Boot to Desktop
With your bootable USB drive prepared, it’s time to connect it to your new PC and begin the installation. This phase involves configuring your PC to boot from the USB and then following the on-screen prompts of the Windows 10 installer.
1. Configuring Your PC to Boot from USB
Most new PCs are set to boot from the primary hard drive by default. You need to tell it to boot from your USB drive instead.
- Insert the USB drive: Plug your Windows 10 installation USB drive into an available USB port on your new PC.
- Power on and access BIOS/UEFI: Turn on your PC and immediately start pressing the key to enter your computer’s BIOS or UEFI firmware settings. Common keys include
Delete,F2,F10, orF12. The exact key varies by manufacturer (e.g., Dell, HP, Lenovo, ASUS, Acer, MSI). Look for a message on the screen during startup, often something like “Press DEL to enter Setup” or “Press F2 for BIOS.” You might need to repeatedly tap the key until the BIOS/UEFI screen appears. - Navigate to Boot Options: Once in BIOS/UEFI, use the arrow keys to navigate to the “Boot” or “Boot Options” section.
- Change Boot Order: Locate the “Boot Order” or “Boot Priority” setting. You need to move your USB drive (it might be listed by its brand name, or as “USB HDD,” “Removable Device,” etc.) to the top of the boot order, or designate it as the primary boot device.
- Save and Exit: After making the change, navigate to the “Exit” tab and select “Save Changes and Exit” or “Exit Saving Changes.” Your PC will restart.
If successful, your PC will now boot from the USB drive, and you’ll see the Windows 10 setup wizard loading.
2. The Windows 10 Setup Process
Once the Windows 10 setup screen appears:
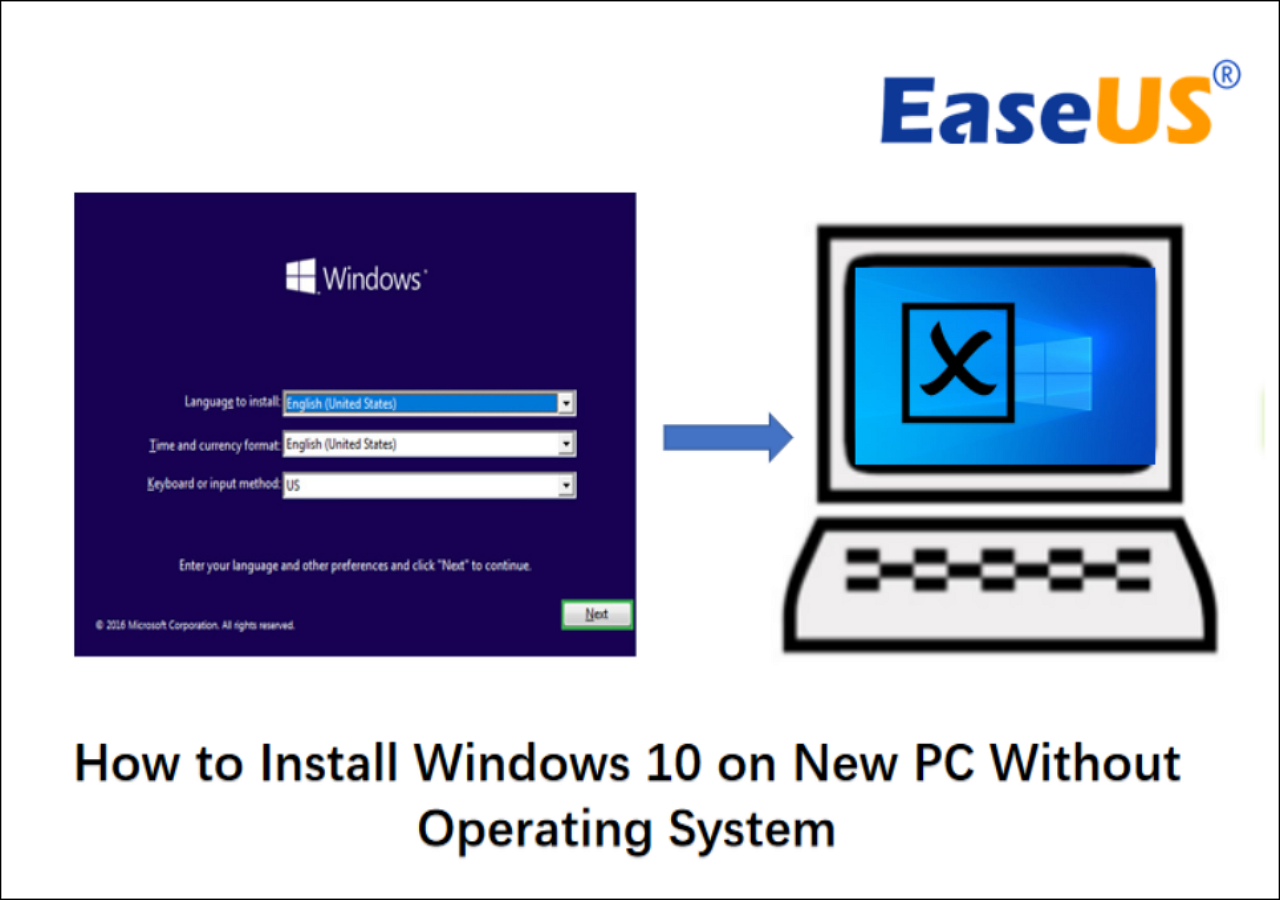
- Language, Time, and Keyboard: Select your preferred language, time and currency format, and keyboard or input method. Click “Next.”
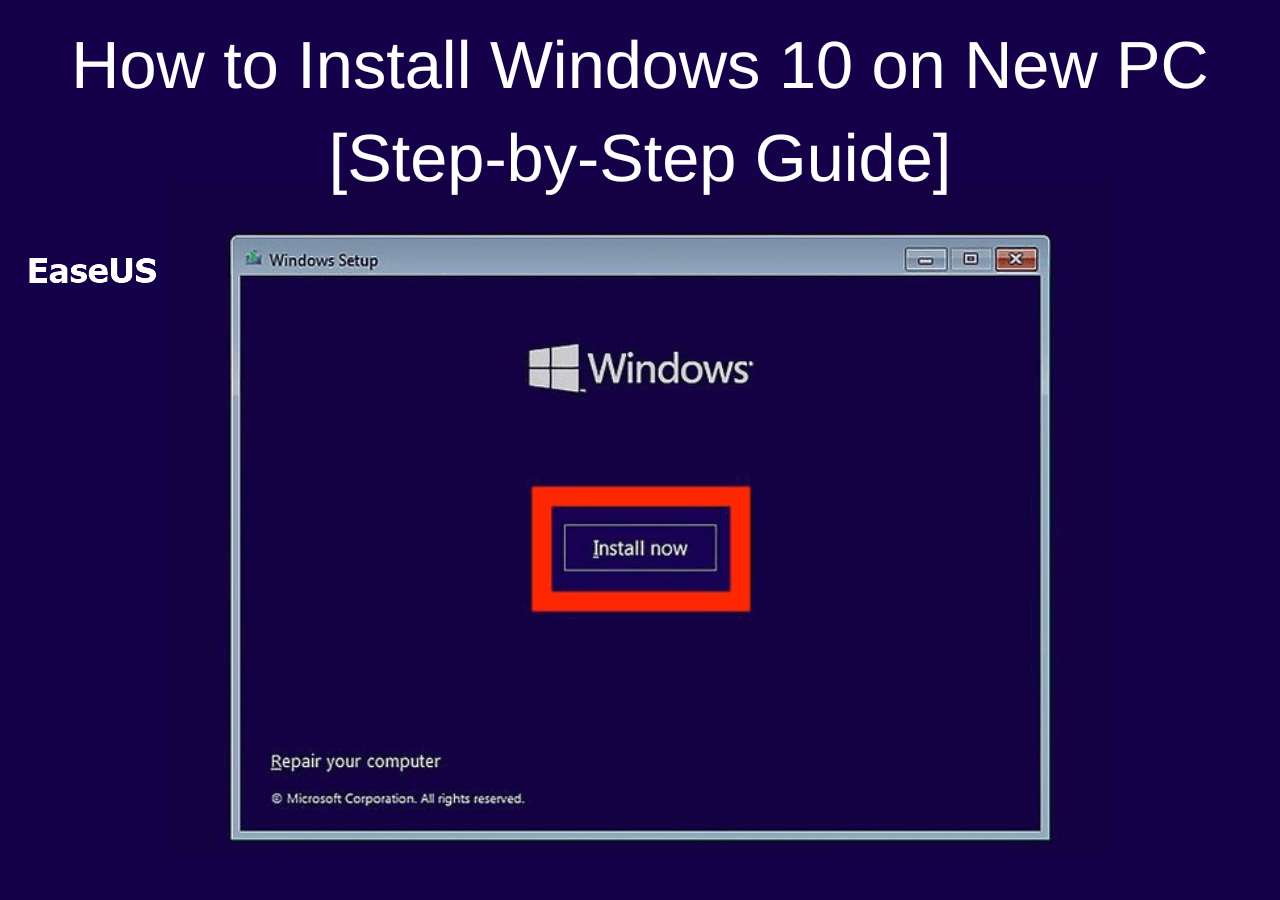
- Install Now: Click the “Install now” button.
- Enter Product Key: If you have your product key, enter it here. If you don’t have one yet, or if you expect Windows to activate via a digital entitlement linked to your Microsoft account, you can click “I don’t have a product key” and proceed. You can activate Windows later.
- Select Operating System: If your product key (or digital entitlement) supports multiple editions (e.g., Home and Pro), select the edition you want to install. Click “Next.”
- Accept License Terms: Read the Microsoft Software License Terms, check “I accept the license terms,” and click “Next.”
- Choose Installation Type:
- Upgrade: (Only appears if you’re installing over an existing Windows version and keeping files). DO NOT use this for a truly new PC or if you want a clean installation.
- Custom: Install Windows only (advanced): This is the option you want for a new PC or a clean install. Select this.
- Partitioning and Drive Selection: This is a crucial step.
- You will see a list of drives and partitions. On a truly new PC, you’ll likely see “Drive 0 Unallocated Space.”
- Select the “Drive 0 Unallocated Space” and click “New.” You can choose to allocate the entire drive as one partition, or create smaller partitions if you wish (e.g., one for the OS and another for data). For most users, using the entire drive for Windows is sufficient. Click “Apply” and then “OK” when prompted to create additional system partitions.
- Now you will see new partitions, including “Primary.” Select the largest “Primary” partition (this is where Windows will be installed) and click “Next.”
- Windows Installation: Windows will now begin copying files, installing features, and installing updates. Your PC will restart several times during this process. Do not remove the USB drive until after the first restart, when you see the “Getting devices ready” or “Just a moment” screen. At this point, the necessary files have been copied to the hard drive. Removing the USB drive prevents the PC from accidentally booting back into the installer instead of the partially installed OS.
3. Initial Configuration: Personalizing Your Experience
After the installation files are copied and the system reboots, you’ll be greeted by the Out-of-Box Experience (OOBE) setup wizard, which guides you through basic configuration.
- Region: Select your country or region.
- Keyboard Layout: Confirm your keyboard layout. You can add a second layout if needed.
- Network Connection: Connect to a Wi-Fi network (if applicable) or plug in an Ethernet cable. An internet connection is highly recommended at this stage to download updates and facilitate Microsoft account login.
- Account Setup:
- Microsoft Account: Microsoft strongly encourages using a Microsoft account (Outlook, Hotmail, Live). This links your settings, OneDrive, and digital licenses. Sign in with your existing account or create a new one.
- Offline Account (Local Account): If you prefer not to use a Microsoft account, look for an option like “Offline account” or “Domain join instead” (the exact phrasing changes with updates). This creates a local user account on your PC.
- Create PIN: Windows 10 will prompt you to create a PIN for faster login. This is generally recommended for security.
- Privacy Settings: Review and adjust your privacy settings (location, speech recognition, diagnostics, etc.). Microsoft gives you control over these, so configure them to your comfort level.
- Cortana: Choose whether to enable or disable the Cortana voice assistant.
- Final Touches: Windows will go through some final setup screens (“Getting things ready for you,” “This might take a few minutes,” etc.).
Eventually, you will arrive at your Windows 10 desktop. Congratulations, Windows 10 is now installed on your new PC!
Post-Installation Essentials: Optimizing Your New System for Peak Performance and Security
Installing Windows 10 is just the beginning. To truly get the most out of your new PC and ensure its longevity, performance, and security, a few crucial post-installation steps are necessary. This phase focuses on bringing your system fully up to date and equipping it with essential tools. These steps are vital for Productivity, Digital Security, and maximizing the Value of your technology investment.
1. Update Windows 10 Immediately
This is perhaps the most critical post-installation step. Even if you downloaded the latest version of the Media Creation Tool, there will inevitably be cumulative updates, security patches, and feature updates released since.
- Go to Start Menu > Settings > Update & Security > Windows Update.
- Click “Check for updates.”
- Allow Windows to download and install all available updates. This process may involve multiple restarts. Repeat checking for updates until no more are found.
Keeping your system updated is fundamental for Digital Security, patching vulnerabilities that could be exploited by malware or hackers. It also ensures you have the latest features and performance enhancements.
2. Install and Update Device Drivers
While Windows 10 is adept at installing generic drivers for most hardware, specialized drivers from your hardware manufacturers (especially for graphics cards, chipsets, and network adapters) often provide better performance, stability, and additional features.
- Graphics Card Drivers: If you have a dedicated graphics card (NVIDIA, AMD), visit the manufacturer’s website and download the latest drivers for your specific model. These are crucial for gaming, video editing, and overall display performance.
- Chipset Drivers: For your motherboard, visit the manufacturer’s website (e.g., ASUS, Gigabyte, MSI, ASRock) and download the latest chipset drivers. These improve system stability and communication between components.
- Network Drivers: While you likely have basic network connectivity, ensure you have the latest Wi-Fi and Ethernet drivers for optimal speed and reliability.
- Other Peripherals: If you have specialized peripherals (printers, external audio interfaces, webcams), download their drivers from the respective manufacturers.
You can often check for missing or outdated drivers by going to Start Menu > Search for “Device Manager” and looking for devices with yellow exclamation marks. Always download drivers directly from the manufacturer’s official website to avoid malicious or incorrect software.
3. Install Essential Software and Applications
Now that your system is stable and updated, it’s time to install the applications you’ll use daily.
- Web Browser: If you prefer something other than Microsoft Edge (e.g., Chrome, Firefox, Brave), download and install it.
- Productivity Suite: Install Microsoft Office, LibreOffice, or other productivity tools.
- Antivirus/Security Software: While Windows Defender provides robust protection, you may prefer a third-party antivirus solution. Ensure it’s installed and up-to-date. This is paramount for Digital Security.
- Communication Tools: Zoom, Microsoft Teams, Slack, Discord, etc.
- Media Players: VLC Media Player or similar.
- Cloud Storage: OneDrive, Dropbox, Google Drive.
Prioritize downloading software from official sources to prevent installing malware or bundled unwanted programs.
4. Configure Backup Solutions
A robust backup strategy is non-negotiable for Digital Security and safeguarding your valuable data.
- Cloud Backup: Integrate cloud services like OneDrive, Google Drive, or Dropbox for automatic syncing of important files.
- Local Backup: Consider setting up File History in Windows 10 (Settings > Update & Security > Backup) to regularly back up personal files to an external hard drive. For a full system image, third-party tools are available.
Regular backups are your safety net against hardware failure, accidental deletion, or ransomware attacks, minimizing potential financial and data loss.

5. Personalize and Optimize Your System
Finally, take some time to personalize your new Windows 10 experience to enhance your Productivity.
- Desktop Background and Theme: Customize your desktop, colors, and sounds via Settings > Personalization.
- Start Menu and Taskbar: Pin frequently used apps to the Start Menu and Taskbar for quick access.
- Power Options: Adjust power settings (Settings > System > Power & Sleep > Additional power settings) to optimize for performance or energy saving, depending on your usage.
- Storage Sense: Enable Storage Sense (Settings > System > Storage) to automatically free up space by deleting temporary files and old downloads.
By diligently following these post-installation steps, you transform a bare operating system into a finely tuned, secure, and personalized digital workspace. This proactive approach ensures your new PC operates at its peak, providing you with a reliable and efficient platform for all your Tech endeavors, enhancing your personal and professional Brand, and offering excellent Value for your investment. Enjoy your new Windows 10 machine!
aViewFromTheCave is a participant in the Amazon Services LLC Associates Program, an affiliate advertising program designed to provide a means for sites to earn advertising fees by advertising and linking to Amazon.com. Amazon, the Amazon logo, AmazonSupply, and the AmazonSupply logo are trademarks of Amazon.com, Inc. or its affiliates. As an Amazon Associate we earn affiliate commissions from qualifying purchases.