
In the dynamic world of technology, where innovation is constant and digital transformation is paramount, mastering fundamental tools is the cornerstone of progress. Among these, Python stands out as an indispensable language, fueling everything from cutting-edge AI tools and intricate software development to data analysis and robust web applications. Whether you’re an aspiring programmer, a data scientist, a cybersecurity enthusiast, or even a digital marketer looking to automate tasks, the question “how do I install Python?” is your gateway to a vast ecosystem of possibilities.
This comprehensive guide will walk you through the essential steps to get Python up and running on your system, ensuring a smooth and productive start to your coding journey. We’ll cover the necessary preparations, detailed installation instructions for major operating systems, best practices for managing your Python environment, and tips for troubleshooting common issues. By the end, you won’t just have Python installed; you’ll have a solid foundation to leverage its power for enhanced productivity, career growth, and exploring the endless frontiers of technology.
Preparing for Your Python Journey: What You Need to Know First
Before diving into the installation process, it’s crucial to understand why Python is so popular, verify if you already have it, and choose the correct version. These initial steps will set you up for success and prevent common pitfalls.
Why Python? A Glimpse into its Power
Python’s meteoric rise to prominence isn’t accidental. Its simple, readable syntax makes it an ideal choice for beginners, while its extensive libraries and frameworks cater to the most complex professional demands. From developing sophisticated AI algorithms and machine learning models to creating powerful backend services for web applications, automating system administration tasks, or even crafting engaging video games, Python’s versatility is unmatched. For professionals focused on productivity and efficiency, Python offers robust solutions for data manipulation, report generation, and process automation, directly impacting business finance and operational costs. For individuals exploring online income and side hustles, Python skills are highly sought after in freelancing, data science, web development, and more.
Before You Begin: Checking for Existing Python Installations
Many operating systems, particularly macOS and various Linux distributions, come with a version of Python pre-installed. However, this is often an older version (like Python 2.x) or a system-managed installation that shouldn’t be directly interfered with. It’s good practice to check your current setup before installing a new version.
To do this, open your system’s command line interface:
- Windows: Search for “cmd” or “PowerShell” in the Start menu.
- macOS: Search for “Terminal” in Spotlight (Cmd + Space).
- Linux: Open your preferred terminal application (usually Ctrl + Alt + T).
Once open, type the following commands and press Enter:
python --version
python3 --version
If you see a version number (e.g., Python 2.7.16 or Python 3.8.5), Python is already present. Pay close attention to whether it’s Python 2 or Python 3. If you get a “command not found” error, Python isn’t installed or isn’t added to your system’s PATH environment variable.
Choosing Your Python Version: Python 3 is Key
For all new projects and learning, always choose Python 3. Python 2 officially reached its end-of-life in 2020, meaning it no longer receives official support or security updates. While you might encounter legacy systems still using Python 2, all modern development, libraries, and tutorials are geared towards Python 3. This guide will focus exclusively on installing the latest stable version of Python 3.
Step-by-Step Installation Guides for Major Operating Systems
The installation process varies slightly depending on your operating system. We’ll cover detailed instructions for Windows, macOS, and Linux, ensuring you can get Python running regardless of your preferred platform.
Installing Python on Windows: The Most Common Path
Windows users represent a significant portion of the Python community. The installation process is straightforward, but one critical step is often overlooked.
-
Download the Installer:
- Open your web browser and navigate to the official Python website: python.org/downloads/windows/
- Look for the latest stable release of Python 3 (e.g., Python 3.X.X). Under the “Windows installer (64-bit)” link is usually the best choice for most modern systems. If you have an older 32-bit system, choose “Windows installer (32-bit)”. Download the
.exefile.
-
Run the Installer:
- Once the download is complete, locate the
.exefile (usually in your “Downloads” folder) and double-click it to run the installer.
- Once the download is complete, locate the
-
Crucial Step: Add Python to PATH:
- This is the most important step. In the initial installer window, you will see a checkbox at the bottom that says “Add Python X.Y to PATH” (where X.Y is your Python version). Make sure to check this box.
- Adding Python to PATH allows you to run Python commands directly from any command prompt window without navigating to the installation directory. Skipping this step is the cause of most “Python command not found” errors on Windows.
-
Choose Installation Type:
- You can select “Install Now” for a default installation (recommended for most users) or “Customize installation” if you need to adjust components or the installation directory. For beginners, “Install Now” is perfectly fine.
-
Complete the Installation:
- Click “Install Now” and follow the prompts. If prompted by User Account Control (UAC), click “Yes” to allow the installer to make changes to your device.
- The installation process will take a few minutes. Once completed, you might see an option to “Disable path length limit.” It’s generally safe to click this, especially if you plan to work with deeply nested directory structures, but it’s not strictly necessary for basic usage.
-
Verify the Installation:
- Open a new Command Prompt or PowerShell window (close any existing ones first).
- Type
python --versionand press Enter. You should seePython 3.X.X(your installed version). - Also, type
pip --versionand press Enter. You should see the pip version, indicating that Python’s package manager is also installed and accessible.
Congratulations! Python is now installed on your Windows system.
Installing Python on macOS: Navigating Apple’s Ecosystem
macOS comes with Python pre-installed, but it’s typically Python 2.x and is used by the system. It’s best to install Python 3 separately without interfering with the system’s version. The recommended method is using Homebrew, a popular package manager for macOS.
-
Install Homebrew (if you don’t have it):
- Open your Terminal application.
- Paste the following command and press Enter:
bash

/bin/bash -c "$(curl -fsSL https://raw.githubusercontent.com/Homebrew/install/HEAD/install.sh)"
- Follow the on-screen instructions, which might include entering your user password and installing Xcode Command Line Tools. Homebrew is invaluable for managing many open-source tools, so it’s a worthwhile investment.
-
Install Python 3 using Homebrew:
- Once Homebrew is installed, simply type:
bash

brew install python
- Homebrew will download and install the latest stable Python 3 version along with pip. It intelligently links Python 3 as
python3andpip3in your PATH.
- Once Homebrew is installed, simply type:
-
Verify the Installation:
- In your Terminal, type:
bash

python3 --version

pip3 --version
- You should see the installed Python 3 and pip versions. Note that on macOS, you’ll typically use
python3instead ofpythonto explicitly call Python 3, avoiding conflicts with the system’s Python 2.
- In your Terminal, type:
Alternative: Download from python.org (Less Recommended for macOS)
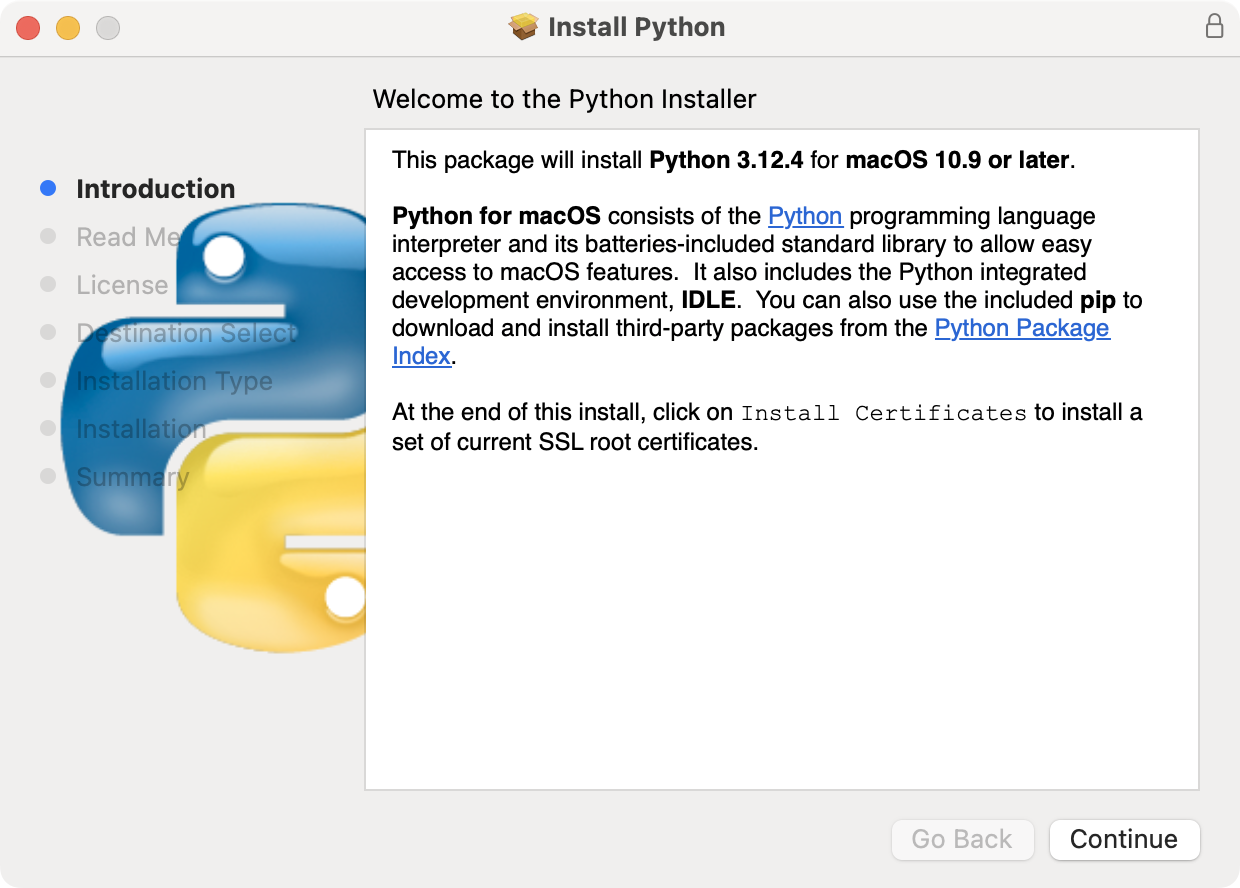
You can also download a macOS installer from python.org/downloads/macos/. This works, but Homebrew generally provides a smoother experience for updates and dependency management in the long run. If you choose this method, download the .pkg file and follow the installer prompts. Remember to verify with python3 --version and pip3 --version in your Terminal afterwards.
Installing Python on Linux: Leveraging Package Managers
Linux distributions are incredibly diverse, but most offer convenient package managers to install Python. This is the cleanest and most recommended method.
-
Check for Default Python:
- Open your terminal and run:
bash

python --version

python3 --version
- Most modern Linux distributions come with Python 3 pre-installed, often alongside Python 2.
- Open your terminal and run:
-
Update Package Manager:
- Before installing anything, it’s good practice to update your package list:
- Debian/Ubuntu-based:
bash

sudo apt update

sudo apt upgrade
- Red Hat/CentOS/Fedora-based:
bash

sudo dnf update # or sudo yum update for older CentOS
- Debian/Ubuntu-based:
- Before installing anything, it’s good practice to update your package list:
-
Install Python 3 (if not already latest):
- If Python 3 is already installed, ensure it’s the latest stable version. Package managers typically provide recent versions.
- Debian/Ubuntu-based:
bash

sudo apt install python3

sudo apt install python3-pip # Install pip for Python 3
- Red Hat/CentOS/Fedora-based:
bash

sudo dnf install python3 # or sudo yum install python3

sudo dnf install python3-pip # or sudo yum install python3-pip
- Arch Linux:
bash

sudo pacman -S python python-pip
- Your system’s package manager will handle downloading and installing Python 3 and its associated
piputility.
-
Verify the Installation:
- In your terminal, run:
bash

python3 --version

pip3 --version
- You should see the version numbers for both. On Linux, similar to macOS, it’s common to use
python3andpip3to explicitly call the Python 3 version.
- In your terminal, run:
Advanced: Compiling from Source (Rarely Needed for Beginners)
For specific needs (e.g., a very particular Python version, or optimizing for a specific hardware architecture), you can compile Python from source. This is significantly more complex and generally not recommended for beginners. You would download the source tarball from python.org, extract it, configure, make, and install. Stick to package managers unless you have a strong reason otherwise.
Mastering Your Python Environment: Virtual Environments and Package Management
Installing Python is just the first step. To maintain a clean, organized, and robust development workflow, understanding virtual environments and Python’s package manager (pip) is crucial. These concepts are fundamental for productivity and digital security, preventing dependency conflicts and ensuring project isolation.
The Power of Isolation: Understanding Virtual Environments
Imagine you’re working on two different Python projects. Project A requires an older version of a library (e.g., requests v2.20), while Project B needs a newer one (e.g., requests v2.30). If you install these libraries globally on your system, you’d quickly run into conflicts, breaking one project when you update for the other.
This is where virtual environments come in. A virtual environment is an isolated Python installation for a specific project. It creates a separate directory containing a Python interpreter and its own set of installed packages, completely independent of your system’s global Python installation and other virtual environments.
Why use them?
- Dependency Management: Each project gets its specific dependencies without affecting others.
- Cleanliness: Your global Python installation remains pristine.
- Reproducibility: You can easily share your
requirements.txtfile, allowing others to recreate your exact project environment. - Digital Security: Isolating project dependencies can reduce the attack surface by limiting the scope of potentially vulnerable libraries.
How to create and activate a virtual environment (using venv – built into Python 3.3+):
-
Navigate to your Project Directory:
cd path/to/your/project(If you don’t have a project directory yet, create one:
mkdir my_python_project && cd my_python_project) -
Create the Virtual Environment:
python3 -m venv .venvThis command creates a directory named
.venv(you can name it anything, but.venvis a common convention) inside your project folder. It copies a local Python interpreter and creates subdirectories for packages. -
Activate the Virtual Environment:
- Windows (Command Prompt):
bash

.venvScriptsactivate
- Windows (PowerShell):
bash

.venvScriptsActivate.ps1
- macOS/Linux:
bash

source .venv/bin/activate
Once activated, your terminal prompt will usually change to indicate the active environment (e.g.,(.venv) user@host:~/my_python_project$). Now, anypip installcommands will install packages into this isolated environment.
- Windows (Command Prompt):
-
Deactivate the Virtual Environment:
- When you’re done working on the project or want to switch to another environment, simply type:
bash

deactivate
Your terminal prompt will return to its normal state.
- When you’re done working on the project or want to switch to another environment, simply type:
Managing Your Libraries: An Introduction to pip
pip (Python’s package installer) is the standard tool for installing and managing Python packages (libraries, frameworks, and modules) that are not part of the standard Python library. These packages extend Python’s capabilities significantly, allowing you to perform tasks from web development (Django, Flask) to data science (NumPy, Pandas) and machine learning (TensorFlow, PyTorch).
Common pip commands:
-
Install a package:
pip install package-nameExample:
pip install requests -
Install a specific version of a package:
pip install package-name==1.2.3 -
Upgrade a package:
pip install --upgrade package-name -
Uninstall a package:
pip uninstall package-name -
List installed packages:
pip list -
Generate a
requirements.txtfile:
This file lists all the packages and their versions required for your project, making it easy to reproduce the environment.pip freeze > requirements.txt -
Install packages from
requirements.txt:
bash

pip install -r requirements.txt
Always ensure your virtual environment is active when using pip to install project-specific dependencies. This keeps your global Python installation clean and your projects isolated.
Troubleshooting Common Installation Issues and Best Practices
Even with clear instructions, you might encounter minor hurdles. Knowing how to troubleshoot common problems and adopting best practices will save you time and frustration, contributing significantly to your long-term productivity and digital security posture.
Navigating the PATH Variable: A Common Hurdle
The most frequent issue for new Python users, especially on Windows, is the “command not found” error when typing python or pip in the terminal. This almost always indicates that Python or its scripts directory is not added to your system’s PATH environment variable.
How to fix PATH issues:
- Windows:
- During installation, ensure you check “Add Python X.Y to PATH.”
- If you missed it, you’ll need to add it manually:
- Search for “Environment Variables” in the Start menu and select “Edit the system environment variables.”
- Click “Environment Variables…”
- Under “System variables,” find the “Path” variable and click “Edit.”
- Click “New” and add the paths to your Python installation directory (e.g.,
C:UsersYourUserAppDataLocalProgramsPythonPython39) and itsScriptssubdirectory (e.g.,C:UsersYourUserAppDataLocalProgramsPythonPython39Scripts). - Click “OK” on all windows and then restart your Command Prompt/PowerShell for changes to take effect.
- macOS/Linux:
- Homebrew usually handles PATH configuration automatically. If you installed Python manually, you might need to add
export PATH="/usr/local/bin:$PATH"(or your Python installation path) to your shell’s configuration file (e.g.,.bashrc,.zshrc,.profile) and thensourcethe file.
- Homebrew usually handles PATH configuration automatically. If you installed Python manually, you might need to add
Dealing with Multiple Python Versions
It’s common to have multiple Python versions on your system, especially on macOS/Linux (system Python 2, installed Python 3). This can be confusing.
- Always use
python3andpip3in your terminal to explicitly call Python 3. - Use virtual environments extensively. This ensures that even if you have multiple global Python versions, your projects rely on their isolated, specific environments.
- Avoid using
sudo pip installunless absolutely necessary and you understand the implications. Installing packages globally withsudocan overwrite system files or lead to permission issues, compromising your digital security. Always prefer installing into virtual environments.
Essential Best Practices for a Smooth Workflow
- Keep Python Updated: Periodically check for new stable Python 3 releases and update your installation. For Homebrew,
brew upgrade pythondoes the trick. For Windows, rerun the installer or download a new one. - Regularly Update pip and setuptools: These fundamental tools are crucial for managing packages.
bash

python3 -m pip install --upgrade pip setuptools
- Always use Virtual Environments: Make it a habit for every new project. It’s the single most impactful best practice for Python development.
- Document Dependencies: Use
pip freeze > requirements.txtto save your project’s dependencies. Commit this file to your version control (e.g., Git). - Understand Error Messages: Don’t just copy-paste errors. Read them carefully; they often contain valuable clues about what went wrong.
Beyond Installation: Your First Steps into Python Programming
With Python successfully installed and your environment management skills honed, you’re ready to take your first steps into the exciting world of programming.
Running Your First Python Code
Let’s test your installation by running a simple “Hello, World!” program.
- Open a Text Editor: Use any plain text editor (Notepad on Windows, TextEdit on macOS, Gedit/VS Code/Sublime Text on Linux).
- Write Your Code: Type the following line:
python

print("Hello, Python World! This is my first step in coding.")
- Save the File: Save the file as
hello.pyin a directory of your choice (e.g.,C:UsersYourUserDocumentsPythonProjects). - Run from Terminal:
- Open your terminal (Command Prompt/PowerShell/Terminal).
- Navigate to the directory where you saved
hello.pyusing thecdcommand:
bash

cd C:UsersYourUserDocumentsPythonProjects
(Adjust path as needed for your OS) - Run the script using the Python interpreter (remember to use
python3if on macOS/Linux):
bash

python hello.py
or
bash

python3 hello.py
- You should see “Hello, Python World! This is my first step in coding.” printed in your terminal. Success!
Exploring IDEs and Code Editors
While a basic text editor and the terminal are sufficient for small scripts, serious development benefits greatly from Integrated Development Environments (IDEs) or advanced code editors. These tools offer features like syntax highlighting, intelligent autocompletion, debugging, and integrated terminals, significantly boosting productivity.
Popular choices include:
- VS Code (Visual Studio Code): Free, lightweight, highly customizable with a vast extension marketplace for Python. Excellent for both beginners and professionals.
- PyCharm: A powerful, dedicated Python IDE from JetBrains. Offers a free Community Edition and a feature-rich Professional Edition. Ideal for larger, more complex projects.
- Sublime Text / Atom: General-purpose text editors that can be extended with Python-specific plugins.
Experiment with a few to find one that aligns with your workflow and personal branding as a developer.

What’s Next? Diving Deeper into the Python Ecosystem
Installing Python is just the beginning. The real journey lies in exploring its vast ecosystem:
- Learn the Basics: Familiarize yourself with Python’s syntax, data types, control flow, functions, and object-oriented programming concepts. Online tutorials, courses, and books abound.
- Explore Libraries: Dive into popular libraries relevant to your interests:
- Web Development: Django, Flask, FastAPI
- Data Science & AI: NumPy, Pandas, Matplotlib, Scikit-learn, TensorFlow, PyTorch
- Automation: Selenium, Requests
- Build Projects: The best way to learn is by doing. Start with small projects and gradually increase complexity.
- Join the Community: Engage with the vibrant Python community through forums, meetups, and online groups.
Conclusion
You’ve successfully navigated the process of installing Python, understood the importance of virtual environments, and familiarized yourself with pip for package management. This foundational knowledge is not merely technical; it’s a strategic asset in today’s tech-driven world. By embracing Python, you unlock pathways to enhanced productivity, advanced technological capabilities, and significant opportunities in areas like AI, software development, data analysis, and online income generation. As you continue your journey, remember that consistent learning and practical application are key. Go forth, experiment, build, and innovate – the Python ecosystem awaits your contributions!