
In the ever-evolving landscape of software development, having the right tools at your disposal can dramatically impact your productivity, code quality, and overall development experience. For Python developers, one name consistently rises to the top: PyCharm. Developed by JetBrains, PyCharm is a powerful Integrated Development Environment (IDE) specifically designed for Python, offering a comprehensive suite of features that cater to everyone from beginners to seasoned professionals.
This guide will walk you through the entire process of installing PyCharm on major operating systems – Windows, macOS, and Linux – ensuring you’re ready to dive into your next Python project with a robust and intelligent coding environment. We’ll cover everything from system prerequisites to initial setup, making sure you can leverage PyCharm’s capabilities from the get-go.
Understanding PyCharm and Its Appeal for Developers
Before we delve into the installation specifics, let’s briefly unpack what PyCharm is and why it has become an indispensable tool for countless Python developers. Understanding its value proposition will contextualize the importance of a smooth installation process.
PyCharm is more than just a text editor; it’s a feature-rich IDE that provides a highly intelligent code editor, extensive navigation capabilities, on-the-fly error checking, powerful refactoring tools, and deep integration with various development tools. It transforms the act of writing Python code from a mere task into an intuitive and efficient workflow.
Why PyCharm Stands Out in the Developer Toolkit
The allure of PyCharm stems from its comprehensive feature set, which is meticulously crafted to enhance every stage of the development lifecycle:
- Intelligent Code Editor: PyCharm offers smart code completion, syntax highlighting, error checking, and code analysis, providing real-time feedback and suggestions that significantly reduce debugging time. It understands the context of your code, offering more accurate suggestions than generic editors.
- Powerful Debugger: Its integrated debugger allows you to set breakpoints, step through code, inspect variables, and evaluate expressions, making it far easier to identify and resolve complex issues within your applications.
- Integrated Version Control Systems (VCS): PyCharm boasts seamless integration with popular VCS like Git, Mercurial, and SVN. This means you can commit, push, pull, and manage branches directly from the IDE, streamlining collaboration and version management.
- Web Development Framework Support: For those working with web frameworks like Django, Flask, or Pyramid, PyCharm provides dedicated support, including project templates, framework-specific code completion, and tools for database integration.
- Scientific Tools and Data Science: The Professional Edition of PyCharm includes powerful tools for scientific development, such as integration with IPython notebooks, Anaconda, and various scientific libraries like NumPy and Matplotlib, making it a favorite among data scientists.
- Database Tools: Connect to various databases directly from the IDE, browse schemas, write SQL queries, and manage data without leaving your development environment.
- Refactoring Capabilities: Renaming variables, methods, or classes, extracting methods, and moving files are made safe and easy with PyCharm’s intelligent refactoring tools, which ensure changes are applied consistently across your project.
- Customization and Plugins: The IDE is highly customizable, from UI themes to keybindings. Furthermore, JetBrains Marketplace offers a vast array of plugins that extend PyCharm’s functionality, catering to almost any specific development need.
Community vs. Professional Edition: Choosing Your Path
PyCharm is available in two main editions:
- PyCharm Community Edition: This is the free, open-source version, perfect for pure Python development. It provides all the core functionalities for basic scripting, local development, and learning Python. It’s an excellent starting point for students, hobbyists, and developers focusing solely on standard Python projects.
- PyCharm Professional Edition: This is the paid version, offering an extended feature set tailored for professional web development (Django, Flask, Pyramid, web2py), scientific tools (Jupyter, Anaconda), database support, remote development capabilities, and more advanced enterprise features. Many organizations and individual professionals opt for this edition due to its comprehensive toolset that covers virtually all aspects of modern software development.
For the purpose of installation, the steps are largely similar for both editions, with the main difference being the initial download file.
Preparing for Installation: System Requirements and Downloads
A smooth installation process begins with proper preparation. Before you download PyCharm, it’s crucial to ensure your system meets the necessary requirements and to download the correct installer for your operating system and chosen edition.
Checking System Compatibility
To ensure PyCharm runs optimally, review the following minimum system requirements. Exceeding these recommendations will, of course, lead to a better user experience, especially when working on larger projects or with memory-intensive tasks.
- Operating System:
- Windows: Microsoft Windows 8 or later (64-bit)
- macOS: macOS 10.14 or later
- Linux: Any modern Linux distribution that supports GNOME, KDE, or Unity desktop environments.
glibc2.14 or later is typically required.
- RAM: Minimum 4 GB of RAM, 8 GB recommended for optimal performance. For large projects or data-intensive tasks, 16 GB or more is highly recommended.
- Disk Space: 3.5 GB of free hard drive space. SSD drives are highly recommended for better performance.
- CPU: Any modern processor. Multi-core processors are highly recommended.
- Python Version: PyCharm supports Python versions 2.7, 3.5, or later. While Python itself is not bundled with PyCharm, you will need a Python interpreter installed on your system to develop Python applications.
- Screen Resolution: Minimum 1024×768.
Meeting these specifications will ensure that PyCharm runs efficiently, allowing you to focus on coding without performance bottlenecks.
Downloading the PyCharm Installer
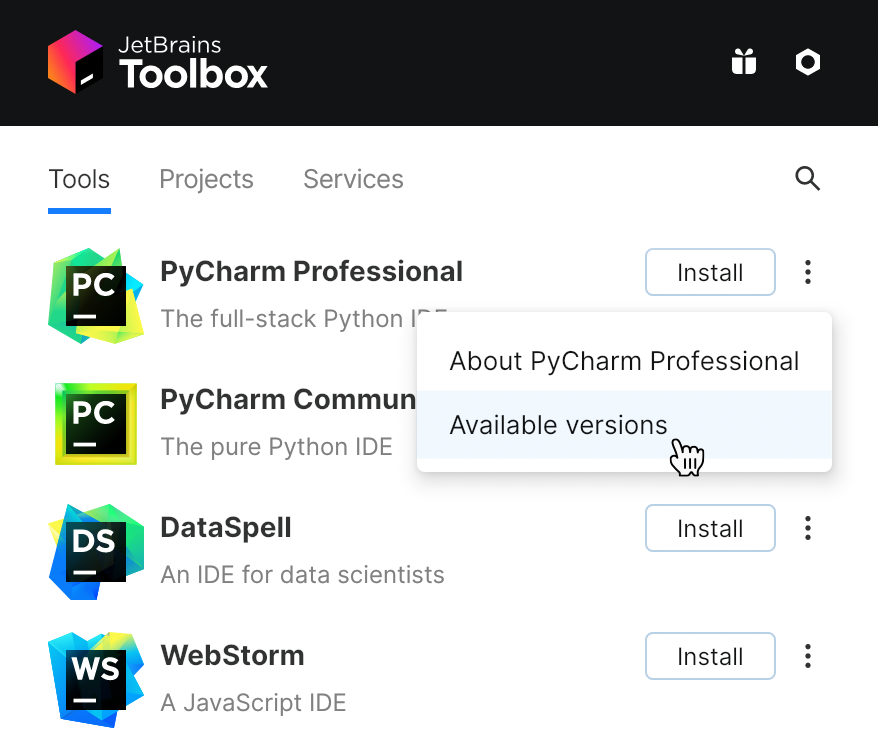
The official source for downloading PyCharm is the JetBrains website. Always download from the official site to ensure you get a legitimate, virus-free installer.
- Open your web browser and navigate to the official JetBrains PyCharm download page: https://www.jetbrains.com/pycharm/download/
- Select your Operating System: The website typically auto-detects your OS, but you can manually select between Windows, macOS, and Linux tabs.
- Choose Your Edition:
- Under the “Professional” section, click the “Download” button for the paid professional edition.
- Under the “Community” section, click the “Download” button for the free community edition.
- Ensure you download the correct file type for your OS (e.g.,
.exefor Windows,.dmgfor macOS,.tar.gzfor Linux).
Once the download is complete, you’ll have the installer file ready to begin the installation process specific to your operating system.
Step-by-Step Installation Guides for Major Operating Systems
The installation process varies slightly depending on your operating system. Follow the instructions relevant to your environment.
Installing PyCharm on Windows
Installing PyCharm on Windows is a straightforward process guided by an intuitive installer wizard.
- Run the Installer: Locate the downloaded
.exefile (e.g.,pycharm-community-YYYY.X.Y.exeorpycharm-professional-YYYY.X.Y.exe) and double-click it to launch the PyCharm Setup wizard. - Welcome Screen: Click “Next” on the welcome screen.
- Choose Installation Location: The wizard will suggest a default installation path (e.g.,
C:Program FilesJetBrainsPyCharm Community Edition). You can accept this or click “Browse…” to choose a different directory. Click “Next”. - Installation Options: This is a crucial step for customizing your PyCharm setup:
- Create Desktop Shortcut: Check this box if you want a shortcut to PyCharm on your desktop for quick access. You can choose 32-bit or 64-bit. For modern systems, select the 64-bit launcher.
- Add “Open Folder as Project”: This option adds a context menu entry when you right-click a folder in File Explorer, allowing you to open that folder directly as a PyCharm project. Highly recommended for convenience.
- Add to PATH (requires restart): This adds the PyCharm launcher directory to your system’s PATH environment variable, allowing you to open PyCharm from the command line by typing
pycharm(orcharmfor Community Edition). This requires a system restart after installation to take effect. It’s generally a good idea for advanced users. - Associate .py files: Check this box to associate Python files (
.py) with PyCharm, so they open automatically in PyCharm when double-clicked.
Click “Next” after making your selections.
- Choose Start Menu Folder: Accept the default “JetBrains” folder name for the Start Menu shortcut or choose a different one. Click “Install”.
- Installation Progress: The installer will now copy files and configure PyCharm. This process may take a few minutes.
- Completion: Once the installation is complete, you’ll see a “Completing PyCharm Setup” screen. You can choose to “Run PyCharm” immediately by checking the box and clicking “Finish”. If you selected “Add to PATH”, you will be prompted to reboot your computer for the changes to take effect.
Installing PyCharm on macOS
Installing PyCharm on macOS is typically a simple drag-and-drop operation.
- Open the DMG File: Locate the downloaded
.dmgfile (e.g.,pycharm-community-YYYY.X.Y.dmgorpycharm-professional-YYYY.X.Y.dmg) and double-click it. This will mount a disk image on your desktop. - Drag to Applications: In the window that appears, you will usually see the PyCharm application icon and an alias to your “Applications” folder. Drag the PyCharm icon into the “Applications” folder. This copies the PyCharm application to your system.
- Eject Disk Image: After the copying process is complete, drag the “PyCharm” disk image icon from your desktop or Finder sidebar to the Trash to eject it. You can also right-click (or Ctrl-click) the icon and select “Eject ‘PyCharm'”.
- First Launch (Security Prompt): The first time you launch PyCharm from your Applications folder (e.g., via Launchpad or Spotlight), macOS might display a security warning stating that the application was downloaded from the internet. Click “Open” to proceed. You might need to confirm with your password or Touch ID.
Installing PyCharm on Linux
Installing PyCharm on Linux typically involves extracting an archive and running a script, though alternative methods like Snap or Flatpak offer easier management. We’ll focus on the manual method first.
-
Download the Archive: You will have downloaded a
.tar.gzarchive (e.g.,pycharm-community-YYYY.X.Y.tar.gzorpycharm-professional-YYYY.X.Y.tar.gz). -
Extract the Archive: Open a terminal and navigate to the directory where you downloaded the file (e.g.,
cd ~/Downloads). Then, extract the archive:
bash

tar -xzf pycharm-community-YYYY.X.Y.tar.gz -C /opt/

# or for professional edition

tar -xzf pycharm-professional-YYYY.X.Y.tar.gz -C /opt/
(ReplaceYYYY.X.Ywith the actual version number.)
This command extracts the contents to the/opt/directory, which is a common location for optional software packages. You might needsudoif/opt/is not writable by your user.
Alternatively, you can extract it to your home directory:
bash

tar -xzf pycharm-community-YYYY.X.Y.tar.gz

# This will create a directory like pycharm-community-YYYY.X.Y in your current location.

# You might then want to move it to a more permanent location, e.g., ~/apps or ~/.local/share/
-
Run the Installation Script: Navigate into the
bindirectory of the extracted PyCharm folder:cd /opt/pycharm-community-YYYY.X.Y/bin/ # or if extracted to home: # cd ~/pycharm-community-YYYY.X.Y/bin/Then, run the
pycharm.shscript:./pycharm.shThis will launch PyCharm. On the first run, it will ask if you want to create a desktop entry.
-
Create a Desktop Entry (Optional but Recommended): When PyCharm launches for the first time, it usually presents an option to “Create Desktop Entry” (or “Configure -> Create Desktop Entry” from the welcome screen). This creates an application shortcut in your system’s application launcher, making it easier to start PyCharm without using the terminal. If you choose this, you can also select “Create entry for all users” if you have administrative privileges.
Alternative Linux Installation Methods (Snap/Flatpak)
For many Linux users, installing PyCharm via Snap or Flatpak offers a more integrated and simpler experience, handling updates and dependencies automatically.
- Snap: If Snap is enabled on your system (common on Ubuntu, Fedora, etc.):
- Community Edition:
sudo snap install pycharm-community --classic - Professional Edition:
sudo snap install pycharm-professional --classic
- Community Edition:
- Flatpak: If Flatpak is enabled on your system:
- Community Edition:
flatpak install flathub com.jetbrains.PyCharm-Community - Professional Edition:
flatpak install flathub com.jetbrains.PyCharm-Professional
- Community Edition:
These methods are generally recommended for their ease of use and maintenance.
Initial Setup and Launching Your First Project
After successfully installing PyCharm, the next step is to configure it for your first use and set up a new project. This initial configuration can significantly impact your workflow.
First-Time Launch Configuration
When you launch PyCharm for the very first time, you’ll be greeted with a series of setup steps:
- Import Settings: If you have previously installed a version of PyCharm or another JetBrains IDE, you’ll be asked if you want to import settings from a prior installation. If this is a fresh install or your first JetBrains IDE, select “Do not import settings” and click “OK”.
- Privacy Policy and User Agreement: Read through the JetBrains Privacy Policy and User Agreement. You must accept these to proceed. Check the box and click “Accept”.
- Data Sharing (Optional): PyCharm may ask if you want to send anonymous usage statistics to JetBrains to help improve the product. This is optional; make your choice and click “Continue”.
- UI Theme Selection: Choose your preferred user interface theme. The most popular options are:
- Darcula: A dark theme, often favored by developers for reducing eye strain.
- Light: The traditional light theme.
You can also browse other themes or customize colors later. Select your theme and click “Next: Launcher Script” (or “Next: Default plugins” depending on edition).
- Default Plugins (Professional Edition Only): The Professional Edition will offer to install a selection of default plugins for various technologies (e.g., JavaScript, Database, VCS tools). You can choose to keep them all, disable some, or install others later. For now, it’s usually safe to keep the defaults or install only what you know you’ll need. Click “Start using PyCharm”.
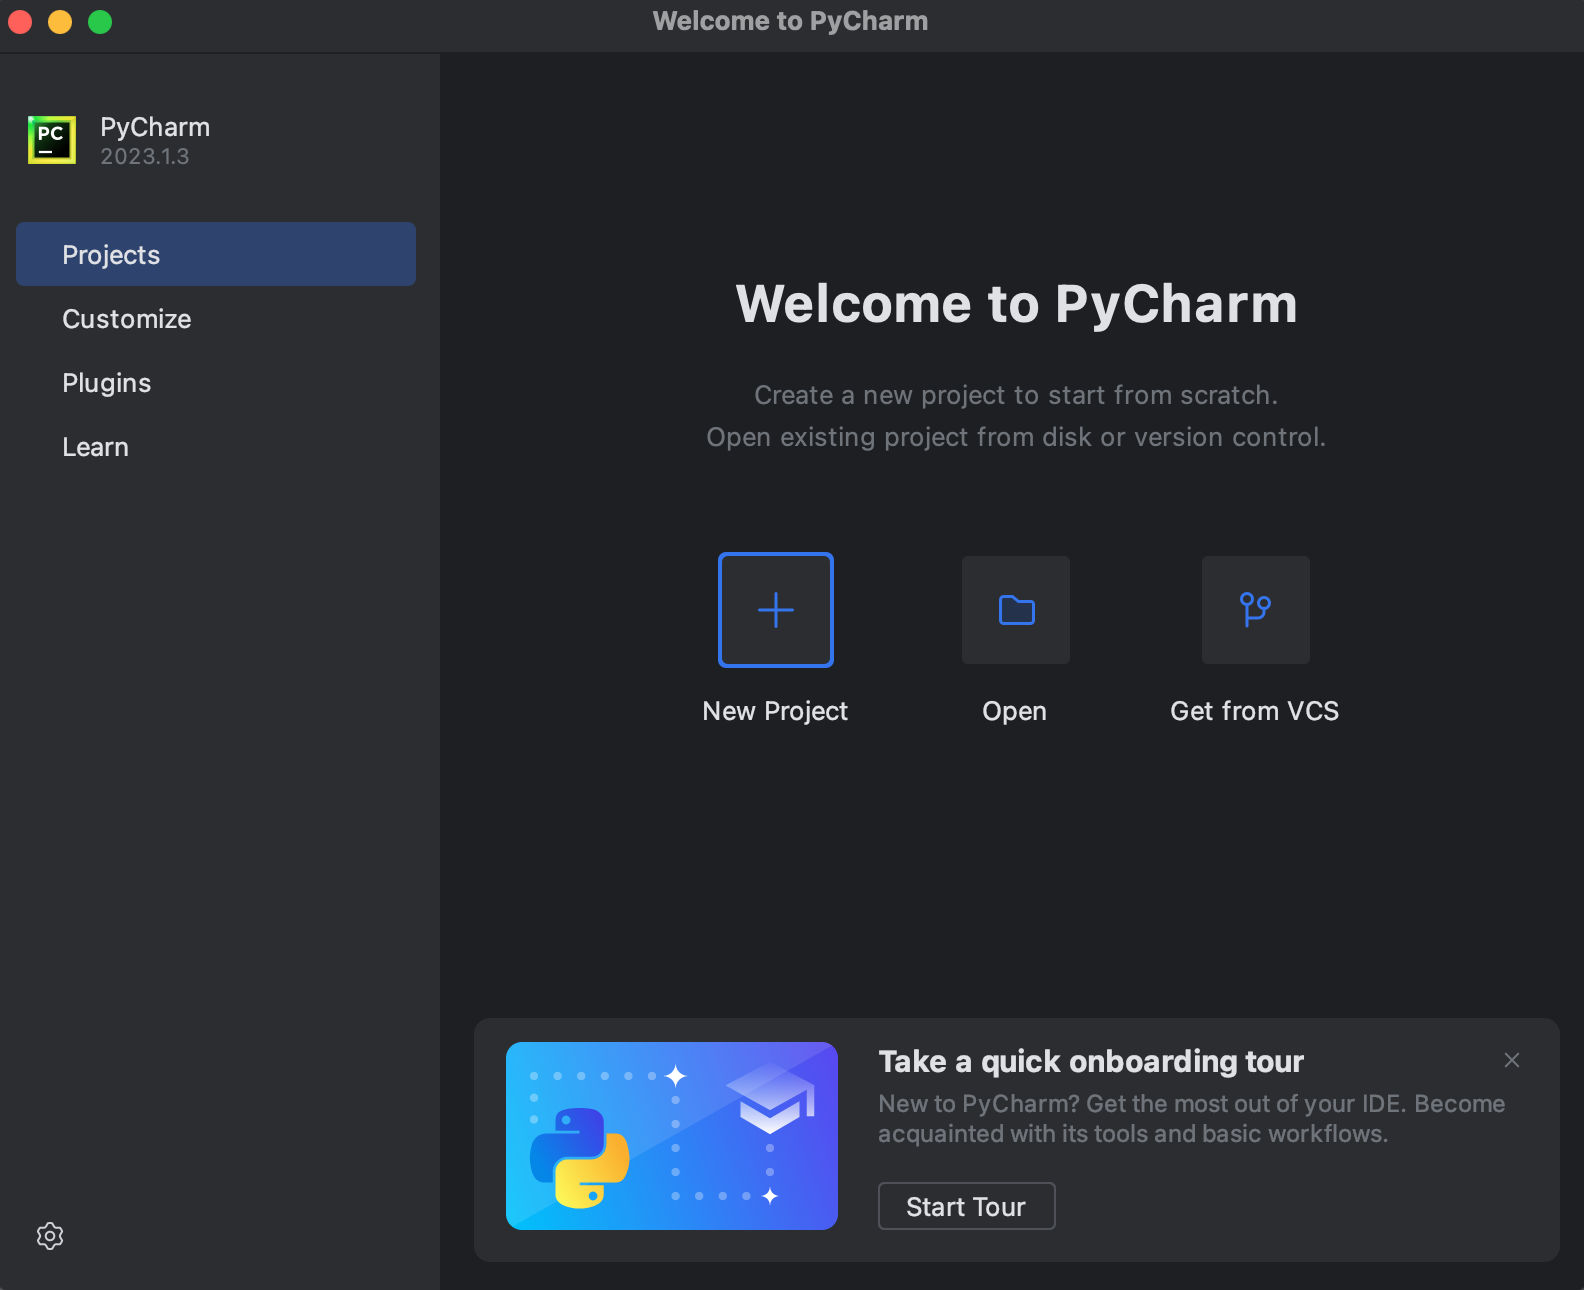
PyCharm will then load, and you’ll arrive at the Welcome Screen.
Creating or Opening Your First Project
The Welcome Screen is your gateway to starting new projects or continuing existing ones.
- New Project: This is what you’ll select to create a brand-new Python project.
- Open: Use this to open an existing project stored on your local machine.
- Get from VCS: This option allows you to clone a project directly from a version control system like Git, often used when collaborating or starting with an open-source project.
Let’s walk through creating a new project, as this is a common first step:
- Click “New Project”: The “New Project” dialog will appear.
- Project Location: Specify the directory where your new project will be stored. By default, PyCharm suggests a location within your user directory (e.g.,
C:UsersYourUserPycharmProjectsMyFirstProject). You can change this by clicking the folder icon. - Python Interpreter: This is one of the most critical aspects of setting up a Python project.
- New environment using: PyCharm strongly encourages the use of virtual environments for each project. This isolates project dependencies, preventing conflicts between different projects.
- Virtualenv: This is the default and recommended option for creating a lightweight, isolated Python environment.
- Conda: If you use Anaconda for data science or managing environments, you can select this.
- Pipenv/Poetry: For more advanced dependency management tools, these options are available.
- Base interpreter: Choose the Python interpreter (e.g., Python 3.9) that will be used as the base for your virtual environment. PyCharm usually detects installed Python versions. If not, you might need to point it to the executable (e.g.,
python.exeon Windows). - Inherit global site-packages (optional): Check this if you want your virtual environment to have access to packages installed in your global Python environment. Generally, it’s better to keep environments isolated and install dependencies locally.
- Make available to all projects (optional): Rarely needed; typically, virtual environments are project-specific.
- New environment using: PyCharm strongly encourages the use of virtual environments for each project. This isolates project dependencies, preventing conflicts between different projects.
- Create
main.pywelcome script (optional): If checked, PyCharm will automatically generate a simplemain.pyfile with a “Hi, PyCharm” message, giving you an immediate file to work with. - Click “Create”: PyCharm will now create the project directory, set up the virtual environment, and open the IDE.
Congratulations! You now have PyCharm installed and your first project ready.
Troubleshooting Common Installation and Setup Issues
Even with clear instructions, you might encounter issues during installation or initial setup. Here are some common problems and their solutions.
Installer Not Running/Crashing
- System Requirements: Double-check that your system meets the minimum requirements (RAM, OS version, disk space).
- Corrupted Download: The installer file might be corrupted. Delete it and re-download it from the official JetBrains website.
- Antivirus Interference: Sometimes, aggressive antivirus software can prevent installers from running correctly. Temporarily disable your antivirus (with caution) and try again, then re-enable it.
- Administrator Privileges: On Windows, try running the installer as an administrator (right-click -> “Run as administrator”).
PyCharm Not Launching
- PATH Issues (Windows/Linux): If you’re trying to launch from the command line and it’s not recognized, ensure PyCharm’s
bindirectory is correctly added to your system’s PATH environment variable. For Windows, remember that adding to PATH requires a system restart. - Java Environment: PyCharm relies on a Java Runtime Environment (JRE). Modern PyCharm versions bundle their own JRE, but conflicts or missing components can sometimes occur. If you suspect an issue, try reinstalling PyCharm.
- Corrupted Configuration Files: PyCharm stores configuration settings in specific directories (e.g.,
~/.config/JetBrains/PyCharmCE2023.3on Linux,~/Library/Application Support/JetBrains/PyCharmCE2023.3on macOS,C:UsersYourUserAppDataRoamingJetBrainsPyCharmCE2023.3on Windows). If PyCharm crashes on startup, try backing up and then deleting these configuration directories. PyCharm will recreate them on the next launch, resetting all settings to default. - Permissions (Linux): Ensure your user has read/write permissions for the PyCharm installation directory and your project folders.
Interpreter Configuration Problems
- Python Not Found: If PyCharm can’t find your Python interpreter, go to
File -> Settings/Preferences -> Project: [YourProjectName] -> Python Interpreter. Click the gear icon, then “Add…” and specify the path to your Python executable (e.g.,python.exeorpython3). - Virtual Environment Issues:
- Ensure your virtual environment is created correctly and that PyCharm is pointing to the
pythonexecutable within that virtual environment (e.g.,venv/bin/pythonon Linux/macOS,venvScriptspython.exeon Windows). - If packages aren’t recognized, make sure the virtual environment is activated, and you’ve installed them using
pip install package_namewhile the environment is active.
- Ensure your virtual environment is created correctly and that PyCharm is pointing to the
- Incorrect Interpreter Type: Ensure you’re selecting the correct interpreter type (Virtualenv, Conda, System Interpreter) when configuring your project.
Performance Issues
- Insufficient RAM: If PyCharm feels sluggish, check your system’s RAM usage. Close other demanding applications. Consider upgrading your RAM if it’s consistently maxed out.
- Cache Invalidation: Go to
File -> Invalidate Caches / Restart...and select “Invalidate and Restart.” This clears PyCharm’s internal caches, which can sometimes become corrupted and lead to performance problems or incorrect code analysis. - Increase Memory Allocation: For demanding projects, you can increase the amount of memory PyCharm is allowed to use. Go to
Help -> Change Memory Settings...and allocate more RAM if your system has it available.
Maximizing Your PyCharm Experience
Now that PyCharm is installed and configured, the real journey begins. To truly harness its power and accelerate your development, consider these next steps:
- Explore Keyboard Shortcuts: PyCharm is incredibly keyboard-centric. Learning essential shortcuts for navigation, refactoring, and debugging will dramatically speed up your workflow. You can find a cheatsheet or customize them in
File -> Settings/Preferences -> Keymap. - Dive into the Plugin Ecosystem: The JetBrains Marketplace offers thousands of plugins that can extend PyCharm’s functionality for specific frameworks, languages, themes, and developer tools. Explore
File -> Settings/Preferences -> Pluginsto discover new additions. - Master Version Control Integration: If you’re using Git or another VCS, take the time to learn PyCharm’s integrated VCS tools. Managing commits, branches, merges, and remote repositories directly from the IDE is a huge time-saver.
- Utilize the Debugger: Don’t just
print()your way through problems. PyCharm’s graphical debugger is a powerful tool for understanding code execution, inspecting states, and resolving bugs efficiently. - Customize Your Environment: From UI fonts and colors to code styles and file templates, PyCharm offers extensive customization options to tailor the IDE to your preferences and boost your personal productivity.

Conclusion
Installing PyCharm is the first step towards a more efficient, enjoyable, and productive Python development experience. Whether you’re building complex web applications, diving into data science, or crafting simple scripts, PyCharm’s intelligent features and robust toolset will significantly enhance your capabilities. By carefully following the installation steps for your operating system and understanding the initial configuration, you’ve laid a solid foundation for leveraging this powerful IDE.
As a tech-focused individual, embracing tools like PyCharm is not just about convenience; it’s about investing in your skill set and optimizing your output. A well-installed and configured IDE empowers you to focus more on problem-solving and innovation rather than grappling with environment setup. Now, with PyCharm ready to go, the world of Python development is truly at your fingertips. Happy coding!
aViewFromTheCave is a participant in the Amazon Services LLC Associates Program, an affiliate advertising program designed to provide a means for sites to earn advertising fees by advertising and linking to Amazon.com. Amazon, the Amazon logo, AmazonSupply, and the AmazonSupply logo are trademarks of Amazon.com, Inc. or its affiliates. As an Amazon Associate we earn affiliate commissions from qualifying purchases.