
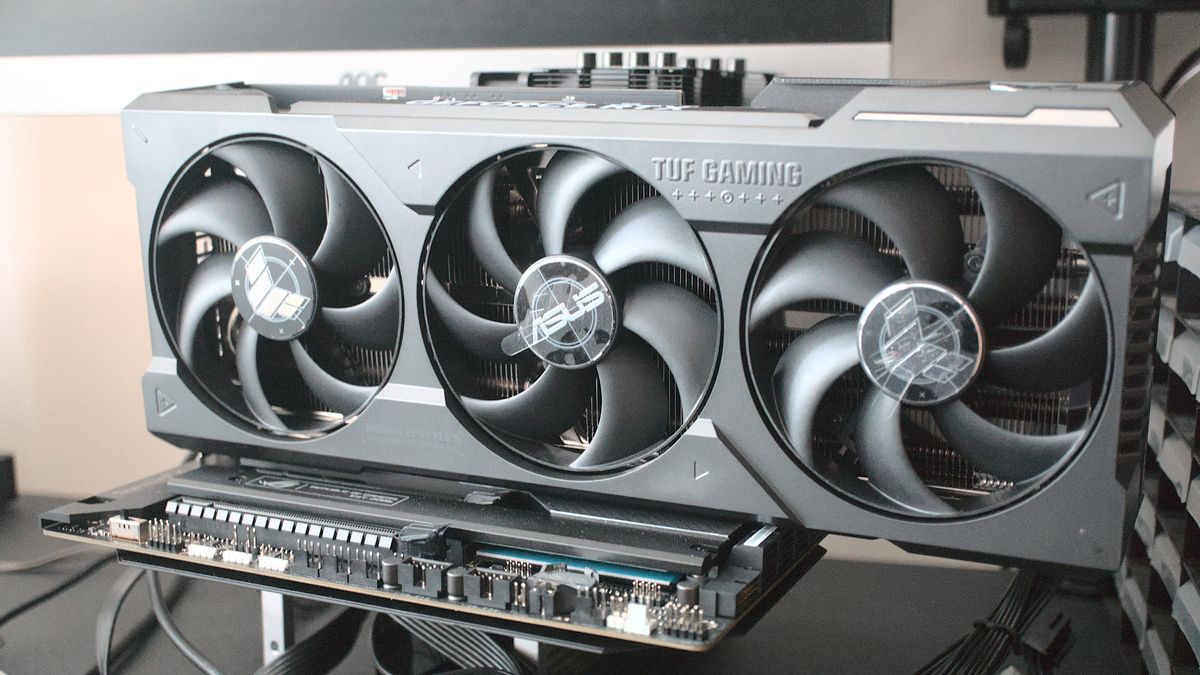
Upgrading your PC’s graphics card, also known as a GPU (Graphics Processing Unit), is arguably one of the most impactful hardware changes you can make to breathe new life into an aging system or maximize the potential of a new build. Whether you’re a hardcore gamer chasing higher frame rates, a creative professional demanding faster rendering times, or simply looking to enhance your visual experience, a new graphics card can deliver a transformative upgrade. While the prospect of delving into your computer’s internal components might seem daunting, the process is surprisingly straightforward with the right preparation and guidance. This comprehensive tutorial will walk you through every step, from initial considerations to post-installation optimization, ensuring a smooth and successful upgrade.
Why Upgrade Your Graphics Card? Unlocking Enhanced Performance
Before we dive into the nuts and bolts, it’s crucial to understand the compelling reasons behind a GPU upgrade. The graphics card is the workhorse responsible for rendering everything you see on your screen, from intricate game worlds to complex video edits. Its capabilities directly impact your system’s performance in visually intensive tasks.
Enhanced Gaming Performance
For gamers, a new graphics card is the ultimate performance booster. Older GPUs can struggle to maintain playable frame rates at higher resolutions or with demanding graphical settings in modern titles. Upgrading allows you to experience smoother gameplay, more vibrant visuals, and the ability to push your settings to “High” or “Ultra” without compromise. This translates to a more immersive and enjoyable gaming experience, whether you’re exploring vast open worlds or competing in fast-paced online arenas. Support for advanced features like Ray Tracing and DLSS/FSR, which significantly enhance visual fidelity and performance, often requires newer generation cards.
Improved Creative Workflows
Beyond gaming, professional workloads heavily rely on GPU power. Video editors will notice drastically reduced rendering times, especially when working with high-resolution footage (4K, 8K) and complex effects. 3D artists and animators can achieve faster viewport performance, quicker renders, and more efficient simulation calculations. Even graphic designers and photographers can benefit from GPU acceleration in software like Adobe Photoshop and Lightroom, speeding up filters and image processing. A robust GPU frees up valuable time, allowing creatives to focus more on their craft and less on waiting for their system to catch up.
Future-Proofing Your System and New Technologies
Technology evolves rapidly, and a new graphics card can help “future-proof” your PC, at least for a few years. Newer cards come equipped with support for the latest display standards (e.g., DisplayPort 2.0, HDMI 2.1), higher refresh rates, and advanced decoding/encoding capabilities. This ensures compatibility with upcoming monitors, VR headsets, and software applications. Furthermore, as new gaming engines and creative tools emerge, they often leverage the advanced architectures found in newer GPUs, making your system more capable of handling future demands.
VR and High-Resolution Support
Virtual Reality (VR) and high-resolution monitors (1440p, 4K, ultrawide) demand immense graphical horsepower. Older or lower-tier GPUs often fall short, leading to motion sickness in VR due to low frame rates or inability to drive large pixel counts efficiently. An upgrade ensures a fluid and comfortable VR experience and crisp, detailed visuals on high-resolution displays, allowing you to fully appreciate their immersive potential.
Essential Pre-Installation Preparations: Setting the Stage for Success
Proper preparation is paramount for a seamless graphics card installation. Skipping these crucial steps can lead to compatibility issues, frustrating delays, or even potential damage to your components. Take your time with this phase to ensure everything is aligned before you even open your PC case.
Compatibility Check: The Foundation of Your Upgrade
Before purchasing any new GPU, thorough compatibility research is non-negotiable.
- Motherboard Compatibility: Virtually all modern graphics cards use the PCI Express (PCIe) x16 slot. Ensure your motherboard has an available PCIe x16 slot. While older generations (PCIe 3.0) are physically compatible with newer cards (PCIe 4.0/5.0), you might not get the full bandwidth potential of the newer card. However, the performance difference is often negligible for most users.
- Power Supply Unit (PSU) Requirements: This is perhaps the most critical compatibility factor. Graphics cards are power-hungry components. Check the recommended PSU wattage for your chosen GPU (usually found on the manufacturer’s website or product page) and compare it against your existing PSU’s output. Ensure your PSU also has the necessary PCIe power connectors (6-pin, 8-pin, or 12VHPWR for very new cards). Running an underpowered PSU can lead to system instability, crashes, or even damage.
- Case Size and Clearance: Graphics cards vary significantly in length, height, and thickness. Measure the available space inside your PC case, especially the length from the PCIe slot to the front panel or drive cages. Also, consider the card’s height and thickness to ensure it doesn’t obstruct other components or prevent your side panel from closing. Some larger cards may require removing drive cages or have clearance issues with CPU coolers.
- CPU Bottleneck: While not strictly a compatibility issue, be aware that a very powerful new GPU paired with a very old or weak CPU might result in a “CPU bottleneck,” where the CPU cannot feed data to the GPU fast enough, limiting the GPU’s potential. This is less common with mid-range upgrades but can be a factor with high-end cards.
Gathering Your Tools
Having the right tools at hand will make the process much smoother:
- Philips Head Screwdriver: Essential for opening your case and securing the card.
- Anti-static Wrist Strap (Recommended): Prevents electrostatic discharge (ESD) from damaging sensitive components. If you don’t have one, regularly touch a bare metal part of your PC case (which should be plugged into a grounded outlet but turned off) to discharge static electricity.
- Flashlight or Headlamp: To illuminate the often cramped and dark interior of your PC case.
- Small Bowl or Magnetic Tray: To hold screws and prevent them from getting lost.
- Compressed Air (Optional): For cleaning out dust from your case and existing components.
- Zip Ties or Velcro Straps (Optional): For cable management.
Backing Up Important Data
While installing a GPU rarely affects data, it’s always good practice to back up any critical files before performing any major hardware changes. This safeguards against unforeseen issues, however unlikely.
Downloading Latest Drivers
Before you even touch your old card, download the latest drivers for your new graphics card from the manufacturer’s official website (NVIDIA or AMD). Store them on a USB drive or easily accessible location. You’ll install these after the hardware is in place. It’s also a good idea to download a tool like Display Driver Uninstaller (DDU) to completely remove old drivers later.
Disconnecting Power and Opening Your PC Case
- Shut Down Your PC: Perform a full shutdown, not just sleep.
- Disconnect All Cables: Unplug the power cable from the wall outlet and the back of your PC. Disconnect all peripherals (monitor, keyboard, mouse, USB devices).
- Move to a Clean, Well-Lit Area: Ensure you have enough space to work comfortably.
- Open Your PC Case: Remove the side panel (usually the left side when looking at the front) by unscrewing thumb screws or regular screws and sliding/pivoting it off.
The Step-by-Step Installation Process: Hands-On Hardware Swap
With preparations complete, it’s time for the actual installation. Handle all components with care and avoid forcing anything.
Removing the Old Graphics Card (if applicable)
If you’re replacing an existing GPU:
- Disconnect Power Cables: Carefully unplug any PCIe power cables (6-pin, 8-pin) from the old graphics card. These usually have a clip that needs to be pressed.
- Unscrew Retention Bracket: Locate the screw(s) securing the GPU’s bracket to the PC case at the back. Remove them and keep them safe.
- Release PCIe Clip: At the end of the PCIe x16 slot on your motherboard, there’s a small retention clip (lever or button). Gently press or pull this clip to release the card. It might be stiff.
- Carefully Pull Out the Card: Hold the card by its edges and gently pull it straight up and out of the PCIe slot. Avoid wiggling it excessively. Place the old card in its anti-static bag or a safe place.
Unboxing and Handling the New Card
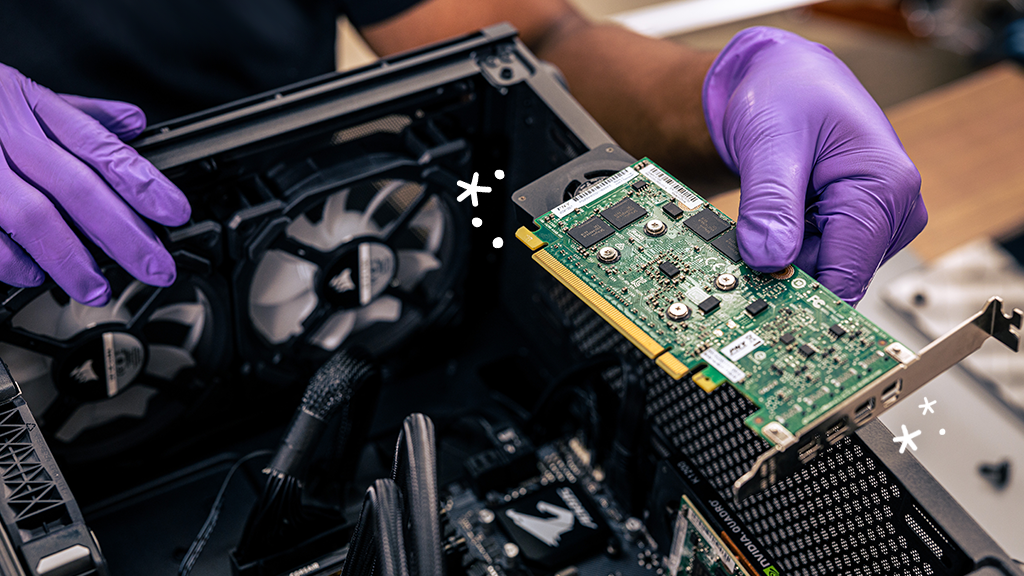
- Open the New GPU Box: Carefully remove the new graphics card from its packaging.
- Handle with Care: Always hold the graphics card by its edges or the metal shroud. Avoid touching the gold contact fingers on the PCIe connector or the circuit board components to prevent static damage or contamination from skin oils.
- Remove Protective Covers: Some cards come with plastic covers over the PCIe connector or display ports. Remove these.
Seating the New Graphics Card
- Align with PCIe Slot: Gently align the new graphics card with the top PCIe x16 slot on your motherboard. The gold contacts on the card should line up precisely with the slot.
- Apply Even Pressure: Press down firmly and evenly on both ends of the graphics card until it clicks securely into place. You should hear an audible click from the PCIe retention clip snapping into position. Double-check that the clip has fully engaged. If you don’t hear a click, ensure the card is seated correctly.
- Secure with Screws: Re-insert the screw(s) to secure the graphics card’s bracket to the PC case. This prevents sag and ensures stability.
Connecting Power Cables
- Identify Required Cables: Check your new GPU for its power input sockets (6-pin, 8-pin, or 12VHPWR). Your PSU should have corresponding PCIe power cables.
- Connect Cables: Route the correct cables from your power supply and firmly plug them into the graphics card. Ensure the clips on the connectors engage properly. Do not use CPU power cables (EPS 8-pin) for a GPU, as they are wired differently. If your card requires multiple connectors (e.g., two 8-pins), connect all of them. Using an adapter that combines multiple connectors from a single PSU cable is generally less ideal than using dedicated cables directly from the PSU.
Securing the Card and Closing the Case
- Cable Management (Optional): Tidy up any loose cables using zip ties or Velcro straps to improve airflow and aesthetics.
- Replace Side Panel: Carefully re-attach the side panel of your PC case and secure it with its screws.
- Reconnect Peripherals: Plug back in your monitor (to the new graphics card’s display outputs), keyboard, mouse, and power cable.
Post-Installation and Software Setup: Bringing Your GPU to Life
The hardware is installed; now it’s time to get the software side in order and verify everything is working as expected.
Initial Boot-Up and BIOS Check
- Power On: Turn on your PC. It might take a moment longer to boot for the first time as the system recognizes the new hardware.
- Monitor Display: Your monitor should display the POST screen or boot into your operating system. If you get no signal, double-check all connections, especially the display cable to the GPU and the GPU’s power cables.
- BIOS/UEFI (Optional): You may enter your motherboard’s BIOS/UEFI settings to ensure the PCIe slot is recognized and functioning correctly. In most cases, this isn’t strictly necessary, as modern motherboards automatically detect the new GPU.
Installing the Latest Drivers
This is a critical step for unlocking your GPU’s full potential and ensuring stability.
- Remove Old Drivers (Highly Recommended): If you had an AMD card and installed an NVIDIA card (or vice-versa), or even upgraded within the same brand, it’s best to use Display Driver Uninstaller (DDU) in Windows Safe Mode to completely remove all traces of previous graphics drivers. This prevents conflicts.
- Install New Drivers: Run the driver installer you downloaded earlier. Follow the on-screen prompts. Choose a “Custom” or “Advanced” installation to deselect unwanted bundled software if you wish, but ensure you install the core graphics driver, HD Audio driver (for HDMI/DisplayPort audio), and PhysX (for NVIDIA).
- Reboot: Your system will likely require a reboot after driver installation.
Verifying Functionality and Performance Benchmarking
After rebooting:
- Device Manager: Right-click the Start button, select “Device Manager,” and expand “Display adapters.” Your new graphics card should be listed without any yellow exclamation marks.
- GPU Software: Open the NVIDIA Control Panel or AMD Radeon Software. You should see options specific to your new GPU.
- Run a Game or Benchmark: Launch a demanding game or a benchmarking tool (e.g., 3DMark, FurMark, Unigine Heaven/Superposition). This will stress-test the card and confirm it’s operating correctly. Monitor temperatures and frame rates using tools like MSI Afterburner or HWMonitor.
Troubleshooting Common Issues
- No Display Signal: Ensure the monitor cable is plugged into the new graphics card, not the motherboard’s integrated graphics. Recheck all power cables to the GPU and motherboard. Try reseating the graphics card.
- System Instability/Crashes: This often points to insufficient PSU power or unstable drivers. Double-check PSU wattage, reconnect power cables, and ensure you’ve performed a clean driver installation.
- Driver Installation Failure: Ensure you downloaded the correct drivers for your specific card and operating system. Try disabling antivirus temporarily or using DDU to thoroughly clean out old drivers.
- Graphics Artifacts/Corruption: Could indicate a faulty card (rare) or overheating. Monitor temperatures.
Optimizing Your New Graphics Card: Maximize Your Investment
Installing the card is one thing; optimizing it for peak performance and longevity is another.
Driver Updates and Software Suites
Regularly check for and install the latest graphics drivers from NVIDIA or AMD. These updates often bring performance improvements for new games, bug fixes, and support for emerging technologies. The NVIDIA Control Panel and AMD Radeon Software also offer extensive customization options for resolution, refresh rates, color settings, and game-specific profiles.
Overclocking (with caution)
Advanced users might consider overclocking their GPU for a modest performance boost. This involves increasing the GPU’s core clock speed and memory clock speed beyond factory settings. Software like MSI Afterburner is commonly used. However, proceed with caution:
- Research: Understand the risks and best practices.
- Gradual Adjustments: Make small increases and test stability.
- Monitor Temperatures: Ensure your card doesn’t overheat. Excessive heat can damage components.
- Warranty: Overclocking can void your warranty, though software-based overclocking is generally safer than hardware modifications.
Monitoring Temperatures and Performance
Utilize tools like HWMonitor, MSI Afterburner, or the built-in monitoring in AMD Radeon Software to keep an eye on your GPU’s temperatures and usage while gaming or working. Healthy temperatures usually stay below 80°C under load. If temperatures consistently run high, consider improving case airflow or adjusting fan curves.
Game Settings and Graphics Optimization
Even with a powerful new GPU, understanding game settings is key. Experiment with various graphical options (texture quality, anti-aliasing, shadow quality, draw distance) to find the perfect balance between visual fidelity and frame rate. Some settings have a disproportionately high performance cost for minimal visual gain. Tools like NVIDIA’s GeForce Experience or AMD’s Radeon Chill can also help optimize game settings and power consumption automatically.
Congratulations! You’ve successfully installed and optimized your new graphics card. Enjoy the enhanced performance, stunning visuals, and immersive experiences that your upgraded system now offers. This powerful component is the heart of your PC’s visual prowess, and with careful installation and ongoing optimization, it will serve you well for years to come.
aViewFromTheCave is a participant in the Amazon Services LLC Associates Program, an affiliate advertising program designed to provide a means for sites to earn advertising fees by advertising and linking to Amazon.com. Amazon, the Amazon logo, AmazonSupply, and the AmazonSupply logo are trademarks of Amazon.com, Inc. or its affiliates. As an Amazon Associate we earn affiliate commissions from qualifying purchases.