
The evolution of in-car entertainment has transitioned from simple terrestrial FM/AM broadcasts to sophisticated satellite-linked digital audio services. SiriusXM, the primary provider of Satellite Digital Audio Radio Services (SDARS) in North America, utilizes a complex network of geostationary and highly elliptical orbit satellites to deliver high-fidelity audio across vast geographic areas. Whether you are driving a brand-new vehicle with an integrated infotainment system or upgrading an older model with aftermarket hardware, setting up SiriusXM requires a precise understanding of hardware identification, signal acquisition, and software synchronization.
Understanding SiriusXM Hardware Architectures
Before beginning the setup process, it is essential to identify the specific technical architecture of your vehicle’s audio system. SiriusXM delivery generally falls into two categories: factory-installed integrated tuners and aftermarket add-on solutions.
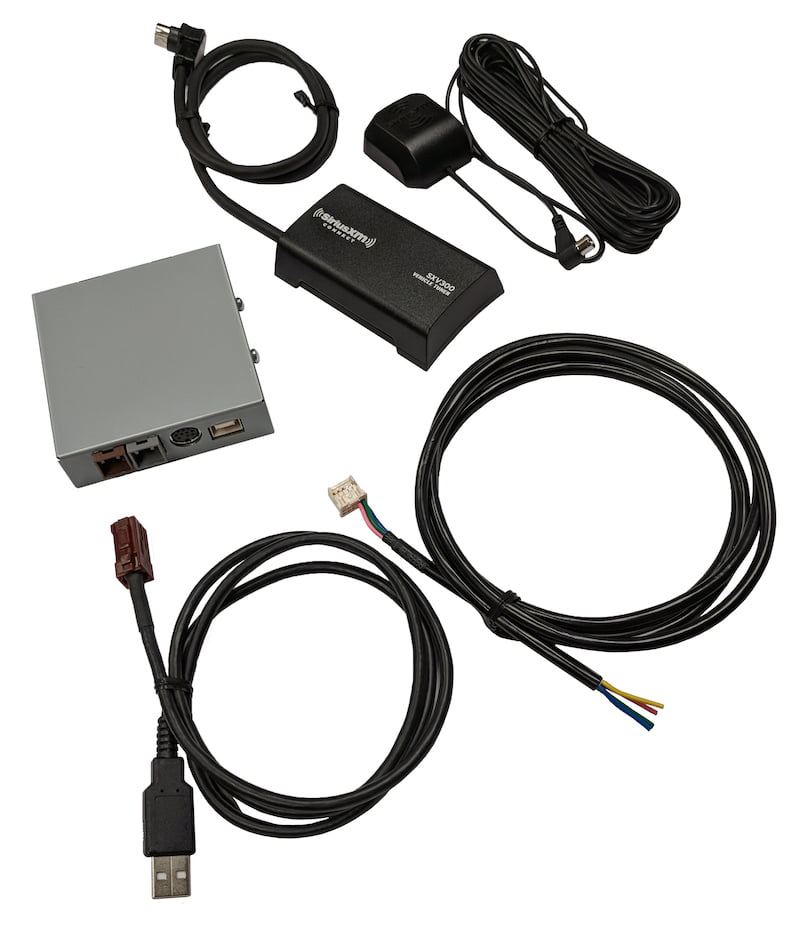
Built-in Factory Tuners
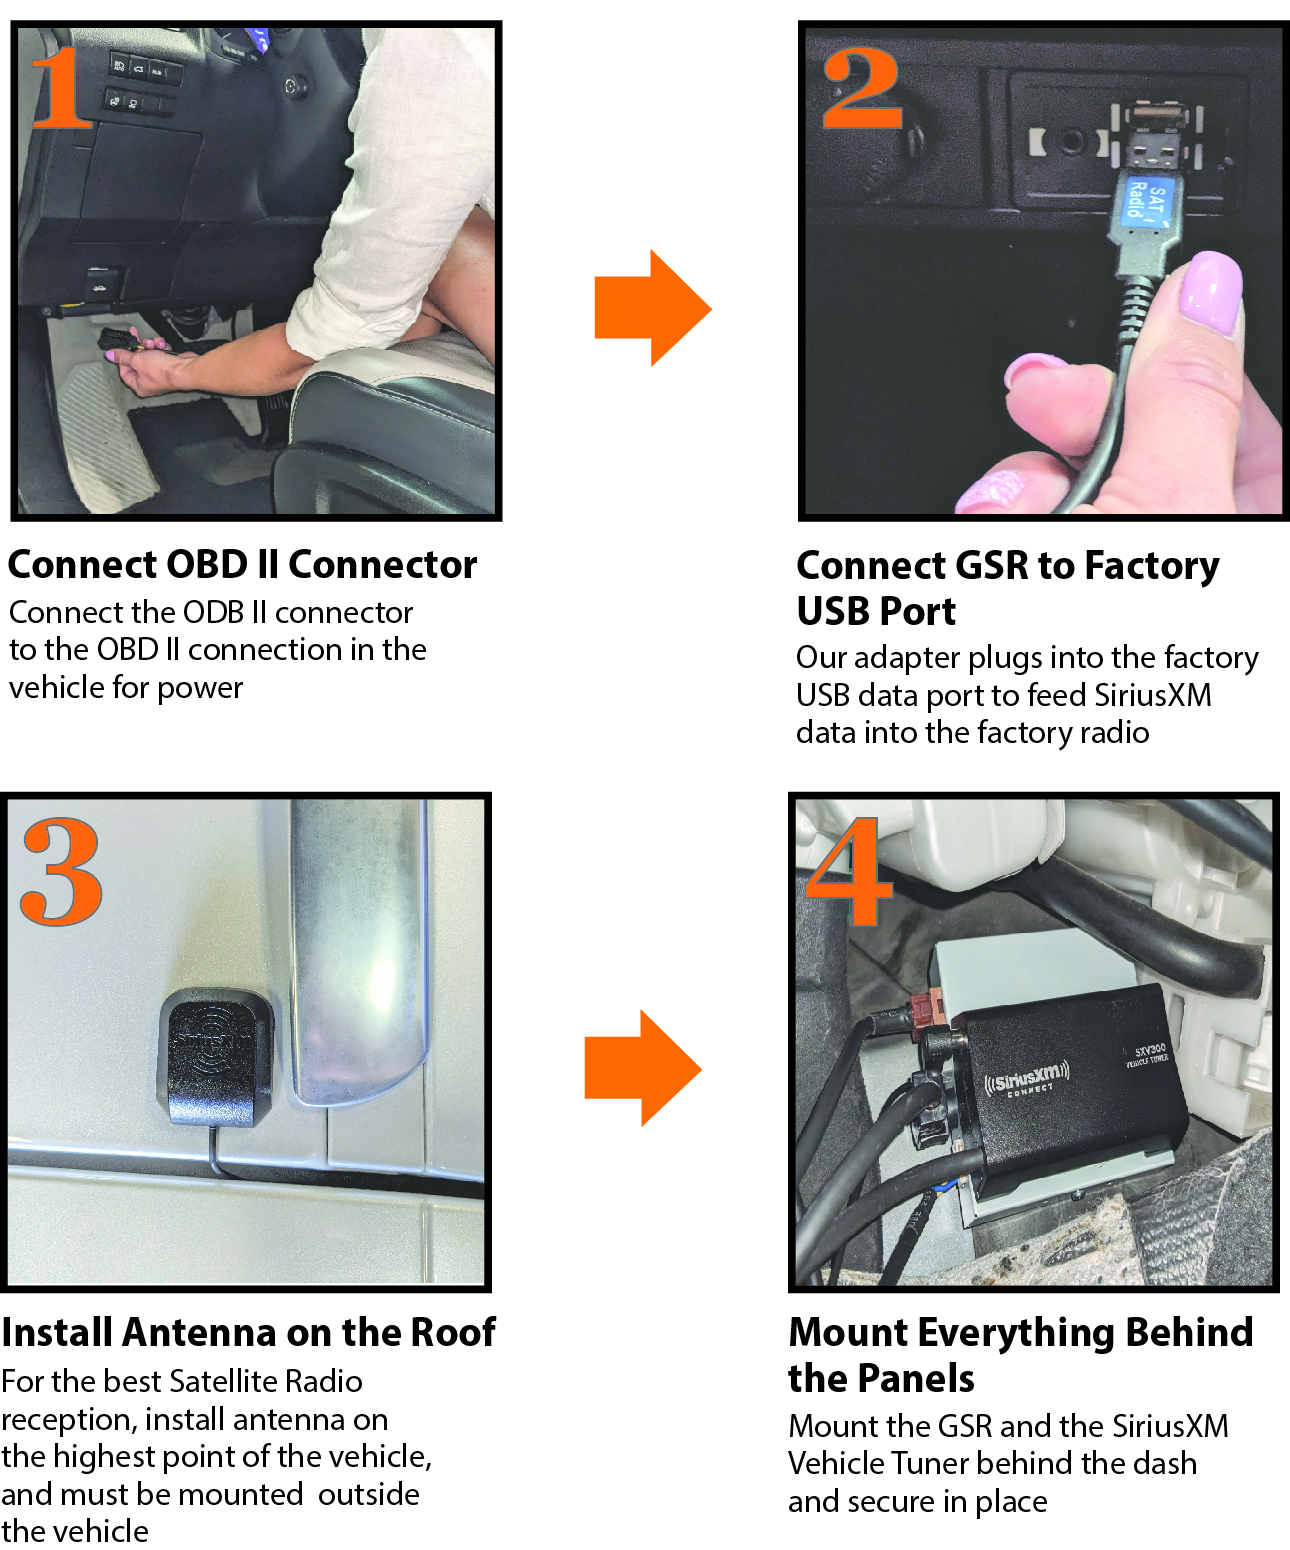
Most modern vehicles manufactured within the last decade come equipped with a pre-installed SiriusXM tuner. In these systems, the satellite radio hardware is integrated directly into the vehicle’s Head Unit (HU). These systems utilize a dedicated satellite antenna—often a “shark fin” or puck-style mount on the roof—connected via a high-frequency coaxial cable to the tuner module located behind the dashboard or in the trunk.
Aftermarket and Plug-and-Play Kits
For vehicles lacking integrated hardware, setup involves installing a standalone receiver. These devices, such as the SiriusXM Commander Touch or the Onyx series, act as external tuners that bypass the car’s native radio limitations. They require their own power source (typically 12V), a dedicated satellite antenna, and an audio output method—either through a 3.5mm auxiliary cable, an FM modulator, or a direct-wire interface.
Identifying Your Radio ID: The First Step to Activation
Every SiriusXM tuner is assigned a unique alphanumeric identifier known as a Radio ID, Electronic Serial Number (ESN), or Receiver ID (RID). This code is the technical fingerprint required for the SiriusXM ground stations to authorize your specific hardware to decrypt the satellite stream.
Method 1: The Channel 0 Protocol
The most universal method for retrieving a Radio ID, regardless of the vehicle make or model, is the Channel 0 protocol.
-
Turn on your vehicle’s ignition to provide power to the infotainment system.
-
Switch the source to “Sirius,” “XM,” or “SAT.”
-
Use the tuning knob or touch screen to navigate to Channel 0.
-
The 8-character alphanumeric ID will immediately populate on the display. It is critical to note that these IDs typically exclude the letters I, O, S, and F to prevent confusion with numbers.
Method 2: Accessing System Settings
In high-tech infotainment environments, such as those found in Tesla, BMW (iDrive), or Audi (MMI), the Radio ID may be nested within the software’s sub-menus. Navigating to “Settings,” then “Source Setup,” and finally “Device Information” will usually yield the ESN. For aftermarket “Dock-and-Play” radios, the ID is often printed on a sticker located on the back of the unit or under the battery compartment.
The Signal Activation and Handshake Process
Once you have secured your Radio ID, the next phase is the “handshake”—the moment the satellite network sends a digital authorization packet to your tuner. This process requires a clear line of sight to the southern sky to ensure the antenna can receive the high-frequency S-band signals transmitted by the satellites.
Initiating the Refresh Signal
You can initiate activation through the SiriusXM online portal or the mobile application. After entering your Radio ID and selecting your service tier, the system puts a “refresh signal” into the broadcast queue.
-
Positioning: Park your vehicle in an open area. Parking garages, dense tree canopies, or tall urban corridors can cause multipath interference, preventing the tuner from locking onto the signal.
-
Powering the Tuner: Ensure your radio is turned on and tuned to the “Preview Channel” (usually Channel 1).
-
The Wait Period: The activation signal is broadcast in repeating cycles. It typically takes between 2 and 15 minutes for the tuner to capture the authorization data. During this time, do not change channels or turn off the vehicle.
-
Confirmation: Once the handshake is successful, the display will transition from “Subscription Updating” or “Channel 1” to a full list of available content.
Integrating SiriusXM via Mobile App and Digital Interfaces
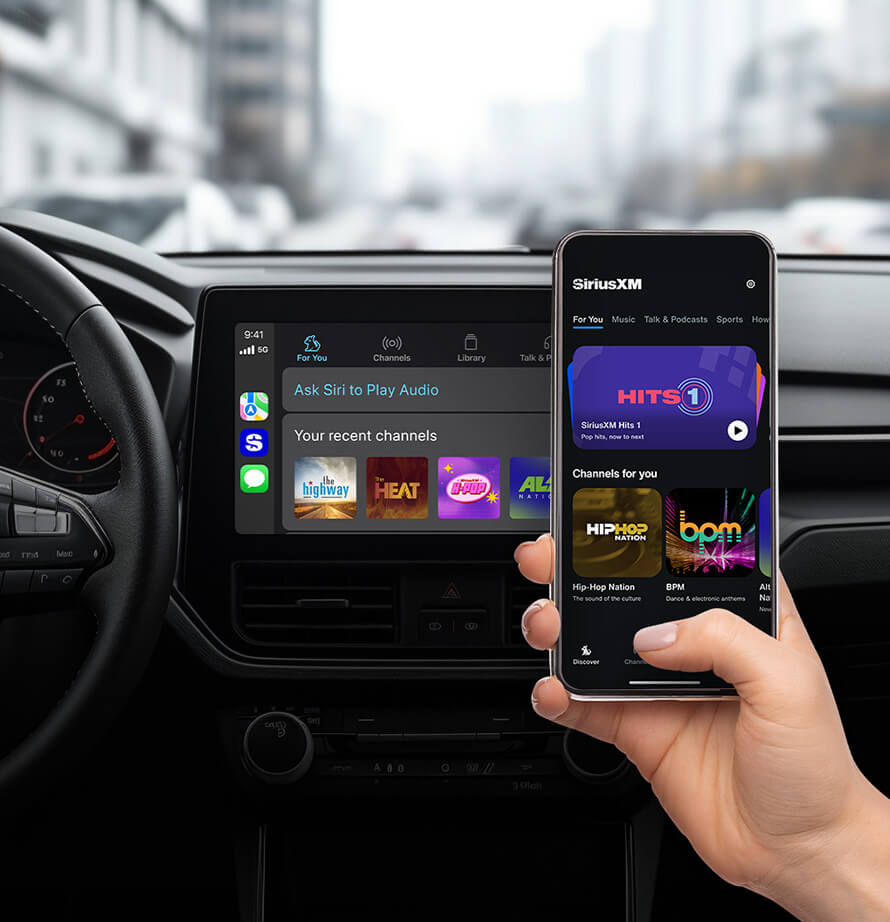
In the modern tech ecosystem, setting up SiriusXM in a car does not strictly require a satellite tuner. Many users opt for the “Streaming-Only” approach, leveraging the SiriusXM app via smartphone integration. This method utilizes 4G/5G LTE data instead of S-band satellite frequencies.
Apple CarPlay and Android Auto Integration
If your vehicle supports Apple CarPlay or Android Auto, the setup is primarily software-driven.
-
Physical Connection: Connect your smartphone to the vehicle via a certified USB data cable or via Wireless CarPlay/Android Auto protocols (Bluetooth + Wi-Fi Direct).
-
App Configuration: Ensure the SiriusXM app is installed on your mobile device and you are logged in.
-
Interface Navigation: Launch the SiriusXM icon from your vehicle’s dashboard display. This interface provides a richer UX than traditional satellite tuners, offering features like “Restart” (to play a song from the beginning) and personalized “For You” recommendations based on algorithmic listening data.
Bluetooth and AUX Workarounds
For older tech stacks that lack smart integration, the setup involves a Bluetooth A2DP stream. Pair your phone to the car’s head unit as a media device. While this offers the convenience of wireless audio, it lacks the metadata richness (album art, artist bios) found in CarPlay or native satellite tuners.
Advanced Troubleshooting: Solving Signal and Hardware Issues
Technical hurdles are common during the setup of satellite-based systems. Understanding the physics of signal propagation and the limitations of automotive hardware can help resolve these issues quickly.
Troubleshooting “Check Antenna” Errors
This is a hardware-level error indicating a break in the circuit.
-
Mechanical Connection: Ensure the SMB (SubMiniature version B) connector is firmly seated in the tuner’s antenna port.
-
Cable Integrity: Satellite antenna cables are thin and prone to crimping. Check for 90-degree bends or pinched wires in the door frames or trunk lid.
-
Antenna Grounding: Most satellite antennas are magnetic. They require a metal ground plane (the car’s roof) to function optimally. If the antenna is mounted on fiberglass or carbon fiber, signal reception will be significantly degraded.
Resolving “Acquiring Signal” or “No Signal” Loops
If the radio is stuck in an acquisition loop, it is often due to an obstruction or a firmware desynchronization.
-
Terrestrial Repeaters: In major cities, SiriusXM uses ground-based repeaters to supplement satellite signals. If you are in a city and losing signal, the tuner may be struggling to hand off from the satellite to the repeater.
-
Hard Reset: For integrated systems, performing a “Soft Reset” of the vehicle’s infotainment system (often by holding the power button for 10–20 seconds) can clear the cache and force a re-scan of the satellite bands.
Software Refresh
If your hardware is active but certain channels are missing, the most effective technical solution is a “Signal Refresh.” This can be triggered remotely by visiting siriusxm.com/refresh on a mobile browser and entering your Radio ID. This forces the network to re-send the authorization packet specifically to your unit, updating the internal channel map to the latest version.
Optimizing Audio Fidelity and Digital Features
Once the technical setup is complete, fine-tuning the system ensures the highest quality digital experience. Satellite radio is compressed to fit hundreds of channels into a limited bandwidth, which can sometimes result in “watery” high frequencies.
Adjusting EQ for Satellite Compression
Most modern car audio DSPs (Digital Signal Processors) have specific presets for satellite radio. Reducing the “Treble” slightly and increasing the “Mid-range” can help mask the artifacts of heavy digital compression.
Setting Up “TuneStart” and “SmartFavorites”
In vehicles with advanced SiriusXM software (SXM with 360L), you can enable “TuneStart.” This technical feature uses a local buffer in the radio’s memory to automatically start a song from the beginning when you switch to a preset channel, regardless of where the live broadcast currently is. Configuring your “SmartFavorites” allows the tuner to background-cache the audio from your top six channels, providing an instantaneous switching experience without the typical 1-2 second lag associated with satellite tuning.
By methodically following these technical protocols—from hardware identification and satellite handshake to mobile app integration—you can ensure a stable, high-performance SiriusXM setup that maximizes the capabilities of your vehicle’s digital infrastructure.
aViewFromTheCave is a participant in the Amazon Services LLC Associates Program, an affiliate advertising program designed to provide a means for sites to earn advertising fees by advertising and linking to Amazon.com. Amazon, the Amazon logo, AmazonSupply, and the AmazonSupply logo are trademarks of Amazon.com, Inc. or its affiliates. As an Amazon Associate we earn affiliate commissions from qualifying purchases.