
The transition from an older operating system to a newer one can seem daunting, but it’s often a necessary step to ensure your computer remains secure, performant, and compatible with modern software and hardware. For many users still running Windows 7, the move to Windows 10 represents a significant leap forward in technology, offering a robust, feature-rich, and secure computing experience. While Microsoft officially ended support for Windows 7 in January 2020, leaving millions of users exposed to potential security vulnerabilities, the good news is that upgrading to Windows 10 is still a viable and highly recommended process. This comprehensive guide will walk you through everything you need to know to successfully install Windows 10 on your Windows 7 PC, ensuring a smooth and efficient transition.
Why Upgrade from Windows 7 to Windows 10?
Before diving into the technicalities of installation, it’s crucial to understand the compelling reasons behind making the switch. Windows 10 isn’t just a cosmetic update; it’s a fundamental improvement across various facets of computing.
Enhanced Security Features
Perhaps the most critical reason to upgrade is security. Windows 7 is no longer receiving security updates, meaning any newly discovered vulnerabilities will remain unpatched, leaving your system susceptible to malware, viruses, and cyberattacks. Windows 10, on the other hand, comes with advanced built-in security features like Windows Defender Antivirus, Firewall, SmartScreen, and regular security updates. These tools work in concert to provide a far more robust defense against modern threats, protecting your personal data and privacy. Features like Windows Hello offer biometric authentication, further enhancing login security.
Modern Interface and User Experience
Windows 10 introduces a refined and more intuitive user interface. While retaining the familiar Start Menu, it blends elements of Windows 7 with a modern, tile-based design for quick access to apps and information. The Action Center consolidates notifications and quick settings, improving user control. Virtual Desktops (Task View) allow for better workspace organization, especially for those who multitask extensively. The overall design language is cleaner, more consistent, and optimized for a range of devices, including touchscreens.
Performance Improvements and Future Compatibility
Windows 10 is generally more efficient and responsive than Windows 7, particularly on newer hardware. It boasts faster boot times, improved memory management, and better utilization of multi-core processors. Furthermore, Windows 10 is the operating system that most new software and hardware are designed for. As developers increasingly drop support for Windows 7, upgrading ensures your system remains compatible with the latest applications, games, and peripherals, extending the usable life of your PC. DirectX 12, exclusively available on Windows 10, offers significant performance boosts for gaming.
Access to New Features and Microsoft Store Apps
With Windows 10, you gain access to a wealth of new features and services. Cortana, Microsoft’s virtual assistant, can help with tasks, reminders, and information retrieval. The Microsoft Edge browser offers improved performance, security, and integration with Windows 10 services. The Microsoft Store provides a centralized, secure platform to download apps, games, and movies, offering a curated experience that enhances productivity and entertainment. Features like Focus Assist, Timeline, and Cloud Clipboard also contribute to a more integrated and productive workflow.
End of Support for Windows 7
As mentioned, Microsoft officially ended mainstream support for Windows 7 on January 14, 2020. This means no more free security updates, non-security fixes, free assisted support options, or online technical content updates. Continuing to use Windows 7 after this date is inherently risky, making the upgrade to Windows 10 not just an improvement but a critical security imperative for any connected device.
Essential Preparations Before You Begin
A successful operating system upgrade hinges on thorough preparation. Skipping these crucial steps can lead to data loss, installation failures, or compatibility issues. Take your time with this phase to ensure a smooth transition.
Check System Requirements for Windows 10
Before anything else, confirm your PC meets the minimum specifications for Windows 10. While Windows 10 is designed to run on a wide range of hardware, checking ensures compatibility:
-
Processor: 1 GHz or faster compatible processor (or SoC).
-
RAM: 1 GB for 32-bit or 2 GB for 64-bit.
-
Hard disk space: 32 GB for 64-bit OS or 20 GB for 32-bit OS.
-
Graphics card: DirectX 9 or later with WDDM 1.0 driver.
-
Display: 800×600 resolution.
While these are minimums, more RAM and a faster processor will significantly enhance the Windows 10 experience.
Back Up Your Important Data
This is the single most critical step. Upgrading an operating system carries an inherent risk of data loss, however small. Before you start, back up all your essential files – documents, photos, videos, music, and any other critical data – to an external hard drive, USB drive, cloud storage service (like OneDrive, Google Drive, or Dropbox), or a network drive. Do not proceed without a complete backup. Consider using Windows 7’s built-in backup utility or a third-party backup solution.
Gather Necessary Tools: USB Drive/DVD and Product Key
You’ll need a blank USB flash drive (at least 8 GB) or a blank DVD to create the Windows 10 installation media.
Additionally, you’ll need a valid Windows 10 product key. If you were eligible for the free upgrade period, your hardware might have a digital license associated with it, which automatically activates Windows 10. Otherwise, you may need to purchase a Windows 10 license. While many sources suggest the free upgrade from Windows 7 is no longer officially supported, in practice, it often still works for legitimate Windows 7 licenses, especially if you had previously upgraded and then reverted.
Update Current Windows 7 Installation
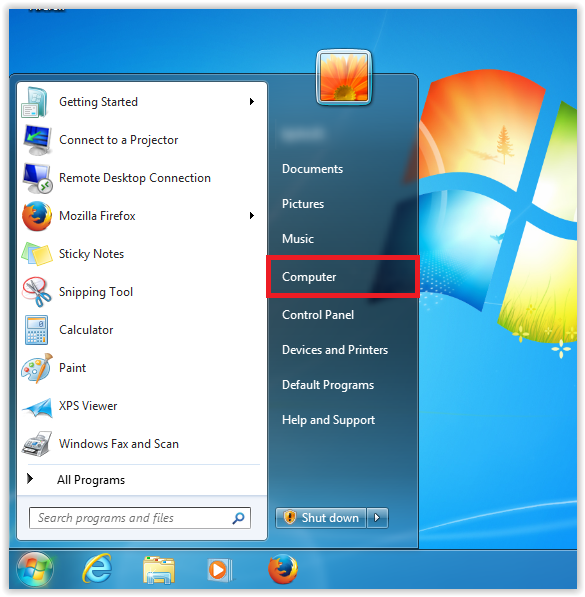
Ensure your Windows 7 system is fully updated before attempting the upgrade. Go to Start > Control Panel > System and Security > Windows Update and check for and install all available updates. This can help resolve potential compatibility issues during the upgrade process.
Disable Antivirus Software Temporarily
Third-party antivirus programs can sometimes interfere with the operating system installation process. Temporarily disable your antivirus software before starting the Windows 10 installation. Remember to re-enable it (or install a new one) after the upgrade is complete.
Choosing Your Installation Method: Upgrade vs. Clean Install
There are two primary ways to install Windows 10 over Windows 7: an in-place upgrade or a clean installation. Each method has its advantages and disadvantages, and your choice will depend on your specific needs and priorities.
In-Place Upgrade: The Simpler Path
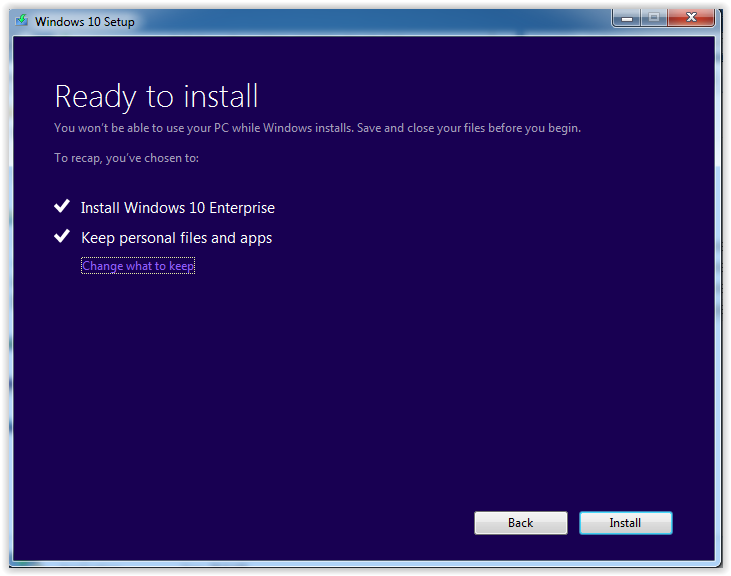
An in-place upgrade attempts to preserve your existing files, settings, and applications while installing Windows 10 over your current Windows 7 installation. This is generally the easier and quicker method for most users.
Pros and Cons of an In-Place Upgrade
-
Pros: Keeps your personal files, programs, and settings intact. Less post-installation work required to reconfigure your system. Generally faster to execute.
-
Cons: Carries over potential issues from your Windows 7 installation (e.g., registry errors, performance slowdowns). Can sometimes result in driver conflicts or unexpected glitches. Requires more disk space during the upgrade process.
This method is suitable if your Windows 7 system is stable, relatively clean, and you want to minimize disruption.
Clean Installation: A Fresh Start
A clean installation involves completely erasing your hard drive (or the partition where Windows 7 is installed) and installing Windows 10 from scratch. This method provides the freshest possible start for your operating system.
Pros and Cons of a Clean Installation
-
Pros: Eliminates old errors, bloatware, and potential performance issues from Windows 7. Results in a faster, more stable, and more responsive system. Optimizes disk space usage.
-
Cons: All your personal files, programs, and settings will be permanently deleted. Requires more post-installation work to reinstall applications, restore data, and reconfigure settings.
-
Understanding Drive Partitioning: If you opt for a clean install, you’ll be presented with options to manage your disk partitions. You can delete the existing Windows 7 partition and install Windows 10 into the unallocated space, or format the partition directly. Be extremely careful during this step to avoid accidentally deleting data from other drives if you have multiple.
This method is recommended if your Windows 7 system has been experiencing performance issues, is heavily cluttered, or if you simply want to ensure the absolute best performance from Windows 10.
Step-by-Step Guide: Performing the Installation
With your preparations complete and your chosen installation method in mind, you’re ready to proceed with the actual installation of Windows 10.
Creating Windows 10 Installation Media
Regardless of whether you choose an upgrade or a clean install, you’ll need Windows 10 installation media.
Using the Media Creation Tool
-
Download the Tool: Go to Microsoft’s official Windows 10 download page (search for “Windows 10 download” on Google) and click “Download tool now” under “Create Windows 10 installation media.”
-
Run the Tool: Once downloaded, run the Media Creation Tool. Accept the license terms.
-
Select Options: Choose “Create installation media (USB flash drive, DVD, or ISO file) for another PC” and click Next.
-
Language, Edition, and Architecture: The tool will usually recommend options based on your current PC. Confirm these or uncheck “Use recommended options for this PC” to select your preferred language, Windows 10 edition (Home or Pro, usually detected automatically), and architecture (64-bit is recommended for most modern PCs).
-
Choose Media Type: Select “USB flash drive” and click Next. Insert your blank USB drive.
-
Select USB Drive: Choose your USB drive from the list. Ensure you select the correct drive, as all data on it will be erased.
-
Download and Create: The tool will then download the Windows 10 files and create the bootable USB drive. This process can take some time depending on your internet speed.
Initiating the Upgrade Process (for In-Place Upgrade)
If you’re performing an in-place upgrade:
-
Mount the Media: Once the USB installation media is ready, open File Explorer in Windows 7, navigate to the USB drive, and double-click the
setup.exefile. -
Follow Prompts: The Windows 10 Setup wizard will launch. Follow the on-screen instructions.
-
Download Updates: It’s recommended to choose “Download and install updates (recommended)” to get the latest fixes.
-
Accept License Terms: Read and accept the license terms.
-
Choose What to Keep: Crucially, select “Keep personal files and apps” when prompted. This ensures your data and programs are preserved.
-
Begin Installation: Click “Install.” Your PC will restart multiple times during the process. Do not turn off your computer. This process can take anywhere from 30 minutes to several hours.
Performing a Clean Install
For a clean installation, the process involves booting from the installation media.
Booting from USB/DVD
-
Restart PC: With the USB drive inserted (or DVD in the drive), restart your computer.
-
Access BIOS/UEFI: As the PC starts, you’ll need to press a specific key (commonly F2, F10, F12, DEL, or ESC) to enter your BIOS/UEFI settings or a boot menu. Consult your PC manufacturer’s manual if unsure.
-
Change Boot Order: In the BIOS/UEFI settings, navigate to the “Boot” tab or section and change the boot order to prioritize the USB drive or DVD drive. Save changes and exit.
-
Boot from Media: Your PC should now boot from the Windows 10 installation media. Press any key when prompted “Press any key to boot from CD or DVD…”.
Custom Installation and Drive Formatting
-
Windows Setup: The Windows Setup screen will appear. Select your language, time, and keyboard preferences, then click Next.
-
Install Now: Click “Install now.”
-
Enter Product Key: Enter your Windows 10 product key if prompted. If you have a digital license, you can click “I don’t have a product key” and Windows will activate automatically after installation when connected to the internet.
-
Accept License Terms: Accept the license terms and click Next.
-
Choose Installation Type: Select “Custom: Install Windows only (advanced).” This is crucial for a clean install.
-
Partition Management: You’ll see a list of drives and partitions.
-
Identify your Windows 7 partition (usually “Drive 0 Partition X” with a larger size).
-
Select and click “Delete” for the main Windows 7 partition and any small recovery/system partitions associated with it on the same physical drive. This will create “Unallocated Space.”
-
Select the “Unallocated Space” and click “New” to create a new partition, or simply click “Next” to let Windows create necessary partitions automatically.
-
Click “Next” to begin the installation on the newly created or unallocated space.
-
-
Installation Process: Windows will now install. Your PC will restart multiple times. This process will also take significant time.
Post-Installation Setup
Once the installation files are copied and restarts are complete, Windows 10 will guide you through the initial setup:
-
Region and Keyboard Layout: Select your region and keyboard layout.
-
Network Connection: Connect to a Wi-Fi or Ethernet network.
-
Account Setup: Choose to sign in with a Microsoft account (recommended for cloud sync and features) or create an offline account.
-
Privacy Settings: Review and adjust the privacy settings according to your preferences.
-
Cortana: Choose whether to enable Cortana.
After these steps, you’ll be taken to the Windows 10 desktop.
Post-Installation Checklist and Optimization
After successfully installing Windows 10, there are several crucial steps to ensure your system is fully functional, secure, and optimized for performance.
Install Device Drivers
While Windows 10 has excellent built-in driver support, some older hardware might require specific drivers, especially for graphics cards, sound cards, and network adapters.
-
Check Device Manager: Open Device Manager (search for it in the Start Menu) and look for any devices with yellow exclamation marks.
-
Visit Manufacturer Websites: Go to your PC manufacturer’s support website or the individual component manufacturers’ websites (e.g., NVIDIA, AMD, Intel, Realtek) to download and install the latest Windows 10 compatible drivers.
Run Windows Update
Immediately run Windows Update to download and install any pending feature updates, security patches, and driver updates that Microsoft provides. Go to Start > Settings > Update & Security > Windows Update and click “Check for updates.” This is vital for security and stability.
Restore Your Backed-Up Data
Now is the time to copy all the personal files you backed up earlier back to your computer. Organize them into appropriate folders.
Customize Settings and Install Essential Software
Personalize your Windows 10 experience:
-
Background and Theme: Change your desktop background, theme, and lock screen images.
-
Start Menu and Taskbar: Pin frequently used apps to the Start Menu and Taskbar.
-
Privacy Settings: Revisit privacy settings to ensure they align with your preferences.
-
Install Applications: Reinstall all your essential software – web browser, office suite, creative tools, games, etc. – making sure to download the latest Windows 10 compatible versions.
Activate Windows 10
If your Windows 10 hasn’t automatically activated (which it should if you used a genuine Windows 7 key or had a digital license), go to Start > Settings > Update & Security > Activation. Enter your product key or troubleshoot activation issues.
Security Best Practices
-
Re-enable Antivirus: If you temporarily disabled a third-party antivirus for the upgrade, re-enable it. If you performed a clean install, Windows Defender is active by default, but you might consider installing a preferred third-party solution.
-
Set up Windows Hello: If your hardware supports it (webcam, fingerprint reader), configure Windows Hello for faster and more secure logins.
-
Regular Backups: Establish a regular backup routine for your new Windows 10 system to protect against future data loss.
Upgrading from Windows 7 to Windows 10 is a worthwhile endeavor that significantly enhances your computing experience in terms of security, performance, and features. By following these steps carefully, you can ensure a successful and seamless transition, bringing your PC into the modern era of computing. While the process may seem extensive, the benefits of a secure and up-to-date operating system far outweigh the initial effort.
aViewFromTheCave is a participant in the Amazon Services LLC Associates Program, an affiliate advertising program designed to provide a means for sites to earn advertising fees by advertising and linking to Amazon.com. Amazon, the Amazon logo, AmazonSupply, and the AmazonSupply logo are trademarks of Amazon.com, Inc. or its affiliates. As an Amazon Associate we earn affiliate commissions from qualifying purchases.