
In the dynamic world of software development and quality assurance, web automation has become an indispensable tool. From automating repetitive tasks to performing robust cross-browser testing, the ability to control web browsers programmatically offers immense benefits. Among the various frameworks available, Selenium stands out as a powerful and widely adopted solution, and its integration with Python makes it particularly accessible and efficient for developers and testers alike.
This guide provides a thorough walkthrough on installing Selenium for Python, covering everything from understanding its core components to configuring browser drivers and troubleshooting common issues. By the end of this article, you will have a solid foundation to begin your journey into web automation with Python and Selenium.
Understanding Selenium and Its Ecosystem
Before diving into the installation process, it’s crucial to grasp what Selenium is and why it pairs so effectively with Python. This section will clarify its role and the necessary prerequisites for a smooth setup.
What is Selenium?
Selenium is an open-source suite of tools designed for automating web browsers. It provides a robust set of APIs that allow developers to simulate user interactions with web applications, such as clicking buttons, filling forms, navigating pages, and extracting data. While primarily known for enabling automated testing, its utility extends to web scraping, task automation, and even generating reports.
The Selenium suite consists of several key components:
-
Selenium WebDriver: This is the core component, providing programming interfaces to control browsers. It directly communicates with the browser through a browser-specific driver (e.g., ChromeDriver for Chrome, GeckoDriver for Firefox).
-
Selenium IDE: A record-and-playback tool for authoring tests, often used for quick test creation and prototyping.
-
Selenium Grid: A system that allows tests to be run in parallel on multiple machines and browsers, significantly speeding up test execution.
For most Python automation tasks, you’ll primarily be interacting with Selenium WebDriver.
Why Python for Selenium?
Python’s appeal as the language of choice for Selenium automation stems from several factors:
-
Readability and Simplicity: Python’s clear syntax and emphasis on readability make it easier to write and maintain automation scripts, even for complex scenarios.
-
Extensive Libraries: Python boasts a vast ecosystem of libraries that complement Selenium, such as
pandasfor data manipulation,requestsfor HTTP interactions, and various testing frameworks likepytestandunittest. -
Large Community Support: A thriving community means abundant resources, tutorials, and support available online, making problem-solving more straightforward.
-
Versatility: Python’s versatility allows developers to integrate web automation scripts with other parts of their application, data analysis pipelines, or machine learning workflows.
These advantages make Python an excellent partner for leveraging Selenium’s powerful capabilities.
Prerequisites for Installation
To ensure a smooth installation and setup process, you’ll need the following:
-
Python: Ensure Python is installed on your system. Version 3.7 or newer is generally recommended for compatibility with modern Selenium releases and libraries.
-
pip: Python’s package installer, which usually comes bundled with Python installations from version 3.4 onwards.
-
A Web Browser: You’ll need at least one web browser installed (e.g., Google Chrome, Mozilla Firefox, Microsoft Edge, Safari) that you intend to automate.
Having these prerequisites in place will allow you to proceed seamlessly with the installation of Selenium.
Step-by-Step Guide to Installing Selenium WebDriver
This section will walk you through the practical steps required to install Selenium, configure browser drivers, and run your first automation script.
Installing Python (If Not Already Present)
If Python isn’t already on your system, follow these general steps:
-
Windows: Download the latest stable version from the official Python website (python.org). During installation, make sure to check the box “Add Python X.X to PATH” to simplify command-line access.
-
macOS: Python 3 might be pre-installed on newer macOS versions. If not, download it from python.org or use a package manager like Homebrew (
brew install python). -
Linux: Python 3 is typically pre-installed on most Linux distributions. You can often install specific versions using your distribution’s package manager (e.g.,
sudo apt install python3for Debian/Ubuntu).
After installation, open a terminal or command prompt and verify Python and pip installation by running:
python --version

pip --version
You should see output indicating the installed versions. If python refers to Python 2, use python3 instead, and pip3 for Python 3’s pip.
Installing the Selenium Python Package
Once Python and pip are ready, installing the Selenium library is straightforward. Open your terminal or command prompt and execute the following command:
pip install selenium
This command will download and install the latest stable version of the Selenium Python bindings from the Python Package Index (PyPI).
To verify the installation, you can open a Python interpreter (python or python3 in your terminal) and try to import Selenium:
import selenium

print(selenium.__version__)
If no error occurs and the version number is printed, Selenium has been successfully installed.
Downloading and Configuring Browser Drivers
Selenium WebDriver communicates with your chosen web browser through a browser-specific executable called a “driver.” Each browser requires its own driver. You need to download the correct driver version that matches your installed browser’s version.
Here’s how to obtain and configure drivers for popular browsers:
ChromeDriver (for Google Chrome)
-
Identify Chrome Version: Open Chrome, go to
chrome://versionorHelp > About Google Chrometo find your browser’s exact version number. -
Download ChromeDriver: Visit the official ChromeDriver download page: https://chromedriver.chromium.org/downloads. Download the ChromeDriver version that corresponds to your Chrome browser version.
- Note: If your Chrome version is, for example, 118.0.5993.70, you should look for ChromeDriver 118.
-
Place the Executable:
-
Option 1 (Recommended for simplicity): Place the downloaded
chromedriver.exe(Windows) orchromedriver(macOS/Linux) file into a directory that is included in your system’s PATH environment variable. Common locations include/usr/local/bin(macOS/Linux) or a dedicatedC:WebDriverfolder that you add to your PATH (Windows). -
Option 2 (Explicit Path): Place the driver anywhere and specify its full path in your Python code.
-
GeckoDriver (for Mozilla Firefox)
-
Identify Firefox Version: Open Firefox, go to
Help > About Firefoxto find your browser’s version. -
Download GeckoDriver: Visit the official GeckoDriver releases page on GitHub: https://github.com/mozilla/geckodriver/releases. Download the appropriate release for your operating system.
-
Place the Executable: Similar to ChromeDriver, place the
geckodriver.exe(Windows) orgeckodriver(macOS/Linux) file in a directory included in your system’s PATH, or be prepared to provide its explicit path in your script.
Other Browsers (Edge, Safari)
-
Microsoft Edge: Edge WebDriver is typically installed with Microsoft Edge. For older versions or specific needs, download from the official Microsoft Edge Developer site.
-
Safari: Safari’s WebDriver comes built-in with macOS. You might need to enable it via
Develop > Allow Remote Automationin Safari’s menu.
Verifying the Installation with a Simple Script
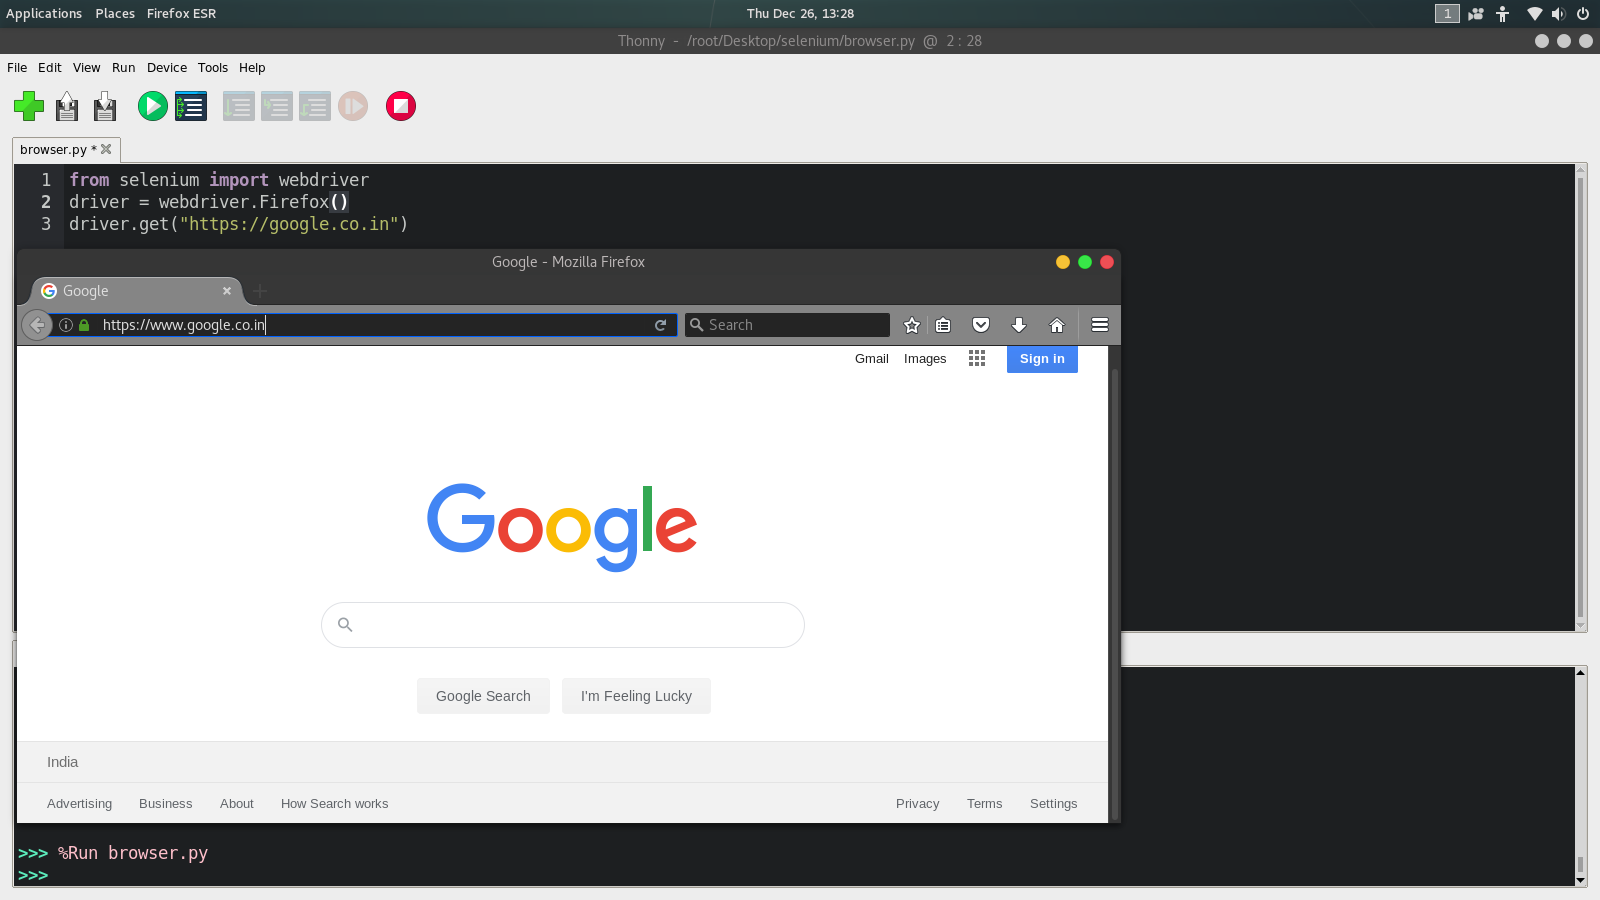
Now that Selenium and a browser driver are installed, let’s run a basic Python script to confirm everything is working.
Create a Python file (e.g., test_selenium.py) and add the following code:
from selenium import webdriver

from selenium.webdriver.common.by import By

import time


# --- Configuration (Choose one option based on your setup) ---

# OPTION 1: If chromedriver is in your PATH

driver = webdriver.Chrome()


# OPTION 2: If you specify the path to chromedriver

# DRIVER_PATH = '/path/to/your/chromedriver' # Example: 'C:\WebDriver\chromedriver.exe' or '/usr/local/bin/chromedriver'

# driver = webdriver.Chrome(executable_path=DRIVER_PATH)


# For Firefox (GeckoDriver):

# driver = webdriver.Firefox()

# OR

# DRIVER_PATH = '/path/to/your/geckodriver'

# driver = webdriver.Firefox(executable_path=DRIVER_PATH)

# -----------------------------------------------------------


<p style="text-align:center;"><img class="center-image" src="https://businessanalyst.techcanvass.com/wp-content/uploads/2024/12/How-to-install-Selenium-with-Python.webp" alt=""></p>


try:

    # Maximize the browser window for better visibility

    driver.maximize_window()


    # Navigate to a website

    print("Navigating to Google...")

    driver.get("https://www.google.com")

    time.sleep(2) # Give the page some time to load


    # Print the page title to verify

    print(f"Page Title: {driver.title}")


    # Find the search input field and type a query

    search_box = driver.find_element(By.NAME, "q")

    search_box.send_keys("Selenium Python automation tutorial")

    time.sleep(1)


    # Submit the form (or click the search button)

    search_box.submit()

    time.sleep(3) # Wait for search results to load


    print("Search completed successfully!")


except Exception as e:

    print(f"An error occurred: {e}")


finally:

    # Close the browser

    if 'driver' in locals() and driver:

        print("Closing the browser.")

        driver.quit()
Save the file and run it from your terminal:
python test_selenium.py
You should observe a Chrome (or Firefox) browser window launching, navigating to Google, performing a search, and then closing. If this happens, your Selenium installation is successful!
Advanced Configuration and Best Practices
While the basic installation gets you started, understanding advanced configurations and best practices can significantly improve your automation scripts’ reliability and maintainability.
Managing WebDriver Paths (Environmental Variables vs. Explicit)
As shown in the example, you have two primary ways to inform Selenium where your browser driver is located:
-
Environmental Variables (PATH): Adding the directory containing your driver executable to your system’s PATH variable is often the cleanest method. Once added, Selenium can find the driver without requiring an explicit path in your code. This is ideal for development environments where multiple projects might use the same driver.
-
Windows: Search for “Environment Variables,” edit “Path” under “System variables,” and add the folder containing
chromedriver.exe. -
macOS/Linux: Edit your shell’s configuration file (e.g.,
.bashrc,.zshrc) and addexport PATH=$PATH:/path/to/driver/folder. Remember tosourcethe file afterward.
-
-
Explicit Path in Code: Providing the full path to the driver executable directly in your
webdriver.Chrome(executable_path='/path/to/driver')call offers granular control and can be useful in specific project setups or when dealing with multiple driver versions. However, it makes scripts less portable.
Utilizing WebDriver Managers
Manually downloading and managing browser drivers can become tedious, especially when browsers update frequently, requiring corresponding driver updates. The webdriver_manager library simplifies this process by automatically downloading and managing the correct driver for your installed browser.
To use it:
-
Install:
pip install webdriver-manager -
Integrate into Code:
from selenium import webdriver

from webdriver_manager.chrome import ChromeDriverManager

from webdriver_manager.firefox import GeckoDriverManager


# For Chrome

driver = webdriver.Chrome(ChromeDriverManager().install())


# For Firefox

# driver = webdriver.Firefox(GeckoDriverManager().install())
This significantly streamlines driver management, ensuring you always have the correct driver version without manual intervention.
Headless Browser Execution
“Headless” mode refers to running a web browser without a graphical user interface (GUI). This means the browser runs in the background, invisible to the user.
Benefits of Headless Mode:
-
Speed: Often faster as there’s no rendering overhead for the visual display.
-
Server Environments: Ideal for running automation scripts on servers or CI/CD pipelines where a GUI is unavailable or undesirable.
-
Resource Efficiency: Can consume fewer system resources.
How to Configure Headless Mode:
You achieve headless mode by setting specific options for your browser.
from selenium import webdriver

from selenium.webdriver.chrome.options import Options as ChromeOptions

from selenium.webdriver.firefox.options import Options as FirefoxOptions

from webdriver_manager.chrome import ChromeDriverManager


# --- For Chrome (Headless) ---

chrome_options = ChromeOptions()

chrome_options.add_argument("--headless") # Enables headless mode

chrome_options.add_argument("--disable-gpu") # Recommended for Windows users

chrome_options.add_argument("--window-size=1920x1080") # Set a virtual resolution

driver = webdriver.Chrome(ChromeDriverManager().install(), options=chrome_options)

print("Chrome is running in headless mode.")


# --- For Firefox (Headless) ---

# firefox_options = FirefoxOptions()

# firefox_options.add_argument("--headless")

# driver = webdriver.Firefox(executable_path=GeckoDriverManager().install(), options=firefox_options)

# print("Firefox is running in headless mode.")


# ... your automation code ...

driver.get("https://www.example.com")

print(f"Page title in headless mode: {driver.title}")

driver.quit()
Headless execution is a crucial optimization for professional automation deployments.
Common Issues and Troubleshooting
Even with careful installation, you might encounter issues. Here are some common problems and their solutions:
WebDriver Not Found Error
This is perhaps the most frequent issue.
-
Cause: The most common reasons are that the browser driver executable is not in the system’s PATH, or the
executable_pathin your code is incorrect, or the driver file itself is missing or corrupted. -
Solution:
-
Ensure the driver executable (e.g.,
chromedriver.exe) is actually present in the specified location. -
Verify your system’s PATH variable includes the directory where the driver resides, and restart your terminal/IDE.
-
Double-check the explicit path in your
webdriver.Chrome(executable_path=...)call. -
Use
webdriver_managerto automatically handle driver downloads and paths.
-
Mismatched Browser and Driver Versions
-
Cause: Browser vendors frequently update their software. If your browser updates but your driver doesn’t, they may become incompatible, leading to errors.
-
Solution: Always download the browser driver version that matches your installed browser’s major version.
webdriver_managerautomates this, making it a highly recommended solution.
Selenium Package Not Found
-
Cause: The
ModuleNotFoundError: No module named 'selenium'indicates that theseleniumPython package is not installed in the Python environment you are currently using. -
Solution:
-
Ensure you ran
pip install seleniumsuccessfully. -
If you have multiple Python versions, ensure you are running
pip(orpip3) associated with the correct Python interpreter. For example, usepython -m pip install selenium. -
If using a virtual environment, ensure it’s activated before installing and running your script.
-
Browser Not Launching or Crashing Immediately
-
Cause: This can stem from various issues, including permissions problems with the driver, corrupted browser profiles, or conflicts with security software (antivirus/firewall).
-
Solution:
-
Check file permissions for the driver executable.
-
Try running the browser manually to ensure it’s functional.
-
Temporarily disable security software to rule out conflicts (with caution).
-
Check for browser-specific error messages in your terminal output.
-
Debugging Tips
-
Read Error Messages Carefully: Python tracebacks and Selenium error messages often provide direct clues about what went wrong.
-
Print Statements: Use
print()statements throughout your script to track execution flow and variable values. -
Wait Conditions: Many issues arise because elements aren’t loaded when Selenium tries to interact with them. Implement explicit waits (
WebDriverWaitcombined withexpected_conditions) rather than relying solely ontime.sleep(). -
Screenshots: Capture screenshots at points of failure to visually inspect the browser state:
driver.save_screenshot("error_screenshot.png").
By systematically addressing these common issues, you can efficiently troubleshoot and resolve most installation and execution problems.

Conclusion
Successfully installing and configuring Selenium for Python is the foundational step towards unlocking powerful web automation capabilities. From basic web navigation to complex test suites, Selenium provides the tools to interact with web browsers programmatically, making it an invaluable asset for developers, testers, and data enthusiasts alike.
This guide has walked you through the essentials: understanding Selenium’s components, a detailed step-by-step installation process, integrating browser drivers, and adopting best practices like webdriver_manager and headless execution. Furthermore, we’ve covered common pitfalls and troubleshooting strategies to help you overcome initial hurdles.
As you become more comfortable with the setup, we encourage you to explore Selenium’s rich API, learn about locators (ID, XPath, CSS selectors), explicit waits, and integrate it with testing frameworks. The world of web automation is vast and continually evolving, and with Python and Selenium in your toolkit, you are well-equipped to navigate its complexities and harness its immense potential.
aViewFromTheCave is a participant in the Amazon Services LLC Associates Program, an affiliate advertising program designed to provide a means for sites to earn advertising fees by advertising and linking to Amazon.com. Amazon, the Amazon logo, AmazonSupply, and the AmazonSupply logo are trademarks of Amazon.com, Inc. or its affiliates. As an Amazon Associate we earn affiliate commissions from qualifying purchases.