
Minecraft, at its core, is a deeply immersive sandbox game, but its true longevity and boundless creativity often stem from its vibrant modding and plugin community. For server administrators, plugins are game-changers, transforming a vanilla experience into something uniquely tailored—whether it’s adding sophisticated moderation tools, complex minigames, economic systems, or simply quality-of-life improvements. Understanding how to correctly install and manage these powerful additions is a fundamental skill for anyone aspiring to run a dynamic and engaging Minecraft server. This guide will walk you through the entire process, from understanding server software compatibility to troubleshooting common issues, ensuring you can confidently enhance your server’s capabilities and provide an unparalleled experience for your players. By meticulously following these steps, you’ll unlock a new realm of possibilities, making your Minecraft server truly stand out.
Understanding Minecraft Server Software and Plugin Compatibility
Before you even think about downloading your first plugin, it’s crucial to grasp the ecosystem of Minecraft server software. Not all server types are created equal, especially when it comes to plugin support. Attempting to install plugins on an incompatible server will, at best, result in them simply not working, and at worst, could cause server instability or crashes. This foundational knowledge is key to a smooth installation process.
Vanilla vs. Plugin-Enabled Server Jars
The most basic form of a Minecraft server is the “vanilla” server, downloaded directly from Minecraft.net. While perfect for a pure, unadulterated Minecraft experience, vanilla servers do not support plugins. They are designed to run the game as Mojang intended, without any third-party server-side modifications beyond what’s available in the official server properties.
To utilize plugins, you need a different kind of server software, often referred to as a “plugin-enabled” or “modded” server jar. The most prominent examples in the plugin world are Spigot, PaperMC, and Purpur. These are forks of the original Minecraft server software that have been modified to incorporate the Bukkit API (Application Programming Interface), which is what nearly all Minecraft plugins are built upon.
It’s important to distinguish between “plugins” and “mods.” While both modify the game, they operate differently and require different server software:
-
Plugins (Bukkit/Spigot/PaperMC-based) operate server-side only and typically don’t require players to install anything on their client. They enhance gameplay, add commands, create minigames, and manage server functions.
-
Mods (Forge/Fabric-based) often require both server and client-side installation. They can drastically alter gameplay mechanics, add new items, blocks, dimensions, and visual effects. This guide focuses exclusively on plugins.
Choosing the Right Plugin Platform
For the vast majority of server administrators looking to install plugins, PaperMC is the recommended choice. It’s a highly optimized fork of Spigot that offers significant performance improvements, bug fixes, and additional configuration options, making it ideal for servers of all sizes. Spigot itself is still widely used, but PaperMC generally provides a superior experience in terms of stability and efficiency. Purpur is a further optimization of PaperMC, offering even more performance tweaks and features.
When choosing your server software, always download it from its official source:
-
Spigot: BuildTools (requires compiling) or various mirror sites if you search carefully (though official method is BuildTools).
-
PaperMC: papermc.io (straightforward download of pre-built JARs).
-
Purpur: purpurmc.org
Once downloaded, this JAR file replaces your vanilla server JAR and becomes the core of your plugin-enabled server.
Verifying Plugin Version and Dependencies
Before downloading any plugin, always check its compatibility requirements. Each plugin is developed for specific versions of Minecraft (e.g., 1.16.5, 1.18.2, 1.20.1) and often for specific server software (e.g., Spigot/PaperMC). Trying to run a plugin designed for Minecraft 1.12.2 on a 1.20.1 server will almost certainly fail.
Look for these critical pieces of information on the plugin’s download page:
-
Supported Minecraft Versions: Ensure your server’s Minecraft version matches the plugin’s supported versions. Many plugins support a range (e.g., 1.16-1.20).
-
Required Server Software: Confirm it’s built for Bukkit/Spigot/PaperMC.
-
Dependencies: Some plugins require other plugins to function. For example, many economy plugins rely on Vault, or advanced permission systems might need ProtocolLib. If a plugin lists dependencies, download and install those first. Failure to do so will result in the dependent plugin not loading.
Paying close attention to these details will save you countless hours of troubleshooting later and ensure a smooth plugin integration into your server environment.
Preparing Your Minecraft Server for Plugin Installation
Proper preparation is the cornerstone of a successful plugin installation. Skipping these preliminary steps can lead to data loss, corrupted server files, or unnecessary headaches. Taking a few moments to set things up correctly will ensure a stable environment for your new plugins and protect your existing server data.
Backing Up Your Server Data
This is arguably the most critical step before making any significant changes to your server, including installing new plugins or updating existing ones. Even seasoned server administrators can encounter unforeseen issues, and a recent backup is your best defense against data loss.
What to back up:
- The entire server directory: This includes your
worldfolders (world, worldnether, worldthe_end),pluginsfolder,server.properties,banned-players.json,ops.json, and any other custom configurations or data.
How to back up:
-
For self-hosted servers: Simply copy the entire server folder to a safe location on your computer or an external drive. You can zip it for easier storage.
-
For rented server hosts (panel-based): Most hosting providers offer a “Backup” or “Files” section in their control panel. Use their built-in backup functionality or download the entire server directory via FTP.
-
Automated backups: Consider setting up automated backup solutions. Many hosting providers offer this, or you can use server-side scripts for self-hosted setups.
Always ensure your backup is complete and stored in a location separate from your live server files.
Locating Your Server’s Root Directory
The “root directory” of your Minecraft server is the main folder where all your server files reside. This is where your server JAR file, server.properties, world folder, and crucially, your plugins folder are located.
How to find it:
-
For self-hosted servers: It’s the folder where you initially placed your
server.jarfile and from where you run the server startup script. -
For rented server hosts (panel-based): Access your server’s control panel (e.g., Multicraft, Pterodactyl, cPanel). Navigate to the “File Manager” section. The root directory is typically the first folder you see upon entering the file manager, containing your server JAR and other core server files. Look for a folder specifically named
plugins. If it doesn’t exist, the server software will create it on the first boot after installing a plugin-enabled server JAR.
Familiarizing yourself with this directory structure is vital, as you’ll be navigating it frequently for plugin installation, configuration, and troubleshooting.
Ensuring Your Server is Offline
It is paramount that your Minecraft server is completely shut down before installing or removing plugins. Attempting to modify the plugins folder while the server is running can lead to:
-
Corrupted files: Plugin files might become corrupted during upload, rendering them unusable.
-
Incomplete installations: The server might not correctly recognize the new plugin or generate its configuration files.
-
Server crashes: Modifying active server processes can destabilize the entire application.
-
Data loss: Changes made while the server is active might not be properly saved or might conflict with existing data.
How to shut down:
-
For self-hosted servers: Use the
/stopcommand in the server console, then close the console window once it confirms shutdown. -
For rented server hosts: Use the “Stop” button in your server’s control panel. Wait for the status to indicate the server is fully offline.
Only once the server is confirmed offline should you proceed with uploading or removing plugin files. This simple step ensures the integrity of your server and the success of your plugin installation.
The Step-by-Step Plugin Installation Process
With your server prepared and backed up, you’re ready to dive into the core process of installing plugins. This section details the critical steps, from securing the right files to getting them onto your server and ensuring they load correctly. Precision and attention to detail here will guarantee a smooth integration of your new server enhancements.
Downloading Plugins from Reputable Sources
The internet is vast, and while many sites offer Minecraft plugins, it’s crucial to download them only from trusted sources to avoid malware, outdated versions, or broken files.
Reputable Sources:
-
SpigotMC Resources: This is the largest and most active repository for Spigot/PaperMC plugins. You’ll find a massive selection of high-quality plugins with detailed descriptions, version compatibility, and user reviews. (spigotmc.org/resources/)
-
BukkitDev: An older but still active platform, especially for legacy plugins. (dev.bukkit.org)
-
Modrinth: Emerging as a strong alternative, Modrinth offers a clean interface and hosts both plugins (for Bukkit/Spigot/PaperMC) and mods (for Fabric/Forge). Ensure you filter for “plugins” and the correct loader. (modrinth.com)
-
GitHub: Many developers host their plugin code and release files directly on GitHub. Always check the official plugin page on SpigotMC or BukkitDev for a link to the developer’s GitHub.
Important Considerations:
-
File Type: Plugins almost exclusively come as
.jarfiles. If you download a.zipor any other file type, it’s likely a mispackaged file, source code, or potentially malicious. -
Ad-link Sites: Be wary of download links that redirect you through multiple ad pages. Stick to direct downloads from the platforms mentioned above or the developer’s verified links.
-
Version Matching: Reiterate checking the plugin’s supported Minecraft version and downloading the correct file for your server.
Once downloaded, keep the .jar file easily accessible, as you’ll need to upload it to your server.
Uploading Plugins to Your Server
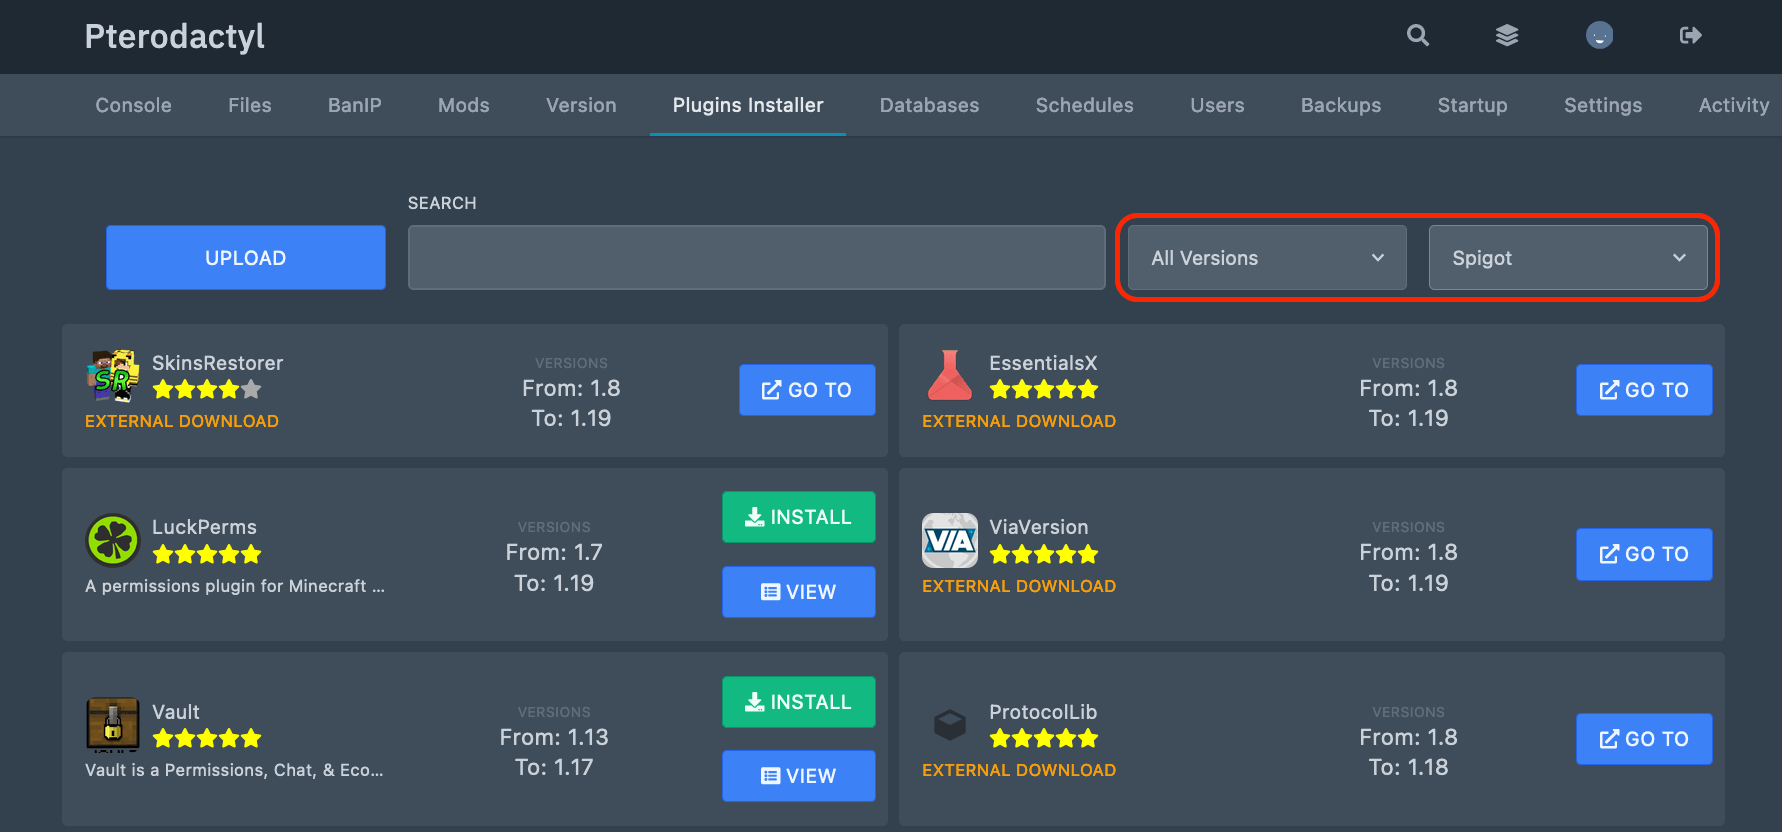
This is where the plugin physically moves from your computer to your server’s file system. The method varies slightly depending on whether you’re self-hosting or using a commercial hosting provider.
1. Locate the plugins folder:
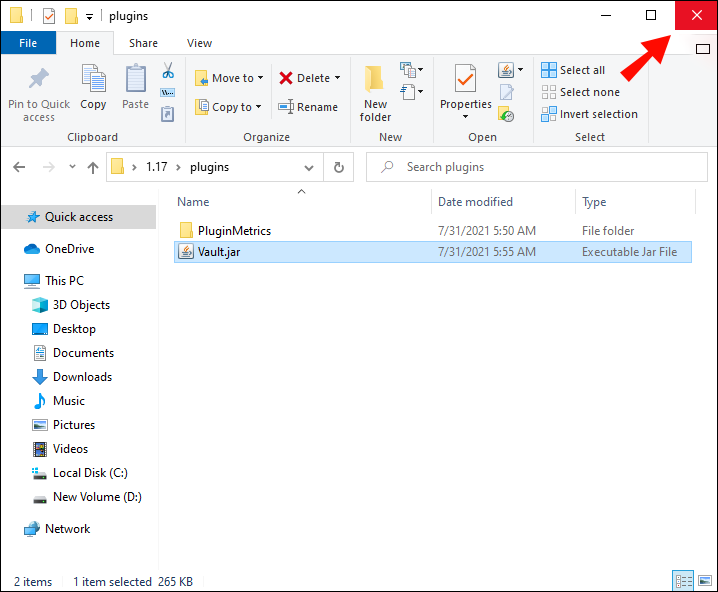
As discussed, navigate to your server’s root directory. Inside, you should find a folder named plugins. If it’s not there, and you’re running a Spigot/PaperMC-based server, it will be created automatically the first time you start the server with a plugin-enabled JAR, or you can create it manually.
2. Uploading Method:
-
For Rented Server Hosts (Web Panel File Manager):
-
Log in to your server host’s control panel.
-
Go to the “File Manager” section.
-
Navigate into the
pluginsfolder. -
Look for an “Upload” button or drag-and-drop functionality. Select the
.jarfile(s) you downloaded earlier. -
Wait for the upload to complete. Ensure the file size matches the original download.
-
-
For Self-Hosted or Dedicated Servers (FTP Client):
-
Download and install an FTP client like FileZilla.
-
Obtain your server’s FTP credentials (host, username, password, port) from your hosting provider or server setup.
-
Connect to your server using the FTP client.
-
On the right-hand side (remote site), navigate to your server’s
pluginsfolder. -
On the left-hand side (local site), navigate to where you saved your downloaded plugin
.jarfiles. -
Drag and drop the plugin
.jarfiles from your local site into the remotepluginsfolder. -
Verify the transfer is complete and the files appear in the remote
pluginsfolder.
-
Regardless of the method, ensure the plugin .jar files are directly inside the /plugins folder, not in any subfolders unless specifically instructed by the plugin developer.
Starting Your Server and Initial Configuration
After uploading the plugins, it’s time to bring your server back online and confirm everything is working.
1. Start Your Server:
-
For self-hosted: Run your server’s startup script.
-
For rented hosts: Click the “Start” button in your control panel.
2. Observe the Server Console:
As the server boots up, pay close attention to the console output. You should see messages indicating that your plugins are loading. Look for lines that say [INFO] [PluginName] Enabling PluginName vX.X.X or similar. If there are errors, they will often appear here, marked with [WARN] or [ERROR].
3. Verify In-Game:
Once the server is fully loaded and you’ve connected, use the /plugins or /pl command in-game (requires operator/admin status). This command lists all loaded plugins. Enabled plugins are typically shown in green, while disabled or errored ones might appear in red or yellow.
4. Initial Configuration Files:
Upon the first successful load, most plugins will generate their own configuration files (usually .yml or .json) within a dedicated folder inside the /plugins directory (e.g., /plugins/EssentialsX/config.yml).
-
Accessing Configuration: You can access and edit these files via your server’s File Manager or FTP client.
-
Editing: Use a plain text editor (like Notepad++, VS Code, or your host’s built-in editor) to modify settings. Be extremely careful with YAML syntax (indentation, colons, spaces) as errors can prevent the plugin from loading or functioning correctly.
-
Reloading Configs: After making changes to a config file, most plugins offer a command (e.g.,
/pluginname reloador/pluginname rl) to apply the changes without restarting the server. Check the plugin’s documentation for the specific command. If no such command exists, a full server restart is necessary.
Troubleshooting Common Installation Issues
Even with careful steps, issues can arise. Knowing how to diagnose them is crucial.
Common Problems and Solutions:
-
Plugin not loading (not appearing in
/plor showing red):-
Check Server Logs: The absolute first step. Look for
[WARN]or[ERROR]messages related to the plugin during server startup. The logs are usually found inlogs/latest.logor similar in your server’s root. -
Version Mismatch: The plugin is for a different Minecraft or server software version. Download the correct one.
-
Missing Dependencies: The plugin requires another plugin (e.g., Vault). Install the dependency first.
-
Corrupted File: The
.jarfile might have been corrupted during download or upload. Re-download and re-upload. -
Incorrect Folder: Ensure the
.jaris directly in the/pluginsfolder. -
Wrong Server Type: You’re trying to install a Bukkit/Spigot/PaperMC plugin on a Vanilla, Forge, or Fabric server.
-
-
Server crashing on startup:
-
This is often due to a severely incompatible or broken plugin.
-
Remove Suspect Plugin(s): Go back to your
pluginsfolder, remove the most recently added plugin(s), and try starting the server again. -
Check Crash Reports: If your server generates a
crash-reportfolder, examine the latest.txtfile for clues about which plugin caused the crash.
-
-
Plugin loading but not working as expected:
-
Check Plugin Configuration: Review the plugin’s
config.yml(or similar) for incorrect settings. -
Check Permissions: Many plugins require a permissions management plugin (like LuckPerms) to grant players (and yourself) access to commands and features.
-
Read Documentation: Refer to the plugin’s official documentation for specific setup instructions, commands, and common issues.
-
Persistent issues may require reaching out to the plugin developer or the community forums (like SpigotMC forums) for assistance, providing them with relevant log snippets.
Managing and Optimizing Your Server’s Plugins
Installing plugins is just the beginning. Effective server administration involves ongoing management and optimization to ensure smooth operation, enhance performance, and keep your server secure and enjoyable for players. This proactive approach prevents issues and ensures your server remains a top-tier destination.
Updating Plugins Safely
Plugins, like any software, receive updates for bug fixes, new features, performance enhancements, and compatibility with newer Minecraft versions. Updating safely is crucial to maintain server stability.
Recommended Update Procedure:
-
Check Changelog: Always review the plugin’s changelog on its resource page. This will inform you of any breaking changes, new dependencies, or specific update instructions. Pay attention to configuration file changes; sometimes, you may need to delete the old config for a new one to generate.
-
Backup Your Server: Before updating any plugin, perform a full server backup. This is your safety net in case the update causes issues.
-
Shut Down Your Server: Never update a plugin while the server is running.
-
Delete Old JAR: Navigate to your
pluginsfolder and delete the old version of the plugin’s.jarfile. -
Upload New JAR: Upload the newly downloaded version of the plugin to the
pluginsfolder. -
Restart Your Server: Start your server and monitor the console for any errors during the plugin’s startup.
-
Test Functionality: Log into your server and test the updated plugin to ensure all its features are working as expected.
For plugins with significant changes, especially those that generate new config files, it might be safer to temporarily remove the plugin, start the server to ensure the old config is not loaded, then shut down, replace, and restart.
Removing Unwanted Plugins
Removing a plugin is generally simpler than installing one, but it still requires care.
Procedure for Removal:
-
Shut Down Your Server: Ensure the server is completely offline.
-
Delete JAR File: Go to your
pluginsfolder and delete the.jarfile of the plugin you wish to remove. -
Delete Plugin Data Folder (Optional but Recommended): Many plugins create a subfolder within the
pluginsdirectory to store their configuration files, data, and logs. For a clean removal, delete this folder as well (e.g.,/plugins/OldPluginFolder). Be cautious not to delete data you might want to preserve if you plan to re-install the plugin later (e.g., player data, economy data). -
Restart Your Server: Start your server. The plugin should no longer load or affect your server.
Monitoring Plugin Performance
A large number of plugins, or even a single inefficient plugin, can impact your server’s performance, leading to lag, low TPS (Ticks Per Second), and a poor player experience.
Tools for Monitoring:
-
timings(PaperMC/Spigot built-in): Type/timings paste(or/spark profiler --timeout 60s) in the console or in-game (as an operator). This generates a web-based report showing how much CPU time each plugin, event, and task consumes. It’s an invaluable tool for identifying resource-hungry plugins. -
Spark: A modern, powerful profiler that offers more detailed and user-friendly reports than standard timings. Highly recommended for in-depth performance analysis. (spark.lucko.me)
-
Server Console: Keep an eye on your server’s console for warning messages related to performance, such as plugins taking too long to process events.
Optimization Strategies:
-
Review
timings/Spark reports regularly: Identify and address plugins that are consistently at the top of the resource usage list. -
Configure plugins efficiently: Many plugins have settings in their config files that can be tweaked to reduce their resource footprint (e.g., disabling unused features, reducing update frequencies).
-
Remove unused plugins: Every plugin consumes some resources, even if minimal. If a plugin isn’t actively used, remove it.
-
Consider alternative plugins: Sometimes, a different plugin offers similar functionality with better performance.
Recommended Essential Plugins
While specific needs vary, certain plugins are almost universally beneficial for a well-managed Minecraft server. These often form the backbone of a functional and engaging server environment.
-
EssentialsX: Provides hundreds of essential commands, economy features, homes, warps, kits, and more. A comprehensive utility plugin.
-
WorldGuard & WorldEdit: WorldEdit allows for powerful in-game world manipulation and building. WorldGuard provides region protection, flag management, and anti-griefing capabilities.
-
LuckPerms: A highly performant and feature-rich permissions management plugin. Essential for controlling what players and staff can do on your server.
-
Vault: An API plugin that many other plugins rely on for economy, permissions, and chat integration. Install this if required by other plugins.
-
ClearLagg / LagAssist: Helps reduce server lag by clearing dropped items, optimizing chunks, and managing entities.
-
CoreProtect / Prism: Robust logging and anti-griefing plugins that track block changes, interactions, and inventory movements, allowing for easy rollbacks and investigations.
-
GriefPrevention: A user-friendly plugin for players to claim land and protect their builds.
These essential tools provide the foundation for a secure, stable, and feature-rich Minecraft server experience, allowing you to focus on community building and content creation.

Conclusion
Installing plugins on a Minecraft server is a rewarding endeavor that unlocks a vast array of possibilities, transforming a basic server into a bespoke gaming environment. From robust moderation tools to intricate minigames and custom economies, plugins empower administrators to craft unique experiences that keep players engaged and coming back for more.
The process, while technical, is straightforward when approached systematically. By understanding the nuances of server software compatibility, diligently backing up your data, sourcing plugins from reputable sites, and meticulously following installation and configuration steps, you lay a solid foundation for a stable and dynamic server. Furthermore, embracing ongoing management—including safe updates, performance monitoring, and efficient troubleshooting—is key to the long-term health and success of your Minecraft community.
Remember, every plugin you add is an opportunity to enhance your server, but also a responsibility to maintain it. Start with essential plugins, learn their configurations, and gradually expand your server’s capabilities. With this guide, you are now equipped to confidently navigate the world of Minecraft server plugins, turning your vision for the ultimate server into a vibrant reality. The only limit is your imagination and your willingness to explore the rich ecosystem of available enhancements.
aViewFromTheCave is a participant in the Amazon Services LLC Associates Program, an affiliate advertising program designed to provide a means for sites to earn advertising fees by advertising and linking to Amazon.com. Amazon, the Amazon logo, AmazonSupply, and the AmazonSupply logo are trademarks of Amazon.com, Inc. or its affiliates. As an Amazon Associate we earn affiliate commissions from qualifying purchases.