
Python has ascended to become one of the most popular programming languages globally, lauded for its readability, versatility, and extensive ecosystem. A significant contributor to its power and flexibility is its modular nature – the ability to import and utilize pre-written code in the form of modules and packages. These modules streamline development, allowing programmers to leverage existing solutions for complex tasks, from data analysis and web development to machine learning and scientific computing, without having to reinvent the wheel.
However, for newcomers and even seasoned developers, the process of installing these modules can sometimes present a hurdle. Understanding the tools and best practices for module installation is fundamental to effectively working with Python. This comprehensive guide aims to demystify the process, providing a professional, insightful, and engaging walkthrough of how to install modules in Python, covering everything from basic installations to advanced techniques and troubleshooting. By the end of this article, you’ll have a robust understanding of Python’s package management system and be equipped to seamlessly integrate any module into your projects.
Understanding Python Modules and Packages
Before diving into the mechanics of installation, it’s crucial to grasp what Python modules and packages truly are and why they are indispensable to the development process. This foundational knowledge will contextualize the subsequent steps and highlight the importance of proper package management.
What are Modules and Packages?
In Python, a module is simply a file containing Python definitions and statements. The filename is the module name with the .py suffix. For instance, if you have a file named my_module.py containing functions and variables, then my_module is a module. Modules allow you to logically organize your Python code, making it reusable and easier to manage. When you want to use the functionalities defined in my_module.py in another script, you simply use the import my_module statement.
A package, on the other hand, is a way of organizing related modules into a directory hierarchy. Think of a package as a directory that contains multiple module files and potentially sub-packages. To signify that a directory is a Python package, it must contain a special file named __init__.py (though in Python 3.3 and later, this file is optional for namespace packages). Packages help avoid naming conflicts and provide a clearer structure for large projects. For example, a data_analysis package might contain statistics.py, visualization.py, and preprocessing.py modules.
Why Use Modules?
The benefits of using modules and packages are manifold:
-
Code Reusability: Once a module is written, its functions and classes can be reused across multiple projects without rewriting the code. This saves significant development time and effort.
-
Organization: Modules break down large programs into smaller, manageable, and logically organized files. This enhances readability and maintainability.
-
Namespace Management: Modules help prevent name collisions. Different modules can have functions or variables with the same name without interfering with each other, as long as they are accessed through their respective module namespaces (e.g.,
module1.function_name()vs.module2.function_name()). -
Collaboration: In team environments, modules allow different developers to work on separate parts of a project concurrently, which can then be integrated seamlessly.
-
Access to Community Resources: The Python community has developed an enormous collection of high-quality modules and packages that cater to almost every programming need imaginable. This rich ecosystem is accessible through package managers, dramatically accelerating development.
The Python Ecosystem: PyPI
At the heart of Python’s modularity lies the Python Package Index (PyPI), often pronounced “Py-Pee-Eye.” PyPI is the official third-party software repository for Python. It hosts thousands of packages (also referred to as “distributions” or “wheels”) that Python developers worldwide have created and shared. When you hear about installing a Python “library” like NumPy, Pandas, Django, or Flask, you are almost always referring to a package hosted on PyPI. This centralized repository makes it incredibly easy for developers to discover, download, and install packages, fostering a vibrant and collaborative open-source community.
Essential Prerequisites and Setup
Before you can install any Python module, you need to ensure your environment is correctly set up. This involves having Python itself installed and, crucially, its primary package installer, pip. Understanding virtual environments is also a key component of robust package management.
Installing Python (and ensuring Pip is included)
The first step, if you haven’t already, is to install Python on your system. It’s recommended to download the latest stable version from the official Python website (python.org).
-
For Windows users: During the installation process, make sure to check the box that says “Add Python X.Y to PATH” (where X.Y is the version number). This is critical as it allows you to run Python and
pipcommands directly from your command prompt or PowerShell. The installer typically includespipby default. -
For macOS users: Python comes pre-installed on macOS, but it’s often an older version (Python 2.x). It’s best to install Python 3 via Homebrew (
brew install python3) or directly frompython.org. Homebrew usually handles PATH configuration andpipinstallation. -
For Linux users: Most Linux distributions come with Python pre-installed. You can install Python 3 and
pipusing your distribution’s package manager, e.g.,sudo apt-get install python3 python3-pipfor Debian/Ubuntu orsudo yum install python3 python3-pipfor Fedora/RHEL.
Verifying Pip Installation
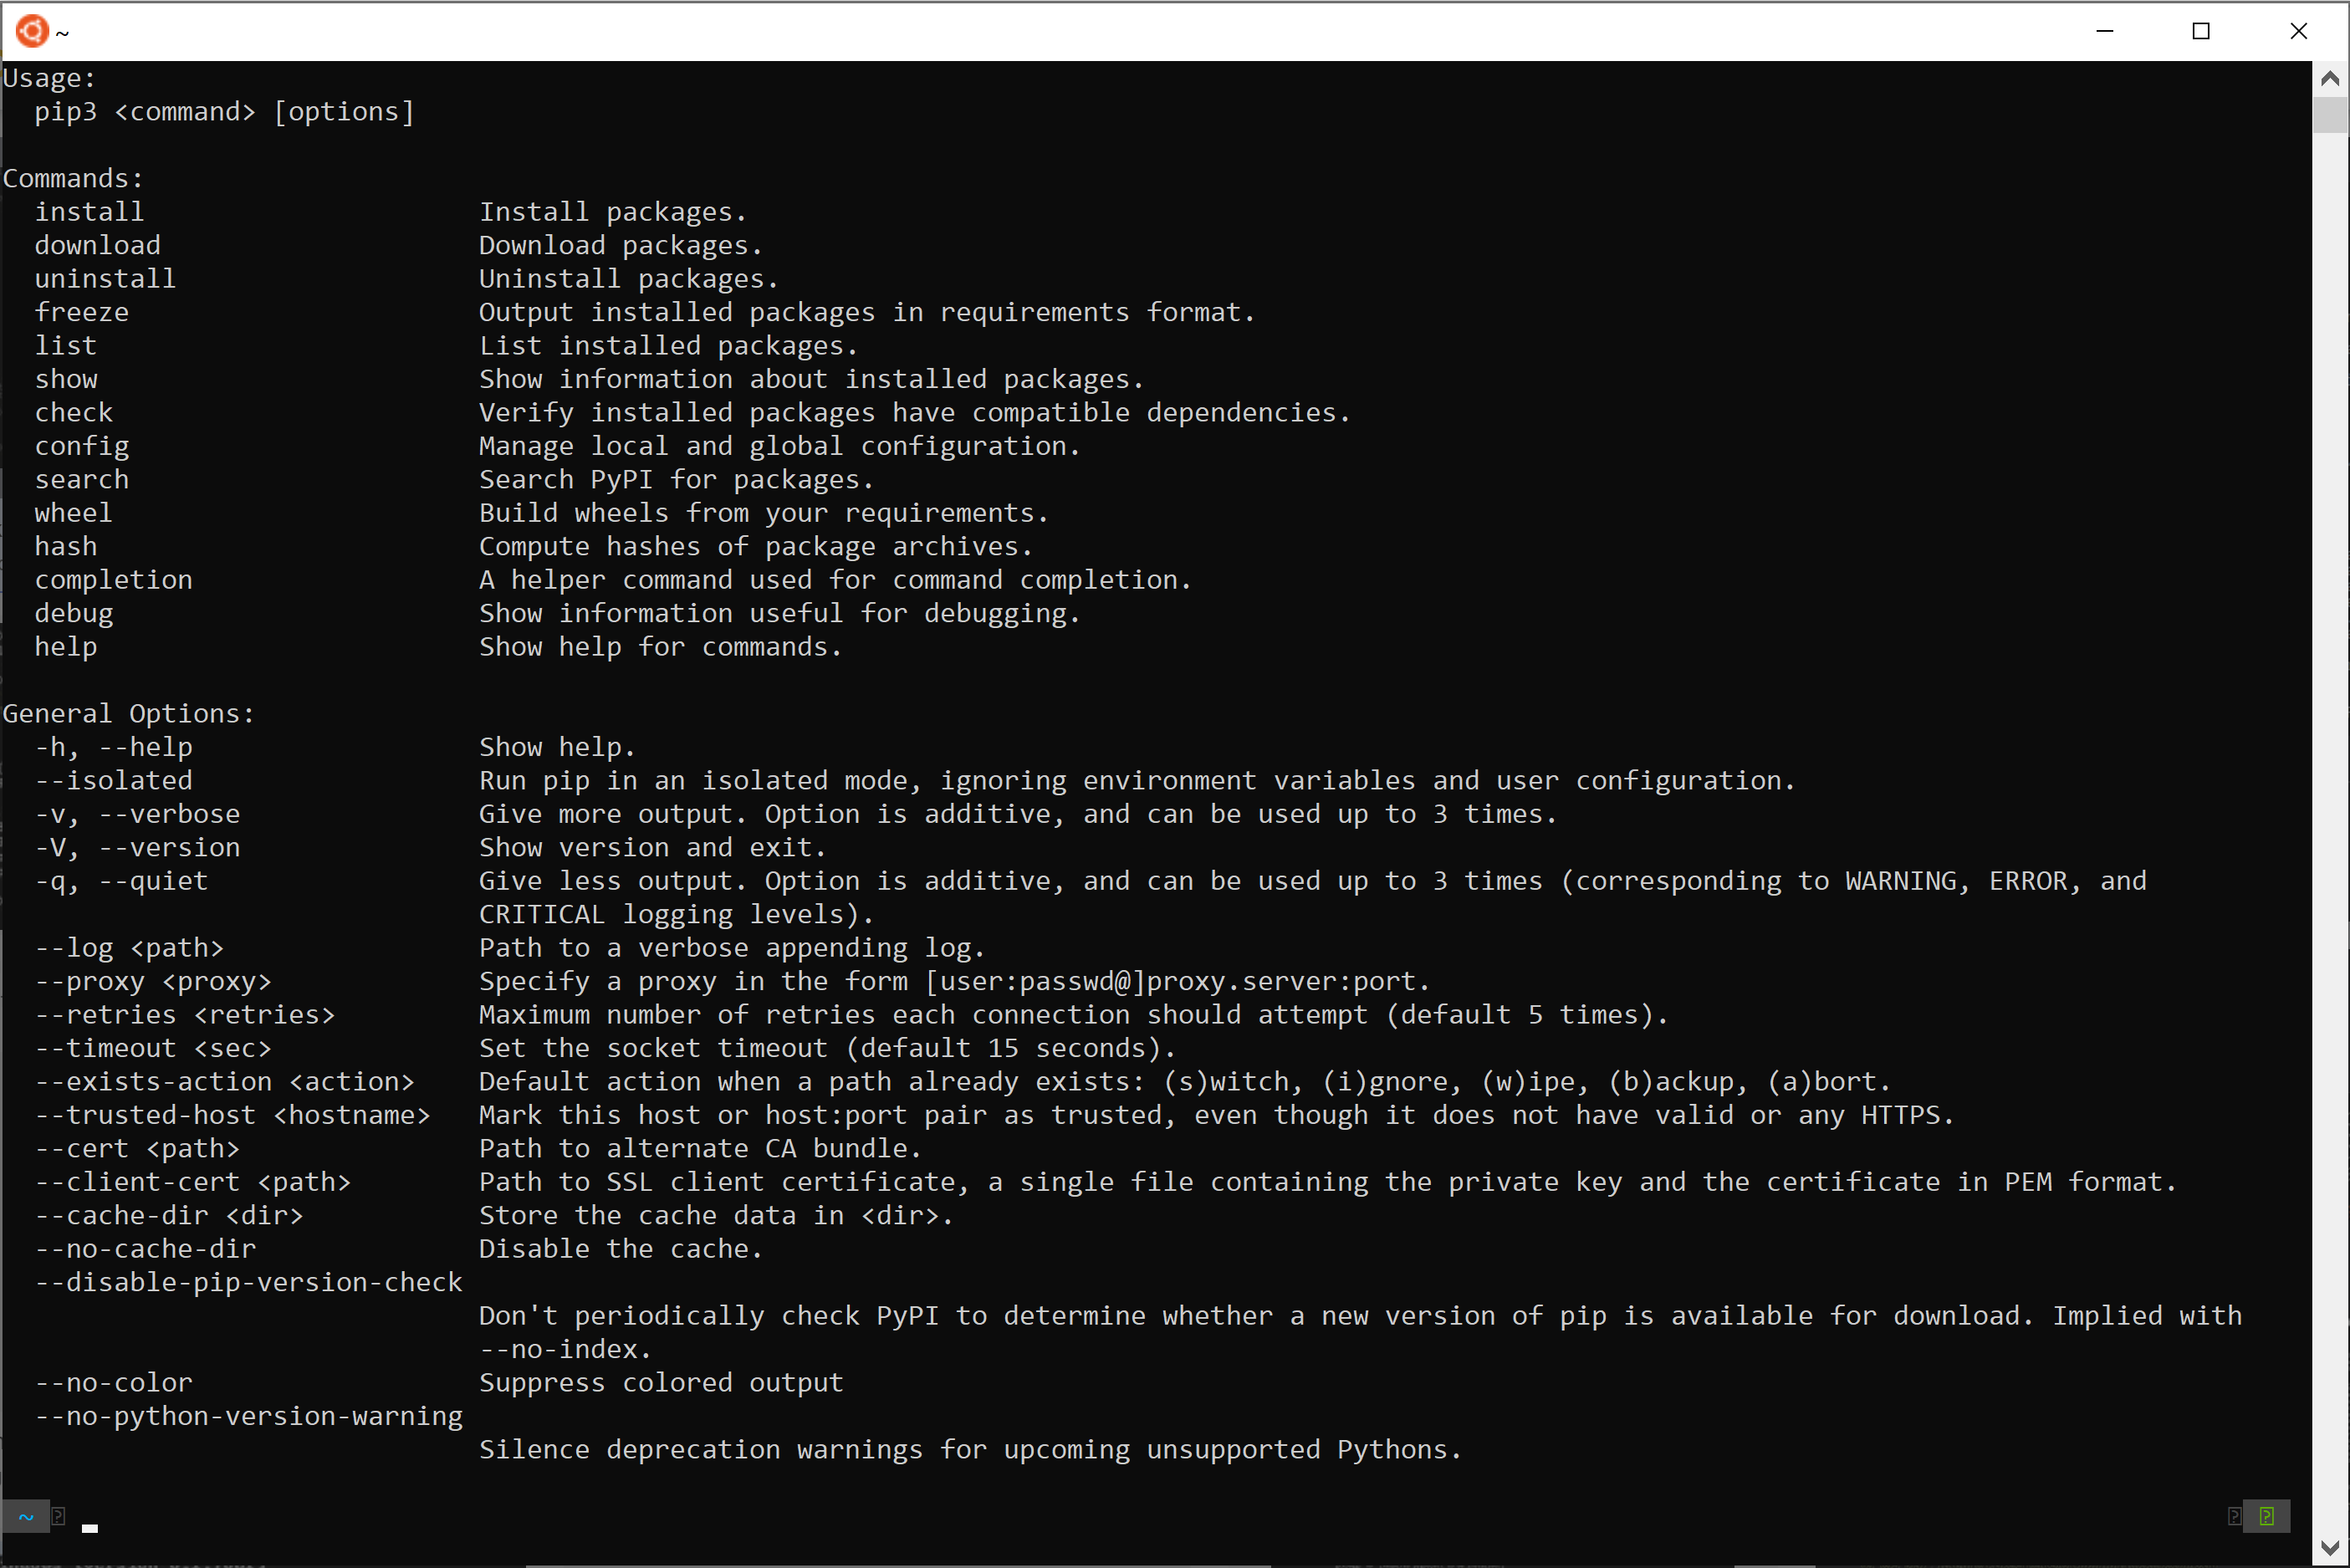
pip is the standard package manager for Python. It allows you to install and manage packages that are not part of the Python standard library. Once Python is installed, pip is usually installed alongside it. To verify if pip is installed and to check its version, open your terminal or command prompt and type:
pip --version
You should see output similar to pip 23.3.1 from /path/to/python/lib/site-packages/pip (python 3.10). If you get an error like “command not found,” it means pip is not in your system’s PATH, or it wasn’t installed correctly. In such cases, you might try python -m ensurepip --default-pip or reinstall Python, paying close attention to the “Add to PATH” option. On some systems, especially where both Python 2 and Python 3 exist, you might need to use pip3 instead of pip.
Understanding Virtual Environments
While you can install packages globally on your system, it’s a strongly recommended best practice to use virtual environments. A virtual environment is an isolated Python environment that allows you to install packages for a specific project without affecting other projects or the global Python installation.
Imagine Project A needs Django==3.2 and Project B needs Django==4.0. If you install Django globally, you can only have one version. Virtual environments solve this by creating separate, isolated spaces for each project. This prevents dependency conflicts and ensures that your project’s dependencies are well-defined and reproducible.
Python 3 includes a built-in module called venv for creating virtual environments. We will explore its usage in the best practices section.
The Primary Method: Using Pip
pip is your go-to tool for installing, managing, and uninstalling Python packages. Understanding its core commands is essential for any Python developer.
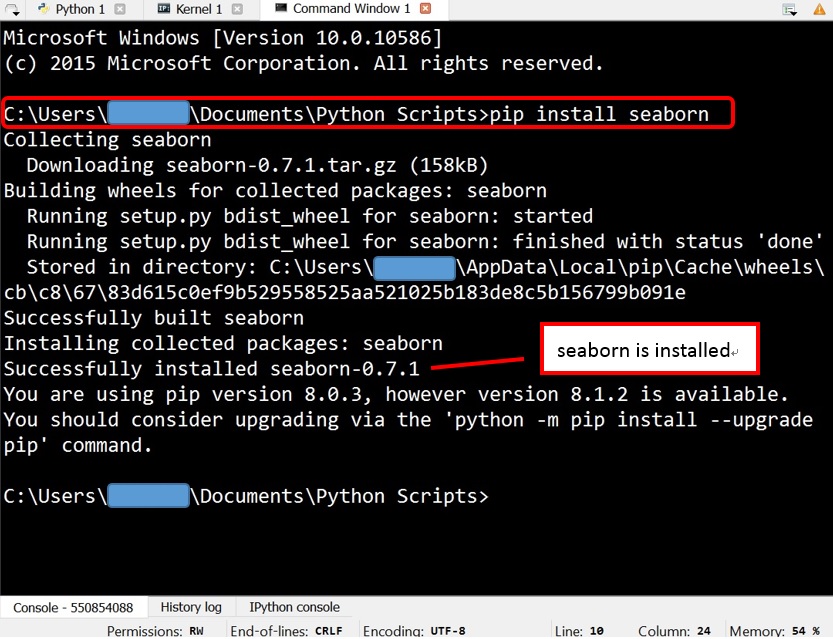
Basic Installation: pip install <package_name>
The most fundamental command for installing a package is pip install. To install a package, open your terminal or command prompt (preferably after activating a virtual environment) and execute:
pip install package_name
Replace package_name with the actual name of the package you wish to install. For example, to install the popular NumPy library for numerical operations:
pip install numpy
pip will connect to PyPI, download the package, and its dependencies, and install them into your current Python environment. You will see output showing the progress of the download and installation.
Installing Specific Versions
Sometimes, you might need to install a specific version of a package due to compatibility requirements or to ensure consistency across development environments. You can do this by specifying the version number using comparison operators:
-
Exact version:
pip install SomePackage==1.0.4 -
Minimum version:
pip install SomePackage>=1.0.4 -
Compatible version (patch releases only):
pip install SomePackage~=1.0.4 # Installs 1.0.4 or any later patch release like 1.0.5, but not 1.1.0
It’s generally good practice to pin exact versions in requirements.txt files for production environments to ensure consistent deployments.
Upgrading and Uninstalling Modules
Packages are frequently updated with new features, bug fixes, and performance improvements. To upgrade an already installed package to its latest version, use the --upgrade flag:
pip install --upgrade package_name
For instance, to upgrade NumPy:
pip install --upgrade numpy
If you no longer need a package in your environment, or if you need to resolve conflicts, you can easily uninstall it:
pip uninstall package_name
pip will ask for confirmation before removing the package and its associated files.
Installing from a requirements.txt file
For projects with multiple dependencies, manually installing each package is tedious and error-prone. This is where requirements.txt files come in. A requirements.txt file lists all the packages and their versions that a particular project depends on. This is crucial for project reproducibility and sharing.

To generate a requirements.txt file from your current environment’s installed packages:
pip freeze > requirements.txt
This command will output a list of all installed packages and their exact versions into the requirements.txt file. A typical requirements.txt might look like this:
Django==4.2.7

djangorestframework==3.14.0

numpy==1.26.2

pandas==2.1.3

requests==2.31.0
To install all packages listed in a requirements.txt file into a new environment (e.g., on a different machine or a fresh virtual environment):
pip install -r requirements.txt
This command is a cornerstone of collaborative development and deployment, ensuring everyone works with the same set of dependencies.
Advanced Installation Methods
While pip install from PyPI covers the vast majority of use cases, there are scenarios where you might need to install packages from other sources or in different ways.
Installing from a Local Directory
If you have a Python package’s source code on your local machine (e.g., a custom package you’ve written or one not yet published to PyPI), you can install it directly. Navigate to the directory containing the setup.py file (or pyproject.toml for modern projects) of the package and use pip install with a dot (.) to signify the current directory:
cd /path/to/your/package/source

pip install .
This command installs the package in “editable” mode (-e or --editable) by default if a pyproject.toml is present with build-system.backend = "setuptools.build_meta" (or for setup.py), meaning changes to the source code will immediately reflect in your installed package without needing to reinstall. If you want a static installation, you might explicitly use pip install --no-editable ..
Installing from Version Control (Git)
Sometimes, you might want to install a package directly from a version control system like Git. This is particularly useful for installing development versions of packages, custom forks, or internal libraries not published to PyPI.
To install a package from a Git repository:
pip install git+https://github.com/user/repo.git
You can also specify branches, tags, or commit hashes:
-
Specific branch:
pip install git+https://github.com/user/repo.git@branch_name -
Specific tag:
pip install git+https://github.com/user/repo.git@v1.2.3 -
Specific commit hash:
pip install git+https://github.com/user/repo.git@abcdefg12345
For private repositories, pip can handle authentication if your Git client is configured (e.g., using SSH keys).
Installing Development Versions
When contributing to a project or testing upcoming features, you might need to install a package in “development mode” or “editable mode.” This links the package’s source code directly to your Python environment, so any changes you make to the source files are immediately reflected in your Python scripts without needing to reinstall.
This is achieved using the -e or --editable flag with pip install:
pip install -e /path/to/package/source
Or, if installing from Git with editable mode:
pip install -e git+https://github.com/user/repo.git#egg=package_name
The #egg=package_name part tells pip what the actual package name is within the repository, especially if the repository name differs from the package name.
Using Alternative Package Managers (Anaconda/Conda)
While pip is the standard for general Python packages, developers working in data science, machine learning, or scientific computing often use Anaconda and its package manager, conda. conda is a cross-platform package and environment manager that can install packages for Python, R, Java, and other languages, including non-Python dependencies (like C/C++ libraries) that pip might struggle with.
If you have Anaconda or Miniconda installed, you can use conda to install packages:
conda install package_name
conda environments offer similar isolation benefits to venv. You can even mix pip and conda within a conda environment, though it’s generally advised to prioritize conda for packages available through its channels to avoid potential conflicts with conda-managed dependencies.
Best Practices and Troubleshooting
Effective module installation isn’t just about knowing the commands; it’s also about adopting best practices to ensure stable, reproducible, and secure development environments, and knowing how to resolve common issues.
The Importance of Virtual Environments
We’ve touched on virtual environments, but it’s worth reiterating their critical role. Always, always use a virtual environment for every new project.
Steps to use venv (the built-in module):
-
Create a virtual environment: Navigate to your project directory and run:
python -m venv venv # 'venv' is the conventional name for the environment directory -
Activate the virtual environment:
-
On Windows:
.venvScriptsactivate -
On macOS/Linux:
source venv/bin/activate
Once activated, your terminal prompt will typically show
(venv)indicating you are operating within the isolated environment. -
-
Install packages: Now, use
pip installas usual. Packages will be installed into this specificvenvdirectory. -
Deactivate: When you’re done working on the project, or need to switch to another project, simply type:
deactivate
This practice isolates project dependencies, prevents conflicts, and makes your projects easily shareable and deployable.
Common Installation Errors and Solutions
Even with best practices, you might encounter issues. Here are some common errors and how to address them:
-
pip is not recognized as an internal or external command: This meanspip(or Python) is not in your system’s PATH. Reinstall Python and ensure the “Add to PATH” option is checked, or manually add Python’s Scripts directory to your PATH. -
Requirement already satisfied: This message means the package is already installed. If you intended to upgrade, usepip install --upgrade package_name. -
No matching distribution found for package_name: This typically means you’ve misspelled the package name, or the package doesn’t exist on PyPI. Double-check the spelling. -
Permissions errors (
Permission deniedorOperation not permitted):-
Never use
sudo pip install(Linux/macOS) or run your terminal as administrator (Windows) for global installs unless absolutely necessary. This can lead to system-wide issues. -
The best solution is to use a virtual environment, which doesn’t require elevated permissions.
-
If you must install globally and encounter this,
pip install --user package_namecan install packages into your user directory, avoiding system-level permissions. However, this is still less recommended than virtual environments.
-
-
Compiler errors (e.g.,
Microsoft Visual C++ 14.0 is requiredon Windows orgcc failedon Linux/macOS): Some Python packages contain C/C++ extensions that need to be compiled during installation.-
On Windows: You might need to install the Microsoft Visual C++ Build Tools. Search for “Build Tools for Visual Studio” and install the C++ build tools.
-
On macOS: Install Xcode Command Line Tools:
xcode-select --install. -
On Linux: Install
build-essential(Debian/Ubuntu) orDevelopment Tools(Fedora/RHEL):sudo apt-get install build-essentialorsudo yum groupinstall "Development Tools".
-
-
Dependency Conflicts: When two packages require different, incompatible versions of a third package. This is the primary reason why virtual environments are so vital. If it happens within an environment, you might need to find alternative packages or adjust your project’s dependency matrix.
Managing Dependencies
Beyond installation, effective dependency management is crucial for project longevity.
-
Pinning Versions: Always pin exact versions in your
requirements.txt(package_name==X.Y.Z). This ensures that your project will always run with the same dependencies, regardless of when or where it’s installed. -
Regular Updates: While pinning exact versions is good for reproducibility, occasionally update your dependencies (
pip install --upgrade -r requirements.txtafter making a newrequirements.txt) to benefit from bug fixes, security patches, and new features. Test thoroughly after updates. -
Audit Dependencies: Periodically review your
requirements.txtto remove unused packages (pip uninstall) or check for security vulnerabilities (tools likepip-auditorsafety).
Security Considerations
Installing third-party code always comes with a degree of risk. Here are some security tips:
-
Source Trustworthiness: Only install packages from trusted sources, primarily PyPI. Be wary of packages from unknown Git repositories unless you’ve thoroughly reviewed their code.
-
Review Package Popularity: For critical packages, check their download statistics, GitHub stars, and community activity. More popular packages are generally better vetted.
-
Scan for Vulnerabilities: Use tools like
pip-audit(pip install pip-audit) to scan yourrequirements.txtor installed packages against known vulnerabilities databases. -
Keep Pip Updated: Ensure
pipitself is up-to-date (pip install --upgrade pip) to benefit from the latest security fixes and features in the package manager.
By adhering to these best practices, you can ensure a smooth, secure, and efficient development workflow using Python modules. The ability to confidently install and manage modules is a cornerstone skill for any Python developer, opening up a vast world of possibilities within the language’s rich ecosystem.
aViewFromTheCave is a participant in the Amazon Services LLC Associates Program, an affiliate advertising program designed to provide a means for sites to earn advertising fees by advertising and linking to Amazon.com. Amazon, the Amazon logo, AmazonSupply, and the AmazonSupply logo are trademarks of Amazon.com, Inc. or its affiliates. As an Amazon Associate we earn affiliate commissions from qualifying purchases.