
Minecraft, a cultural phenomenon in the gaming world, offers an unparalleled sandbox experience. Yet, even within its boundless blocky landscapes, players often seek to expand their horizons further. This is where “mods” come into play – user-created modifications that can transform every aspect of the game, from adding new creatures and items to overhauling graphics and fundamental gameplay mechanics. For many, particularly those utilizing platforms like TLauncher for their Minecraft Java Edition, understanding the process of installing these mods is a gateway to an entirely new dimension of creativity and exploration. This guide delves into the technical intricacies of integrating mods with TLauncher, ensuring a smooth and enriched Minecraft journey.
The Allure of Modding: Why Enhance Your Minecraft Experience?
The vanilla Minecraft experience is undoubtedly rich, but its open-ended nature naturally invites players to tinker and customize. Mods offer an extensive toolkit for this, pushing the boundaries of what’s possible within the game engine. From subtle quality-of-life improvements to massive content additions, mods are a cornerstone of the Minecraft community, fostering innovation and extending the game’s longevity exponentially.
Understanding Minecraft Mods
At its core, a Minecraft mod is an alteration to the original game code, designed to introduce new features, change existing ones, or fix bugs not addressed by official updates. These modifications can range from simple aesthetic changes, like new textures or improved lighting, to complex additions such as advanced machinery, magic systems, or entirely new dimensions to explore. The sheer variety means there’s a mod for almost every conceivable desire, catering to builders, adventurers, engineers, and redstone enthusiasts alike. Modding transforms Minecraft from a game into a platform, constantly evolving through community-driven development.
Why TLauncher for Modded Minecraft?
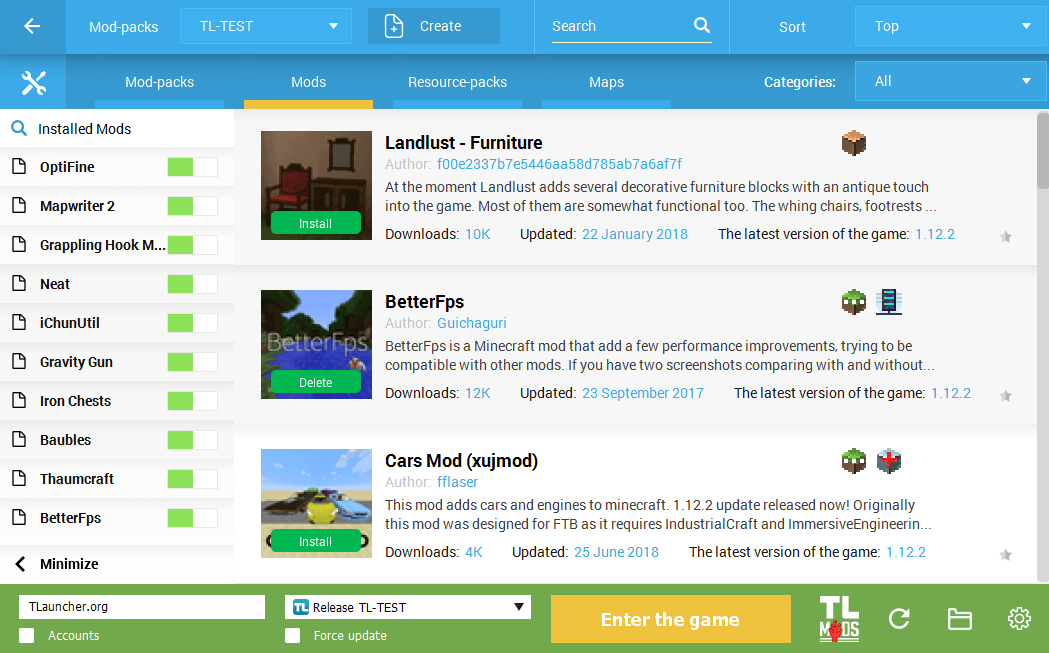
TLauncher has become a popular alternative launcher for Minecraft Java Edition, particularly favored for its user-friendliness and integrated features. While it serves a broader audience, its robust profile management system makes it surprisingly well-suited for handling multiple modded instances of Minecraft. Unlike the official launcher which primarily focuses on official releases, TLauncher often provides simplified access to various Minecraft versions, including snapshot builds and, crucially for modders, profiles pre-configured for mod loaders like Forge and Fabric. This integration streamlines the initial setup phase, reducing common friction points associated with manual mod installation, making it an attractive option for those looking to dive into the world of modded Minecraft without extensive technical overhead.
Essential Preparations Before You Begin
Before embarking on your modding adventure, a few crucial preliminary steps can save you significant frustration and potential data loss. These technical preparations ensure your system and game environment are optimally configured for the introduction of third-party modifications. Ignoring these can lead to crashes, incompatibility issues, or even corruption of your existing game worlds.
Ensuring Java is Up-to-Date
Minecraft Java Edition, as its name suggests, relies heavily on a properly installed and updated Java Runtime Environment (JRE). Mods, being custom code, often leverage specific Java features or require a particular version to function correctly. An outdated or improperly configured Java installation is a leading cause of mod-related crashes. Before installing any mods, it is highly recommended to:
-
Check your current Java version: You can typically do this through your operating system’s control panel or by running a command in the terminal.
-
Download the latest recommended Java version: For newer Minecraft versions (1.17+), Java 17 or higher is often required. For older versions (1.16.5 and below), Java 8 is usually sufficient. Always download from the official Oracle website or adoptium.net to ensure security and compatibility.
-
Install Java: Follow the installation prompts carefully. In some cases, you might need to uninstall older versions to prevent conflicts, though modern installers often handle this.
A correctly configured Java environment is the bedrock upon which your modded Minecraft experience will be built.
Backing Up Your Worlds and Game Files
This step cannot be overstressed. Modding, by its nature, involves altering game files. While usually safe, there’s always a slim chance of unexpected conflicts or errors that could corrupt your save files or even your entire Minecraft installation.
-
Locate your Minecraft save folder: This is typically found within the
.minecraftdirectory. On Windows, type%appdata%.minecraftsavesinto your file explorer. On macOS, it’s~/Library/Application Support/minecraft/saves. -
Copy the entire
savesfolder: Paste it to a secure location, such as an external hard drive, cloud storage, or another folder on your computer. -
Consider backing up your entire
.minecraftfolder: This is a more comprehensive backup that includes configurations, resource packs, and potentially other important data.
Having a backup ensures that if anything goes wrong, you can easily revert to your unmodded, pristine game state without losing hours of progress or beloved creations.
Identifying Compatible Mod Loaders (Forge vs. Fabric)
Minecraft mods don’t typically run directly with the vanilla game. They require a “mod loader” – an API (Application Programming Interface) that allows mods to interact with the game code without directly altering the core game files, thus improving compatibility and management. The two dominant mod loaders are Forge and Fabric.
-
Forge: Historically the most popular and mature mod loader, Forge has an extensive library of mods developed over many years. It is generally more resource-intensive but supports a vast array of complex mods.
-
Fabric: A newer, lightweight, and more modular mod loader, Fabric is known for its faster startup times and better performance. It gained popularity with newer Minecraft versions (especially 1.14+), and many developers now create mods exclusively for Fabric.
Crucially, a mod built for Forge will not work with Fabric, and vice-versa. You must choose a mod loader based on the mods you intend to use. Check the mod’s description or download page to see which loader it requires. TLauncher simplifies the installation of both, allowing you to switch between them easily through its profile system.
Step-by-Step Guide to Installing Your Mod Loader
With your preparations complete, the next critical phase is to install the chosen mod loader. This step creates a modding environment within your TLauncher setup, acting as the foundation for all subsequent mod installations. TLauncher significantly streamlines this process, integrating directly with mod loader installations.
Downloading and Running Forge or Fabric Installer
The process for installing Forge or Fabric is remarkably similar, thanks to their dedicated installers.
-
Visit the official website: For Forge, go to
files.minecraftforge.net. For Fabric, go tofabricmc.net/use/. -
Select the correct Minecraft version: It’s imperative that the version of Forge/Fabric you download matches the Minecraft version you intend to mod (e.g., Minecraft 1.19.2 requires Forge/Fabric for 1.19.2).
-
Download the installer: Look for the “Installer” or “Universal Jar” link. This will download a
.jarfile. -
Run the installer: Double-click the downloaded
.jarfile. If Java is correctly installed, a small window will appear. -
Choose “Install Client”: Ensure this option is selected. The installer will automatically detect your
.minecraftdirectory. Click “OK” to proceed. The installer will download necessary files and set up the mod loader. You should see a success message upon completion.
This process creates a new profile within your Minecraft directory and registers it with any compatible launchers.
Setting Up the Modded Profile in TLauncher
Once the mod loader is installed, you need to tell TLauncher to use this new modded environment. TLauncher typically detects these new installations automatically.
-
Open TLauncher: Launch the TLauncher application.
-
Locate the version selector: In the bottom-left corner of the TLauncher interface, you’ll find a dropdown menu or a list of available versions.
-
Select the modded profile: You should now see new profiles listed, typically named something like
Forge [Minecraft Version]orFabric Loader [Minecraft Version]. Select the one corresponding to the mod loader and Minecraft version you just installed. For example,Forge 1.19.2. -
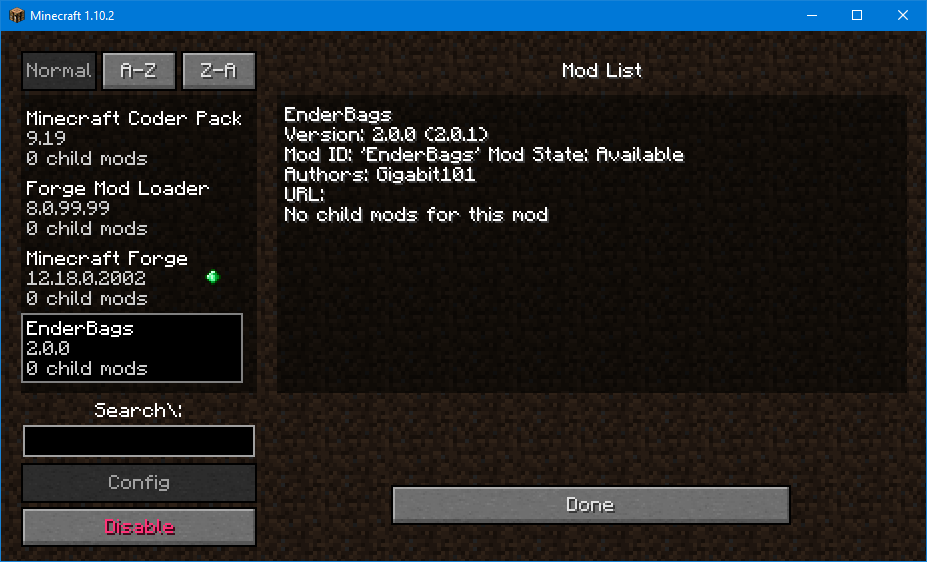
(Optional) Test launch: Before adding any individual mods, it’s a good idea to launch Minecraft with just the mod loader. This verifies that the mod loader itself is correctly installed and functioning. The game should load to the main menu, and you might see a new “Mods” button or an indication that Forge/Fabric is active. Close the game once you’ve confirmed this.
Integrating Your Chosen Mods into Minecraft
With your mod loader successfully installed and configured in TLauncher, you are now ready to add the actual mods. This involves sourcing the mod files and placing them in the correct directory. This step is where your creative vision for your modded world truly begins to take shape.
Sourcing Reliable Mod Files
The internet is teeming with Minecraft mods, but not all sources are equally trustworthy. To ensure security and compatibility, always download mods from reputable websites:
-
CurseForge: The largest and most popular repository for Minecraft mods. Mods are generally well-vetted, and the site offers version filtering and extensive information. (
curseforge.com/minecraft/mc-mods) -
Modrinth: A growing alternative to CurseForge, known for its clean interface and open-source focus. (
modrinth.com)
When downloading, always:
-
Verify compatibility: Ensure the mod is for your exact Minecraft version and the mod loader (Forge or Fabric) you have installed. A mismatch will almost certainly lead to a crash.
-
Read descriptions and comments: Check for any special installation instructions, known bugs, or required dependencies (other mods that must be installed for this one to work).
-
Download the
.jarfile: Most mods are distributed as.jarfiles. Do not download.exefiles unless you are absolutely sure of their origin and purpose, as these can be malicious.
Locating and Utilizing the ‘Mods’ Folder
Once you have your mod .jar files, they need to be placed in the designated ‘mods’ folder.
-
Open TLauncher: Ensure you have selected your modded profile (e.g., Forge 1.19.2).
-
Access the game folder: In the TLauncher interface, usually near the “Install” or “Enter the game” button, there’s an icon resembling a folder. Click this to open your
.minecraftdirectory. -
Locate the
modsfolder: Inside the.minecraftdirectory, you should find a folder namedmods. If it doesn’t exist, you can create it manually. This folder is automatically generated by Forge or Fabric upon its first launch. -
Copy mod files: Drag and drop or copy-paste all your downloaded
.jarmod files into thismodsfolder. Do not extract the.jarfiles; they should remain as individual.jararchives.
If a mod has dependencies, ensure all required dependency .jar files are also placed in this mods folder.
Launching Minecraft with Installed Mods
With your mods in the mods folder, the final step is to launch the game and enjoy your new additions.
-
Return to TLauncher: Ensure the modded profile (e.g., Forge 1.19.2) is still selected.
-
Click “Enter the game”: TLauncher will now launch Minecraft using the selected mod loader, which will then scan the
modsfolder and load all compatible.jarfiles. -
Verify mod loading: Once Minecraft loads, check the main menu. If using Forge, there will usually be a “Mods” button, which you can click to see a list of all loaded mods. Fabric might not have a dedicated button but loaded mods are usually evident through their effects in-game.
Congratulations! You’ve successfully installed mods into your Minecraft Java TLauncher setup.
Troubleshooting Common Issues and Best Practices
Modding, while rewarding, can sometimes present technical challenges. Understanding common issues and adopting best practices will ensure a smoother, more enjoyable experience and help maintain the stability of your modded Minecraft world.
Addressing Game Crashes and Conflicts
Crashes are an inevitable part of extensive modding. When your game fails to launch or crashes during play, it’s almost always due to mod-related issues.
-
Read the Crash Report: When Minecraft crashes, it typically generates a crash report. These are invaluable, as they often point directly to the mod causing the problem or the type of error (e.g., “Out of Memory,” “java.lang.NoClassDefFoundError”). The crash report’s location is usually indicated in the error message.
-
Version Mismatches: The most common cause of crashes. Double-check that all mods are for the exact Minecraft version and mod loader you are using.
-
Mod Conflicts: Sometimes, two or more mods try to modify the same aspect of the game in incompatible ways.
-
The 50/50 Method: If you have many mods, move half of them out of the
modsfolder. Launch the game. If it works, the problem is in the other half. If it crashes, the problem is in the half you kept. Repeat this process, narrowing down the culprit until you find the problematic mod. -
Dependency Issues: Ensure all required dependency mods are installed. A crash report often lists missing classes if this is the case.
-
-
Out of Memory Errors: Modded Minecraft can be resource-intensive. If you get “Out of Memory” errors, you may need to allocate more RAM to Minecraft through TLauncher’s settings (usually under “Settings” or “Advanced Settings”). Be careful not to allocate too much, leaving insufficient RAM for your operating system.
-
Corrupted Installation: In rare cases, the mod loader or even TLauncher installation might get corrupted. As a last resort, try reinstalling TLauncher and the mod loader from scratch after backing up your worlds.
Managing and Updating Your Mod Library
A well-maintained mod library is key to a stable modded experience.
-
Keep Mods Updated: Mod developers frequently release updates for bug fixes, performance improvements, and compatibility with newer Minecraft versions. Regularly check CurseForge or Modrinth for updates to your installed mods.
-
Remove Unused Mods: If you stop using a mod, remove its
.jarfile from themodsfolder. This reduces clutter, potential conflicts, and improves game performance. -
Organize Your
modsFolder: For extensive modpacks, consider creating subfolders (e.g., “Core,” “Tech,” “Magic”) or using mod managers like MultiMC or ATLauncher (though TLauncher users typically manage manually). While Minecraft doesn’t natively support subfolders inmods, some mod loaders might. It’s safer to keep all.jarfiles directly in themodsfolder. -
Document Your Modlist: For larger setups, keeping a simple text file or spreadsheet listing your installed mods, their versions, and any specific notes can be incredibly helpful for troubleshooting or recreating your setup.
Security Considerations for Mod Downloads
While the modding community is generally safe, security should always be a concern when downloading third-party software.
-
Stick to Reputable Sources: As mentioned, CurseForge and Modrinth are generally safe. Avoid unknown forums, direct download links from suspicious websites, or pirated content sites, which are prime vectors for malware.
-
Verify File Extensions: Always ensure you’re downloading
.jarfiles for mods. Be highly suspicious of.exefiles, as these can contain viruses or unwanted software. -
Antivirus Software: Keep your antivirus software updated and active. It can help detect and block potentially malicious files.
-
Read Reviews and Comments: Before downloading a new mod, check its page for user reviews or comments. If many users report issues, malware, or suspicious behavior, it’s best to avoid that mod.
By adhering to these guidelines, you can significantly enhance your Minecraft Java experience through modding with TLauncher, enjoying a stable, personalized, and creatively rich blocky world. Modding is an art form in itself, and with these technical steps, you are well-equipped to become a master of your own Minecraft universe.
aViewFromTheCave is a participant in the Amazon Services LLC Associates Program, an affiliate advertising program designed to provide a means for sites to earn advertising fees by advertising and linking to Amazon.com. Amazon, the Amazon logo, AmazonSupply, and the AmazonSupply logo are trademarks of Amazon.com, Inc. or its affiliates. As an Amazon Associate we earn affiliate commissions from qualifying purchases.