
The digital landscape of PC gaming offers an unparalleled level of flexibility and customization, largely thanks to the vibrant modding community. Mods, short for modifications, are user-created alterations to a game’s content, code, or assets. They range from simple texture swaps and bug fixes to entirely new quests, characters, or gameplay mechanics, profoundly transforming the gaming experience. For enthusiasts of Steam games, delving into the world of modding can unlock countless hours of extended gameplay, provide fresh perspectives on beloved titles, and even breathe new life into older classics. This comprehensive guide will navigate you through the technical intricacies and best practices of installing mods for your Steam games, ensuring a smooth and rewarding journey into enhanced digital entertainment.
The Transformative Power of Modding: Why Gamers Embrace Customization
Modding isn’t merely a niche hobby; it’s a fundamental aspect of PC gaming culture that significantly enhances a game’s longevity and appeal. Understanding the ‘why’ behind modding is the first step in appreciating its profound impact on the tech landscape of gaming.
Beyond the Developer’s Vision: What Are Mods?
At its core, a mod is a piece of software that alters a game. These alterations can be minor, like changing the color of a character’s armor, or monumental, such as overhauling an entire game engine or adding hundreds of hours of new content. Mods can be categorized broadly into:
-
Graphical Enhancements: High-resolution textures, improved lighting, weather effects, and shader packs that elevate a game’s visual fidelity far beyond its original release.
-
Gameplay Overhauls: Reworking core game mechanics, balancing systems, adding new abilities, or introducing entirely new game modes.
-
New Content: Quests, characters, items, weapons, maps, and even entirely new storylines that expand the game’s universe.
-
Quality of Life Improvements: User interface (UI) enhancements, bug fixes not addressed by official patches, performance optimizations, and accessibility features.
-
Utility Mods: Tools that aid other mods or provide in-game information, often critical for complex mod setups.
The diversity of mods means that virtually any aspect of a game can be tweaked or expanded, offering players an unprecedented level of control over their gaming experience.
Elevating the Gaming Experience: Benefits of Modding
The appeal of modding stems from a multitude of benefits that directly impact the player’s engagement and satisfaction:
-
Extended Replayability: Mods can fundamentally change a game, making even titles played for hundreds of hours feel fresh again. A new questline for an RPG or a new faction for a strategy game can dramatically extend its lifespan.
-
Personalization and Aesthetics: For many, modding is about tailoring the game to their exact preferences, from character appearance to environmental details. This personal touch deepens immersion and connection with the game world.
-
Performance and Bug Fixes: The modding community often addresses long-standing bugs or performance issues that official patches might have missed or left unresolved, making games more stable and enjoyable.
-
Innovation and Creativity: Modders frequently experiment with concepts that developers might not have considered, pushing the boundaries of what a game can be. This creative exchange often influences future official game designs.
-
Community Engagement: Modding fosters a strong sense of community, where players share creations, offer support, and collaborate on ambitious projects, enriching the social aspect of gaming.
By embracing mods, players transform from passive consumers to active participants in the evolution of their favorite digital worlds.
Understanding the Landscape: Prerequisites for Successful Modding
Before diving into the actual installation process, a few foundational steps and understandings are crucial to ensure a smooth modding experience and prevent potential issues:
-
Basic File Management: Familiarity with navigating file directories, copying, pasting, and extracting compressed files (e.g., .zip, .rar) is essential, especially for manual installations.
-
Back Up Your Game Files: This cannot be stressed enough. Always back up your save files and, ideally, the clean installation of the game itself before applying any mods. This acts as a safety net, allowing you to revert to a working state if something goes wrong.
-
System Requirements and Performance: While many mods improve visuals, some are performance-intensive. Ensure your PC meets or exceeds the recommended specifications, especially for large graphical overhauls.
-
Understand End-User License Agreements (EULAs): Be aware that some game developers’ EULAs may restrict certain types of modding, especially for multiplayer games, where anti-cheat systems might flag modifications as unfair advantages. Stick to single-player modifications unless explicitly sanctioned.
-
The Internet Connection: A stable internet connection is required to download mods from various platforms.
Taking these preparatory steps will significantly mitigate risks and prepare you for a more enjoyable modding journey.
Navigating the Modding Ecosystem: Where to Find Your Enhancements
The vast universe of game mods is scattered across numerous platforms, each offering a unique approach to discovery and installation. Knowing where to look is key to finding quality content and a supportive community.
The Steam Workshop: Official and Streamlined Modding
For games that support it, the Steam Workshop is often the easiest entry point into modding. It’s integrated directly into the Steam client and offers a user-friendly experience:
-
Ease of Use: Simply browse the workshop page for a specific game, find a mod you like, and click “Subscribe.” Steam automatically downloads and integrates the mod into your game.
-
Limitations: While convenient, the Workshop’s features can be limited. Not all games support it, and the types of mods available might be restricted compared to external sites. Complex mod setups, such as those requiring specific load orders or dependency management, might not be fully supported.
-
Unsubscribing: Removing mods is as simple as unsubscribing, and Steam typically handles the uninstallation process.
The Steam Workshop is ideal for beginners and those looking for straightforward enhancements without external tools.
Dedicated Modding Hubs: Nexus Mods and Mod DB
For the vast majority of games and for more advanced modding, dedicated platforms like Nexus Mods and Mod DB are indispensable. These sites host millions of mods and boast robust community features:
-
Vast Libraries: Nexus Mods, in particular, is renowned for its immense collection of mods for hundreds of games, from classic RPGs like Skyrim and Fallout to modern titles like Cyberpunk 2077. Mod DB offers a similar, though sometimes broader, range including total conversion mods.
-
Community Support: Both platforms feature active forums, comment sections, and detailed mod pages where creators provide installation instructions, troubleshoot issues, and engage with users.
-
Advanced Tools: These sites often integrate with or recommend powerful mod managers (like Vortex from Nexus Mods) that simplify complex installations, manage load orders, and resolve conflicts.
-
File Verification: Reputable modding sites generally have systems in place (community flagging, author reputation) to ensure files are clean and safe, though exercising caution remains prudent.
These hubs are the go-to for serious modders seeking depth, variety, and robust community resources.
Official Game Forums and Community Sites: Niche Discoveries
Beyond the major hubs, official game forums, dedicated subreddits, and independent community websites often host unique mods, developer-sanctioned tools, and discussions:
-
Niche Content: You might find specific lore-friendly additions, highly specialized tools, or smaller, experimental mods that haven’t made it to larger platforms.
-
Developer-Provided Tools: Some developers release Software Development Kits (SDKs) or modding tools that allow for deep customization, often found on their own forums or dedicated portals.
-
Direct Interaction: These smaller communities allow for more direct interaction with mod creators and a closer-knit support network, which can be invaluable for niche games or troubleshooting unique issues.
Always exercise extra caution when downloading from lesser-known sites, ensuring files are scanned for malware before execution.
Step-by-Step Mod Installation Methods: A Comprehensive Guide
Installing mods can range from a single click to a multi-step process involving external tools. Understanding the different methods is crucial for successful integration.
The Direct Approach: Manual Mod Installation
Manual installation is the most fundamental method and often required for mods not supported by managers or workshops.
-
Download the Mod: Obtain the mod file, usually a compressed archive (.zip, .rar, .7z) from your chosen modding site.
-
Locate Your Game Directory: For most Steam games, this is typically found at
C:Program Files (x86)Steamsteamappscommon[Game Name]. You can also right-click the game in your Steam Library, select “Manage” > “Browse local files.” -
Extract the Mod Files: Using a tool like 7-Zip or WinRAR, extract the contents of the downloaded archive. Crucially, read the mod’s instructions (README file) before proceeding. Mod files rarely go directly into the root game folder. They often belong in specific subfolders like
Data,Mods,Assets, or a custom folder created by the game. -
Place Files into Game Directory: Copy the extracted mod files into the correct game subfolder as specified by the mod author. This might involve overwriting existing files, so ensure you have backups.
-
Edit Configuration Files (If Required): Some mods require manual edits to
.inior.txtconfiguration files within the game directory to activate them or adjust settings. Always make a copy of the original file before editing. -
Launch and Verify: Start the game and check if the mod is active. Many games have in-game mod menus or specific ways to confirm installation.
This method provides granular control but demands careful attention to detail and reliance on the mod author’s instructions.
Streamlining with Tools: Utilizing Mod Managers
For games with extensive modding scenes (e.g., The Elder Scrolls, Fallout, Witcher 3), mod managers are indispensable tools that automate much of the manual process and help manage complex setups. Popular examples include Vortex (from Nexus Mods), Mod Organizer 2, and others specific to certain games.

-
Install the Mod Manager: Download and install your chosen mod manager. Ensure it’s compatible with the game you intend to mod.
-
Configure for Your Game: Point the mod manager to your game’s installation directory. It will often detect compatible games automatically.
-
Download Mods through Manager (or manually): Many managers integrate directly with sites like Nexus Mods, allowing you to “Mod Manager Download” directly. Alternatively, you can download files manually and import them into the manager.
-
Activate Mods: Once downloaded, activate the mod within the manager’s interface. The manager typically handles extracting, placing files, and managing dependencies.
-
Manage Load Order: This is where mod managers shine. For games where multiple mods might conflict, the order in which they load is critical. Managers provide tools to sort load orders, detect conflicts, and suggest resolutions (e.g., Loot for Skyrim).
-
Deploy and Launch: After setting up your mods, deploy them using the manager. Then, launch the game through the mod manager (or its custom launcher) to ensure all activated mods are loaded correctly.
Mod managers simplify complex setups, offer better conflict resolution, and make uninstallation much cleaner, significantly reducing troubleshooting time.
In-Game Editors and Consoles: Developer-Provided Customization
Some games include built-in modding tools or console commands that allow for real-time alterations or the creation of content:
-
Creation Kits/Editors: Games like Fallout and Skyrim have official Creation Kits (often available for free on Steam) that allow users to create new assets, quests, and worlds within the game’s engine.
-
Console Commands: Many games feature a developer console (accessed usually by the
~key) where players can input commands to alter game states, spawn items, or troubleshoot issues. While not strictly “mods,” they offer a form of in-game customization.
These methods leverage developer-provided functionalities for deeper integration and often safer modifications.
Verifying Installation and Initial Checks
After any installation method, confirming the mod is working is crucial:
-
Launch the Game: Always launch the game after installing mods.
-
Check In-Game Mod Menus: Many modern games (especially those with official mod support) feature in-game menus to enable/disable or configure mods.
-
Look for New Content: If the mod adds items, quests, or visual changes, actively look for them in the game world.
-
Monitor Performance: Keep an eye on frame rates and stability. If performance significantly drops or crashes occur, it might indicate an issue with a newly installed mod.
A systematic approach to verification helps quickly identify and address any problems.
Best Practices, Troubleshooting, and Staying Secure in the Modding World
Modding, while rewarding, requires a disciplined approach to maintenance and security. Adhering to best practices will minimize frustrations and ensure a stable gaming environment.
The Golden Rules of Modding: Backups and Readme Files
-
Backup, Backup, Backup: As reiterated, always back up your original game files and save games before modding. This is your ultimate failsafe.
-
Read Everything: Every reputable mod comes with a README file or detailed instructions on its download page. Read them thoroughly. They contain crucial information about installation, compatibility, dependencies, and known issues.
-
Check Compatibility: Ensure the mod is compatible with your game version and other installed mods. An outdated or conflicting mod is a primary source of issues.
-
Check for Dependencies: Many mods require other “parent” mods to function. Install these dependencies first.
Neglecting these rules is the quickest way to encounter problems.
Diagnosing Common Issues: Crashes, Conflicts, and Performance Drops
Even with careful installation, issues can arise. Common problems include:
-
Game Crashes: Often caused by incompatible mods, incorrect load order, missing dependencies, or resource conflicts.
-
Performance Drops: High-resolution texture packs or demanding script-heavy mods can significantly impact frame rates, especially on less powerful hardware.
-
Visual Glitches/Bugs: Can be due to texture conflicts, incorrect mesh placements, or corrupted files.
-
Mod Conflicts: When two or more mods try to alter the same game file or script in incompatible ways, leading to unexpected behavior or crashes. Mod managers with conflict detection are invaluable here.
Troubleshooting Steps:
-
Isolate the Problem: If you installed multiple mods, disable them one by one or in small batches to identify the culprit.
-
Verify Game Files (Steam): In Steam, right-click the game, go to “Properties” > “Installed Files” > “Verify integrity of game files.” This will replace any corrupted or modified core game files (but often leaves mod files untouched).
-
Check Mod Forums/Communities: Often, someone else has encountered and solved the same problem.
-
Revert to Backup: If all else fails, revert to your clean game backup.
A methodical approach to troubleshooting saves time and prevents further complications.
Keeping Your System Safe: Security Considerations for Downloads
While most mod creators are benevolent, malicious software can sometimes be disguised as mods.
-
Reputable Sources Only: Stick to well-known modding platforms (Nexus Mods, Mod DB, Steam Workshop) with strong community moderation.
-
Antivirus Scans: Always scan downloaded mod archives with your antivirus software before extracting and installing.
-
Beware of Executables: Be extremely cautious with mods that require running an
.exefile as part of the installation, unless it’s from a highly trusted source (like an official mod manager installer). -
Read Comments and Endorsements: High endorsement counts and positive user comments on mod pages are good indicators of a mod’s safety and quality.
Prioritizing digital security ensures your modding adventure doesn’t compromise your system.
Uninstallation and Reverting Changes: When Things Go Awry
Removing mods cleanly is as important as installing them correctly:
-
Mod Managers: If you used a mod manager, use its uninstall/deactivate feature. This is typically the cleanest method.
-
Manual Uninstallation: If you installed manually, you’ll need to manually delete the files you added. This can be tricky if you don’t remember exactly what you copied where. This is another reason to always back up your original files.
-
Verify Integrity of Game Files (Steam): As mentioned, this can revert core game files to their original state, which can sometimes help remove stubborn mod remnants.
-
Reinstall the Game: In extreme cases, a complete reinstallation of the game may be necessary to completely cleanse it of problematic mods.
Understanding how to revert changes ensures that you can always return to a stable, vanilla game state if needed.
The Future of Game Customization: Trends and Community Impact
Modding is not a static practice; it’s an evolving aspect of the gaming ecosystem, deeply intertwined with technological advancements and community dynamics.
Community-Driven Development: The Longevity of Games
Mods significantly extend the commercial lifespan of games. Titles like The Elder Scrolls V: Skyrim, released over a decade ago, continue to sell well, largely due to a thriving modding community that consistently produces new content and improvements. This community-driven development fosters a symbiotic relationship: developers create a canvas, and modders paint endless new possibilities, keeping the game relevant and engaging for years. This also acts as an incubator for talent, with many modders eventually joining official game development studios.
Ethical Modding and Support for Creators
As modding becomes more professional, ethical considerations gain prominence. Many platforms now allow users to donate to mod creators, recognizing the immense time and effort invested. Respect for intellectual property, proper attribution, and adherence to community guidelines are becoming increasingly important for maintaining a healthy and sustainable modding environment. The rise of sophisticated mod tools also raises questions about accessibility and ensuring all users can participate responsibly.
The Evolving Relationship Between Developers and Modders
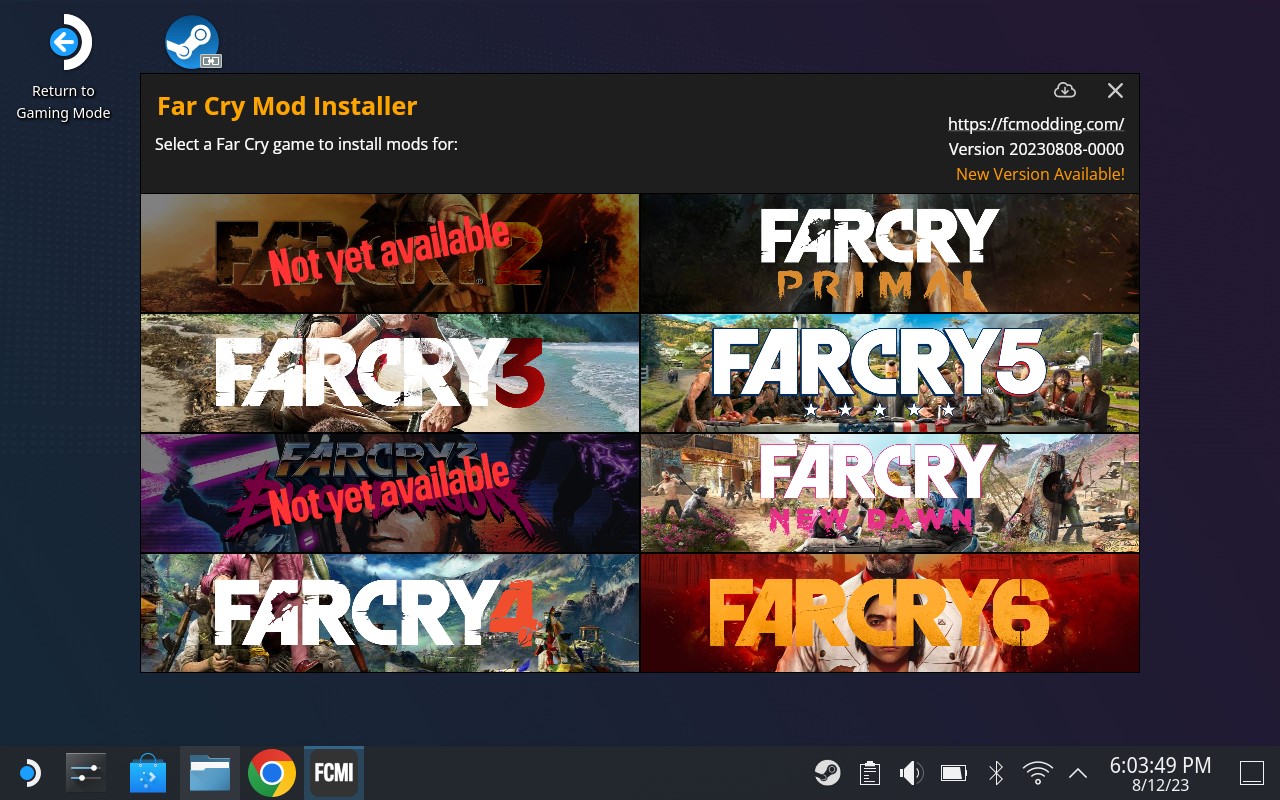
The relationship between game developers and the modding community has matured significantly. Many developers now actively encourage modding by releasing official SDKs, providing dedicated forums, and even incorporating popular mod concepts into official updates or sequels. This collaboration benefits both parties: developers gain free content expansion and community engagement, while modders receive official recognition and resources, blurring the lines between amateur and professional game development. This trend signals a promising future where official game development and community-driven content generation become even more integrated.
In conclusion, installing mods for Steam games is a rewarding journey into the heart of PC gaming customization. While it requires a foundational understanding of file management and attention to detail, the payoff—a tailored, enriched, and endlessly engaging gaming experience—is immeasurable. By following this guide, embracing best practices, and leveraging the powerful tools available, you can confidently unlock the full, incredible potential of your Steam gaming library.
aViewFromTheCave is a participant in the Amazon Services LLC Associates Program, an affiliate advertising program designed to provide a means for sites to earn advertising fees by advertising and linking to Amazon.com. Amazon, the Amazon logo, AmazonSupply, and the AmazonSupply logo are trademarks of Amazon.com, Inc. or its affiliates. As an Amazon Associate we earn affiliate commissions from qualifying purchases.