
The Nintendo 3DS, a groundbreaking handheld console, continues to captivate enthusiasts years after its official discontinuation. For many, its longevity isn’t just a testament to its original design and game library, but also to the vibrant custom firmware (CFW) community that has flourished around it. At the heart of this community lies Luma3DS, an open-source custom firmware that unlocks a new realm of possibilities for your device. This guide delves into the technical intricacies of installing Luma3DS, providing a professional, insightful, and engaging roadmap for users looking to enhance their 3DS experience. We’ll explore what Luma3DS offers, the essential preparation required, a detailed step-by-step installation process, and crucial post-installation considerations, all within the strict confines of a tech-focused narrative.

Understanding Luma3DS and Its Benefits
Before embarking on the installation journey, it’s crucial to grasp what Luma3DS is and why it has become the de facto standard for 3DS custom firmware. This foundational understanding will illuminate the value it brings to your handheld console.
What is Luma3DS?
Luma3DS is a custom firmware (CFW) for the Nintendo 3DS family of systems (including the 2DS, New 3DS, and New 2DS XL). Developed by Aurora Wright, it replaces aspects of the console’s official firmware, running directly on the system’s ARM9 processor. Unlike earlier, more complex CFW solutions, Luma3DS is lauded for its stability, ease of use, and robust feature set. It essentially grants users a higher level of control over their device, enabling functionalities not available on a stock Nintendo 3DS. It’s often referred to as the “boot manager” for your 3DS, loading before the official system software and allowing for various modifications.
Why Consider Custom Firmware for Your 3DS?
The decision to install custom firmware is typically driven by a desire for enhanced functionality, preservation, and personalization. The official Nintendo 3DS ecosystem, while robust, has inherent limitations. Luma3DS shatters many of these, opening up a plethora of advantages:
-
Region-Free Gaming: Play games from any region without needing a separate console. This is particularly valuable for importing titles not released in your local market.
-
Homebrew Application Support: Access a vast library of homebrew applications, ranging from emulators for older consoles to fan-made games, utilities, and media players. This dramatically extends the utility of your 3DS beyond its original scope.
-
Game Backup and Restoration: Create backups of your own game cartridges and digital titles, allowing you to play them directly from your SD card without carrying multiple physical games. This also aids in game preservation, especially as physical media degrades over time.
-
Customization and Theming: Personalize your 3DS interface with custom themes, splash screens, and even custom boot animations, far beyond what the official theme shop offers.
-
Overclocking (for New 3DS/2DS XL): Enhance the performance of certain demanding games by increasing the CPU clock speed, leading to smoother frame rates and faster loading times.
-
Cheats and Modding: Implement cheats in games or apply game modifications (mods) to alter gameplay experiences.
-
System Updates Management: Gain more control over system updates, potentially allowing you to defer or selectively apply them, ensuring compatibility with your homebrew ecosystem.
Key Features and Capabilities
Beyond the general benefits, Luma3DS itself offers specific features that make it so powerful. These include:
-
Rosalina Menu: A powerful in-game menu accessible via a key combination (L+Down+Select) that provides on-the-fly access to various settings, cheats, screenshots, and more. It’s the central hub for many of Luma’s advanced functions.
-
Game Patching (LayeredFS): Luma3DS supports LayeredFS, a system that allows users to replace game files on the fly without modifying the original game data. This is crucial for applying fan translations, texture packs, and game modifications.
-
Firmware Spoofer: Ensures compatibility with online services and newer games even if you’re running on an older system firmware version, by making your console report a newer version to game servers.
-
SD Card Management: Optimized handling of SD card access, crucial for faster loading of games and applications.
Understanding these aspects sets the stage for a smooth and informed installation process.
Essential Prerequisites and Preparations
Successful Luma3DS installation hinges on meticulous preparation. Skipping steps or overlooking crucial details can lead to complications, ranging from minor inconveniences to more serious issues like a bricked console. This section outlines the hardware, software, and procedural steps necessary before you even begin the technical installation.
Required Hardware and Software
Gathering the correct components is the first critical step. Ensure you have the following:
-
Nintendo 3DS Family Console: This guide applies to all models: Original 3DS, 3DS XL, 2DS, New 3DS, New 3DS XL, and New 2DS XL. The specific model may slightly influence the initial entry point method, but the Luma3DS installation itself is largely universal.
-
SD Card: A high-quality MicroSD card (for New 3DS/2DS XL) or standard SD card (for Old 3DS/2DS) is essential. A minimum of 4GB is recommended, but 16GB, 32GB, or even 64GB+ is preferable for storing games and applications. Ensure it’s formatted as FAT32. For cards larger than 32GB, you might need a third-party formatter like Rufus or guiformat on Windows, as the built-in formatter often defaults to exFAT.
-
SD Card Reader/Writer: You’ll need a way to connect your SD card to your computer to transfer files. Most modern computers have built-in card readers, or you can use an external USB reader.
-
Computer: A Windows, macOS, or Linux computer with internet access is required to download necessary files and manage your SD card.
-
Stable Internet Connection: For downloading software and potentially for parts of the installation process that rely on web exploits.
-
3DS Charger: Ensure your 3DS is fully charged or connected to its charger throughout the installation process. Power loss during critical steps can lead to system corruption.
Backing Up Your 3DS System
This is arguably the most critical preparatory step. While Luma3DS is stable, any custom firmware installation carries inherent risks. A comprehensive backup provides a safety net, allowing you to restore your system to its original state should anything go awry.
-
NAND Backup: The most important backup is a NAND (internal memory) backup. This creates a complete snapshot of your 3DS’s internal system memory, including its unique encryption keys. Specific tools like GodMode9 (which you will install during the Luma3DS process) are used for this. You will create this backup early in the installation process. Store this backup securely on your computer, not just on the SD card you’re using for CFW.
-
Save Data Backup: For individual game saves, consider using a homebrew application like Checkpoint once Luma3DS is installed. For now, focus on the NAND backup.
Preparing Your SD Card
A properly prepared SD card is fundamental to a successful installation.
-
Formatting: If your SD card is new or if you’ve used it for other purposes, it’s highly recommended to format it as FAT32. For MicroSD cards larger than 32GB, use a tool that specifically allows FAT32 formatting, as Windows’ built-in utility might not offer it for large drives.
-
File Structure: While you’ll be copying files in later steps, it’s good practice to ensure your SD card is empty before starting, or at least organized, to avoid confusion. Some guides recommend creating a “Nintendo 3DS” folder if one doesn’t exist, though this is often created automatically by the system.
-
Download Essential Files: Before starting, download the latest stable release of Luma3DS (
boot.firmandboot.3dsx) from its official GitHub page. You will also need other tools, depending on your chosen entry point (e.g.,installer.zipfor unSAFE_MODE,boot.firmfor SafeB9SInstaller, etc.). Always download from official or trusted sources to prevent malicious software.
By diligently completing these prerequisites, you significantly increase the likelihood of a smooth and successful Luma3DS installation.
Step-by-Step Luma3DS Installation Process
The actual installation of Luma3DS involves several stages, beginning with gaining an initial entry point into the 3DS system, deploying the necessary files, and finally configuring the custom firmware. This section details the process, assuming a common installation method often used today, focusing on clarity and precision. Note: Specific exploits and methods can change. Always refer to a current, reputable guide like 3ds.hacks.guide for the most up-to-date and tailored instructions based on your specific 3DS model and firmware version.
Initial Entry Point: Exploiting Your 3DS
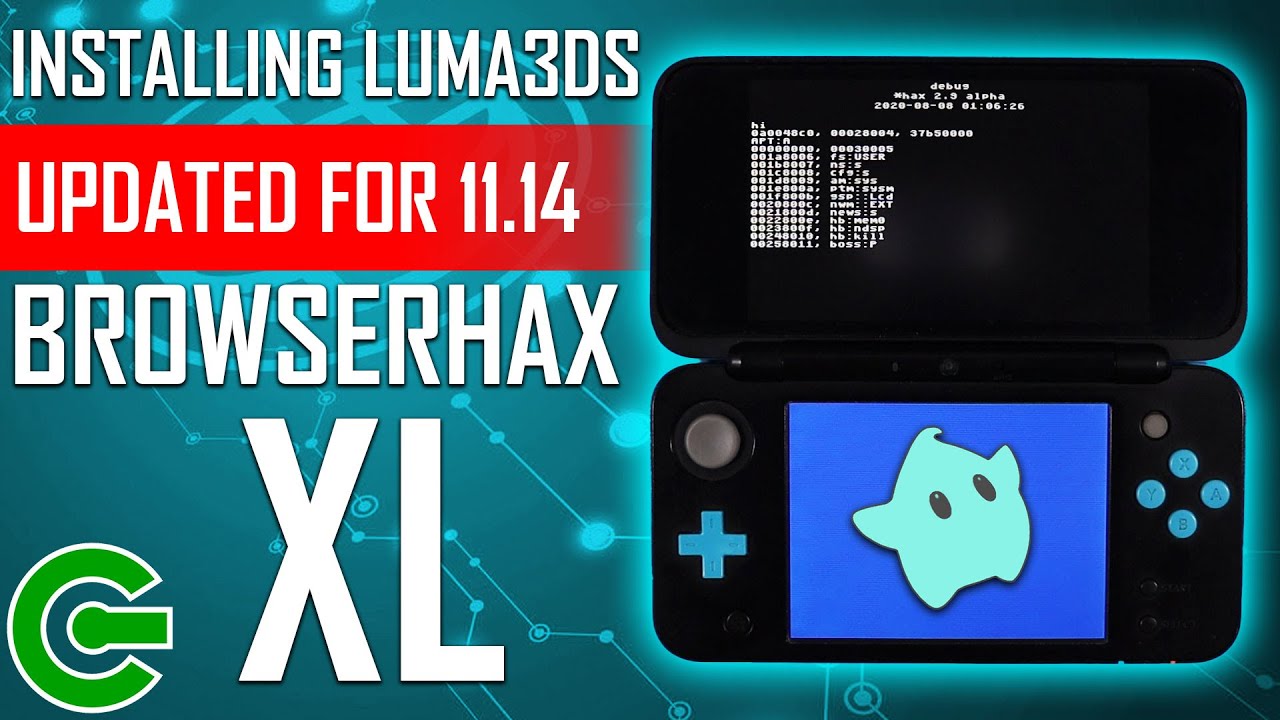
The first major hurdle is to get your 3DS to run unsigned code, which is the “exploit.” This initial entry point varies significantly depending on your console’s current firmware version and whether you have access to certain games or accessories. Common methods include:
-
Browserhax: A web-browser-based exploit that works on specific older firmware versions.
-
Seedminer (DSiWare Exploits like
TwiLight Menu++orFlipnote Studio): Involves using a PC to generate a custom DSiWare title that, when launched on your 3DS, provides an entry point. This method is highly reliable for most firmware versions. -
Hardmod: A physical modification (soldering) typically reserved for situations where software exploits are unavailable or too difficult.
-
NTRBoot: Requires a flashcart (like an Ace3DS X or R4i Gold 3DS Plus) to trick the system into booting custom firmware from the SD card. This is a very robust method for almost all consoles.
Once the initial exploit is successful, it typically loads a payload that gives you access to the Homebrew Launcher or a tool like SafeB9SInstaller, which is crucial for installing boot9strap.
Deploying the Luma3DS Files
After gaining initial access, the core custom firmware components need to be placed on your SD card.
-
boot9strapInstallation:boot9strap(b9s) is a critical component that allows unsigned code to run very early in the 3DS’s boot process. UsingSafeB9SInstaller(launched via your initial exploit), you will installboot9strapto your system’s NAND. This is a crucial, irreversible step that permanently modifies your console to boot custom firmware. This step typically involves pressing a button combination after verifying specific hashes displayed on the screen. -
Luma3DS Files: Once
boot9strapis installed, you copy theboot.firmandboot.3dsxfiles (and thelumafolder, if present) of the latest Luma3DS release to the root of your SD card.boot.firmis the main Luma3DS payload thatboot9strapwill load, andboot.3dsxallows you to access the Luma3DS configuration menu from the Homebrew Launcher.
The First Boot and Configuration
With boot9strap and Luma3DS files in place, the system should now boot into Luma3DS.
-
Initial Luma3DS Configuration Menu: Upon the first boot after installing
boot9strapand Luma3DS, your 3DS will likely present you with the Luma3DS configuration menu. This menu (accessed by holdingSELECTduring boot-up on subsequent boots) allows you to enable crucial features. -
Recommended Settings:
-
“Show NAND or user string in System Settings”: Highly recommended to enable, as it confirms Luma3DS is running by adding “Luma3DS” or a similar identifier next to your system version.
-
“Enable game patching”: Essential for using fan translations, mods, and LayeredFS.
-
“Enable new 3DS CPU for old 3DS games”: For New 3DS/2DS XL owners, this overclocks the CPU, improving performance in some older games.
-
“Set developer UNITINFO”: Typically not needed for general users.
-
“Autoboot EmuNAND”: Usually left unchecked as most modern setups use a “SysNAND CFW,” meaning custom firmware runs directly on the system’s main NAND.
-
-
Saving Settings: After selecting your desired options, press
STARTto save and reboot the console.
Finalizing Your Custom Firmware Setup
The console should now boot into the regular 3DS Home Menu, but with Luma3DS running in the background.
-
Install Essential Homebrew: Use the Homebrew Launcher (accessible via a
boot.3dsxentry point, or often directly fromSafeB9SInstaller) to install applications likeFBI(a title manager for installing.ciafiles),GodMode9(a powerful file browser and backup tool), andCheckpoint(for save data management). -
Create a NAND Backup (using GodMode9): This is where you create the crucial NAND backup mentioned earlier. Follow instructions within GodMode9 to dump your
NAND.binfile. Store this file safely on your computer. -
Update Luma3DS and System Firmware: Once Luma3DS is stable, you can safely update your 3DS system firmware through the official Nintendo System Settings. Luma3DS handles official updates gracefully. You should also keep Luma3DS itself updated by replacing
boot.firmandboot.3dsxwith newer versions from the official GitHub.
By carefully following these steps, you will have successfully installed Luma3DS on your Nintendo 3DS, opening up a world of enhanced possibilities.
Post-Installation: Exploring and Maintaining Your CFW
Installing Luma3DS is just the beginning. The true value of custom firmware lies in its utilization and ongoing maintenance. This section focuses on verifying the installation, managing Luma3DS settings, and exploring the vast ecosystem of homebrew applications.
Verifying Luma3DS Installation
After the installation, the first thing to do is confirm that Luma3DS is indeed active and running correctly.
-
Check System Settings: Navigate to
System Settings->Other Settings->Profile->Nintendo DS Profile. If Luma3DS is correctly installed, you should see the Rosalina menu appear. Alternatively, if you enabled “Show NAND or user string in System Settings” during the initial configuration, you’ll see “Luma3DS” or a similar string next to your system version in the mainSystem Settingsdisplay. -
Access Rosalina Menu: Hold
L + Down + SELECTsimultaneously during gameplay or while on the Home Menu. The Rosalina menu should pop up, indicating full functionality. If it doesn’t appear, troubleshoot your Luma3DS installation. -
Launch Homebrew Apps: Try launching a simple homebrew application via the Homebrew Launcher. Successful execution confirms your CFW is working.
Managing Luma3DS Settings and Updates
Effective management ensures your CFW remains stable and up-to-date.
-
Luma3DS Configuration Menu: To revisit the Luma3DS configuration options, hold
SELECTwhile booting your 3DS. This will bring you back to the menu where you initially set options like “Enable game patching” and “Show NAND or user string.” You can toggle features on or off as needed. -
Updating Luma3DS: Keeping Luma3DS updated is crucial for security, stability, and compatibility with new games and system features. Updating is typically straightforward:
-
Download the latest
boot.firmandboot.3dsxfiles from the official Luma3DS GitHub releases page. -
Copy these files to the root of your SD card, overwriting the old ones.
-
Reinsert the SD card and boot your 3DS. Luma3DS will automatically load the new version.
-
-
System Firmware Updates: With Luma3DS installed, you can safely update your 3DS’s system firmware through the official Nintendo
System Settings. Luma3DS is designed to be compatible with official updates, often referred to as “update safe.” However, it’s always wise to check community resources before a major official update, just in case a new update introduces unforeseen complications for specific homebrew applications (though this is rare with Luma3DS).
Common Applications and Customizations
The true power of Luma3DS lies in the ecosystem of homebrew applications it enables.
-
FBI: This is an indispensable title manager. Use it to install
.cia(CTR Importable Archive) files, which are equivalent to official digital game installations. This is how you’ll install most homebrew applications and game backups. -
GodMode9: A powerful file manager and system tool. Beyond creating NAND backups, GodMode9 allows you to inject files into your console’s NAND, extract game data, format SD cards, and perform advanced recovery operations.
-
Checkpoint: A robust save data manager. Use it to back up and restore game saves for both cartridge and digital titles, protecting your progress and allowing for save file manipulation.
-
Universal Updater: A homebrew application that allows you to download and install other homebrew applications directly from your 3DS, streamlining the process of expanding your software library.
-
Theming and Custom Splash Screens: Explore custom themes through applications like Anemone3DS or simply replace
splash.binandsplashbottom.binfiles on your SD card for custom boot images. -
Emulators: Discover a wealth of emulators for systems like the Game Boy, Game Boy Color, Game Boy Advance, SNES, and even some N64 titles, transforming your 3DS into a retro gaming powerhouse.
By engaging with these tools and maintaining your Luma3DS installation, you unlock the full potential of your Nintendo 3DS, transforming it into a highly personalized and versatile handheld entertainment system.
Troubleshooting and Important Considerations
While the Luma3DS installation process is generally robust, technical issues can arise. Furthermore, understanding the broader implications of modifying your console is crucial for responsible usage.
Addressing Common Installation Issues
Encountering problems during or after installation can be frustrating, but many common issues have straightforward solutions.
-
Black Screen on Boot: This is a common and often alarming issue.
-
Check SD Card: Ensure the SD card is properly inserted and that
boot.firmis in the root directory. Corrupt SD cards can also cause this; try reformatting or using a different card. -
Luma3DS Version: Ensure you’re using the correct and latest stable version of Luma3DS for your system.
-
NAND Corruption: If a critical step was interrupted or done incorrectly, NAND corruption could occur. This is where your NAND backup becomes invaluable, allowing for restoration via GodMode9.
-
-
Rosalina Menu Not Appearing: If
L + Down + SELECTdoesn’t bring up the Rosalina menu:-
Confirm Luma3DS is Loaded: Check System Settings for the Luma3DS string.
-
Correct Key Combination: Ensure you are pressing the exact key combination.
-
Reinstall Luma3DS: If all else fails, consider reapplying the
boot.firmandboot.3dsxfiles.
-
-
Homebrew App Crashing:
-
Outdated Apps: Ensure your homebrew applications are updated to their latest versions, as older versions might not be compatible with newer Luma3DS or system firmware.
-
SD Card Issues: Bad sectors or fragmentation on your SD card can cause data corruption leading to crashes.
-
Memory Issues: Some demanding homebrew might struggle on original 3DS models due to limited RAM.
-
-
Error Messages: Specific error codes (e.g.,
00Fxxxxxx) often point to particular issues. Searching these codes alongside “Luma3DS” or “3DS homebrew” can quickly lead to solutions on community forums or guides.
When troubleshooting, always consult reputable communities like r/3dshacks on Reddit or the official 3ds.hacks.guide Discord server. These communities are invaluable resources for specific and up-to-date assistance.
Staying Safe and Secure
Modifying your console comes with responsibilities. Adhering to best practices helps maintain system stability and security.
-
Only Download from Trusted Sources: Always obtain Luma3DS, homebrew applications, and tools from their official GitHub repositories or other well-known, reputable homebrew sites. Avoid downloading from unknown forums or suspicious links, as these could contain malicious code.
-
Keep Backups: Regularly back up your game saves using Checkpoint, and consider updating your NAND backup periodically, especially after major system changes or official firmware updates.
-
Be Mindful of Online Activity: While Luma3DS is generally safe for online play with official games, using cheats or heavily modified games online carries a risk of being banned by Nintendo. Exercise caution and discretion.
-
Understand What You Install: Before installing any homebrew application, understand its purpose and origin. Not all homebrew is created equal, and some might be buggy or have unintended consequences.

Legal and Ethical Implications
It’s important to acknowledge the legal and ethical landscape surrounding custom firmware.
-
Warranty Void: Installing custom firmware will almost certainly void your console’s warranty. Nintendo will not service a modified device.
-
“Piracy”: While Luma3DS itself is legal, its capabilities can facilitate the installation of pirated games. This guide strictly focuses on the technical aspects of Luma3DS installation and its legitimate uses, such as region-free play and homebrew. Users are responsible for their actions and should respect copyright laws.
-
System Ownership: The debate around modifying a console you own is complex. From a technical standpoint, CFW empowers users to exert greater control over their hardware. Legally, the terms of service and copyright laws provide companies with significant control over their software. Users should be aware of these tensions.
By understanding these considerations, users can navigate the world of 3DS custom firmware responsibly, ensuring a stable, secure, and enjoyable experience while respecting the broader digital ecosystem. The installation of Luma3DS transforms the 3DS from a mere gaming device into a powerful, customizable, and versatile handheld computer, a testament to the enduring ingenuity of the technology community.
aViewFromTheCave is a participant in the Amazon Services LLC Associates Program, an affiliate advertising program designed to provide a means for sites to earn advertising fees by advertising and linking to Amazon.com. Amazon, the Amazon logo, AmazonSupply, and the AmazonSupply logo are trademarks of Amazon.com, Inc. or its affiliates. As an Amazon Associate we earn affiliate commissions from qualifying purchases.