
In the fast-paced world of technology, the mantra often heard is “always update to the latest version.” While this advice holds true for security patches and new feature additions, there are specific scenarios where reverting to or installing an older version of a software or driver becomes not just advisable, but essential. For NVIDIA graphics card users, this often comes into play with display drivers. This comprehensive guide will walk you through the precise steps and crucial considerations for downloading older NVIDIA drivers, ensuring system stability and optimal performance for your specific needs.
Why Revert or Seek Older Drivers? Understanding the Rationale
The decision to install an older driver might seem counterintuitive, yet it’s a common and sometimes necessary practice among PC enthusiasts, professionals, and gamers. Understanding the underlying reasons is key to approaching this process with confidence and care.
Stability and Performance Issues with New Drivers
Brand new drivers, despite undergoing rigorous testing, can sometimes introduce unforeseen bugs, performance regressions, or compatibility issues with certain hardware configurations or software applications. Users might experience game crashes, stuttering, graphical glitches, or even system instability after a driver update. In such cases, rolling back to a previously stable driver version is often the quickest and most effective troubleshooting step. This is particularly true for users with older or less common hardware, where the latest drivers might prioritize optimizations for newer architectures.
Software and Game Compatibility
Certain legacy software applications, professional tools, or even older video games might have been developed and optimized for specific driver versions. Updating to a newer driver can sometimes break compatibility, leading to launch failures, incorrect rendering, or missing features. For example, a graphic designer relying on an older CAD program might find that a new driver introduces visual artifacts or reduces performance, necessitating a return to a known compatible version. Similarly, some vintage games might perform better or even only run correctly with drivers from their era.
Troubleshooting and Diagnostics
When diagnosing system issues like crashes or graphical anomalies, drivers are often a prime suspect. Installing an older, known-stable driver version can help isolate whether the problem lies with the driver itself or with other hardware components, software conflicts, or operating system issues. If reverting to an older driver resolves the problem, it strongly suggests the new driver was the culprit, narrowing down the scope of further investigation. This diagnostic approach saves significant time and effort in complex troubleshooting scenarios.
Specific Feature Support or Removed Functionality
Occasionally, newer driver versions might drop support for very old hardware features, API versions, or specific functionalities that were present in previous iterations. While rare, this can be critical for users who rely on these niche capabilities. Additionally, for users running older operating systems that are no longer officially supported by the latest NVIDIA drivers, seeking out the last compatible driver version is the only way to ensure basic functionality.
Preparing for a Driver Rollback or Installation
Before embarking on the process of downloading and installing older NVIDIA drivers, a thorough preparation phase is crucial. This helps mitigate potential risks, ensures you select the correct driver, and sets the stage for a smooth installation.
Backing Up Your System (Optional but Recommended)
While not strictly mandatory, creating a system restore point or a full system backup before making significant driver changes is highly recommended. Drivers interact deeply with the operating system, and a botched installation can sometimes lead to boot issues or system instability. A restore point allows you to easily revert your system to its previous state if anything goes wrong, providing a safety net. Windows’ built-in System Restore feature is generally sufficient for this purpose, but third-party backup solutions offer more robust options.
Identifying Your GPU Model and Current Driver Version
To download the correct older driver, you must know your exact NVIDIA GPU model (e.g., GeForce RTX 3080, GTX 1060, Quadro P5000) and the operating system you are running (e.g., Windows 10 64-bit, Windows 11 64-bit). You can find this information in several ways:
-
Device Manager: Right-click the Start button, select “Device Manager,” expand “Display adapters,” and note your NVIDIA GPU. Double-clicking it and going to the “Driver” tab will show your current driver version.
-
NVIDIA Control Panel: Right-click on your desktop, select “NVIDIA Control Panel,” then click “System Information” in the bottom-left corner.
-
DXDiag: Press
Win + R, typedxdiag, and hit Enter. Go to the “Display” tab to see your GPU model and driver details.
Knowing your current driver version also helps you determine which older version you want to roll back to, especially if you’re targeting a specific stable release.
Understanding the Risks
While older drivers can resolve specific issues, it’s vital to acknowledge their inherent risks. They typically lack the latest security updates, leaving your system potentially vulnerable to exploits. Furthermore, they won’t offer optimizations for the newest games or software, and might even perform worse in modern titles. Future game releases are unlikely to be optimized for very old drivers. This process should be undertaken only when necessary and with a clear understanding of these trade-offs. It’s a pragmatic solution for specific problems, not a long-term strategy for overall system health.
Disconnecting from the Internet (Temporary)
Before uninstalling your current drivers or installing new ones, it’s a good practice to temporarily disconnect your computer from the internet. This prevents Windows Update from automatically downloading and installing a generic or newer NVIDIA driver in the background, which can interfere with your manual installation process and cause conflicts or instability. You can do this by unplugging your Ethernet cable or disabling Wi-Fi through your network settings. Reconnect once the installation is complete and you’ve taken steps to prevent automatic updates (discussed later).
The Definitive Guide: Downloading Older NVIDIA Drivers
NVIDIA maintains an extensive archive of past driver versions, making it relatively straightforward to find and download the specific legacy driver you need directly from their official website. Using official sources is crucial to avoid potentially malicious or corrupted driver packages from third-party sites.
Navigating the Official NVIDIA Driver Archive
-
Visit the NVIDIA Driver Downloads Page: Open your web browser and go to the official NVIDIA driver download page. A common URL for this is
www.nvidia.com/drivers. -
Use the “Manual Driver Search” or “Beta and Legacy Drivers” Section: On the driver download page, you’ll typically find an option for manual driver search. Sometimes there’s a dedicated link for “Beta and Legacy Drivers” or “Advanced Driver Search.” Click on this to access the comprehensive search filters.
-
Enter Your Product Details: You will be presented with several dropdown menus to specify your hardware and operating system:
-
Product Type: Select your graphics card series (e.g., GeForce, Quadro, NVS, ION).
-
Product Series: Choose the specific series within that type (e.g., GeForce RTX 30 Series, GeForce GTX 16 Series).
-
Product: Pinpoint your exact GPU model (e.g., RTX 3080, GTX 1660 SUPER).
-
Operating System: Select your installed Windows version and architecture (e.g., Windows 10 64-bit, Windows 11 64-bit). Be precise here.
-
Download Type: Usually “Game Ready Driver (GRD)” or “Studio Driver (SD)” for GeForce cards. If you’re looking for older drivers, either might be relevant depending on your original issue. For very old cards, this option might not even exist, or there might be “All” options.
-
Language: Choose your preferred language.
-
-
Click “Search”: After filling in all the details, click the “Search” button.
Selecting the Correct Driver Version
The search results page will display a list of available drivers for your specified hardware and OS, usually ordered from newest to oldest.
-
Browse the List: Scroll down to find the older driver version you need. If you’re targeting a specific version, locate it. If you’re simply rolling back due to recent issues, you might want to try the driver version immediately preceding your current problematic one, or a version known to be stable from community feedback.
-
Check Release Notes: It’s a good practice to click on the “Release Notes” or “Details” link for a driver version. This often provides information about included fixes, known issues, and supported hardware/software, which can help confirm it’s the right choice for your particular problem.
-
Note the Driver Version: Make a note of the exact version number and release date of the driver you intend to download, just for your records.
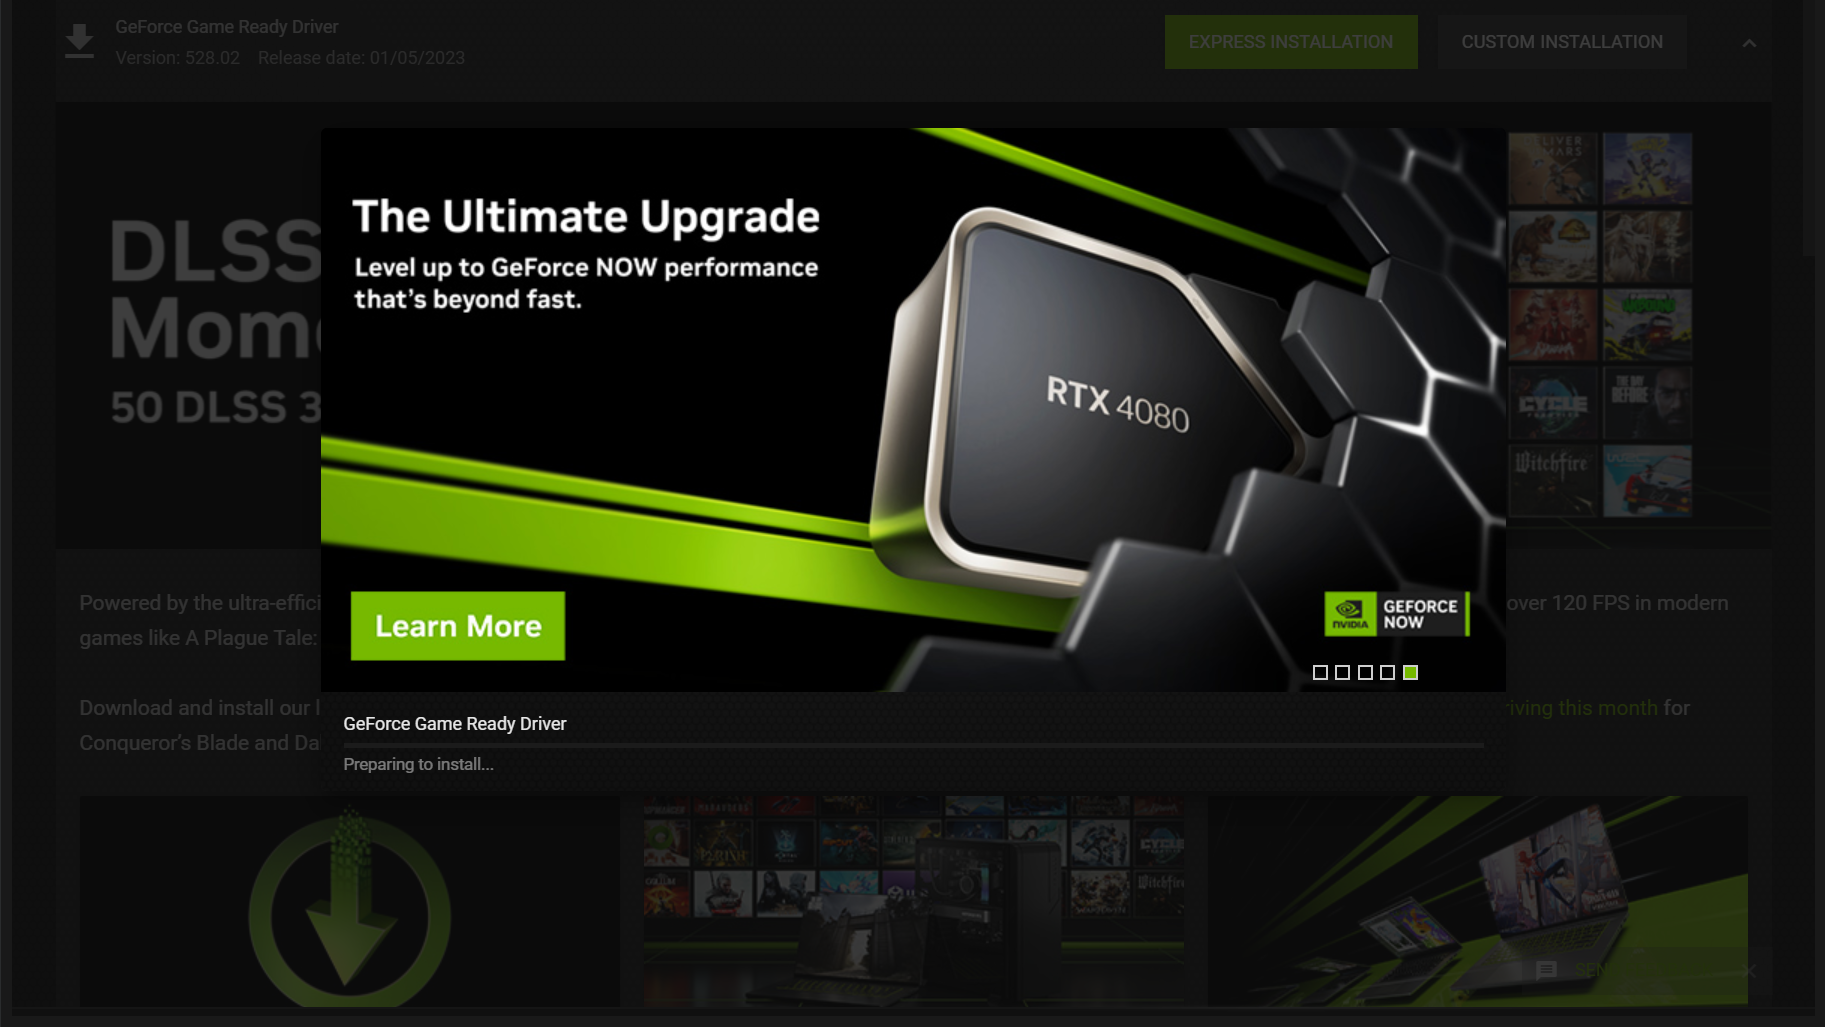
Downloading the Driver Package
Once you’ve identified the correct driver:
-
Click “Get Download”: Click on the title or the “Get Download” button next to the desired driver version.
-
Agree and Download: You’ll likely be redirected to a download page with NVIDIA’s license agreement. Read it if you wish, then click “Agree & Download” to start the download.
The driver package will be an executable file (e.g., 516.94-desktop-win10-win11-64bit-international-dch-whql.exe) that will be saved to your default downloads folder.
Verifying Driver Integrity (Optional but Good Practice)
While downloading from the official NVIDIA site minimizes risk, some advanced users prefer to verify the integrity of large downloads. NVIDIA often provides a checksum (like MD5 or SHA256) for their driver packages. If available on the download page, you can use a checksum utility (many are free online) to compare the checksum of your downloaded file with the one provided by NVIDIA. If they match, you can be certain the file was not corrupted during download and hasn’t been tampered with.
Installation Process: A Clean Slate Approach
To ensure the older driver installs correctly and to prevent conflicts with residual files from previous installations, a “clean installation” is paramount. This involves completely removing all traces of your current drivers before installing the older version.
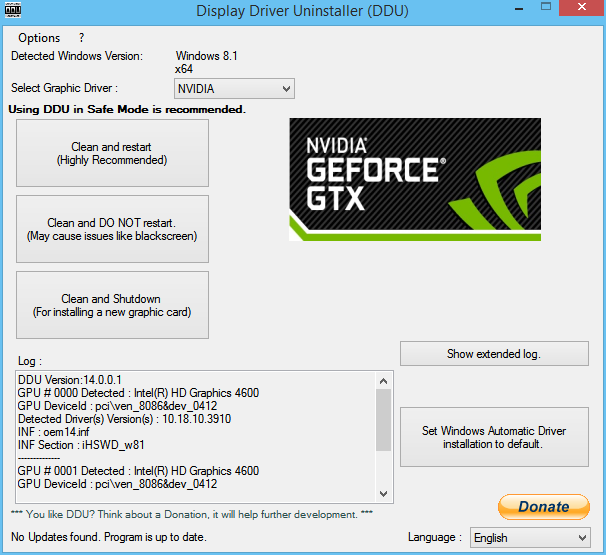
Uninstalling Current Drivers with DDU (Display Driver Uninstaller)
Simply uninstalling via Windows’ Control Panel or Device Manager often leaves behind registry entries, folders, and files that can interfere with a new driver installation. The recommended tool for a truly clean sweep is Display Driver Uninstaller (DDU).
-
Download DDU: Obtain the latest version of DDU from its official developer’s (Wagnardsoft) Guru3D forum page.
-
Extract DDU: DDU comes as an archived executable. Extract it to a folder on your desktop.
-
Boot into Safe Mode: This is crucial. DDU works best and is safest when run from Windows Safe Mode, as it prevents other drivers and services from interfering.
-
Go to Start > Settings > System > Recovery (Windows 11) or Update & Security > Recovery (Windows 10).
-
Under “Advanced startup,” click “Restart now.”
-
After rebooting, select “Troubleshoot” > “Advanced options” > “Startup Settings” > “Restart.”
-
Press
4orF4for “Enable Safe Mode.”
-
-
Run DDU: Once in Safe Mode, navigate to the extracted DDU folder and run
Display Driver Uninstaller.exe. -
Select Driver Type and GPU: In DDU, ensure “Select Device Type” is set to “GPU” and “Select Device” is set to “NVIDIA.”
-
Clean and Restart: Click on “Clean and restart (Highly recommended).” DDU will then meticulously remove all NVIDIA driver components and reboot your system into normal mode.
Performing a Custom/Clean Installation
After DDU has done its work and your system has restarted (still disconnected from the internet):
-
Run the Downloaded NVIDIA Driver Installer: Locate the older NVIDIA driver executable you downloaded and double-click it to start the installation process.
-
Extract Installer Files: The installer will first prompt you to choose a location to extract its files. The default location is usually fine.
-
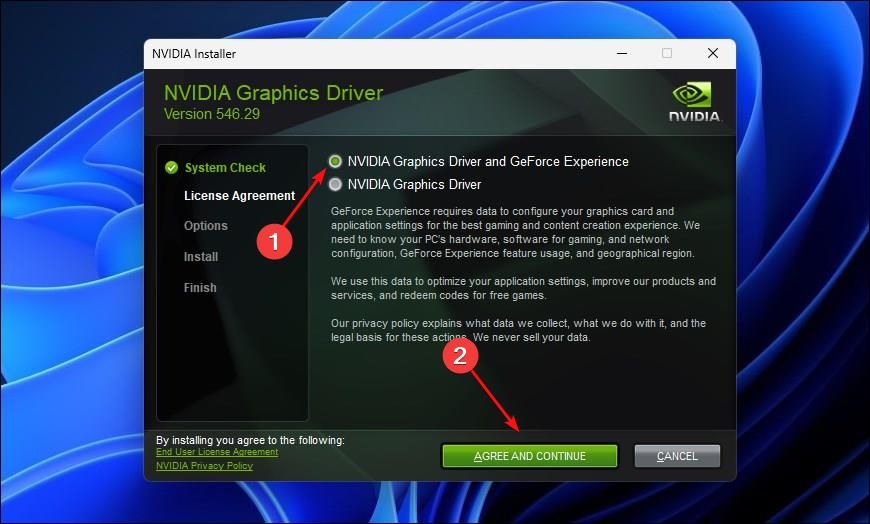
Agree to License Agreement: Review the NVIDIA Software License Agreement and click “AGREE AND CONTINUE.”
-
Select Installation Option: This is a critical step.
-
Choose “Custom (Advanced)” installation. Do NOT choose Express.
-
Click “NEXT.”
-
-
Select Components: On the next screen, you’ll see a list of components to install (Graphics Driver, GeForce Experience, PhysX, etc.). You can deselect components like GeForce Experience if you don’t use them, but ensure “Graphics Driver” is selected.
- Crucially, check the box for “Perform a clean installation” (this option is sometimes grayed out if you’re not doing a custom install, or if DDU has already done a perfect job, but always look for it). This option instructs the NVIDIA installer itself to remove previous driver files before installing the new ones, acting as a secondary layer of cleanliness.
-
Complete Installation: Click “NEXT” and follow the on-screen prompts to complete the installation. Your screen might flicker or go black momentarily during this process; this is normal.
-
Restart Your PC: After the installation finishes, the installer will likely prompt you to restart your computer. Do so.
Post-Installation Verification
Once your PC has restarted, reconnect to the internet.
-
Check Device Manager: Right-click the Start button, select “Device Manager,” expand “Display adapters,” double-click your NVIDIA GPU, and go to the “Driver” tab. Verify that the “Driver Version” now matches the older version you intended to install.
-
NVIDIA Control Panel: Open the NVIDIA Control Panel and check the “System Information” section to confirm the driver version.
-
Test for Resolution: Launch the game or application that was experiencing issues to see if the problem has been resolved.
Maintaining Driver Stability and Preventing Automatic Updates
Successfully installing an older driver is only half the battle. Windows, by default, is often configured to automatically update drivers, which can quickly undo your efforts. Preventing these unwanted updates is crucial for maintaining the stability you sought.
Disabling Automatic Driver Updates in Windows
There are several ways to prevent Windows Update from automatically installing new NVIDIA drivers:
-
Via System Properties (Recommended for most users):
-
Right-click “This PC” or “My Computer” on your desktop or in File Explorer, and select “Properties.”
-
Click “Advanced system settings” on the left pane.
-
Go to the “Hardware” tab and click “Device Installation Settings.”
-
Select “No (your device might not work as expected)” and then “Save Changes.”
-
You might also need to explicitly prevent driver updates through Windows Update itself.
-
-
Using Group Policy Editor (for Windows Pro/Enterprise/Education):
-
Press
Win + R, typegpedit.msc, and hit Enter. -
Navigate to
Computer Configuration > Administrative Templates > Windows Components > Windows Update > Manage end user experience. -
Find “Do not include drivers with Windows Updates,” double-click it, select “Enabled,” and click “Apply” then “OK.”
-
-
Using Registry Editor (for Windows Home, use with caution):
-
Press
Win + R, typeregedit, and hit Enter. -
Navigate to
HKEY_LOCAL_MACHINESOFTWAREPoliciesMicrosoftWindowsWindowsUpdate. (If “WindowsUpdate” isn’t there, you might need to create the key.) -
Inside
WindowsUpdate, create a new DWORD (32-bit) Value namedExcludeWUDriversInQualityUpdate. Set its Value data to1. -
Restart your PC for changes to take effect.
-
-
Using Microsoft’s Show or Hide Updates Troubleshooter: Microsoft occasionally provides a dedicated troubleshooter (often named
wushowhide.diagcab) that allows you to temporarily hide specific updates, including driver updates. Search for it on Microsoft’s support site if the above methods are too complex or don’t work.
Monitoring System Performance
After installing the older driver and disabling automatic updates, continuously monitor your system’s performance. Observe if the specific issues you were facing have been resolved. Play your games, use your problematic applications, and keep an eye on system stability. This ongoing observation will confirm whether the driver rollback was successful in addressing your primary concern. If problems persist, the issue might lie elsewhere in your system.
When to Consider Updating Again
While maintaining an older driver can be necessary for stability, it’s not a permanent solution for everyone. Security vulnerabilities are regularly patched in newer drivers, and performance optimizations for upcoming titles are crucial for gamers. Once your specific compatibility or stability issue with the newest drivers has been resolved by NVIDIA (often via a subsequent driver release), it’s advisable to consider updating again. Keep an eye on NVIDIA’s release notes and community feedback. When a new driver appears stable and addresses your concerns, repeat the clean installation process to bring your system up to date, ensuring you get the best balance of performance, features, and security.
Conclusion
Downloading and installing older NVIDIA drivers is a powerful troubleshooting technique that can resolve a multitude of system instabilities, performance issues, and compatibility conflicts. It’s a pragmatic approach for users who prioritize stability and functionality over always having the absolute latest features. By meticulously following the steps outlined – from thorough preparation and precise driver selection to a clean installation using DDU and careful management of automatic updates – you can successfully navigate this process. Remember, while older drivers offer specific solutions, they also come with trade-offs, particularly regarding security and modern optimizations. Thoughtful driver management, understanding your specific needs, and knowing when to eventually update again are the hallmarks of an informed PC user.
aViewFromTheCave is a participant in the Amazon Services LLC Associates Program, an affiliate advertising program designed to provide a means for sites to earn advertising fees by advertising and linking to Amazon.com. Amazon, the Amazon logo, AmazonSupply, and the AmazonSupply logo are trademarks of Amazon.com, Inc. or its affiliates. As an Amazon Associate we earn affiliate commissions from qualifying purchases.