
The evolution of digital broadcasting has transformed YouTube from a simple video-sharing repository into a powerhouse for real-time communication. Engaging in a YouTube Live session requires more than just clicking a “Go Live” button; it demands a sophisticated understanding of hardware integration, software encoding, and network optimization. To produce a stream that meets modern professional standards—characterized by high-fidelity audio, crisp 1080p or 4K visuals, and zero latency issues—creators must master the technical ecosystem that supports the platform. This guide breaks down the essential technological pillars required to execute a flawless YouTube Live broadcast.
Hardware Essentials: Building a High-Performance Streaming Rig
The foundation of any high-quality live stream is the hardware used to capture and process data. While mobile streaming is an option for casual updates, professional-grade broadcasts require a dedicated setup capable of handling heavy computational loads without overheating or dropping frames.
Cameras and Video Capture
To move beyond the grainy quality of standard integrated webcams, serious creators utilize DSLRs or mirrorless cameras. These devices offer superior sensors and depth of field. However, connecting a high-end camera to a computer requires a video capture card, such as the Elgato Cam Link 4K or an internal PCIe card like the Blackmagic DeckLink. These devices convert the HDMI output from your camera into a digital signal that your computer recognizes as a webcam source.
When selecting a camera, ensure it supports “Clean HDMI Output,” which means it can send a video signal without the UI elements (like battery life or focus boxes) appearing on the stream. Furthermore, the camera must have an external power solution—typically a “dummy battery” connected to an AC outlet—to prevent the device from shutting down mid-stream.
Audio Gear: Microphones and Interfaces
In the world of live streaming, audio quality is arguably more important than video. Viewers will tolerate a lower resolution, but they will quickly abandon a stream with distorted or muffled audio.
There are two primary paths for audio: USB and XLR. USB microphones, like the Shure MV7, are “plug-and-play” and ideal for beginners. However, the gold standard is an XLR setup, which involves a professional condenser or dynamic microphone (such as the Shure SM7B) connected to an audio interface (like the Focusrite Scarlett or the GoXLR). The interface acts as a pre-amp and an analog-to-digital converter, providing granular control over gain levels and hardware-level noise suppression.
Lighting and Background Management
Technological quality is often a result of how well the sensor handles light. Three-point lighting—comprising a Key Light, Fill Light, and Back Light—is the industry standard. High-CRI (Color Rendering Index) LED panels are preferred because they allow for precise color temperature adjustments (measured in Kelvins), ensuring that skin tones look natural under the camera’s white balance settings.
Software Configuration and Streaming Encoders
Once the hardware is in place, the next step is the software encoder. This is the engine that compresses your video and audio data and sends it to YouTube’s servers in real-time.
Choosing the Right Encoder: OBS vs. vMix
Open Broadcaster Software (OBS) Studio is the industry-standard open-source tool for most creators. It allows for complex scene building, including overlays, browser sources, and window captures. For high-end corporate productions, vMix offers more advanced features like NDI (Network Device Interface) support and multi-view outputs, though it comes with a significant licensing cost.
Within these programs, you must configure your “Scenes.” A professional broadcast usually consists of a “Starting Soon” screen, the “Main Content” scene, and an “Ending” screen. Utilizing “Sources” within these scenes allows you to layer your webcam over gameplay, slide presentations, or guest video feeds via tools like VDO.Ninja.
Bitrate, Resolution, and Frame Rate
The balance between resolution and bitrate determines the visual clarity of your stream. For a 1080p stream at 60 frames per second (fps), YouTube recommends a bitrate between 4,500 and 9,000 Kbps.
The codec used is also vital. Most streamers use H.264 (AVC) because of its universal compatibility. However, if you have a modern NVIDIA GPU, utilizing the NVENC (New) encoder is highly recommended. This offloads the encoding process from the CPU to a dedicated chip on the graphics card, preventing the system from lagging during CPU-intensive tasks.
Understanding RTMP and Stream Keys
YouTube Live operates primarily via the RTMP (Real-Time Messaging Protocol). To connect your software to YouTube, you need a “Stream Key,” a unique string of characters found in the YouTube Studio dashboard. When you paste this key into your encoder (OBS), it creates a secure handshake between your computer and YouTube’s ingest server. It is critical to keep this key private; anyone with access to it can broadcast directly to your channel.
Navigating the YouTube Live Dashboard and Studio
The YouTube Studio “Live Control Room” is your mission control. It provides real-time analytics, health reports for your stream, and tools to interact with your audience.
Scheduled vs. Instant Streams
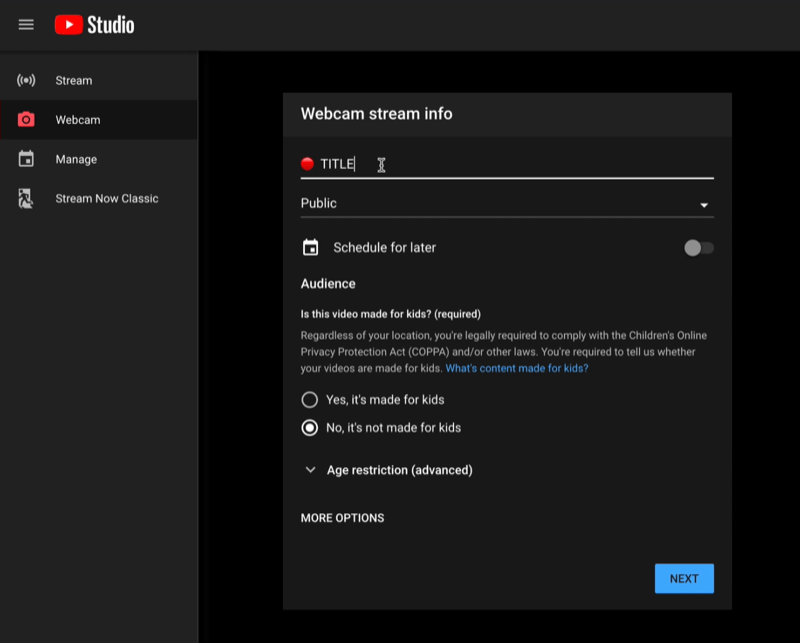
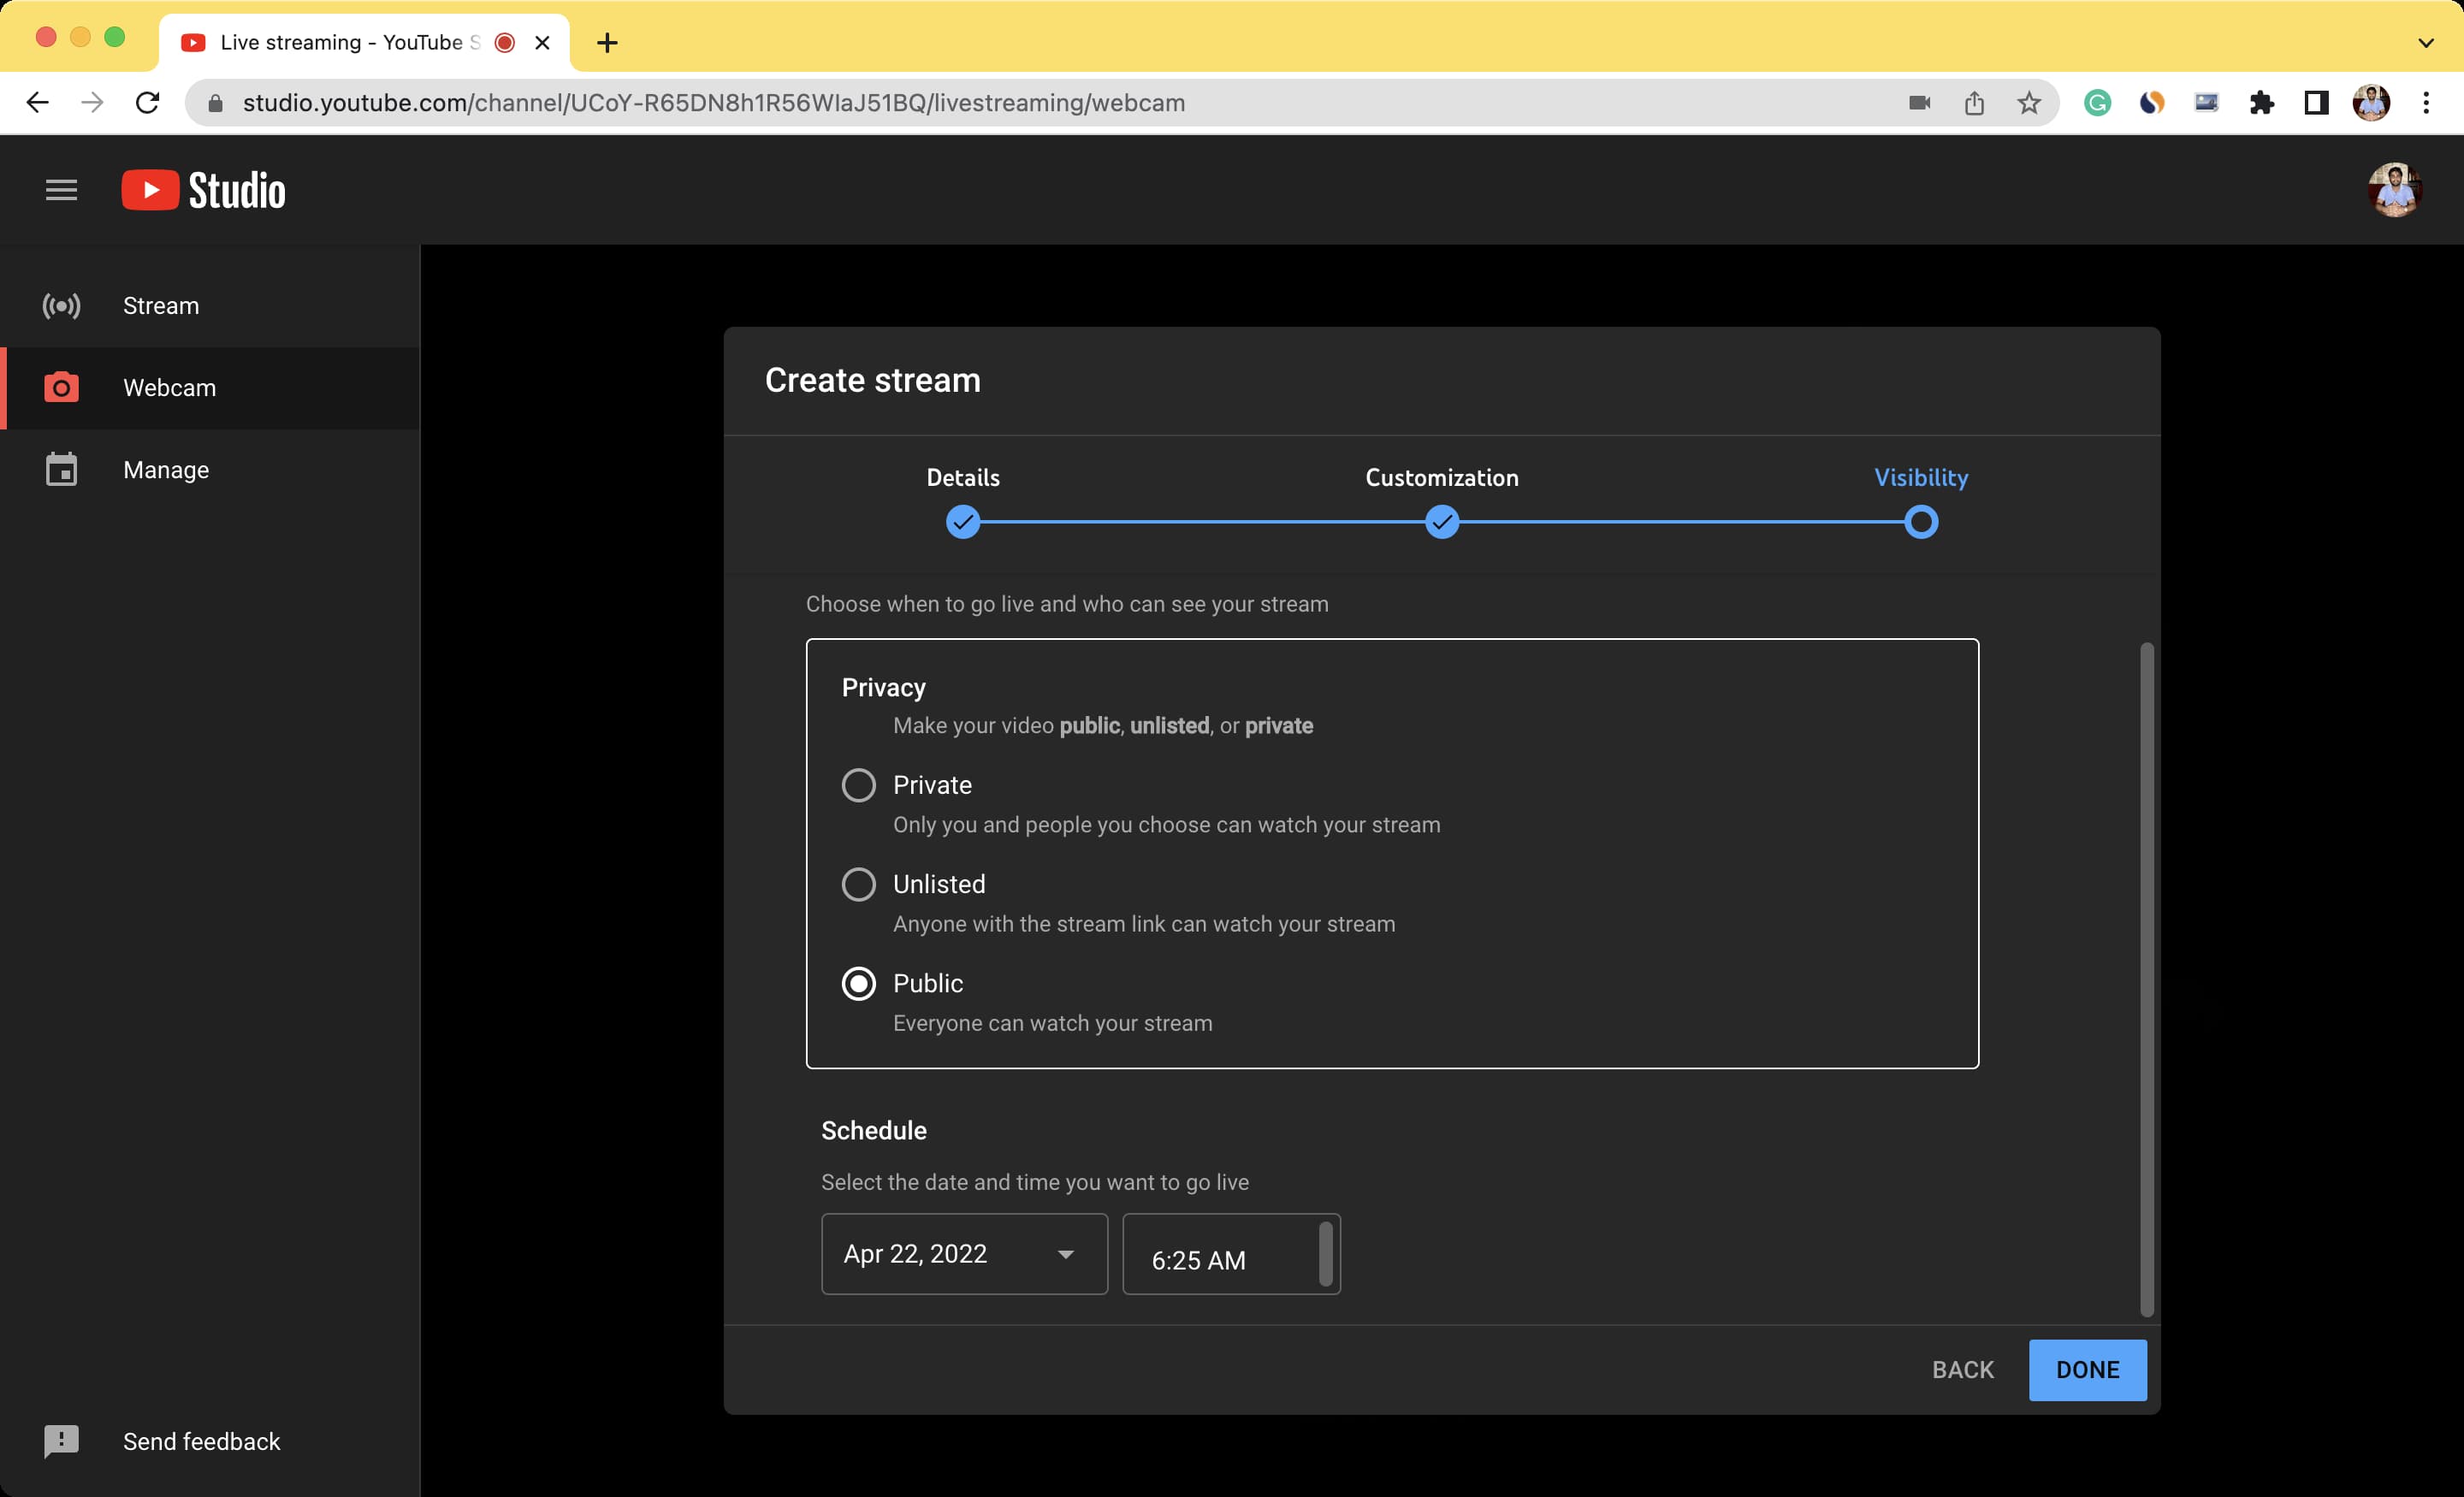
YouTube offers two main ways to go live: “Stream Now” and “Manage/Schedule.” Scheduling a stream is technologically advantageous because it generates a persistent URL that you can use for promotion. It also allows you to upload a custom thumbnail and set metadata (tags and descriptions) in advance, which helps YouTube’s algorithm index the live event for search.
Latency Modes: Choosing the Right Speed
In the YouTube Live settings, you will find three latency options:
-
Normal Latency: Best for the highest image quality and 4K streaming. It has a delay of 15–30 seconds, making real-time chat interaction difficult.
-
Low Latency: A middle ground that allows for near real-time interaction (5–10 second delay) while maintaining high-definition stability.
-
Ultra-Low Latency: Reduces the delay to 1–2 seconds. This is essential for Q&A sessions or highly interactive content, though it may result in more buffering for viewers with slower internet connections.
Managing Live Chat and Moderation Tools
The Live Control Room includes a chat module where you can set “Slow Mode” (limiting how often users can post) or “Subscriber-only Mode.” From a technical standpoint, you can also integrate third-party bots like Nightbot or Cloudbot. These tools connect via API to your chat, automatically filtering spam and blacklisting specific keywords to maintain a professional environment.
Network Optimization and Connectivity
Even the most expensive hardware will fail if the network connection is unstable. Live streaming is an “upload-heavy” activity, which is the opposite of most internet usage (which is download-heavy).
Ethernet vs. Wi-Fi
The first rule of professional streaming is to never use Wi-Fi. Wireless signals are prone to interference and “jitter,” which causes dropped frames. A hardwired Cat6 or Cat7 Ethernet connection provides the consistent throughput necessary for a steady stream.
Bandwidth Management and Upload Speeds
Before going live, perform a speed test to determine your “Upload Speed.” As a rule of thumb, your stream’s bitrate should not exceed 50% of your total available upload capacity. For example, if your upload speed is 20 Mbps, you should cap your bitrate at 10,000 Kbps (10 Mbps). This overhead accounts for network fluctuations and ensures that other devices on your network don’t cause the stream to crash.
ISP Throttling and VPNs
Some Internet Service Providers (ISPs) detect high-volume RTMP traffic and throttle the connection. Using a high-speed VPN with a dedicated “WireGuard” protocol can sometimes bypass this, though it adds another layer of complexity. It is generally better to work with your ISP to ensure you have a “Business Class” line if you intend to stream frequently at high bitrates.
Advanced Technical Workflows: Multi-Streaming and Remote Guests
As your production value grows, you may want to incorporate more complex technical elements into your YouTube Live strategy.
Multi-Streaming via Cloud Servers
If you wish to broadcast to YouTube and other platforms simultaneously, using a cloud-based restreaming service (like Restream.io or a self-hosted RTMP server) is more efficient than encoding multiple streams on your local machine. These services take one single high-quality feed from your computer and redistribute it to various destinations, saving your local bandwidth and CPU cycles.
Incorporating Remote Guests
Bringing guests onto a YouTube Live stream involves sophisticated audio routing. Using software like “VB-Audio VoiceMeeter” allows you to create virtual audio cables. This enables you to capture audio from a Zoom or Discord call and route it into OBS without creating a feedback loop where the guest hears themselves.
For the highest video quality from guests, avoid screen-capturing a video call. Instead, use “browser-based” capture tools that utilize WebRTC technology. These tools provide a direct peer-to-peer connection, ensuring that your guest’s video feed remains high-resolution and synchronized with your own.

The Fail-Safe: Testing and Monitoring
The final step in the technical workflow is the “Private Test.” By setting your stream visibility to “Unlisted” in the YouTube Studio, you can conduct a full-scale rehearsal. Monitor the “Stream Health” tab for warnings about “Output Scaled” or “Skipped Frames.” Only when the dashboard displays a “Good Connection” status for at least ten minutes of testing should you proceed to a public broadcast. This rigorous testing phase is what separates amateur hobbyists from professional broadcasters in the YouTube ecosystem.
aViewFromTheCave is a participant in the Amazon Services LLC Associates Program, an affiliate advertising program designed to provide a means for sites to earn advertising fees by advertising and linking to Amazon.com. Amazon, the Amazon logo, AmazonSupply, and the AmazonSupply logo are trademarks of Amazon.com, Inc. or its affiliates. As an Amazon Associate we earn affiliate commissions from qualifying purchases.