
The PlayStation 4 remains one of the most successful gaming consoles in history, and its primary input device, the DualShock 4, is celebrated for its ergonomics and feature set. However, for many users—especially those transitioning from newer hardware or picking up a pre-owned unit—the specifics of its power requirements can be confusing. To maintain the longevity of your hardware and ensure a seamless gaming experience, understanding the exact specifications of the PS4 controller’s charging system is essential.
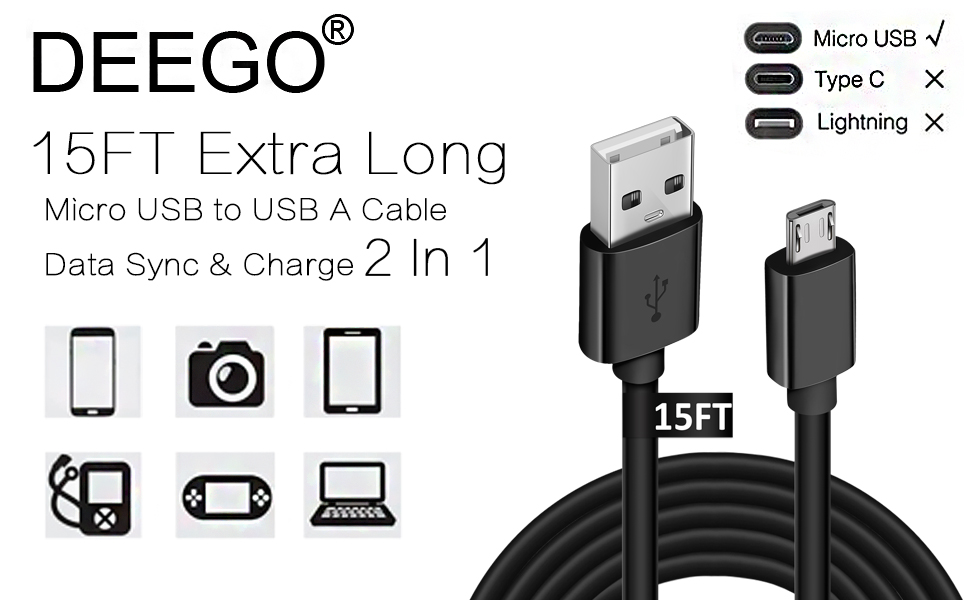
At its core, the DualShock 4 uses a Micro-USB Type-B connection for charging and data synchronization. While this was the industry standard during the PS4’s launch in 2013, the tech landscape has since shifted toward USB-C. Consequently, finding the right cable and power source involves more than just finding a plug that fits; it requires an understanding of voltage, amperage, and the distinction between “charge-only” and “data-sync” cables.

The Hardware Standard: Identifying the Micro-USB Type-B Connection
The DualShock 4 controller features two primary ports that can be used for power, but the most common and recognizable is the Micro-USB port located at the top of the controller, nestled between the L1 and R1 triggers.
Micro-USB vs. USB-C
It is important to distinguish the PS4’s Micro-USB port from the USB-C port found on the PlayStation 5’s DualSense controller. Micro-USB is asymmetrical, with a trapezoidal shape that requires the cable to be inserted in a specific orientation. USB-C, by contrast, is symmetrical and reversible. If you are trying to use a cable from a modern smartphone or a PS5, it likely will not fit the PS4 controller.
The Importance of Data Sync Cables
Not all Micro-USB cables are created equal. In the world of tech accessories, cables are generally categorized into two types: “charge-only” and “data-sync.”
- Charge-only cables contain only two wires (positive and negative power). These will provide power to the controller but will not allow it to communicate with the PS4 console.
- Data-sync cables contain four wires (two for power, two for data).
The PS4 controller requires a data-sync cable to “pair” with the console for the first time or to reconnect after being used on a different device. If you find your controller is glowing orange (charging) but won’t connect to the console even when plugged in, you are likely using a charge-only cable.
The EXT Port
On the bottom of the controller, next to the 3.5mm headphone jack, sits a proprietary connection known as the EXT (Extension) port. While most users rely on the Micro-USB port, the EXT port is frequently used by high-quality charging docks. This port allows for a more stable “drop-and-charge” experience, bypassing the wear and tear that frequent plugging and unplugging can cause to the more delicate Micro-USB port.
Power Specifications and Electrical Safety
Understanding the electrical requirements of the DualShock 4 is the most critical step in preventing hardware failure. Many users make the mistake of using high-wattage “fast chargers” designed for modern smartphones, which can result in a fried internal circuit board.
Voltage and Amperage
The official Sony DualShock 4 is designed to receive power at 5 Volts (5V) DC. The amperage (current) drawn by the controller typically ranges between 800mA (0.8A) and 1.5A.
When you plug the controller into the PS4 console itself, the USB 3.0 ports provide a steady, regulated stream of 5V power that is perfectly tuned to the controller’s needs. Problems arise when using third-party wall adapters.
The Danger of Fast Chargers
Modern smartphones often come with “Fast Charging” or “Quick Charge” wall bricks. These adapters are intelligent; they can output 9V, 12V, or even 20V to rapidly fill a phone’s battery. While these adapters are supposed to “handshake” with the device to determine the correct voltage, they often fail to communicate correctly with the DualShock 4.
The controller’s charging circuit is not designed to handle high-voltage spikes. If a fast charger sends 9V to a controller built for 5V, the charging chip (often the PMIC) can burn out instantly. If your controller no longer charges or shows no light bar activity even with a known-good cable, a high-voltage wall adapter is the likely culprit of the damage.
Recommended Power Sources
For the safest experience, users should prioritize the following power sources:
- The PS4 Console: Using the provided USB ports is the gold standard for safety.
- PC or Laptop USB Ports: These provide a stable 5V output.
- Standard 5V/1A Wall Adapters: Older phone chargers (like the small cubes provided with older iPhones) are generally safe because they do not feature fast-charging protocols.
Charging Methods: Console, PC, and External Docks
While the Micro-USB cable is the standard tool, there are several ways to keep your DualShock 4 powered up, each with its own technical advantages.
Using the PS4 Rest Mode
One of the most convenient ways to charge is during the console’s “Rest Mode.” However, this must be enabled in the system settings. Navigate to Settings > Power Save Settings > Set Features Available in Rest Mode > Supply Power to USB Ports. Setting this to “Always” or “3 Hours” ensures that your controllers charge while you aren’t playing, utilizing the console’s internal power regulator.
Third-Party Charging Docks
As mentioned earlier, the EXT port on the bottom of the controller is a robust alternative. Charging docks, such as the official Sony DualShock 4 Charging Station or reputable third-party options from brands like PowerA or HyperX, utilize this port.
- Benefits: These docks usually plug directly into a wall outlet and use a dedicated transformer to ensure the correct voltage. They also reduce physical stress on the Micro-USB port, which is a common point of mechanical failure in PS4 controllers.
Charging via PC or Mac
The DualShock 4 is a “Plug and Play” HID (Human Interface Device). When you connect it to a computer via Micro-USB, the computer’s USB port will provide the necessary 5V to charge the battery. This is an excellent alternative if your console’s USB ports are full or if you are using the controller for PC gaming via Steam or DS4Windows.
Diagnosing and Fixing Common Charging Problems
Even with the correct charger, technical issues can arise. Understanding the LED signals and hardware resets can save a user from unnecessarily discarding a functional controller.
Interpreting the Light Bar
The light bar on the back of the DualShock 4 is a diagnostic tool:
- Pulsing Orange: The controller is in standby and currently charging.
- Solid White: The controller is on and trying to connect to a console.
- No Light: If plugged in and there is no light, the battery may be full, the cable may be faulty, or the internal charging circuit is damaged.
- Blinking White/Light Blue: This usually indicates a syncing error where the controller cannot find the host console.
The Hard Reset
If a controller refuses to charge or pair, a “Soft Reset” via the console menu may not work. Instead, perform a hardware reset. On the back of the controller, near the L2 button, there is a small pinhole. Insert a paperclip or SIM tool and hold the internal button for 5 seconds. This clears the controller’s memory and often resolves handshake issues with charging cables.
Physical Obstructions
Because Micro-USB ports are open to the environment, they are magnets for lint and debris. If the cable feels “mushy” when inserted or falls out easily, use a toothpick or compressed air to clean the port. Even a small amount of pocket lint can prevent the pins from making a clean electrical connection.
Best Practices for DualShock 4 Battery Health
The DualShock 4 uses a Lithium-Ion battery, which is subject to chemical aging. To ensure your controller lasts for years rather than months, follow these professional maintenance tips.
Avoid Deep Discharges
Lithium-Ion batteries are stressed when they drop to 0%. Try to plug in your controller when the console gives you the “Battery Low” notification (usually around 10-15%). Repeatedly letting the controller die completely can reduce the overall capacity of the battery over time.
Manage the Light Bar and Vibration
From a software perspective, you can extend the time between charges by reducing power consumption. In the PS4’s Quick Menu, you can set the Light Bar brightness to “Dim” and turn off “Vibration.” The light bar, while aesthetically pleasing, is a constant drain on the 1000mAh battery.

Replacing the Internal Battery
If your controller only works when plugged in, the internal battery has likely reached the end of its life cycle. Unlike modern smartphones, the DualShock 4 is relatively easy to service. With a small Phillips head screwdriver and a plastic pry tool, the back shell can be removed, allowing the internal battery—connected by a simple 2-pin molex connector—to be swapped for a new one. This is a cost-effective way to revitalize a tech-heavy peripheral without buying a brand-new controller.
By adhering to these technical standards—using the correct Micro-USB data-sync cable, avoiding high-voltage fast chargers, and utilizing the console’s regulated power—users can ensure their PS4 controllers remain reliable components of their gaming setup. As the industry moves further away from Micro-USB, maintaining these legacy devices requires a bit more knowledge, but the effort pays off in hardware longevity and performance.
aViewFromTheCave is a participant in the Amazon Services LLC Associates Program, an affiliate advertising program designed to provide a means for sites to earn advertising fees by advertising and linking to Amazon.com. Amazon, the Amazon logo, AmazonSupply, and the AmazonSupply logo are trademarks of Amazon.com, Inc. or its affiliates. As an Amazon Associate we earn affiliate commissions from qualifying purchases.