
In the realm of modern computing, the mouse is the primary bridge between human intent and digital execution. Whether you are a competitive eSports athlete, a professional graphic designer, or a software developer, the precision of your cursor movement is dictated by a single, critical metric: DPI. Short for “Dots Per Inch,” DPI is a measurement of how sensitive a mouse is to physical movement. Despite its importance, many users find themselves asking, “What is my DPI?” because, unlike screen resolution or RAM capacity, DPI is often tucked away within proprietary software or hardware configurations.

Understanding your DPI is not just about knowing a number; it is about mastering the ergonomics and efficiency of your digital workspace. This guide explores the technical foundations of mouse sensitivity, methods for identifying your current settings, and how to optimize these parameters for your specific workflow.
Understanding the Mechanics: What Is Mouse DPI?
Technically speaking, DPI refers to the number of individual points a mouse sensor can detect within one linear inch of movement. If your mouse is set to 800 DPI, moving it exactly one inch on your desk will result in the cursor moving 800 pixels on your screen. Therefore, a higher DPI setting makes the mouse more “sensitive,” requiring less physical movement to cover large digital distances.
DPI vs. CPI: The Technical Distinction
While the industry standard term is DPI, the more technically accurate term for mouse sensors is CPI, or “Counts Per Inch.” DPI is a term borrowed from the printing industry, describing the density of ink droplets on paper. In contrast, mouse sensors use an optical CMOS (Complementary Metal-Oxide-Semiconductor) sensor—essentially a tiny, high-speed camera—to take thousands of images of the surface below it. The sensor then counts the number of discernible “points” it sees as it moves. While hardware enthusiasts often use the terms interchangeably, knowing that DPI represents the count of tracking points helps in understanding how sensor resolution impacts precision.
How Sensors Track Movement
Modern mice primarily use optical or laser sensors. Optical sensors use an LED light to illuminate the surface, while laser mice use a coherent light beam. The sensor captures images of the surface’s microscopic texture. An internal Digital Signal Processor (DSP) analyzes these images to determine the direction and distance of movement. High-quality sensors can track at 20,000 DPI or higher, though for most human applications, such extreme sensitivity is physically impossible to manage without high-level software interpolation.
How to Find Your Current Mouse DPI
Because the Windows and macOS operating systems do not have a built-in “DPI meter” in the taskbar, identifying your exact setting requires investigating the hardware and its supporting software.
1. Check the Manufacturer’s Software
The most reliable way to determine your DPI is through the official software suite provided by your mouse manufacturer. Leading brands integrate their hardware with sophisticated dashboards:
- Logitech G Hub: Provides a real-time slider and preset “ticks” for DPI.
- Razer Synapse: Offers detailed sensitivity stages and the ability to link specific DPI settings to different applications.
- SteelSeries GG (Engine): Allows for “CPI” adjustments in increments of 100 or 50.
- Corsair iCUE: Features comprehensive performance tuning, including surface calibration.
If you are using a gaming or high-end productivity mouse, download the software from the manufacturer’s support page. Once installed, the current DPI setting is usually displayed prominently on the “Sensitivity” or “Pointer Settings” tab.
2. Using Hardware DPI Buttons
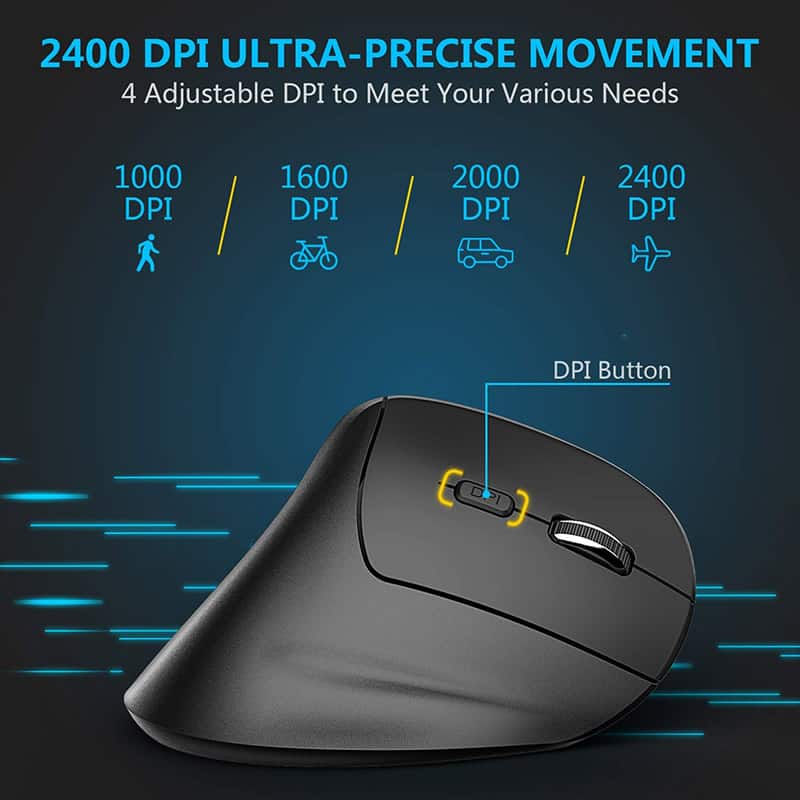
Many mid-range and high-end mice feature a dedicated DPI cycle button, usually located behind the scroll wheel or on the underside of the device. Pressing this button often triggers a color change in an integrated LED. For instance, a mouse might flash Red for 400 DPI, Green for 800 DPI, and Blue for 1600 DPI. You can consult your device’s manual to find the specific values associated with these color codes.
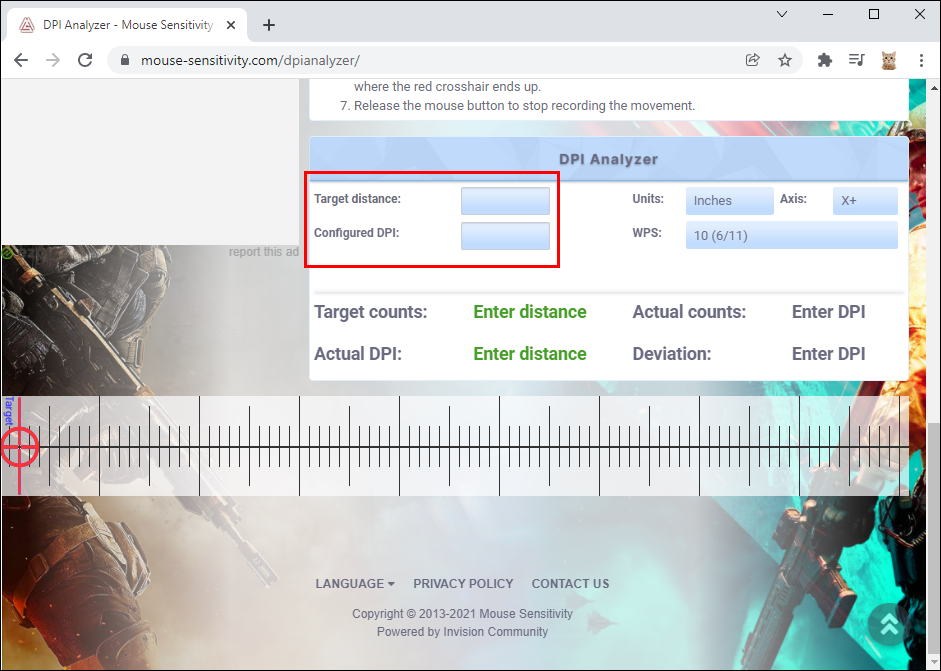
3. Online DPI Analyzers and Calculation
If you are using a “plug-and-play” mouse without dedicated software, you can estimate your DPI using an online DPI analyzer. These tools require you to move your mouse a specific physical distance (such as 1 or 2 inches) and then measure how many pixels the cursor traveled.
- The Process: You place your mouse at the “0” mark on a physical ruler, click a starting point on the screen, move the mouse exactly one inch to the right, and release. The tool divides the pixel travel by the physical distance to give you an approximate DPI reading. While not as precise as software-reported numbers, it is a viable solution for generic hardware.
4. Checking the Product Specifications
If the mouse is static and has no adjustable settings, its DPI is likely fixed at a factory standard. Most budget office mice are set to a fixed 800, 1000, or 1200 DPI. Searching for the specific model number on the manufacturer’s website will reveal the hardware’s “Native DPI.”
The Science of Sensitivity: DPI vs. Polling Rate
To truly understand mouse performance, one must look beyond DPI and consider the “Polling Rate.” While DPI determines how much the cursor moves per inch, the polling rate determines how often the mouse reports its position to the computer.
Polling Rate Explained
Measured in Hertz (Hz), the polling rate indicates the frequency of data transmission. A mouse with a 125Hz polling rate reports its position 125 times every second (every 8 milliseconds). A gaming-grade mouse typically operates at 1000Hz (every 1 millisecond).
- The Synergy: High DPI combined with a low polling rate can result in “jittery” or pixel-skipping movement. For a smooth experience, especially on high-refresh-rate monitors (144Hz or 240Hz), a polling rate of at least 500Hz is recommended to ensure that the sensor’s high-resolution data is being processed efficiently by the OS.
The Myth of “More is Better”
Marketing materials often boast 25,000+ DPI sensors. In technical reality, most professional users operate between 400 and 3200 DPI. Extremely high DPI settings can actually introduce “noise” into the sensor’s data. When the sensor is forced to look for microscopic deviations, it can sometimes interpret tiny vibrations or surface imperfections as intentional movement, leading to a loss of actual precision.
Optimizing DPI for Productivity and Gaming
Finding the “right” DPI is a subjective process that depends on your screen resolution and the nature of your tasks.
1. Gaming: The Precision vs. Speed Tradeoff
In the gaming world, DPI is a foundational setting.
- Low DPI (400–800): Preferred by first-person shooter (FPS) players. It allows for “arm aiming,” where large physical movements result in precise crosshair placement. This reduces the margin of error for small adjustments.
- High DPI (1600+): Common in Real-Time Strategy (RTS) or MOBA games, where players need to move the cursor across the entire screen rapidly to manage units or cast spells.
2. Creative Professional Work
For graphic designers and video editors, DPI is often adjusted on the fly.
- High DPI is useful for navigating across dual-monitor setups or wide-screen 4K displays.
- Low DPI is essential for “pixel-perfect” editing, such as using the Pen tool in Adobe Illustrator or performing detailed masking in Photoshop. Many professional mice include a “Sniper Button” or “DPI Shift” that temporarily lowers the DPI while held, allowing for momentary precision.
3. General Productivity and Ergonomics
On a standard 1080p monitor, 800 to 1200 DPI is generally considered the “sweet spot” for ergonomic comfort. If your DPI is too low, you may find yourself repeatedly lifting and resetting the mouse (clutching), which can lead to wrist strain. If it is too high, you may experience “overshooting,” where you struggle to click small icons or buttons, leading to micro-tensions in the hand.
Technical Factors Influencing Perceived DPI
Even if you know your DPI, two different computers might “feel” different due to software-level modifications.
Windows Pointer Precision (Mouse Acceleration)
In Windows, there is a setting called “Enhance Pointer Precision.” When enabled, the OS applies acceleration. If you move the mouse quickly, the cursor travels further than if you moved the mouse the same physical distance slowly. For technical precision—especially in gaming—it is widely recommended to disable this feature. You want a 1:1 relationship between your hand movement and the cursor movement, which is only possible when acceleration is turned off.
Monitor Resolution (PPI)
The perceived speed of your DPI is inextricably linked to your monitor’s resolution. On a 1080p screen, 800 DPI feels relatively fast. On a 4K screen, which has four times the pixels, that same 800 DPI will feel sluggish because the physical movement required to span the screen has quadrupled. As you upgrade to higher-resolution displays, you will likely need to increase your mouse DPI to maintain the same “feel.”
Surface Material
The surface on which you use your mouse impacts the sensor’s ability to maintain its rated DPI. Hard pads (plastic or glass) offer less friction and higher tracking consistency for laser sensors, while cloth pads provide more control and “stopping power” for optical sensors. If a sensor cannot clearly distinguish the texture of the surface, it may skip counts, effectively lowering your functional DPI.
Conclusion
Determining “what is my DPI” is the first step toward optimizing your interaction with your computer. Whether you rely on manufacturer software like Logitech G Hub, hardware indicators, or manual calculation, knowing this metric allows you to standardize your performance across different devices and applications. By balancing DPI with polling rates and disabling software acceleration, you ensure that your mouse operates as a high-precision instrument rather than a source of frustration. Ultimately, the best DPI is not the highest number available, but the one that aligns most perfectly with your physical movements and digital objectives.
aViewFromTheCave is a participant in the Amazon Services LLC Associates Program, an affiliate advertising program designed to provide a means for sites to earn advertising fees by advertising and linking to Amazon.com. Amazon, the Amazon logo, AmazonSupply, and the AmazonSupply logo are trademarks of Amazon.com, Inc. or its affiliates. As an Amazon Associate we earn affiliate commissions from qualifying purchases.