Embarking on a fresh Windows installation is often a rite of passage for PC users, whether you’re building a new system, upgrading an old one, or simply seeking a clean slate. It promises enhanced performance, improved security, and a streamlined digital experience. Yet, for many, this journey grinds to a halt at a seemingly innocuous but critically important screen: “Where do you want to install Windows?” This prompt, while straightforward in its intent, frequently becomes a source of frustration, presenting users with an empty list of drives, an error message about missing drivers, or an inability to proceed.

This article delves deep into this pivotal moment, exploring the common reasons behind installation drive issues and offering comprehensive solutions. We’ll cover everything from elusive storage drivers and intricate BIOS settings to disk preparation and best practices, ensuring you can confidently navigate your next Windows installation and unlock your system’s full potential. For anyone invested in the Tech landscape, understanding these nuances is crucial for both personal productivity and digital security.
The Critical Juncture: Understanding the “Where Do You Want to Install Windows?” Prompt
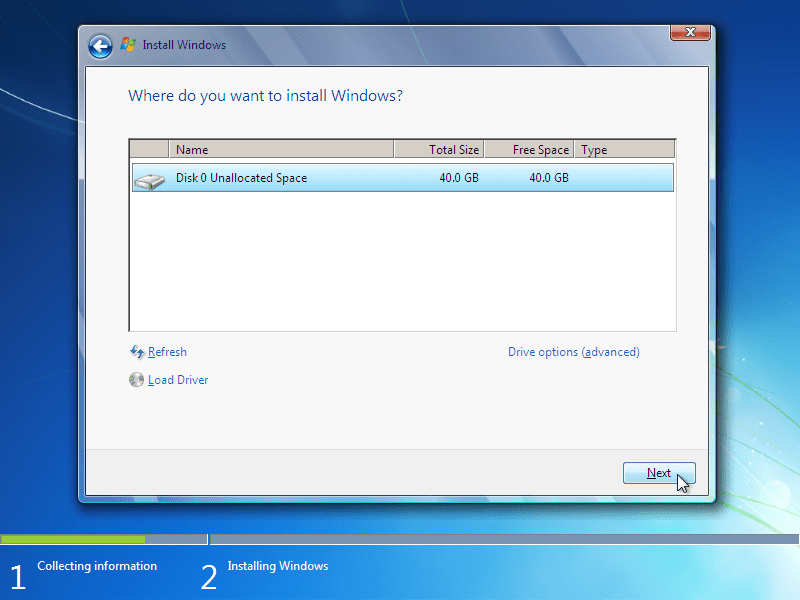
When you boot from your Windows installation media, the setup wizard guides you through a series of choices, culminating in the screen that asks you to select a drive for the operating system. Ideally, this screen should present a clear list of all connected storage devices – your hard drives (HDDs) and solid-state drives (SSDs) – allowing you to choose one, format it, and proceed. However, the reality for many users is far less simple.
Initial Challenges and User Expectations
The expectation is a smooth, intuitive process. You’ve prepared your USB drive, perhaps downloaded the latest Windows ISO, and you’re ready to go. Then, upon reaching the drive selection screen, you’re met with a blank canvas or an alarming message: “No signed device drivers were found. Make sure that the installation media has the correct drivers, and then click OK,” or “We couldn’t find any drives. To get a storage driver, click Load driver.”
These messages indicate a fundamental breakdown in communication between the Windows installer and your system’s hardware. The installer simply cannot “see” your storage drives, not because they aren’t physically present, but because it lacks the necessary instructions (drivers) to interface with them or because system configurations are preventing recognition.
The Importance of Drive Recognition
For Windows to install correctly, it absolutely must recognize and be able to interact with the target drive. Without this fundamental connection, the installation cannot proceed. This problem is particularly prevalent with newer hardware, especially high-speed NVMe SSDs, which often require specific storage drivers that are not universally included in older Windows installation images. Similarly, certain motherboard configurations, particularly those related to RAID arrays or advanced storage controllers, can also obscure drives from the installer’s view. Recognizing these challenges upfront is the first step towards a successful installation.
Decoding Common Installation Drive Errors and Their Root Causes
Understanding why the Windows installer can’t see your drives is crucial for effectively troubleshooting the problem. The causes often boil down to a few key areas, ranging from missing software components to incorrect hardware configurations.
The Elusive Driver: NVMe SSDs and Intel RST
One of the most frequent culprits, especially in modern systems featuring NVMe (Non-Volatile Memory Express) SSDs, is the absence of appropriate storage drivers. NVMe technology offers vastly superior speeds compared to traditional SATA drives, but it often requires specific drivers to be loaded during the Windows installation process.
- NVMe SSDs: While Windows 10 and 11 have improved NVMe support, some newer or proprietary NVMe controllers still necessitate manufacturer-specific drivers. If your motherboard or laptop features an NVMe drive, and you’re encountering drive recognition issues, a missing NVMe driver is a strong candidate for the problem.
- Intel Rapid Storage Technology (RST): For Intel-based platforms, the Intel RST driver is a common requirement. This driver facilitates communication with the storage controller, particularly when configured for RAID (Redundant Array of Independent Disks) or even certain AHCI (Advanced Host Controller Interface) modes on some chipsets. Even if you’re not using a RAID array, many modern Intel motherboards default to a VMD (Volume Management Device) setting or a specific controller mode that requires the RST driver (often found as
f6flpy-x64.zipor similar, containing the VMD driver). Without it, the installer won’t detect the drives connected to that controller. AMD platforms can have similar requirements for their respective chipset or storage drivers.
BIOS/UEFI Configurations: RAID vs. AHCI
The Basic Input/Output System (BIOS) or its modern successor, Unified Extensible Firmware Interface (UEFI), is the firmware that controls your computer’s hardware at a very low level. Incorrect settings here can directly impact drive visibility.
- SATA Mode (RAID vs. AHCI): Most commonly, motherboards offer a choice between AHCI and RAID modes for SATA controllers. While AHCI is the standard mode for individual drives and is generally preferred for SSDs, some systems might default to RAID mode even if no RAID array is configured. If your Windows installer doesn’t have the necessary RAID drivers (like Intel RST), it won’t see drives connected in this mode. Switching this setting to AHCI in your BIOS/UEFI can often resolve the issue, provided you’re not planning to build a RAID array and are performing a clean install. Be cautious when changing this on an existing OS installation, as it can prevent booting.
- Boot Mode (UEFI vs. Legacy/CSM): Modern Windows versions (10 and 11) are designed for UEFI boot mode, which offers benefits like Secure Boot and faster startup. Older systems or specific configurations might use Legacy BIOS or Compatibility Support Module (CSM) mode. Mismatched boot modes (e.g., trying to install to a drive partitioned for MBR in UEFI mode or vice-versa) can cause issues. For Windows 10/11, ensure UEFI mode is enabled.
- Secure Boot: While usually not a direct cause of drive invisibility, Secure Boot (a UEFI feature) can occasionally interfere with the booting of certain installation media or drivers. Temporarily disabling it for the installation process might be a troubleshooting step, though it should ideally be re-enabled afterward for enhanced security.
Disk Health, Formatting, and Partitioning Woes
Sometimes the problem isn’t with drivers or BIOS, but with the drive itself or its current state.
- Brand New Drives: A freshly installed, uninitialized, or unallocated drive might not immediately appear in the installer if it’s completely blank. While the installer usually allows you to create partitions, some scenarios might benefit from pre-formatting.
- Existing Partitions/Operating Systems: Drives with existing partitions from other operating systems (e.g., Linux, or a previous Windows installation with a complex partition scheme) can sometimes confuse the installer or lead to errors if it attempts to use a partition that isn’t ready.
- Corrupted Drive/Bad Sectors: A physically failing or corrupted drive, or one with bad sectors, might not be recognized at all, or might fail during the partitioning/formatting stage.
- Physical Disconnection: While seemingly obvious, a loose or improperly connected SATA data or power cable, or a poorly seated NVMe drive, can lead to it not being detected.
Corrupted Media and Hardware Incompatibilities
Less common but still possible, issues with the installation media itself or fundamental hardware incompatibilities can also derail the process.
- Corrupted Installation Media: A faulty USB drive, a scratched DVD, or a corrupted ISO file used to create the media can lead to incomplete files or errors during driver loading, making drives invisible.
- Hardware Incompatibility: Though rare with mainstream components, very specific or niche hardware might have compatibility quirks with certain Windows versions or installation processes. This is usually more of a concern with highly specialized systems rather than typical consumer builds.
A Comprehensive Troubleshooting Guide: Overcoming Installation Hurdles
Now that we understand the potential causes, let’s explore systematic solutions to get your Windows installation back on track.
Preparing Your System: Drivers and BIOS Settings
Proactive preparation can save a lot of headaches. Before you even boot the installer, take these steps:
- Download Essential Drivers:
- Identify Your Motherboard/Laptop Model: This is critical. Check your system’s documentation, the physical motherboard, or use a tool if you can boot into another OS.
- Visit Manufacturer’s Support Page: Go to the official website of your motherboard (e.g., ASUS, MSI, Gigabyte, ASRock) or laptop (e.g., Dell, HP, Lenovo) manufacturer.
- Locate Storage/Chipset Drivers: Look for the “Support” or “Drivers & Downloads” section for your specific model. Download the latest Intel Rapid Storage Technology (RST) drivers, VMD (Volume Management Device) drivers, or equivalent AMD RAID/chipset drivers. Make sure to download the 64-bit version.
- Extract to a USB Drive: The drivers are often compressed (ZIP file). Extract the contents to a clearly labeled folder on a separate, empty USB flash drive (not the one you’re using for Windows installation). You typically need the
.inf,.sys, and.catfiles, not the installer executable.
- Adjust BIOS/UEFI Settings:
- Access BIOS/UEFI: Restart your computer and repeatedly press the designated key (commonly DEL, F2, F10, or F12) to enter the BIOS/UEFI setup.
- SATA Mode: Navigate to the storage configuration settings (often under “Advanced,” “Peripherals,” or “Storage Configuration”). Change the “SATA Mode” or “Storage Mode” from “RAID” to “AHCI” if you are not planning to use a RAID array. Save changes and exit.
- Boot Mode: Ensure “UEFI Boot” is enabled and “Legacy/CSM” is disabled, especially for Windows 10/11 on modern hardware.
- Disable VMD (if applicable): On some newer Intel platforms, there might be a “VMD Controller” or “Intel Volume Management Device” option. If you are experiencing issues, temporarily disabling it (and then possibly needing the RST drivers) can be a troubleshooting step.
- Secure Boot: If you’re encountering persistent issues, temporarily disable Secure Boot. Remember to re-enable it after installation.
Loading Essential Drivers During Installation

Once you’ve booted from the Windows installation media and reach the “Where do you want to install Windows?” screen with no drives visible:
- Click “Load driver”: This option is typically present in the bottom left corner of the screen.
- Browse for Drivers: Insert the USB drive containing your downloaded and extracted storage drivers. Click “Browse” and navigate to the folder on the USB drive where you placed the
.inffiles for your storage controller (e.g., Intel RST, VMD driver). - Select and Install: Select the appropriate driver file. The installer should then load the driver, and with a bit of luck, your drives will magically appear in the list.
- Proceed with Installation: Once your drives are visible, you can select the desired drive, create partitions if necessary, format it, and continue with the Windows installation process.
Managing and Preparing Your Drives
If driver loading doesn’t solve the problem, or if you need to thoroughly clean a drive, you can use the built-in Diskpart utility. WARNING: The clean command will erase ALL data on the selected disk. Ensure you select the correct disk!
- Access Command Prompt:
- At the “Where do you want to install Windows?” screen, press
Shift + F10(orShift + Fn + F10on some laptops) to open Command Prompt.
- At the “Where do you want to install Windows?” screen, press
- Launch Diskpart:
- Type
diskpartand press Enter.
- Type
- List Disks:
- Type
list diskand press Enter. This will show you all detected physical drives with their sizes. Carefully identify your target drive by its size (e.g., Disk 0, Disk 1).
- Type
- Select Disk:
- Type
select disk X(replaceXwith the number of your target drive, e.g.,select disk 0) and press Enter.
- Type
- Clean the Disk (CAUTION!):
- Type
cleanand press Enter. This command will wipe all partitions and data from the selected disk.
- Type
- Convert to GPT (for UEFI) or MBR (for Legacy BIOS):
- For UEFI systems (recommended for Windows 10/11): Type
convert gptand press Enter. - For Legacy BIOS systems: Type
convert mbrand press Enter.
- For UEFI systems (recommended for Windows 10/11): Type
- Create Primary Partition:
- Type
create partition primaryand press Enter.
- Type
- Format the Partition:
- Type
format quick fs=ntfs label="Windows"and press Enter. This will quickly format the new partition with the NTFS file system and label it “Windows”.
- Type
- Assign a Drive Letter (Optional but Recommended):
- Type
assignand press Enter.
- Type
- Exit Diskpart and Command Prompt:
- Type
exitand press Enter to leave Diskpart. - Type
exitand press Enter again to close Command Prompt.
- Type
- Refresh the Installer: Back on the “Where do you want to install Windows?” screen, click the “Refresh” button (or go back and forward in the wizard) to see the newly prepared drive.
Advanced Recovery: Command Prompt and Diskpart
Beyond basic preparation, the Command Prompt in the installer also allows you to:
- Check Physical Connections: Ensure all SATA and power cables are secure. For NVMe drives, confirm they are seated correctly in their M.2 slots.
- Recreate Installation Media: If you suspect your USB drive or DVD is faulty, download a fresh ISO from Microsoft’s official website. Use the Media Creation Tool or a reliable utility like Rufus to create a new bootable USB on a different flash drive. This eliminates any potential corruption in the installer itself.
- Check Disk Health (Limited): While full disk diagnostics aren’t available, if Diskpart consistently fails to
cleanorformata drive, it might indicate a physical problem with the drive itself.
Best Practices for a Seamless Windows Installation
Beyond troubleshooting, adopting a proactive approach can prevent many common installation issues. These best practices not only streamline the setup process but also lay the groundwork for a stable and efficient operating system.
Prioritizing Official Sources and Up-to-Date Drivers
The digital world is awash with third-party driver sites, but for critical system components, stick to the source.
- Manufacturer Websites are King: Always download drivers (especially for chipset, storage controllers, and network interfaces) directly from your motherboard or laptop manufacturer’s official support page. These drivers are specifically tested and optimized for your hardware.
- Latest Drivers are Crucial: New hardware often requires the latest drivers. An older Windows installation media might not include them, necessitating a manual load. Make it a habit to check for and download these drivers before starting your installation, keeping them handy on a separate USB drive.
- Official Windows ISOs: Always obtain your Windows installation media from Microsoft’s official website using the Media Creation Tool. This ensures you have a legitimate, uncorrupted, and generally up-to-date version of the operating system.
Verifying Hardware Compatibility
While modern operating systems are highly compatible, a quick check can prevent unexpected issues.
- System Requirements: Ensure your hardware meets the minimum system requirements for the version of Windows you intend to install (e.g., TPM 2.0 and Secure Boot for Windows 11).
- Motherboard QVL: For critical components like RAM and NVMe SSDs, consult your motherboard’s Qualified Vendor List (QVL). While not strictly necessary, it confirms that the manufacturer has tested these components with your board, ensuring optimal compatibility and performance.
- New Hardware Research: If you’re installing on brand-new or very recent hardware, a quick online search for “Windows 11 install [your motherboard/CPU model]” can reveal common quirks or specific driver requirements unique to that platform.
The Power of a Clean Installation and Regular Backups
A clean installation offers numerous advantages and is generally recommended for optimal performance and stability.
- Eliminate Digital Clutter: A clean install removes all previous software, configurations, and potential remnants of malware or corrupted files, providing a truly fresh start. This is particularly valuable from a “Productivity” standpoint, ensuring your system isn’t bogged down by unnecessary processes.
- Optimal Performance: Over time, operating systems can accumulate fragmentation and inefficiencies. A clean install ensures your Windows is running at its peak, leveraging your hardware effectively. This ties into “Tech” trends around system optimization.
- Backup, Backup, Backup: Before any major system operation like a Windows installation, always back up your important data. This cannot be stressed enough. Store your personal files, documents, photos, and any crucial data on an external drive, a network-attached storage (NAS) device, or a cloud service. This simple step is your ultimate safeguard against data loss, protecting your “Money” in terms of irreplaceable digital assets and the time it takes to recover them.
Maximizing Your Windows Experience: Post-Installation Considerations
A successful Windows installation is just the beginning. To truly harness your system’s capabilities and align with the “Tech,” “Brand,” and “Money” aspects of a well-optimized digital life, consider these post-installation steps.
Optimizing Drive Performance (SSD vs. HDD)
Your choice of drive impacts daily performance significantly.
- SSD Optimization: If Windows is installed on an SSD, ensure that features like TRIM are enabled (usually by default) and avoid unnecessary defragmentation (SSDs don’t need it and it can reduce their lifespan). Prioritize installing frequently used applications and games on your fastest SSD.
- HDD Utilization: For HDDs, use them primarily for mass storage (documents, media files) rather than frequently accessed applications. Regular defragmentation (if not automated by Windows) can help maintain performance for large files.
- Driver Updates: After installation, visit your motherboard and graphics card manufacturer websites to download and install the latest drivers. This ensures all hardware components are working efficiently and securely.
Enhancing System Security and Productivity
A fresh installation offers a prime opportunity to build a secure and productive environment.
- Robust Security: Immediately install a reputable antivirus/anti-malware solution. Keep Windows Defender and your chosen security software updated. Enable Windows Firewall and review privacy settings. From a “Digital Security” perspective, this is non-negotiable.
- Essential Software: Install your core applications for productivity (e.g., office suite, web browser, communication tools). Avoid unnecessary software (“bloatware”) to keep your system lean and fast.
- Updates and Patches: Regularly check for and install Windows Updates. These often contain critical security patches and performance enhancements. Keeping your system updated is a cornerstone of “Digital Security” and system stability.
- Backup Strategy: Establish a consistent backup routine. Utilize Windows’ built-in backup tools or third-party solutions to regularly back up your system image and critical data. This safeguards your “Productivity” by minimizing downtime in case of an issue.
The Long-Term Value of a Well-Planned Setup
A thoughtfully executed Windows installation and subsequent optimization contribute to long-term value.
- Reduced Downtime: A stable, well-configured system is less prone to crashes, errors, and performance degradation, translating to less downtime and more productive hours.
- Extended Hardware Lifespan: Proper driver management, optimal drive usage, and a clean operating environment can indirectly contribute to the longevity of your hardware.
- Future-Proofing: By staying updated with drivers and Windows versions, you ensure your system remains compatible with new software and security standards, providing sustained value for your technology investment.
- Personal Branding and Professionalism: For individuals using their PCs for “Personal Branding” or professional work, a reliable and efficient system is a reflection of professionalism and attention to detail.
In conclusion, while the “Where do you want to install Windows?” screen can initially seem like a formidable barrier, it’s ultimately a solvable challenge. By understanding the underlying causes—be it missing drivers, BIOS misconfigurations, or disk issues—and systematically applying the troubleshooting steps outlined here, you can overcome these hurdles. A successful installation paves the way for a robust, efficient, and secure computing experience, allowing you to fully leverage the latest technology trends and maximize your digital potential.
aViewFromTheCave is a participant in the Amazon Services LLC Associates Program, an affiliate advertising program designed to provide a means for sites to earn advertising fees by advertising and linking to Amazon.com. Amazon, the Amazon logo, AmazonSupply, and the AmazonSupply logo are trademarks of Amazon.com, Inc. or its affiliates. As an Amazon Associate we earn affiliate commissions from qualifying purchases.